
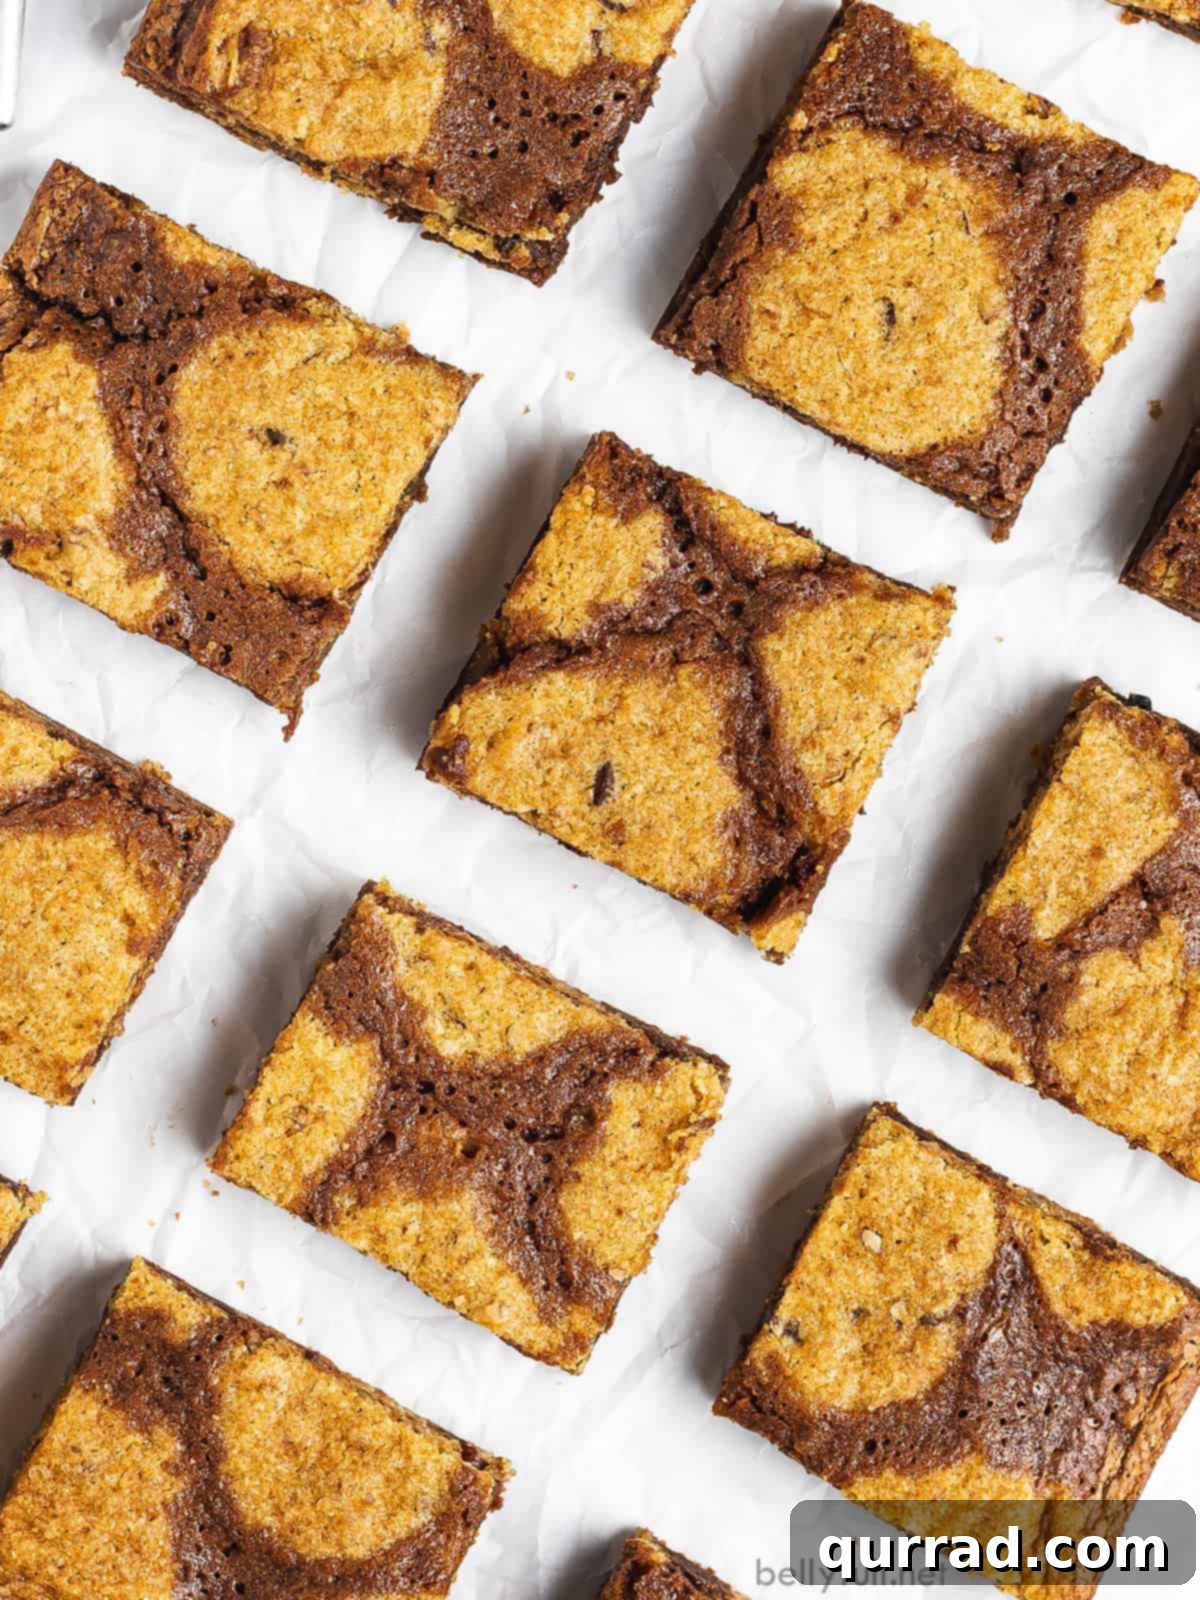
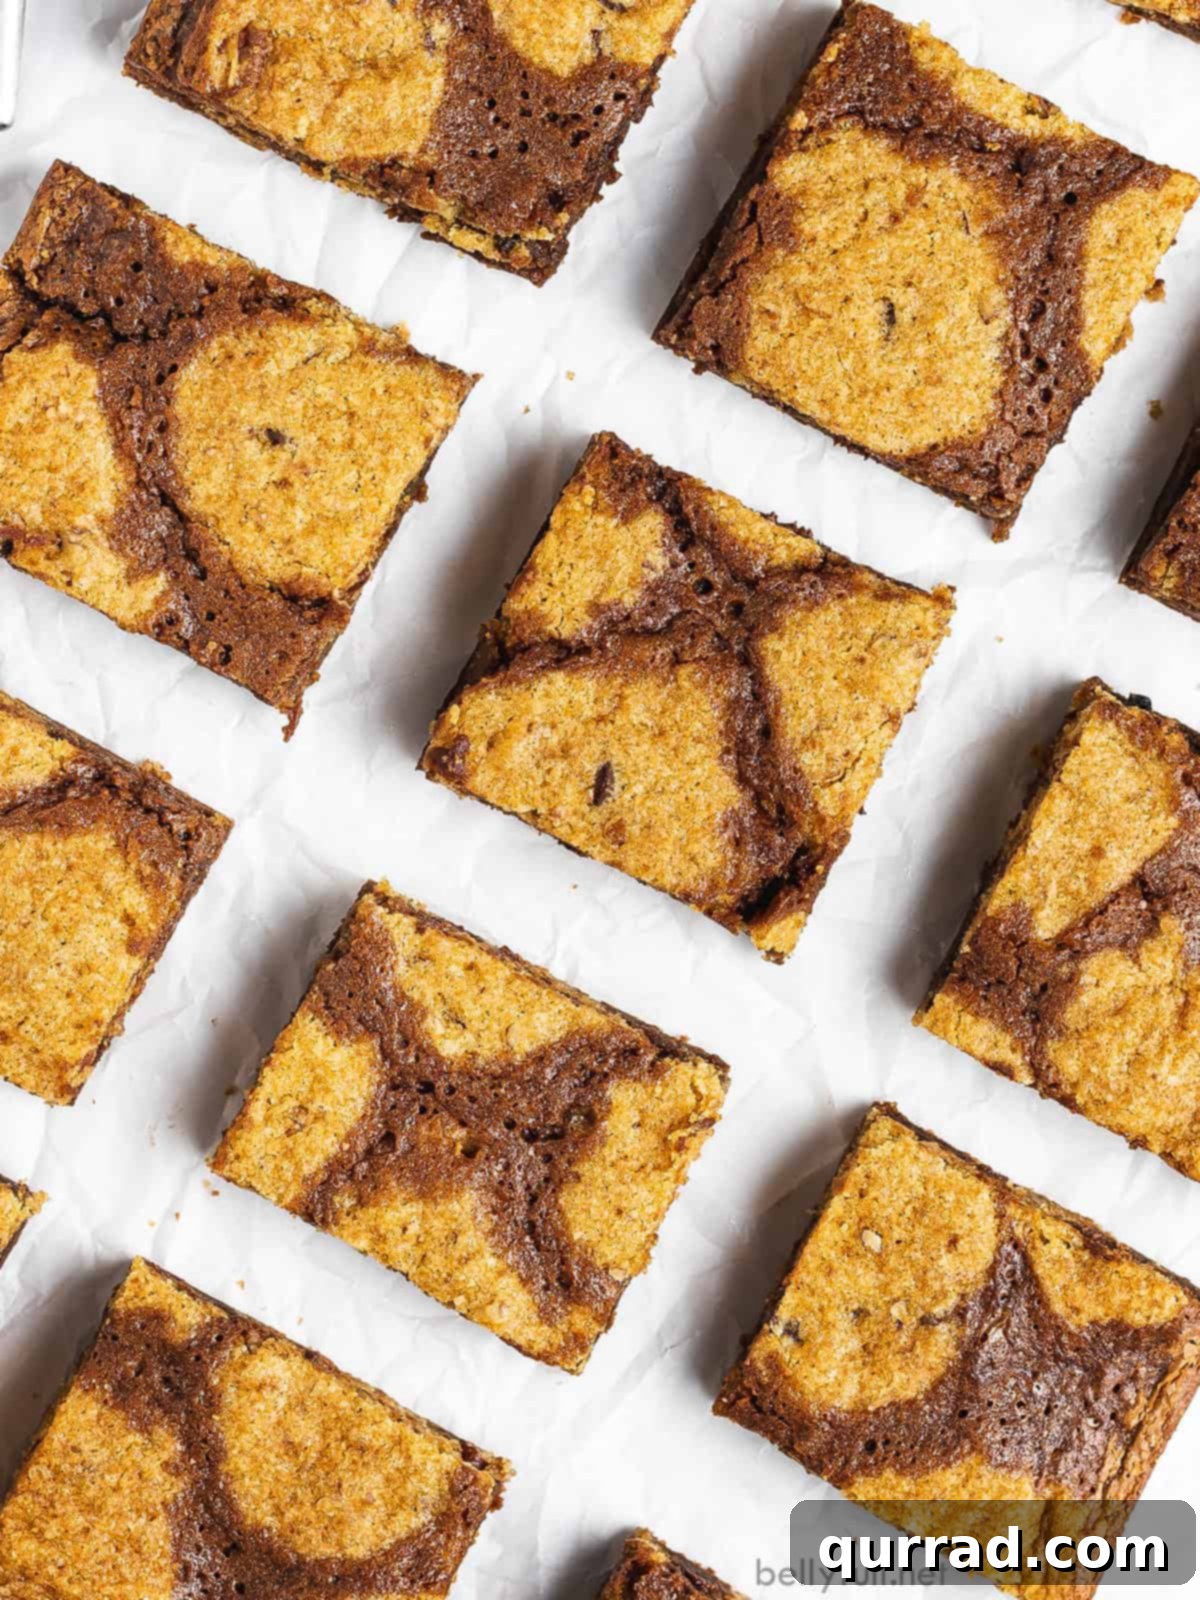
When the craving strikes for something sweet, but you’re torn between the deep, decadent richness of a fudgy brownie and the comforting, chewy perfection of a chocolate chip cookie, there’s no need to choose. Enter the **Brookie**: the ultimate dessert mash-up that perfectly marries the best qualities of both beloved treats into one irresistible bar. This harmonious blend offers the dense, intensely chocolatey satisfaction of a brownie on the bottom, crowned with a soft, golden layer of your favorite chocolate chip cookie. It’s a culinary triumph that truly delivers the best of both worlds, ensuring every bite is a delightful duality of texture and flavor.
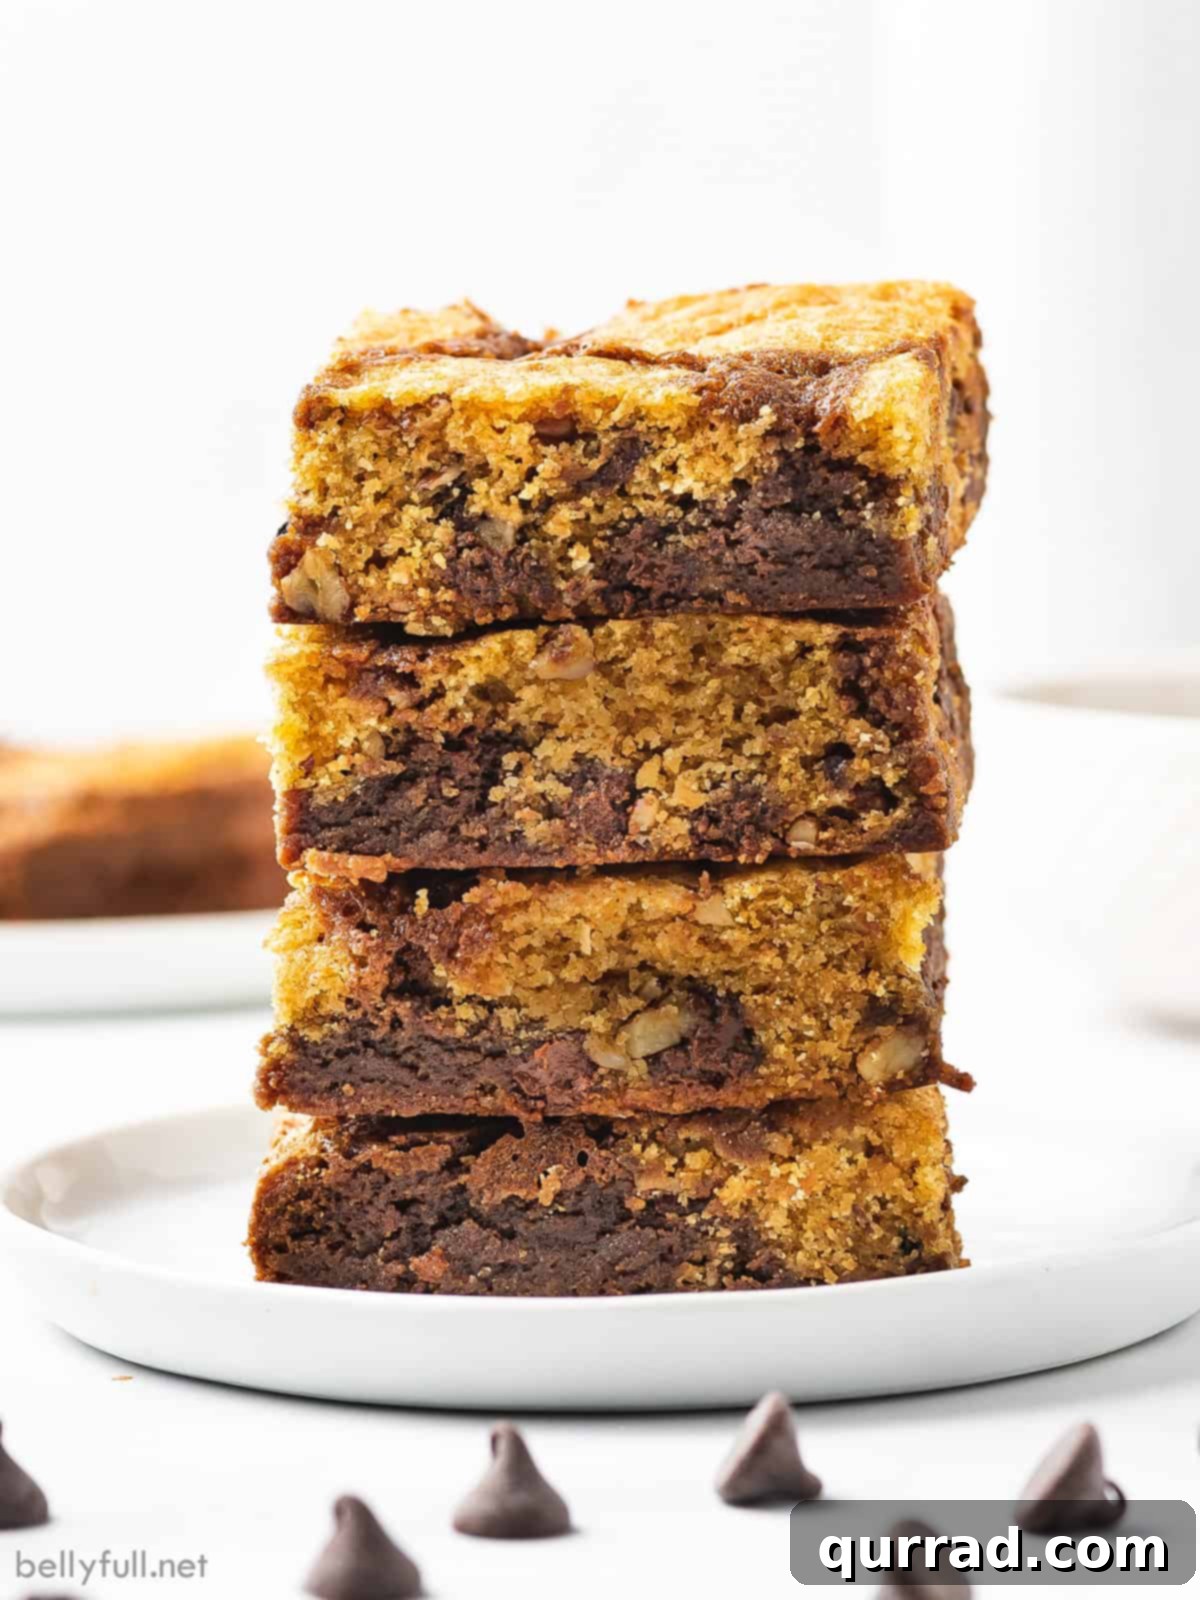
Indulge in Homemade Brookies: The Perfect Chocolate Chip Cookie Brownie Bars
For many dessert enthusiasts, the eternal dilemma of choosing between a rich, fudgy brownie and a warm, chewy chocolate chip cookie is a real struggle. Thankfully, with this easy **Brookies recipe**, that difficult decision becomes a thing of the past. These incredible chocolate chip cookie brownie bars offer a solution, combining the best attributes of both desserts into one glorious treat. Imagine a moist, intensely chocolatey brownie base providing that signature fudgy texture, perfectly complemented by a generous layer of classic, golden-brown chocolate chip cookie dough on top. Whether you proudly stand with “Team Brownie” or firmly believe in “Team Cookie,” these homemade brookies are guaranteed to satisfy every sweet craving.
While numerous brookies recipes lean on the convenience of a boxed brownie mix, we firmly believe that the true magic happens when you craft these delights completely from scratch. Don’t let the thought of making both layers from scratch intimidate you; this recipe is surprisingly straightforward and efficient. Most of the ingredients needed are likely staples already found in your pantry and refrigerator, making it an accessible baking project for anyone. Opting for homemade not only enhances the flavor and texture significantly but also provides a deeply satisfying baking experience. From the initial mixing bowls to the glorious moment they emerge from the oven, this entire process takes less than an hour, culminating in a dessert that tastes incredibly gourmet.
Serving these warm, gooey brookies fresh from the oven, perhaps with a generous scoop of vanilla bean ice cream melting deliciously on top, elevates the experience to pure bliss. The contrast of warm and cold, fudgy and chewy, creates a symphony of sensations that will undoubtedly become a new favorite in your dessert repertoire. Get ready to impress your friends and family with these show-stopping chocolate chip cookie brownie bars, proving that sometimes, you truly can have it all.
Why Choose Homemade Brookies? The From-Scratch Advantage
Beyond the sheer delight of combining two iconic desserts, there’s a profound satisfaction in preparing **homemade brookies** from scratch. While store-bought mixes offer convenience, they often fall short in delivering the depth of flavor and the perfect texture that distinguishes truly exceptional baked goods. When you craft your brownie and cookie layers using wholesome ingredients, you gain complete control over the quality, ensuring no artificial flavors or preservatives sneak into your treat. This control allows for a richer, more authentic chocolate flavor in the brownie base and a chewier, more nuanced cookie layer that simply can’t be replicated with pre-packaged components.
Moreover, the process itself is incredibly rewarding. There’s a special joy in seeing simple ingredients transform into something extraordinary. This recipe is designed to be efficient, proving that “from scratch” doesn’t have to mean “time-consuming.” In fact, you’ll find that with a little organization, these brookies come together remarkably quickly, making them a fantastic option for a last-minute dessert or a weekend baking project. The aroma of baking chocolate and vanilla filling your kitchen is an added bonus, setting the stage for the delicious indulgence to come. By choosing homemade, you’re not just baking a dessert; you’re creating an experience and a treat that truly stands out.
Brookies Recipe: Chocolate Chip Cookie Brownie Perfection
This comprehensive guide will walk you through creating the most delicious chocolate chip cookie brownie bars. With distinct layers of rich, fudgy brownie and classic, chewy chocolate chip cookie, this recipe is a crowd-pleaser for any occasion.
Prep Time: 15 minutes
Cook Time: 40 minutes
Total Time: 55 minutes
Yields: 24 bars
Recipe Summary
Brookies are the ultimate dessert mash-up, where fudgy brownies and chewy chocolate chip cookies are combined! These chocolate chip cookie brownie bars are made completely from scratch in under an hour and truly offer the best of both worlds. Follow the detailed steps below, accompanied by helpful images, to create this irresistible treat.
Ingredients
For the Fudgy Brownie Batter
- ½ cup unsalted butter (1 stick, cubed)
- ½ cup semi-sweet chocolate chips
- ½ cup granulated sugar
- ½ cup packed light brown sugar
- 1 tsp vanilla extract
- ½ tsp salt
- 2 large eggs
- ½ cup all-purpose flour (spooned and leveled for accurate measurement)
For the Chewy Chocolate Chip Cookie Dough
- ½ cup unsalted butter (1 stick, at room temperature for optimal creaming)
- ½ cup granulated sugar
- ¼ cup packed light brown sugar
- 1 tsp vanilla extract
- 1 large egg
- ½ tsp salt
- ½ tsp baking powder
- ¼ tsp baking soda
- 1 ¼ cups all-purpose flour (spooned and leveled)
- ½ cup semi-sweet chocolate chips
- ¼ cup finely chopped walnuts (optional, but highly recommended for an added crunch)
Instructions for Perfect Brookies
- Prepare Your Pan and Preheat Oven: Begin by preheating your oven to 350°F (175°C). Position an oven rack in the middle of the oven. Line a 13x9x2-inch baking pan with parchment paper. Ensure the parchment paper extends beyond the two longer sides of the pan; this overhang will serve as a convenient “sling” for lifting the brookies out once they’re baked. Lightly spray the parchment paper with nonstick cooking spray to guarantee easy release.
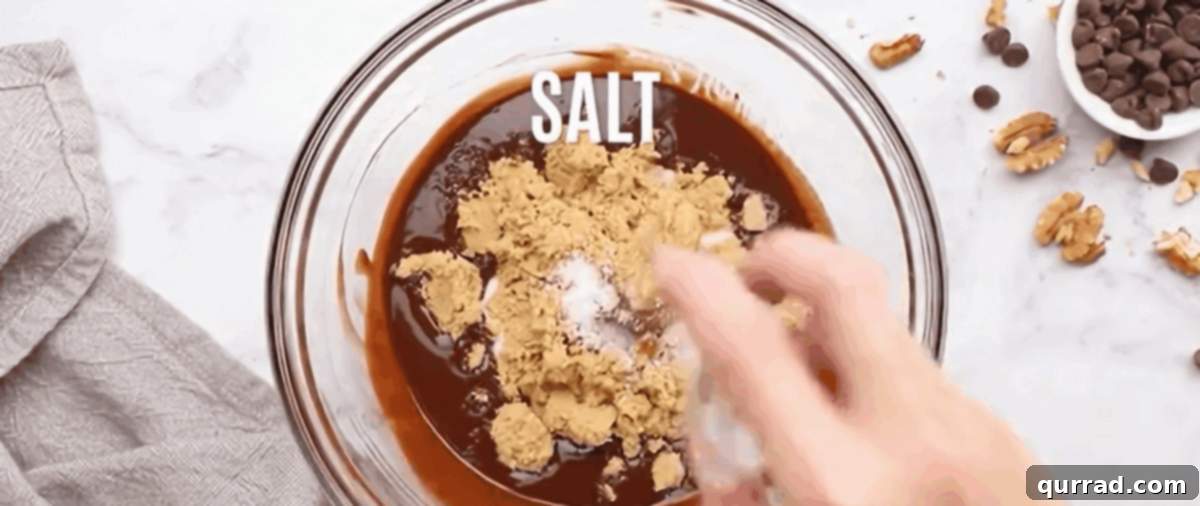
- Craft the Fudgy Brownie Batter: In a medium-sized, microwave-safe mixing bowl, combine the cubed ½ cup unsalted butter and ½ cup semi-sweet chocolate chips. Microwave these ingredients in short, 20-second bursts, stirring thoroughly after each interval, until the mixture is completely melted and beautifully smooth. Take care not to overheat the chocolate. Once melted, incorporate the ½ cup granulated sugar and ½ cup packed light brown sugar, whisking vigorously until they are well combined. Stir in the 1 teaspoon of vanilla extract and ½ teaspoon of salt. Next, whisk in the 2 large eggs, adding them one at a time and mixing until each is fully incorporated into the mixture. Finally, gently whisk in the ½ cup all-purpose flour (remember to spoon and level it to avoid a dense brownie) until just combined and no dry streaks of flour are visible. Pour this rich brownie batter into your prepared pan, spreading it evenly with a spatula to create a smooth, consistent base layer. Set the pan aside as you prepare the cookie dough.
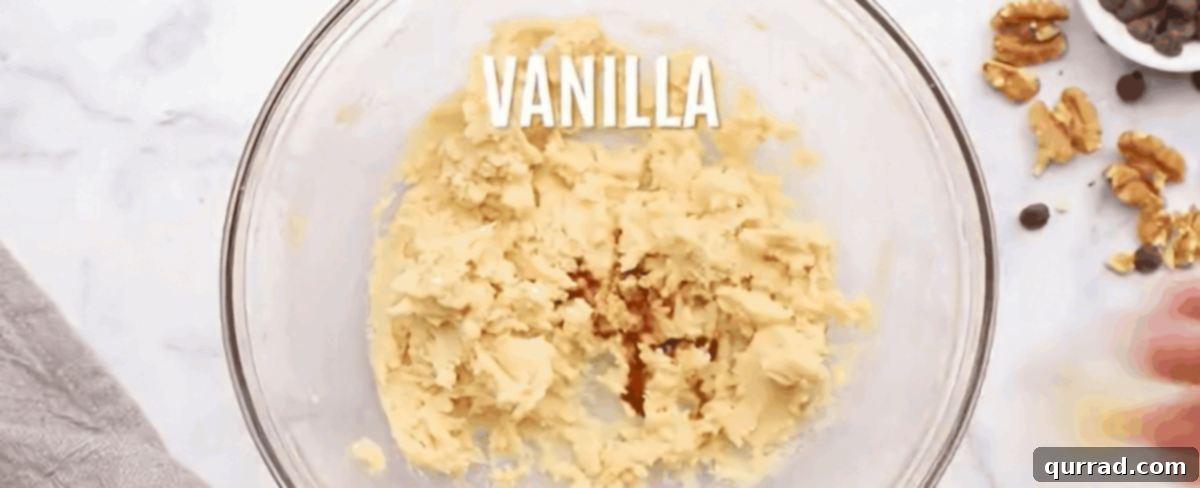
- Prepare the Chewy Chocolate Chip Cookie Dough: In a separate large mixing bowl, using an electric mixer (either a handheld or stand mixer fitted with the paddle attachment), cream together the ½ cup unsalted butter (ensure it’s at room temperature for the best results) and both sugars (½ cup granulated sugar and ¼ cup packed light brown sugar) until the mixture becomes wonderfully light and fluffy. This process typically takes about 2 to 3 minutes. Pause occasionally to scrape down the sides of the bowl with a spatula, ensuring all ingredients are evenly incorporated. Beat in the 1 teaspoon of vanilla extract and the 1 large egg until they are fully combined. Scrape the bowl down one more time to catch any unmixed ingredients. Now, add the dry leavening agents and seasoning: ½ teaspoon of salt, ½ teaspoon of baking powder, and ¼ teaspoon of baking soda. Beat until these are evenly distributed. Gradually mix in the 1¼ cups all-purpose flour until the dough just comes together, being careful not to overmix. As the final touch, gently fold in the ½ cup semi-sweet chocolate chips and the optional ¼ cup finely chopped walnuts until they are just distributed throughout the cookie dough.
- Assemble the Brookies: With both batters ready, take small spoonfuls of the prepared chocolate chip cookie dough and carefully drop them evenly over the brownie batter layer in the pan. There’s no need to meticulously spread the cookie dough out or press it down flat; leaving small, irregular dollops allows the fudgy brownie layer to subtly peek through after baking, creating that appealing, rustic “brookie” look.
- Bake to Perfection: Loosely cover the entire baking pan with aluminum foil. This step is important as it helps the brookies bake evenly and prevents the delicate cookie layer from browning or crisping too quickly. Place the covered pan in the preheated oven and bake for 20 minutes. After 20 minutes, carefully remove the aluminum foil and continue baking for an additional 20 minutes, or until the edges of the brownie layer appear shiny and set, and the cookie portion turns a beautiful, inviting golden brown.
- Check for Doneness: The total baking time should typically be around 40 minutes. Both the brownie and cookie layers should look set. It’s perfectly normal for the cookie portion to still appear a bit soft and slightly underbaked when first removed from the oven – this contributes to its signature chewy texture. To test for ideal doneness, insert a toothpick into the center of the brookies. It should come out moist with a few crumbs attached, but importantly, not gooey or wet with raw batter. Remember that the brookies will continue to cook slightly from residual heat once removed from the oven, and they will firm up considerably as they cool.
- Cool Completely: This is a crucial step for achieving the perfect texture and for clean, effortless cutting. Transfer the baking pan to a wire rack and allow the brookies to cool completely to room temperature. Rushing this step can result in crumbly bars that are difficult to slice cleanly.
- Slice and Serve: Once entirely cool, use the parchment paper overhang to gently lift the entire slab of brookies out of the pan and transfer it to a clean cutting board. Carefully pull the parchment paper away from the edges. Using a sharp knife, cut the brookies into approximately 2-inch squares directly on the parchment paper for stability and ease.
- Enjoy Your Masterpiece: Serve these delightful brookies as they are, or elevate the experience further with a glass of cold milk, a generous scoop of creamy vanilla ice cream for an ultimate brookie sundae, or even a drizzle of homemade caramel sauce. Prepare for smiles and requests for the recipe!
Baker’s Notes & Customization Tips
- Chocolate Choices: While semi-sweet chocolate chips are a classic and delicious choice for both layers, feel free to experiment. You could use rich dark chocolate chips or chopped dark chocolate in the brownie batter for a more intense, less sweet flavor. For the cookie layer, milk chocolate chips offer a sweeter, creamier profile that many find irresistible.
- Add-Ins Galore: The beauty of brookies lies in their incredible versatility. If walnuts aren’t your preference or you’re looking for something different, try other nuts like pecans, almonds, or even macadamia nuts. For a fun twist, incorporate colorful M&Ms, festive sprinkles, white chocolate chunks, or even a swirl of peanut butter into the cookie dough before baking. The possibilities are endless!
- Perfect Texture Tips: Ensure your butter for the cookie dough is indeed at room temperature. This allows it to cream properly with the sugars, incorporating air and resulting in a lighter, chewier cookie texture. For truly fudgier brownies, be mindful not to overmix the flour into the batter; mix only until just combined to avoid developing too much gluten, which can lead to a tougher brownie.
- Don’t Overbake: Brookies, much like their brownie counterparts, benefit from being slightly underbaked for that ultimate gooey, fudgy center. Keep a close eye on your oven and rely on the toothpick test for ideal doneness, rather than baking until completely firm. They will continue to set as they cool.
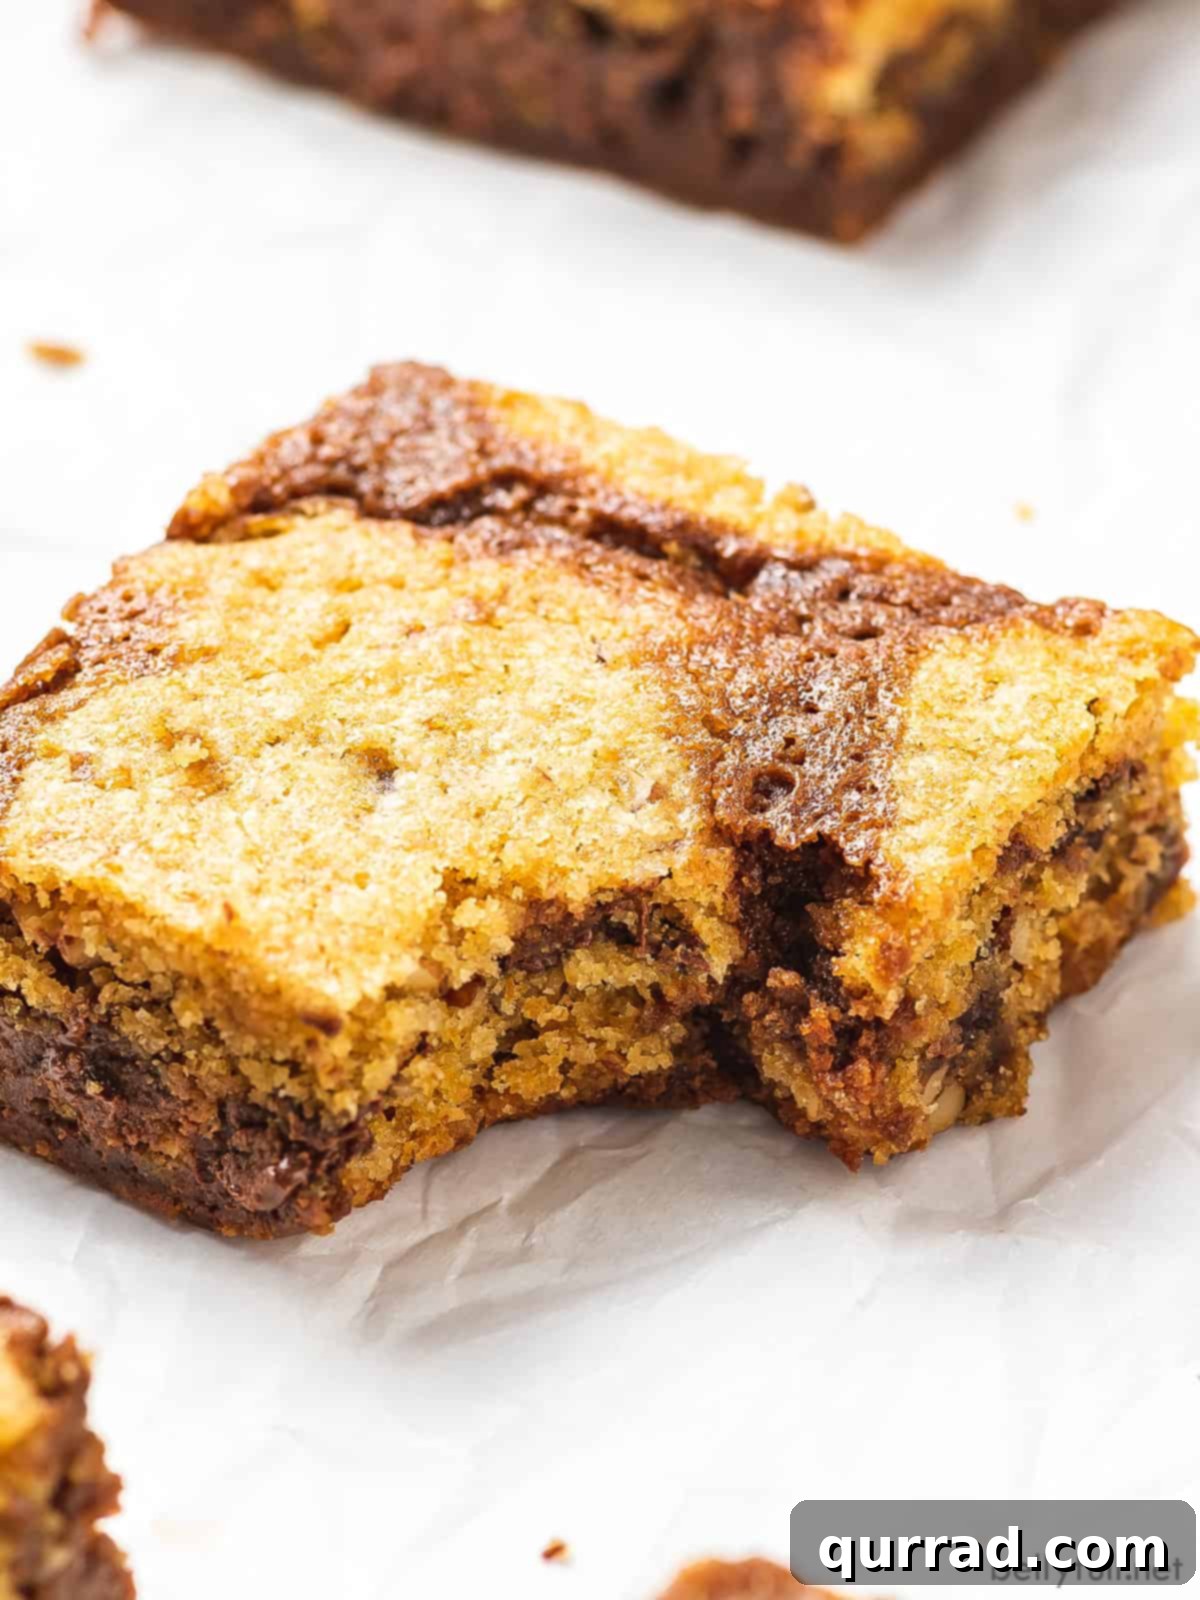
How to Properly Store Your Homemade Brookies
Ensuring your delicious brookies remain fresh and delightful is key to enjoying them for days to come. Proper storage can significantly extend their shelf life and maintain their incredible texture, allowing you to savor every bite.
- Room Temperature Storage: For immediate enjoyment or if you plan to devour them within a few days, brookies can be stored in an airtight container at room temperature. They will maintain their quality and flavor for up to 3 days. To keep them at their peak freshness and prevent them from drying out, you can place a slice of plain white bread or a half of an apple in the container; it helps absorb moisture and keeps the bars wonderfully soft and moist.
- Refrigerator Storage: If you prefer a slightly firmer, chewier texture, or if you need to extend their shelf life a bit longer, store your brookies in an airtight container in the refrigerator. They will keep beautifully for up to 6 days. For the best experience, allow them to come to room temperature for about 15-20 minutes, or warm them slightly in the microwave for 10-15 seconds before serving.
- Freezing for Long-Term Enjoyment: Brookies freeze exceptionally well, making them perfect for meal prep, batch baking, or saving for unexpected cravings. Once completely cooled, wrap individual brookie bars tightly in plastic wrap. This step prevents freezer burn and helps maintain their freshness. Then, transfer the wrapped bars to a freezer-safe container or a heavy-duty freezer Ziploc bag. They will keep wonderfully in the freezer for up to 3 months. When you’re ready to enjoy, you can thaw them on the kitchen counter for a few hours. For a quick indulgence, simply pop a frozen brookie into the microwave for 15-30 seconds until warm and soft – it’s a fantastic way to recreate that freshly baked experience instantly!
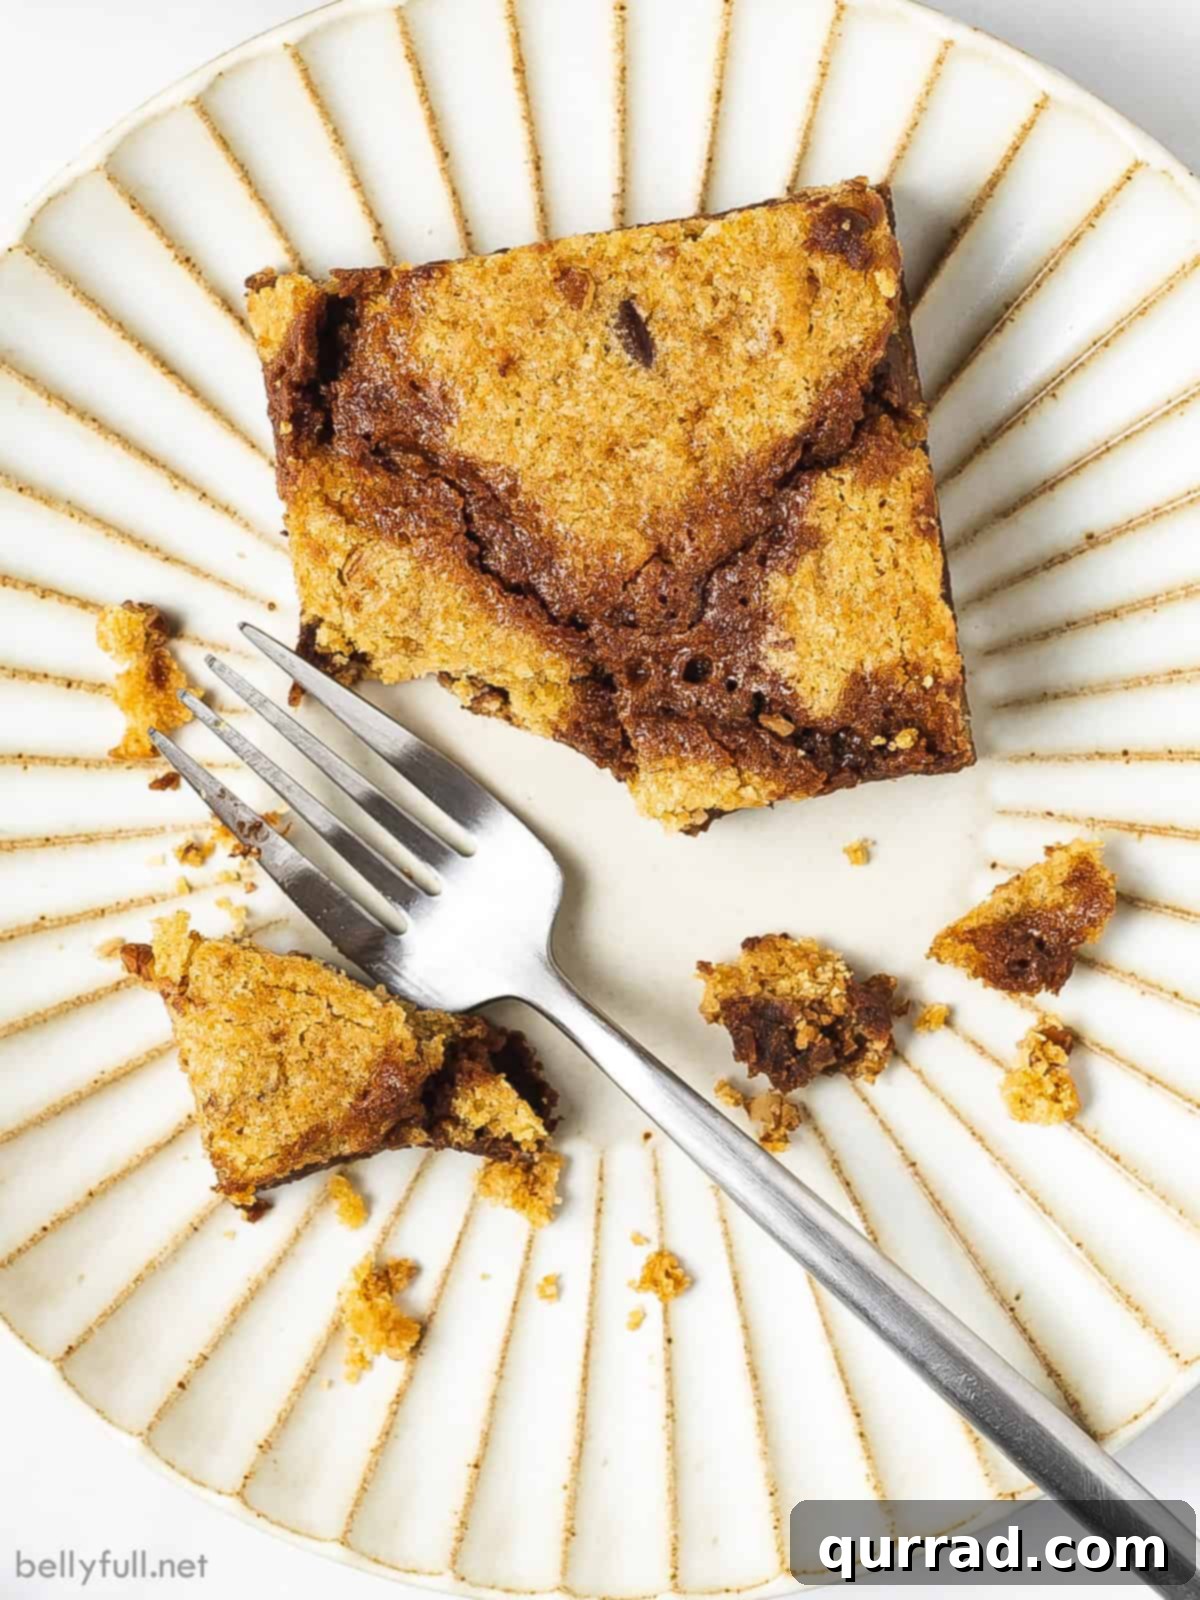
What to Serve with Your Decadent Brookies
Brookies are a standout dessert on their own, but pairing them with the right companions can transform them into an even more extraordinary indulgence. Their rich, dual-textured nature makes them incredibly versatile for serving, suitable for a casual treat or a more elaborate dessert presentation.
- Classic Dairy Pairings: A tall, cold glass of milk is the quintessential partner for any chocolate chip cookie or brownie, and brookies are no exception. The refreshing coolness of milk perfectly complements the rich sweetness of the bars. For an extra luxurious touch, a dollop of freshly made whipped cream adds a light, airy contrast that beautifully balances the intensity of the chocolate and the sweetness of the cookie.
- Ice Cream Extravaganza: Elevate your brookie experience with a generous scoop of your favorite ice cream. Classic vanilla bean is always a safe and delightful bet, as its creamy simplicity allows the brookie flavors to shine. However, don’t shy away from more adventurous flavors like Rocky Road, salted caramel, coffee, or even mint chocolate chip for a delightful flavor contrast. Heating the brookie slightly before adding the ice cream creates a warm-cold dynamic that is simply heavenly, turning a simple dessert into an impromptu “Brookie Sundae.”
- Beverage Bliss: Beyond milk, consider a warm mug of freshly brewed coffee, an espresso, or a rich hot chocolate to accompany your brookie. The slight bitterness of coffee can wonderfully cut through the sweetness of the dessert, creating a sophisticated pairing, while hot chocolate doubles down on the chocolatey comfort for an ultimate cozy experience. For a truly nostalgic and decadent treat, serve them alongside a creamy vanilla malted milkshake – a luxurious double whammy of dessert and drink!
- Sauces and Drizzles: For an added layer of flavor and visual appeal, a light drizzle of homemade caramel sauce, a smooth chocolate ganache, a vibrant raspberry coulis, or even a simple dusting of powdered sugar can take your brookies to the next level.
- Fresh Fruit Contrast: To provide a refreshing counterpoint to the rich sweetness, serve brookies with a side of fresh berries like strawberries, raspberries, or blueberries. Their natural tartness and juicy texture offer a wonderful balance to the deep, sweet flavors of the chocolate and cookie.
More Irresistible Dessert Bar Recipes to Explore
If you’ve fallen in love with the convenience and deliciousness of dessert bars, there’s a whole world of treats waiting for you to discover. Dessert bars are fantastic for gatherings, potlucks, or simply satisfying your sweet tooth with easy-to-serve portions. Here are some other fantastic bar recipes that are sure to become new favorites:
- Classic 7 Layer Bars: A beloved recipe featuring layers of graham cracker crust, chocolate chips, butterscotch chips, coconut, and nuts, all drenched in sweetened condensed milk.
- Sweet Praline Crunch Bars: Indulgent bars with a buttery shortbread base and a rich, nutty praline topping that delivers an amazing crunch.
- Chewy Snickerdoodle Cookie Bars: All the warm, cinnamon-sugar goodness of snickerdoodle cookies, but in an easy-to-make bar form that’s perfectly chewy.
- Decadent Millionaire Bars: A luxurious treat with a shortbread base, a gooey caramel center, and a rich chocolate topping – truly a millionaire’s dessert.
- Rich Gooey Butter Cake Bars: A St. Louis classic, these bars feature a cake-like crust topped with a sweet, gooey, buttery filling that’s impossible to resist.
- German Chocolate Gooey Bars: A delightful twist on the classic German chocolate cake, combining a rich chocolate base with a gooey butterscotch and coconut-pecan topping.
The Art of Baking Brookies: Essential Tips for Success
Achieving the perfect brookie every time involves a few key considerations that can elevate your baking from simply good to truly extraordinary. Paying attention to these details will ensure your chocolate chip cookie brownie bars are consistently fudgy, chewy, and utterly delicious, delighting everyone who tries them.
- Ingredient Temperature Matters: This is a golden rule in baking. For the brownie batter, melting the butter and chocolate together ensures a smooth, uniform, and incredibly fudgy base. However, for the cookie dough, using room temperature butter is crucial. This allows it to cream properly with the sugars, incorporating essential air that leads to a lighter, chewier cookie texture. If your butter is too cold, the dough will be dense and difficult to mix; too warm, and it can result in a greasy, spreading cookie.
- Accurate Flour Measurement: Baking is as much a science as it is an art, and precise flour measurement is critical for consistent results. Always spoon your flour lightly into the measuring cup (do not pack it down) and then level it off with a straight edge, such as the back of a knife or a ruler. Scooping directly from the flour bag can compact the flour significantly, leading to an excess of flour in your recipe, which can result in dry, dense brownies and tough cookies.
- Don’t Overmix the Batter: When incorporating flour into both the brownie and cookie batters, mix only until the flour is just combined and no dry streaks remain. Overmixing develops the gluten in the flour, which can lead to a tough, dry texture in both the brownie and cookie layers. A few small streaks of flour are preferable to an overmixed, chewy batter. Gentle folding is key once the flour is added.
- The Parchment Paper Advantage: Lining your baking pan with parchment paper that overhangs the sides is a small step with a huge payoff. It not only ensures that your brookies won’t stick to the pan but, more importantly, it allows you to easily lift the entire slab of baked brookies out of the pan once cooled. This makes for clean, effortless cutting and perfectly intact bars every single time, saving you from frustration and ensuring beautiful presentation.
- Patience During Cooling is Key: It can be incredibly tempting to cut into warm, fragrant brookies fresh out of the oven, but resist the urge! Cooling them completely on a wire rack is absolutely essential for achieving the perfect texture. As they cool, the brownie layer sets further and becomes fudgier, and the cookie layer firms up to its ideal chewy consistency. Cutting them while warm can result in a messy, crumbly experience, as the layers haven’t had a chance to fully set.
- Customize to Your Heart’s Content: Don’t be afraid to make these brookies truly your own! Beyond the suggested chocolate and nut variations, consider adding a sprinkle of flaky sea salt on top before baking to enhance and balance the chocolate flavors. Experiment with different extracts like almond, peppermint, or even a hint of orange zest for a unique and personal twist.
By keeping these detailed baking tips in mind, you’ll consistently create brookies that are not just delicious, but perfectly textured and visually appealing – a true testament to your baking prowess and a delightful treat for all.
Nutrition Information
While an exact nutritional breakdown can vary based on specific product brands, precise measurements, and any customizations you make, here is an estimated nutritional value per serving (calculated for 1 bar, assuming 24 servings from the recipe):
- Serving Size: 1 bar
- Calories: 221 kcal
- Carbohydrates: 26g
- Protein: 2g
- Fat: 12g
- Saturated Fat: 7g
- Polyunsaturated Fat: 1g
- Monounsaturated Fat: 3g
- Trans Fat: 0.3g
- Cholesterol: 44mg
- Sodium: 24mg
- Potassium: 87mg
- Fiber: 1g
- Sugar: 18g
- Vitamin A: 274 IU
- Vitamin C: 0.02mg
- Calcium: 22mg
- Iron: 1mg
Disclaimer: Nutritional information provided is an automatic calculation and can vary based on the exact products you use and any modifications made to the recipe. If precise nutritional values are crucial for your dietary needs, we recommend calculating them independently using your specific ingredients.
We hope you thoroughly enjoy baking and savoring these incredible homemade Brookies! Don’t hesitate to experiment with flavors and textures to make this recipe truly your own. Share your delightful creations with friends and family, and most importantly, happy baking!