
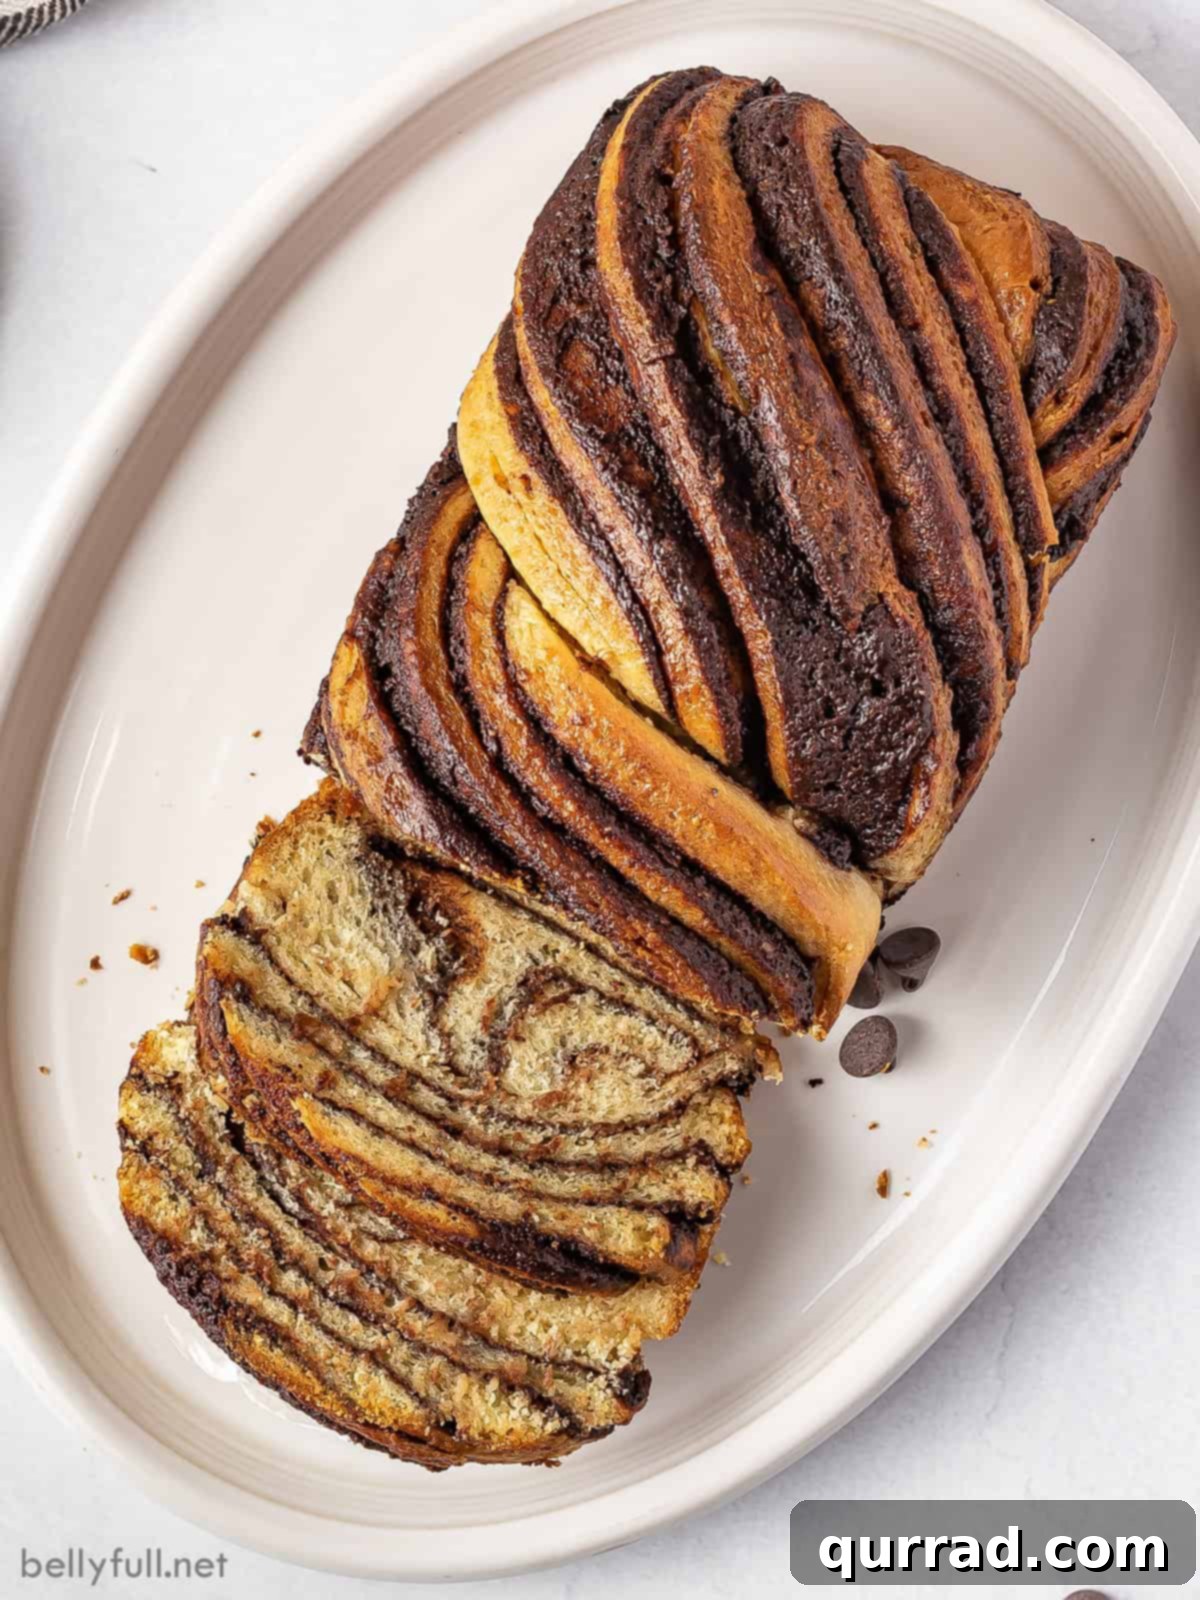
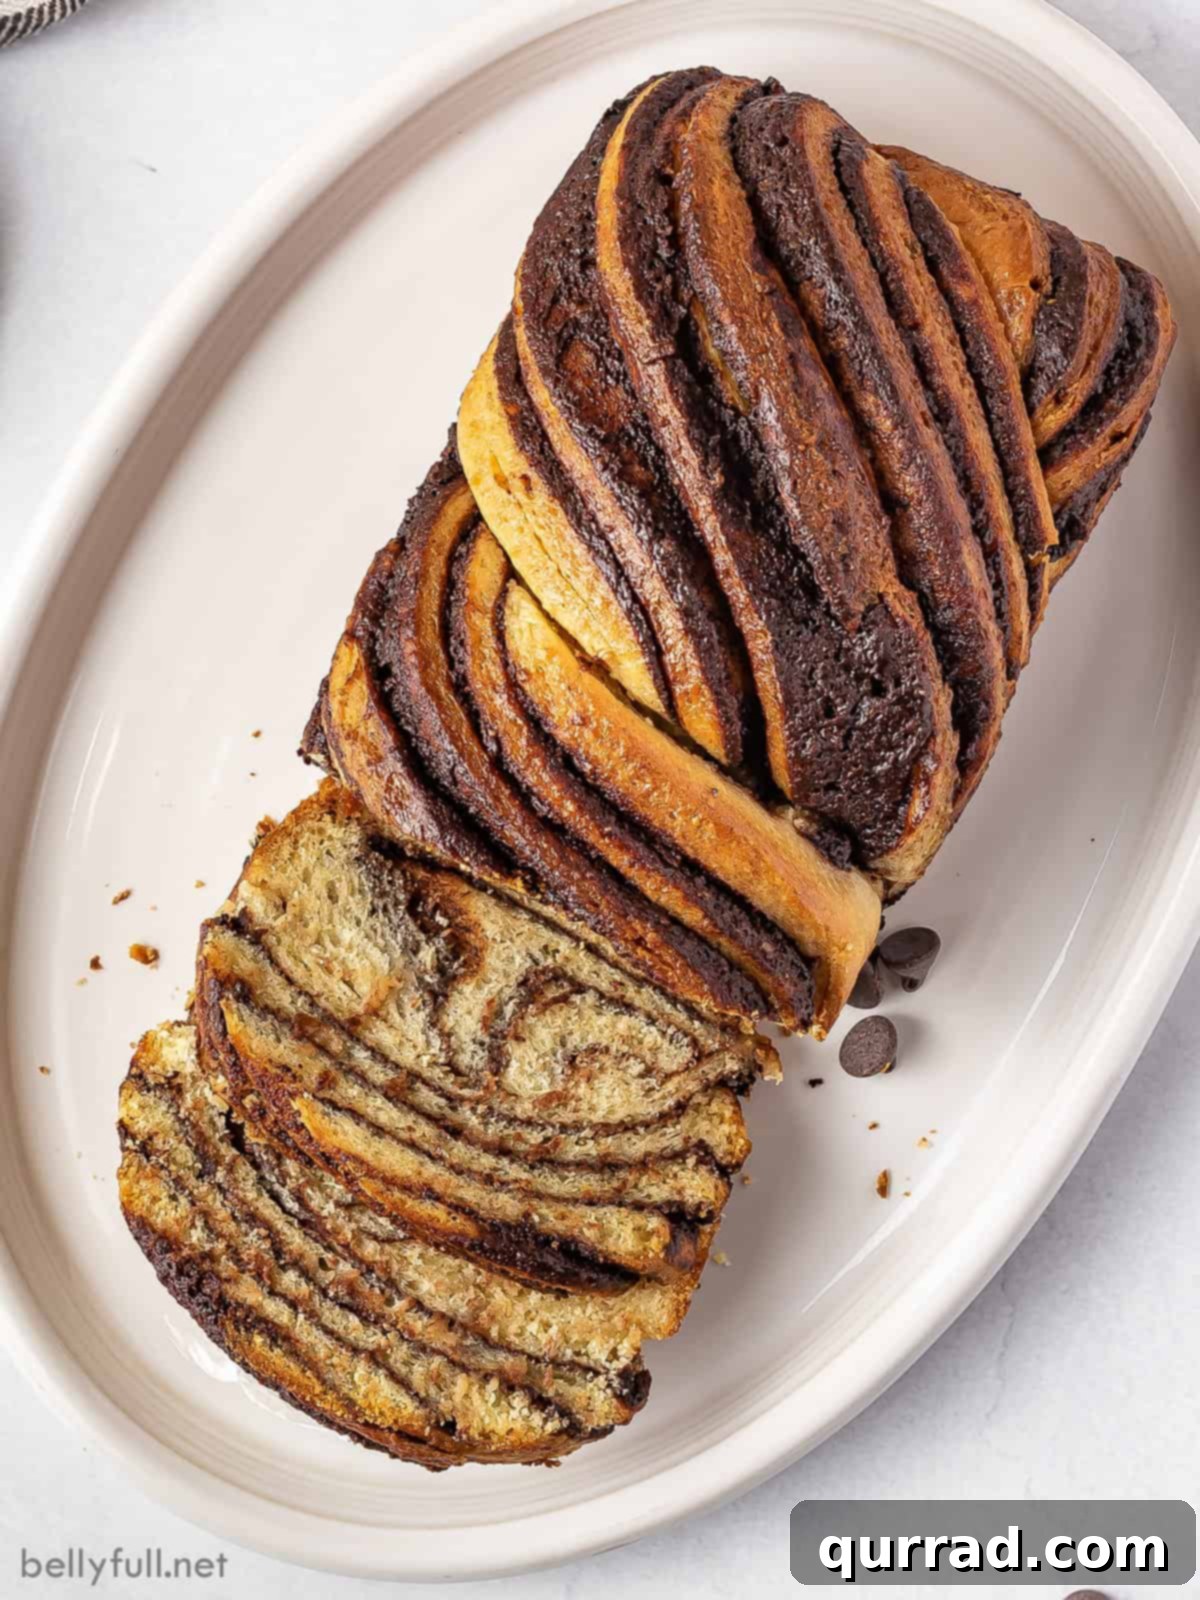
Indulge in a truly extraordinary baking experience with this exquisite Chocolate Babka. This sweet, rich, and utterly irresistible bread boasts a tender, brioche-like texture reminiscent of your favorite cinnamon rolls, generously swirled with a decadent chocolate filling. It’s more than just a dessert; it’s a magnificent centerpiece, a showstopping bread recipe perfect for sharing with loved ones over a warm cup of coffee or tea. To ensure your success, we’ve meticulously detailed every step, complete with visual guidance to help you master this culinary art.
Our recipe yields two glorious loaves, making it ideal for sharing or for creating an epic breakfast treat. Imagine transforming the second loaf into mouthwatering French toast – a delightful twist that’s sure to impress!
Mastering the Art of Chocolate Babka
There’s an undeniable magic to a freshly baked loaf of babka, and we are absolutely thrilled to share our perfected recipe with you. While traditional chocolate babka often carries a reputation for being challenging to make, we firmly believe it’s a misconception. It certainly requires more time and patience than a quick bread, but the process itself is not inherently difficult. If you’ve ever successfully baked enriched doughs like cinnamon rolls or a beautiful loaf of challah bread, then you possess all the necessary skills to create this delightful babka.
This isn’t a recipe you can whip up in just 30 minutes or even a couple of hours. The key to its incredible flavor and texture lies in several crucial resting and rising periods, some extending an hour or more, and even an essential overnight chill of up to 8 hours for optimal results. Therefore, preparing chocolate babka requires a bit of planning and forethought. However, we promise you, every moment spent waiting is profoundly worth it! This recipe is perfectly suited for those relaxed days when you have time to unwind, enjoy the process, and let the enticing aroma of baking fill your home.
What Exactly is Babka? Exploring its Rich Heritage
Babka is a beloved Eastern European yeast-risen sweet bread, often enjoyed with coffee. While it’s widely regarded as a Jewish sweet bread, its presence can also be found in many Polish bakeries, highlighting its deep cultural roots across the region. The foundation of babka is a rich, buttery dough, strikingly similar to a brioche, which contributes to its luxurious feel. This tender dough is then generously layered with a decadent chocolate filling, resulting in a finished texture that beautifully combines the lightness of brioche with the soft, swirled goodness of a cinnamon roll.
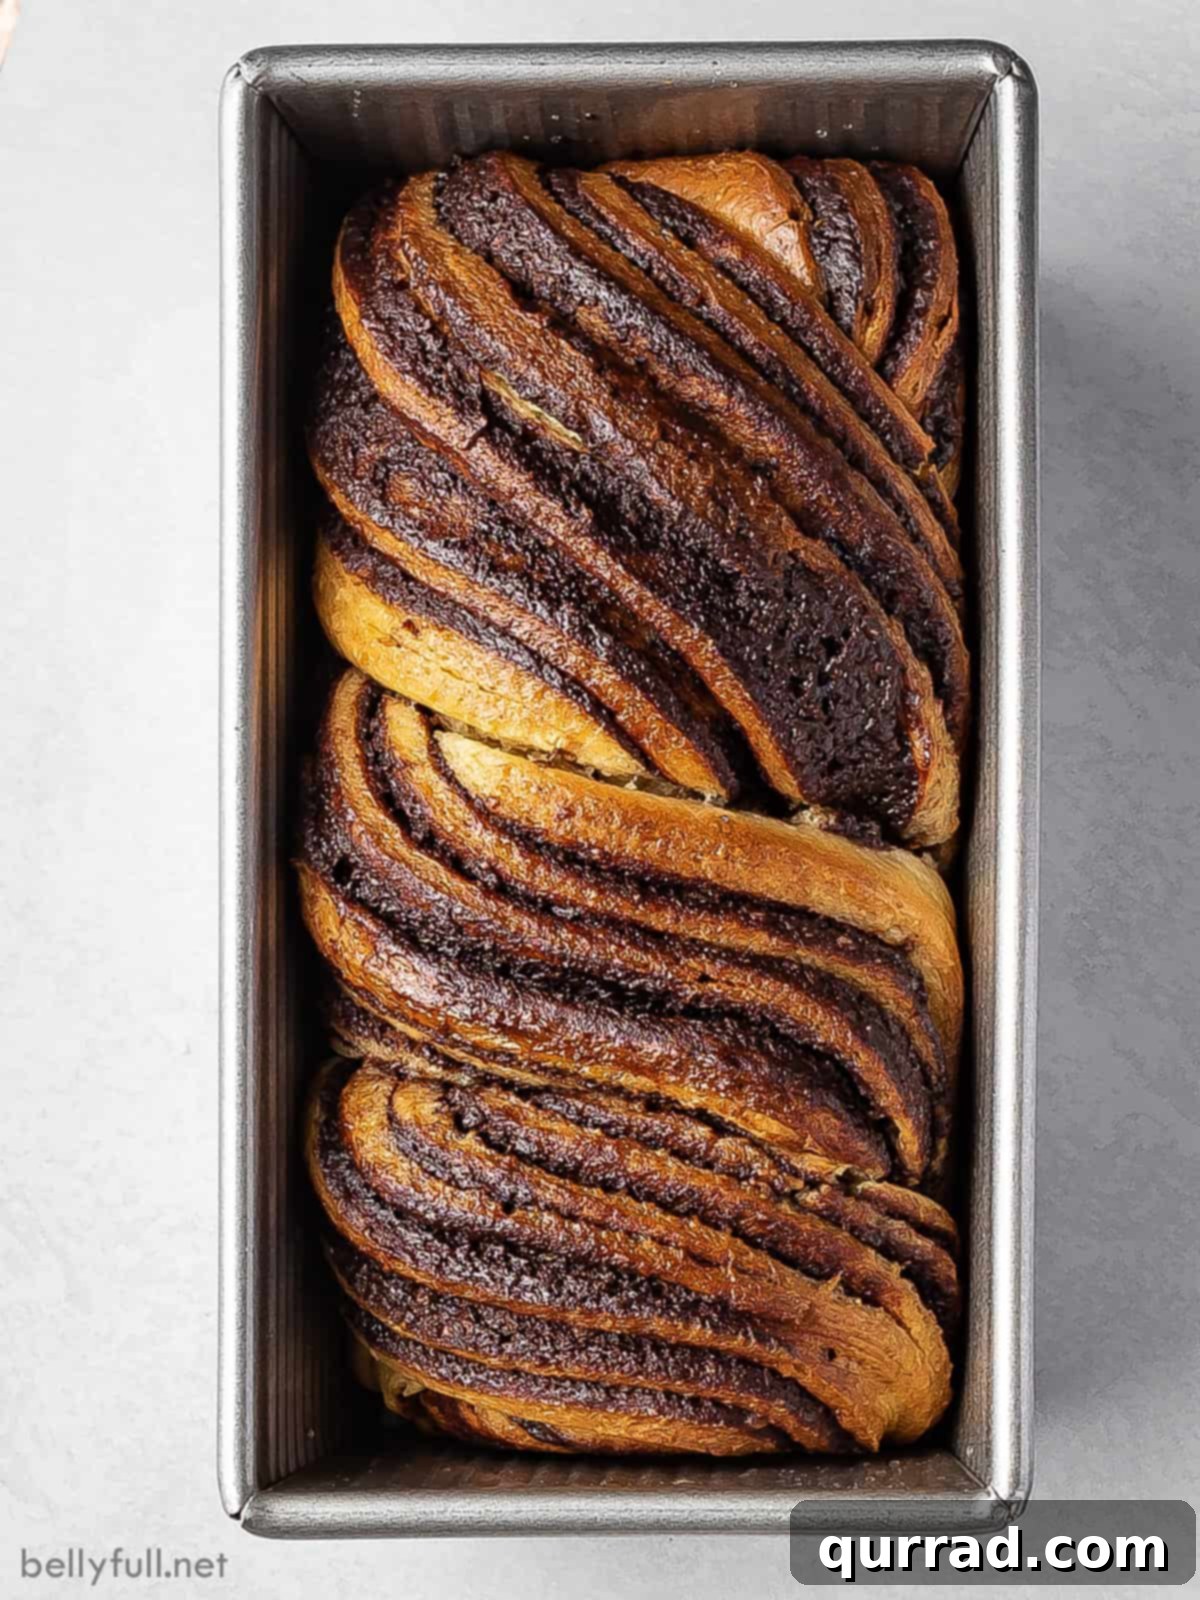
What truly sets babka apart is its distinctive appearance. Long logs of dough, once filled and rolled, are skillfully braided or twisted together in a mesmerizing criss-cross pattern. This artistic technique isn’t just for show; it’s meticulously designed to expose the glorious layers of chocolate filling throughout the loaf, ensuring that every single bite is bursting with rich, sweet chocolate. Despite its impressive complexity and appearance, the ingredients required for babka are largely common pantry staples, making it an accessible indulgence. You’ll typically need all-purpose flour, granulated sugar, powdered sugar, active dry yeast, a pinch of salt, rich cocoa powder, softened butter, whole milk, fresh eggs, and quality chocolate chips to bring this masterpiece to life.
Your Step-by-Step Guide to Baking Perfect Chocolate Babka
Don’t let the seemingly extensive list of steps deter you from embarking on this rewarding baking journey. While making babka is certainly a hands-on experience and requires patience for various resting times, none of the individual steps are inherently difficult. Each stage is straightforward, building upon the last to create something truly spectacular. For your convenience, a comprehensive, printable recipe with detailed directions can be found further below. Additionally, we encourage you to watch the accompanying video for invaluable visual guidance that will clarify each process.
Crafting the Dough and Decadent Chocolate Filling
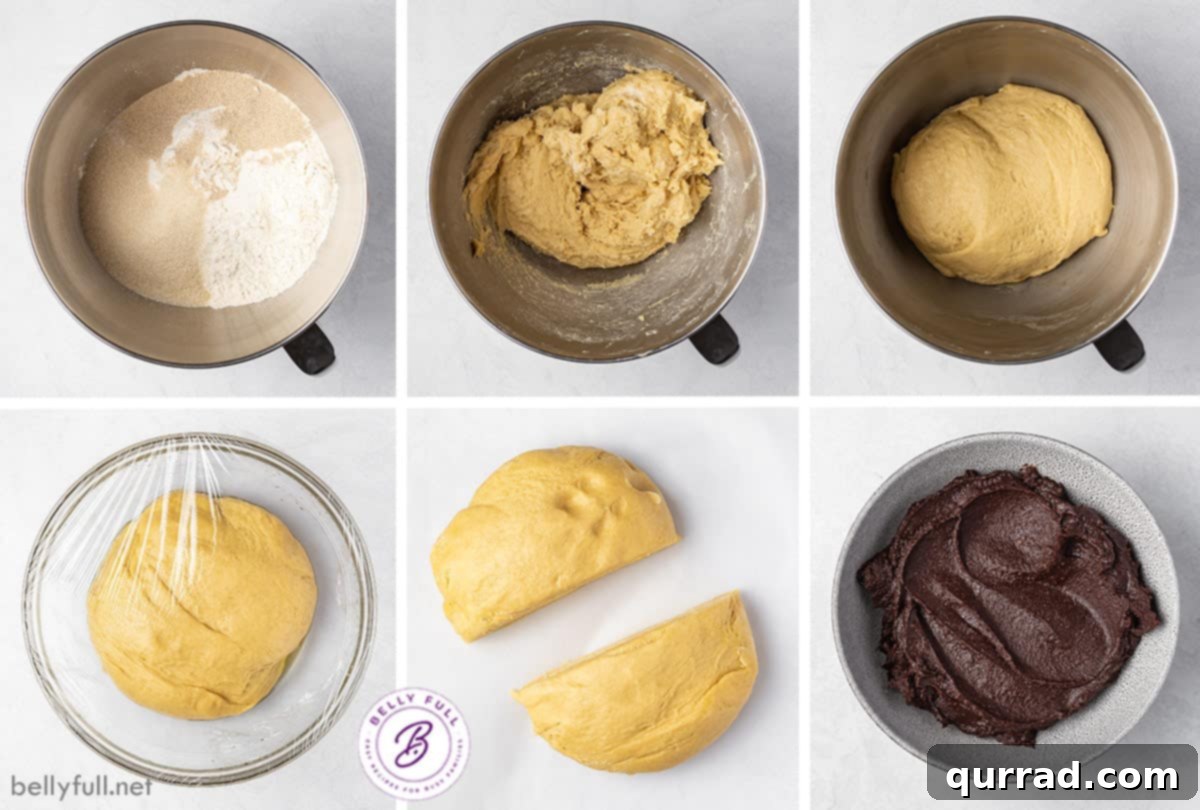
- Prepare the Dough: This enriched dough truly shines when prepared using a stand mixer equipped with a dough hook attachment. Begin by combining your dry ingredients: flour, granulated sugar, instant dry yeast, and kosher salt. Once these are whisked together, gradually add the lightly beaten eggs and lukewarm whole milk. Mix on medium speed until the ingredients are fully incorporated and the dough starts to form a rough, shaggy ball, typically taking about 2-3 minutes. The magic then continues as you switch to a medium-low speed and incorporate the softened unsalted butter, one tablespoon at a time. It’s crucial to wait until each pat of butter is fully absorbed into the dough before adding the next. This gradual addition ensures the butter is thoroughly integrated, creating a rich, pliable dough. This butter-incorporation stage usually takes around 5 minutes. After all the butter is added, continue kneading the dough for an additional 8 to 10 minutes on medium speed. During this time, the dough will transform, becoming wonderfully smooth, elastic, and no longer sticky to the sides of the bowl. This extensive kneading develops the gluten, which is vital for babka’s characteristic chewy yet tender crumb.
- Allow the Dough to Rise and Chill: Once kneaded to perfection, transfer the dough ball to a large bowl that has been lightly brushed with canola oil. This prevents sticking during the rise. Cover the bowl tightly with plastic wrap and let it rise at room temperature for one hour. While it won’t necessarily double in size during this initial rise, you should observe it becoming noticeably puffy and slightly increased in volume. After this initial rise, the bowl, still covered, is transferred to the refrigerator. It needs to chill overnight, or for a minimum of 8 hours. This prolonged cold fermentation is paramount for two reasons: it allows the dough to continue rising slowly, developing deeper, more complex flavors, and it makes the dough much easier to handle and shape when cold.
- Prepare the Chocolate Filling: While your dough is happily chilling, you can prepare the luscious chocolate filling. In a small saucepan, combine the unsalted butter and heavy cream over medium heat. Stir occasionally until the butter is completely melted and the mixture begins to steam gently. At this point, add the semisweet chocolate chips and stir constantly until the chocolate is fully melted and the mixture is smooth and glossy. Remove the saucepan from the heat and immediately whisk in the powdered sugar, unsweetened cocoa powder, and a pinch of salt. The powdered sugar helps achieve a smooth texture, while the cocoa powder intensifies the chocolate flavor. Transfer this rich chocolate mixture to a separate bowl and allow it to cool for about an hour. During this cooling period, the filling will thicken to a wonderfully spreadable, paste-like consistency, perfect for layering into your babka dough.
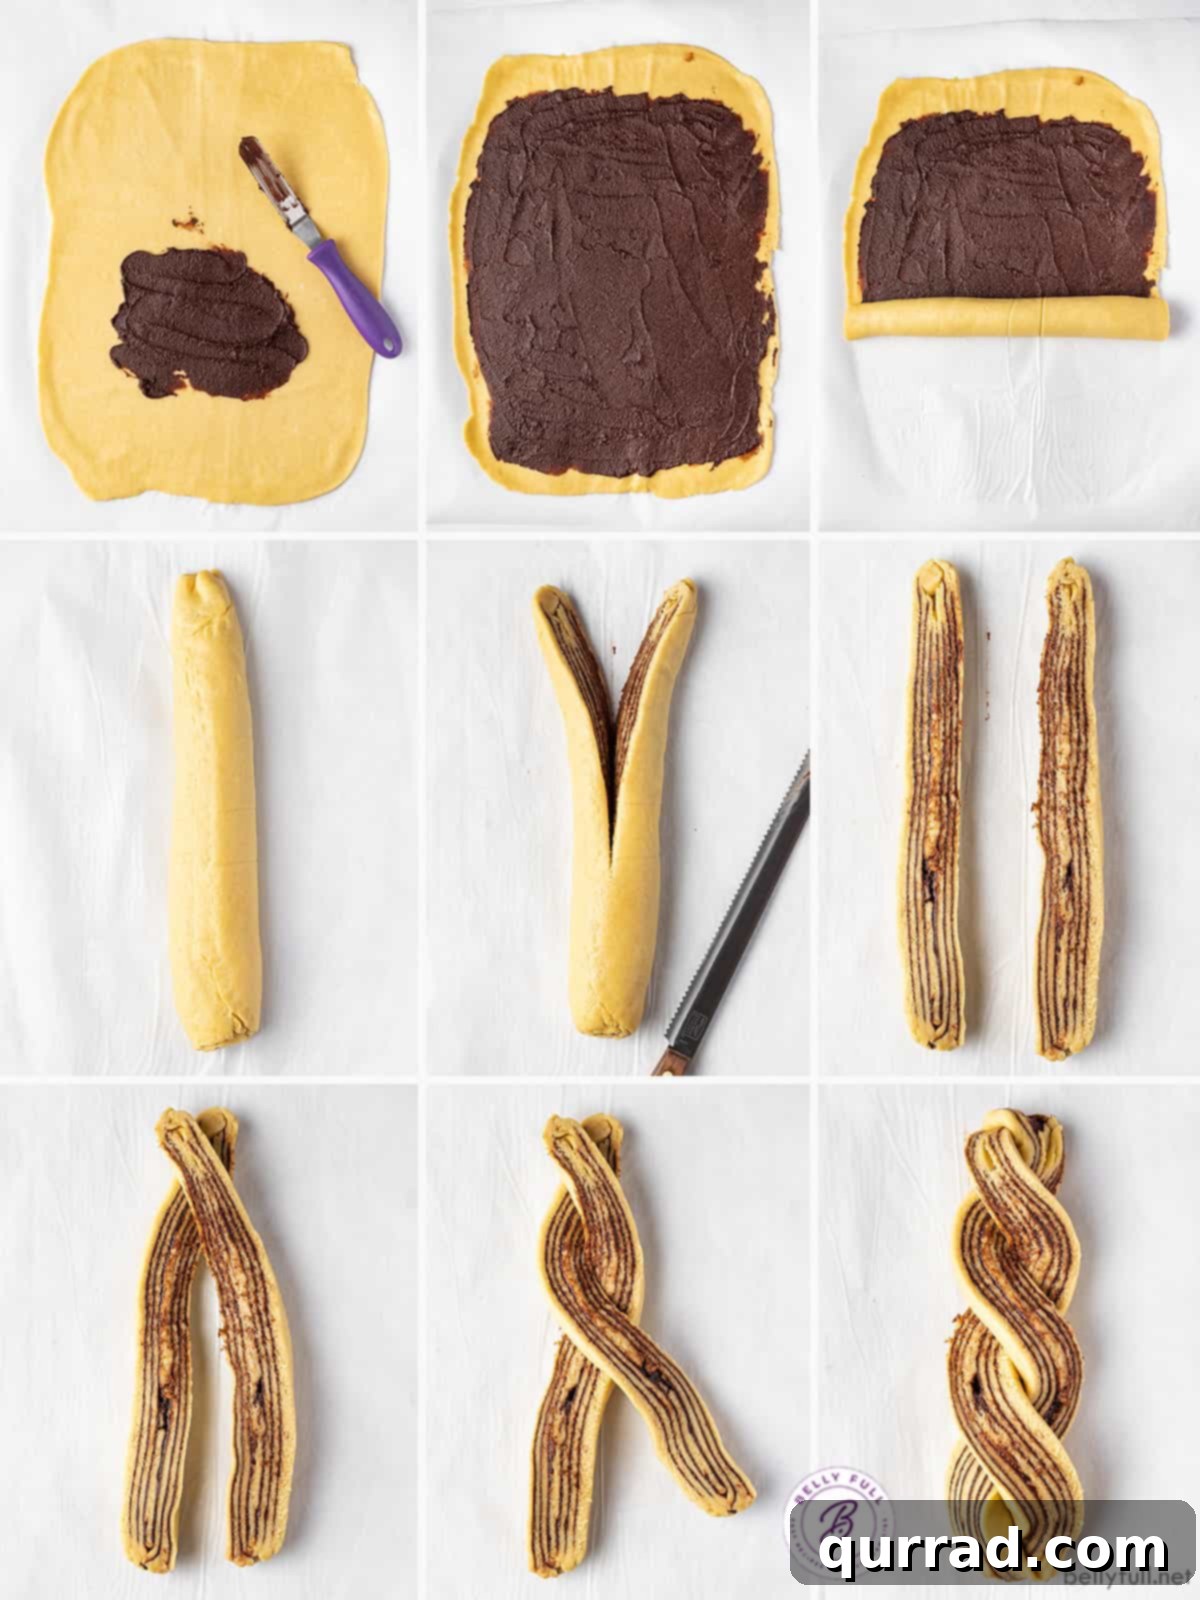
- Fill and Chill the Dough Logs: Retrieve your chilled dough and filling. On a lightly floured surface, punch down the dough gently to release any air, then divide it evenly in half with a bench scraper or sharp knife. Work with one half of the dough at a time, keeping the other half covered and in the fridge. Roll out the first dough half into a large, thin rectangle, approximately 12×16 inches, with the shorter edge facing you. Using an offset spatula, carefully spread half of the cooled chocolate filling evenly over the entire surface of the dough, leaving a small 1/2-inch margin at the top edge furthest from you. This margin helps with sealing. Starting from the short side closest to you, tightly roll the dough rectangle into a neat log, pressing gently to seal the seam at the end. Wrap this log tightly in plastic wrap and transfer it to the refrigerator. Repeat the entire process with the second half of the dough and the remaining chocolate filling. Allow both filled logs to chill in the fridge for a few minutes while you prepare your loaf pans. This brief chill helps firm up the filling and the dough, making it easier to handle for the twisting step.
The Art of the Twist and the Perfect Bake
- Prepare the Loaf Pans: Begin by generously greasing two standard loaf pans (either 9×5-inch or 8×4-inch) with canola oil. Then, line each pan with parchment paper, ensuring you leave a few inches of overhang on the long sides. This parchment paper sling will be your best friend for effortless removal of the baked babka from the pans.
- Twist the Babka Logs: Take one chilled dough log from the fridge. Using a large, sharp serrated knife, carefully cut the log in half lengthwise, starting from the top. You will now have two long, even halves, each revealing the beautiful layers of chocolate filling. Position these two halves parallel to each other on your work surface, ensuring the cut sides, showcasing the chocolate layers, are facing upwards. Gently twist the two halves together a few times, making sure to keep those chocolate layers visible on top. Once twisted, lightly squeeze the ends of the twisted log together to seal them, then tuck them neatly underneath. This creates the classic babka swirl effect. Repeat with the second dough log.
- Second Rise: Carefully transfer each twisted babka loaf into its prepared pan. Don’t worry if there seem to be some gaps in the pan; these will beautifully fill out as the babka rises and bakes. Cover the pans loosely with plastic wrap and let them rise at room temperature for another 1-2 hours, or until they have almost doubled in size. The dough should look noticeably puffy and risen, reaching about 1/2-inch below the rim of the pan. This second rise is crucial for a light and airy texture.
- Bake to Golden Perfection: About 15 minutes before the end of the rising time, preheat your oven to 350°F (175°C), positioning a rack in the middle of the oven. Once the oven is fully preheated, carefully remove the plastic wrap from both babka pans. Bake the babkas for 30 to 35 minutes, or until the tops are beautifully golden brown. To confirm doneness, a toothpick inserted deep into the loaf should come out clean. For the most accurate measure, use an instant-read thermometer; the internal temperature should register around 190°F (88°C).
- Prepare the Simple Syrup: While your babkas are baking and filling your kitchen with an incredible aroma, prepare the simple syrup topping. In a small saucepan over medium heat, combine water and granulated sugar. Bring the mixture to a gentle bubble, stirring until the sugar is completely dissolved. Once dissolved, remove the saucepan from the heat and stir in the vanilla extract. Set this aside to cool slightly.
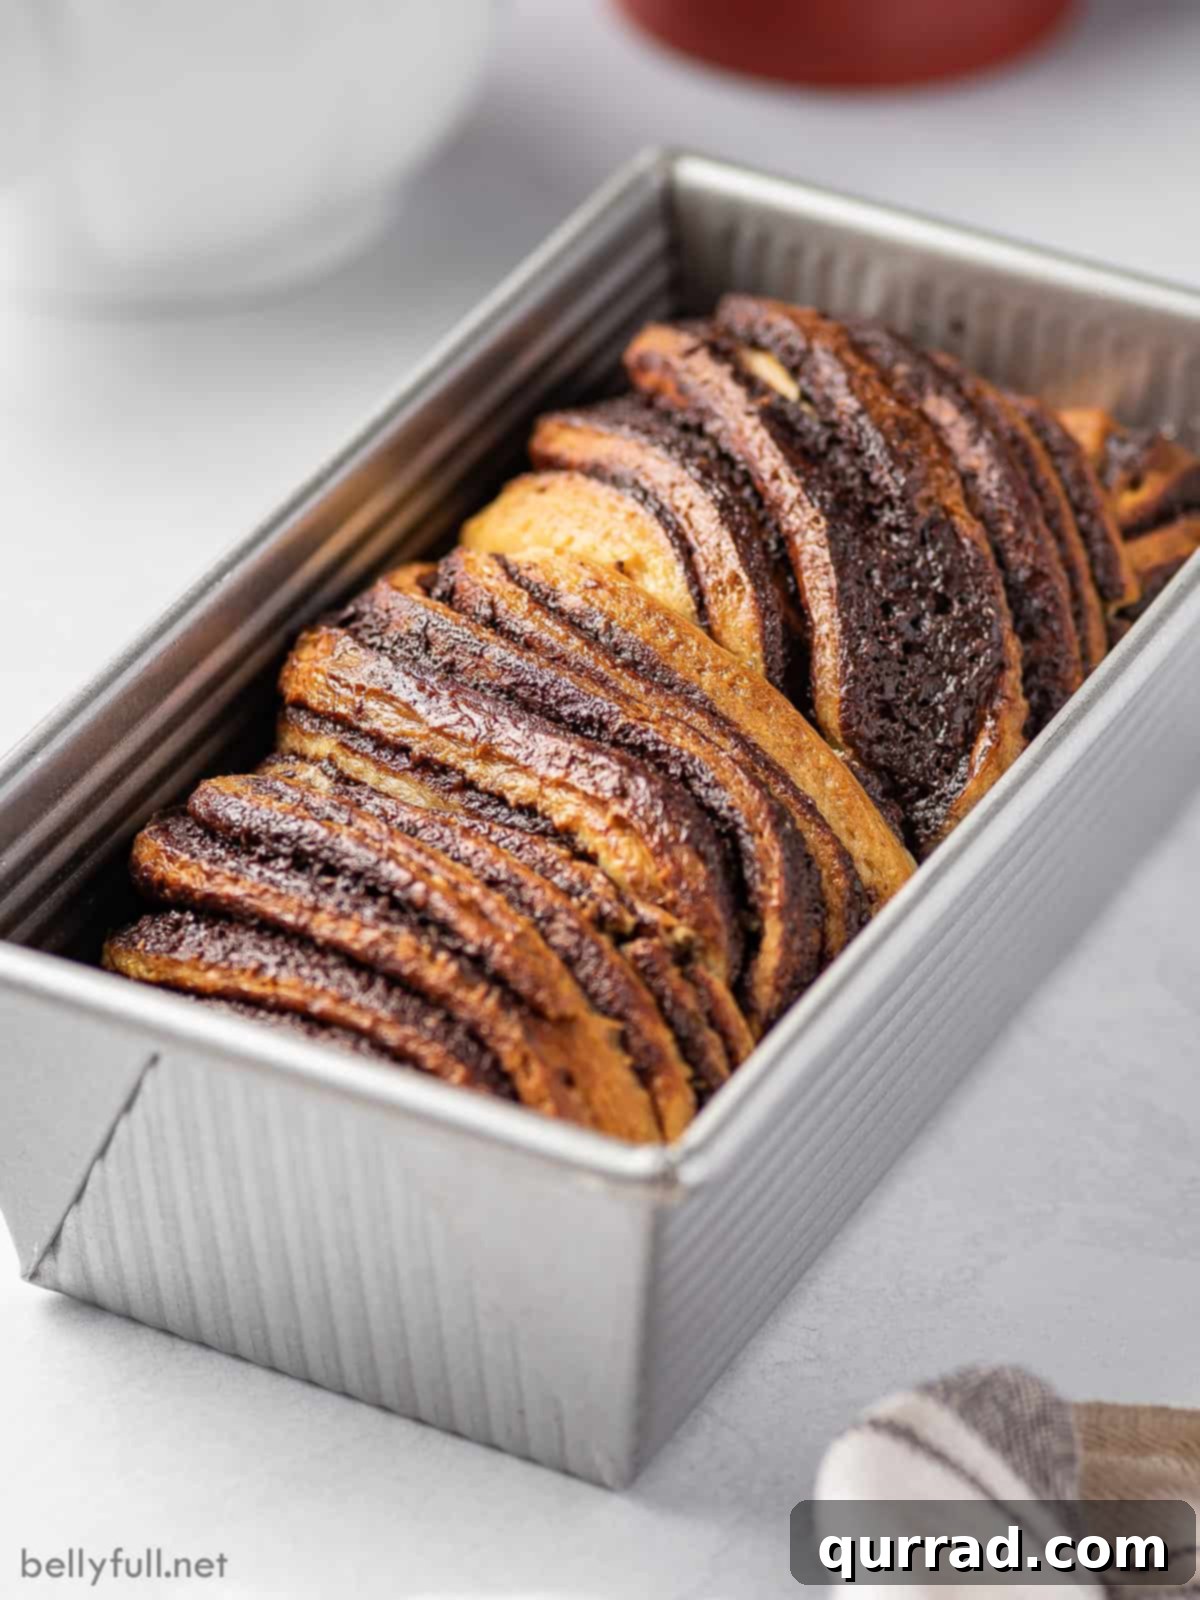
- Drizzle with Syrup: Immediately after taking the babkas out of the oven, use a fork or a tiny skewer to gently pierce the top of each loaf in several places. Then, using a pastry brush, liberally brush the prepared simple syrup all over the warm surface of both breads. It might seem like a lot, but use all of it, dividing it equally between the two loaves. This syrup not only adds a beautiful, glossy shine but also helps to keep the babka wonderfully moist and tender for days.
- Cooling Process: Allow the babka loaves to cool in their pans for just 10 minutes. This allows them to absorb the syrup fully without sticking. After 10 minutes, use the parchment paper overhangs to carefully lift the loaves out of the pans and transfer them to a wire rack to cool completely. This final cooling step is perhaps the hardest test of patience! It’s essential to let the chocolate babka cool to nearly room temperature before attempting to slice it. If you cut into it too soon, the warm chocolate filling will not have had enough time to set properly, resulting in a messy, unset center. The waiting is part of the reward!
The Importance of Chilling Babka Dough
The chilling period for babka dough is not merely a suggestion; it’s a critical step that significantly impacts both the flavor and the workability of your finished bread. Ideally, you should aim to chill the dough in the refrigerator overnight. This extended cold fermentation, typically 8 hours or more, allows the yeast to work slowly, developing a more complex and nuanced flavor profile that is truly unmatched. Furthermore, a cold dough is much firmer and less sticky, making it considerably easier to roll out, spread the filling, and create those beautiful, intricate twists without the dough tearing or the filling oozing out.
However, we understand that time doesn’t always permit an overnight chill. If you’re pressed for time, you can still achieve a delicious babka on the same day, provided the dough can chill in the fridge for a minimum of 2 hours. While not as ideal as an overnight rest, this shorter chill time is still beneficial for gluten development and making the dough more manageable. It’s a crucial step you shouldn’t skip entirely.
It’s worth noting that if the dough remains in the refrigerator for an extended period, it may become quite firm and difficult to roll initially. Should this happen, simply allow the dough to sit at room temperature for 30 to 60 minutes before you begin shaping. This will soften it just enough to make it pliable and easy to work with once more.
Creative Babka Filling Add-Ins and Variations
While classic rich chocolate remains the most iconic and beloved babka filling, the beauty of this versatile bread lies in its adaptability. There are numerous delightful additions you can incorporate alongside the chocolate, or even use to replace it entirely, to create your own unique babka masterpiece. Here are some fantastic babka filling ideas to inspire your next bake:
- Cinnamon: A timeless pairing with sweet bread. You can add a generous dusting of ground cinnamon directly to your chocolate filling for a chocolate-cinnamon swirl, or even create a dedicated cinnamon-sugar filling similar to what you’d find in cinnamon rolls.
- Nutella: For an incredibly easy and deeply hazelnut-chocolate flavored babka, simply use Nutella as your filling instead of the homemade chocolate mixture. It spreads beautifully and provides a comforting, familiar taste.
- Chocolate Chips: If you love textural contrast, sprinkle a handful of mini or regular chocolate chips (not melted) over your chocolate filling before rolling the dough. These will create delightful pockets of molten chocolate after baking.
- Pecans or Other Nuts: To add a lovely crunch and nutty depth, finely chop toasted pecans, walnuts, or almonds and sprinkle them over your chocolate filling. They complement the sweetness and richness perfectly.
- Dried Fruit: For a touch of fruity sweetness and chewiness, consider adding finely chopped dried cranberries, cherries, or apricots to your chocolate filling. They introduce a pleasant tartness that balances the rich chocolate.
- Cream Cheese: For a truly decadent experience, prepare a sweet cream cheese filling (similar to Danish pastries) and swirl it alongside or in place of the chocolate. The tanginess of the cream cheese offers a wonderful counterpoint to the sweet dough.
Essential Tips for Babka Baking Success
If you’re approaching your first chocolate babka bake with a mix of excitement and a touch of apprehension, rest assured that these helpful tips will guide you toward a perfectly delicious outcome:
- Embrace Patience – Do Not Rush: This is, without a doubt, the single most critical piece of advice for making babka. Do not, under any circumstances, rush any of the specified rising or cooling times. The easiest way to compromise the quality of your babka is by not allowing the dough to rise correctly or fully develop. Yes, it involves significant waiting periods, but the incredible depth of flavor and light, airy texture you achieve by honoring these times are 100% worth every minute.
- Utilize a Thermometer for Doneness: The most reliable way to confirm that your babka bread is perfectly baked through, without being over-baked or under-baked, is by using an instant-read thermometer. Insert it into the center of the loaf; the ideal internal temperature for babka should be approximately 190°F (88°C). This ensures a fully cooked interior and a delightful crumb.
- Promptly Remove from Pan After Syrup: Once you’ve applied the simple syrup to your freshly baked babka, allow it to cool in the pan for no more than 10 minutes. This brief period is sufficient for the bread to absorb the syrup’s moisture. Leaving it in the pan for too long, especially with the syrup, significantly increases the likelihood of the babka sticking, making removal difficult and potentially damaging the loaf. After 10 minutes, transfer it to a wire rack to finish cooling.
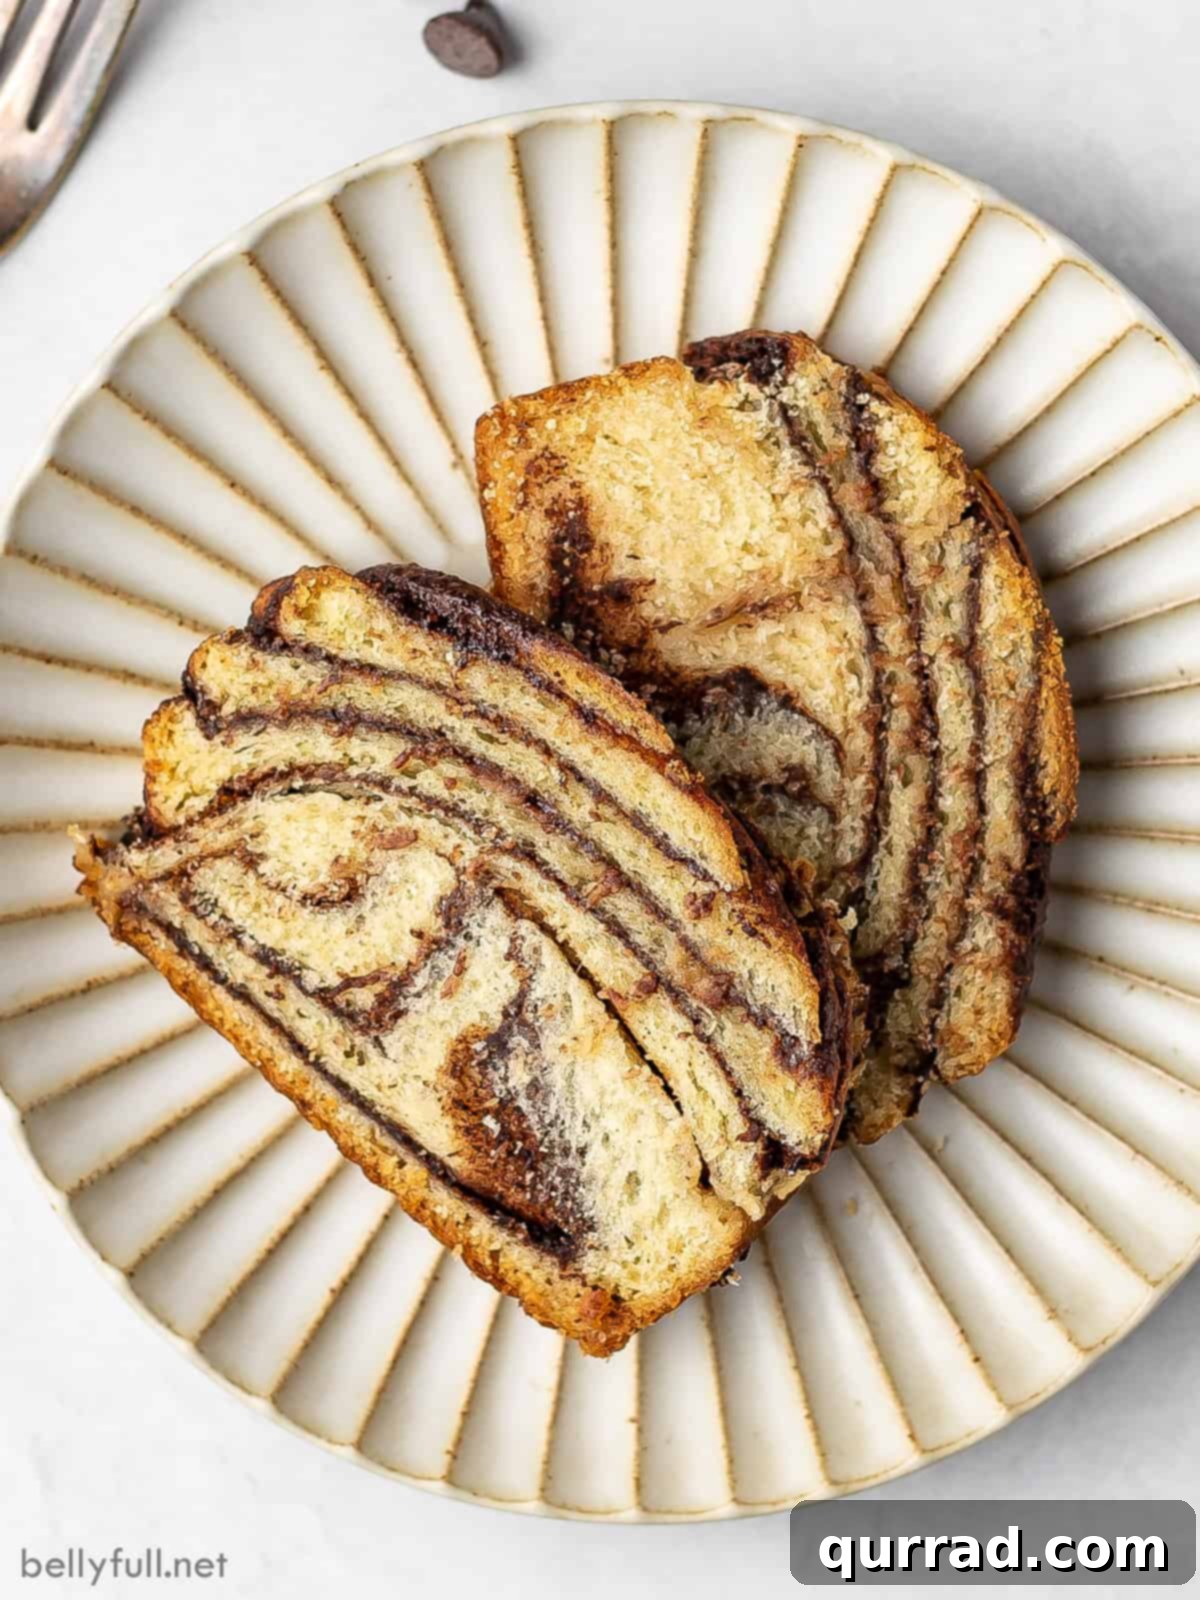
- Allow for Complete Cooling Before Slicing: We understand the immense temptation to slice into a warm, fragrant babka immediately after it comes out of the oven. However, resisting this urge is crucial for the best results. Allow the chocolate babka to cool to at least room temperature, or even slightly cooler, before attempting to slice it. This cooling period is vital for the chocolate filling to properly set and firm up. If you cut into it while it’s still warm, the filling will be too soft and runny, leading to a messy interior and less defined swirls. Patience truly makes perfect here.
Storing and Enjoying Your Homemade Babka
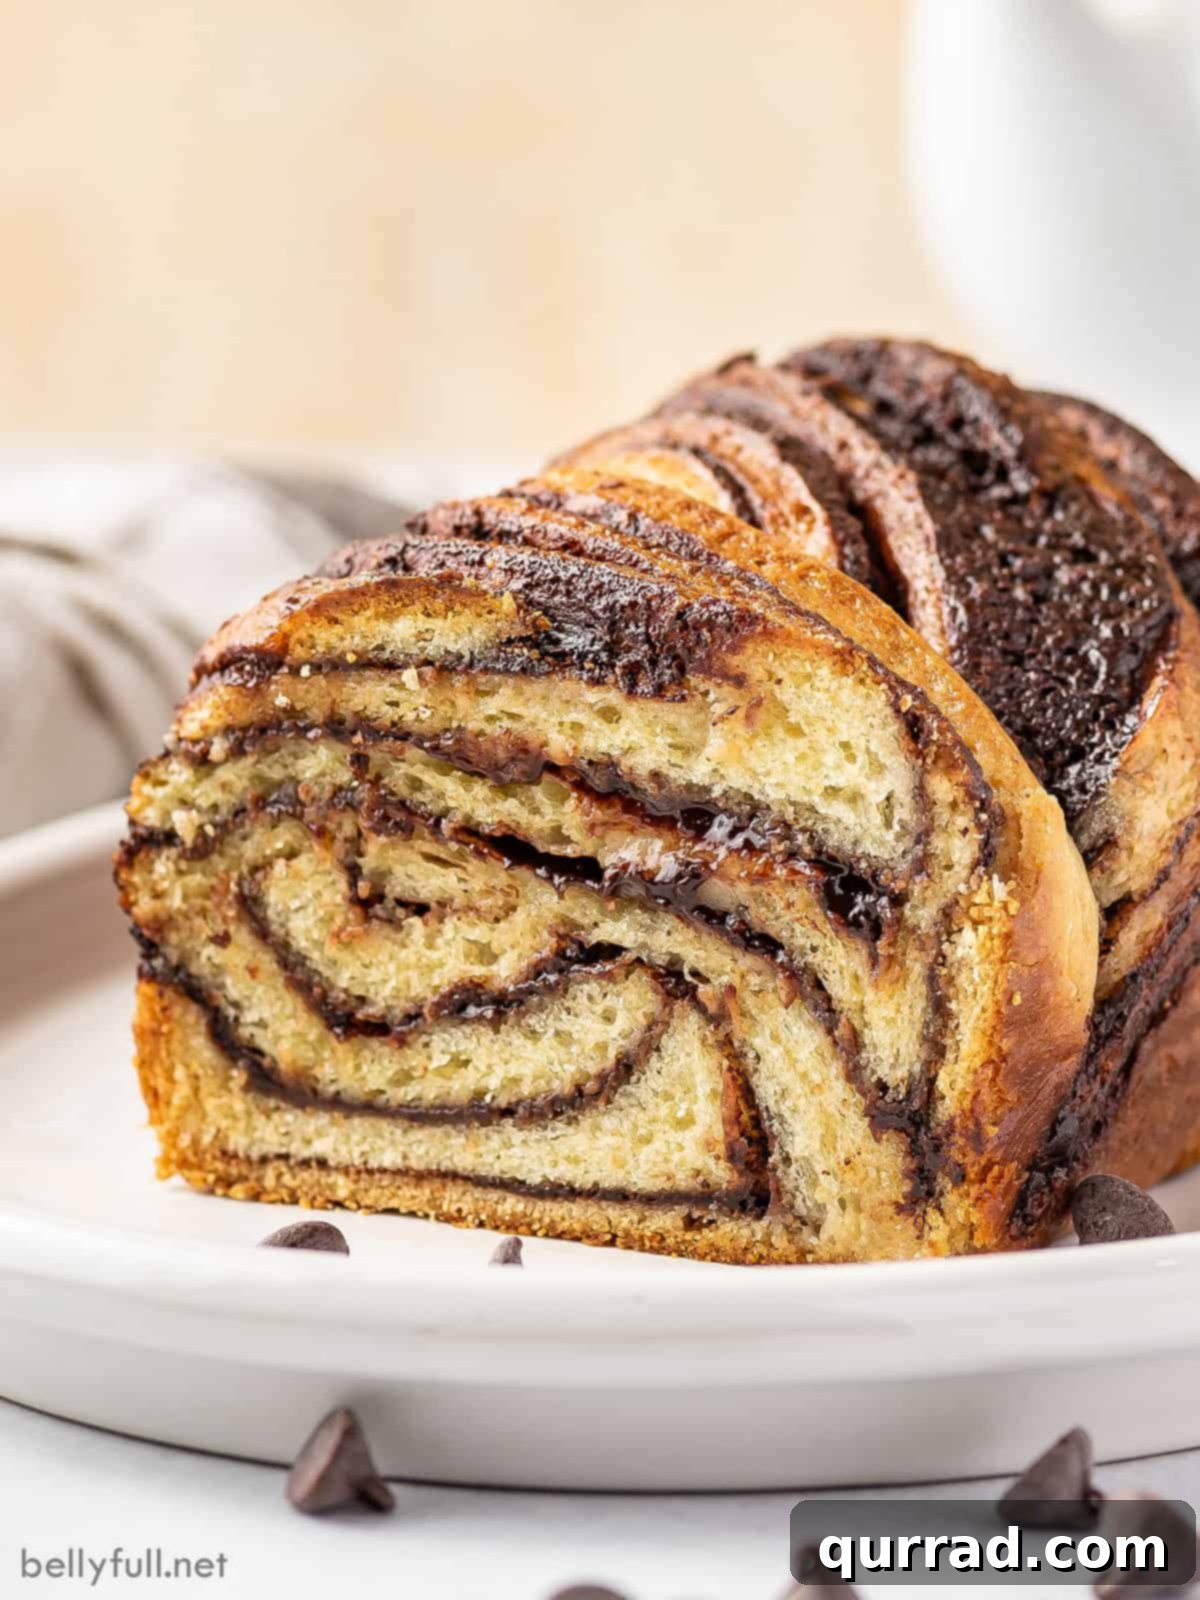
- Serving Suggestions: Babka is truly at its peak when enjoyed within 24 hours of baking. During this time, its flavors are freshest and its texture most sublime. Serve your babka either slightly warm, gently reheated, or at room temperature. It’s a versatile treat, traditionally savored for breakfast, as an indulgent brunch item, or as a delightful accompaniment to an afternoon coffee or tea break. Its rich taste and beautiful appearance make it ideal for any gathering.
- Storing Leftovers: If you happen to have any babka left (a rare occurrence!), it will maintain its deliciousness for up to 3 days when stored properly in an airtight container at room temperature. It’s important to note that baked babka should never be stored in the refrigerator, as the cold air can dry out the bread and negatively impact its tender texture.
- Freezing Babka Bread: This recipe conveniently yields two loaves, which is perfect if you want to enjoy one now and save an extra for later! Chocolate babka freezes exceptionally well. To freeze a loaf, first ensure it has cooled completely to room temperature. Then, wrap it tightly in plastic wrap, followed by another layer of aluminum foil. This double wrapping protects it from freezer burn. It can be stored in the freezer for up to two months. When you’re ready to enjoy it, simply thaw the frozen loaf on your kitchen counter for about 2 hours, or transfer it to the refrigerator overnight. Once thawed, you can warm it gently in the oven for a freshly baked experience.
Video Guide: How to Make Chocolate Babka
Watch the Full Chocolate Babka Recipe Tutorial
For a detailed visual walkthrough of each step in making this delicious chocolate babka, watch our comprehensive video tutorial. It covers everything from preparing the dough to achieving the perfect twist and bake.
(Video content would be embedded here, e.g., via a YouTube iframe)
More Delicious Jewish Food Recipes
If you’ve enjoyed baking this incredible babka, explore more beloved recipes from Jewish culinary traditions:
- Classic Challah Bread
- Decadent Chocolate Challah Bread
- Flaky Rugelach Pastries
- Sweet Sufganiyot (Jelly Donuts)
- Creamy Cheese Blintz
- Irresistible Matzo Toffee
Explore More Irresistible Bread Recipes
For those who love the aroma of freshly baked bread, discover other fantastic recipes that are sure to become family favorites:
- Homemade Cinnamon Swirl Bread
- Soft Homemade Sandwich Bread
- Flavorful Focaccia Bread
- Light and Airy Popovers
We truly hope you adore this delicious and rewarding recipe! Please consider leaving a review below to share your experience. Don’t forget to follow Belly Full on TikTok, Facebook, Instagram, Pinterest, and YouTube for more culinary inspiration!
Chocolate Babka Recipe Card
Sweet and rich, this Chocolate Babka has the texture of a cinnamon roll with a decadent chocolate filling. This is a showstopper bread recipe to share with friends and enjoy with a cup of coffee or tea.
- Prep Time: 45 minutes
- Cook Time: 35 minutes
- Rise and Chill Time: 10 hours
- Total Time: 11 hours 20 minutes
- Servings: 32 slices (2 loaves)
Ingredients
For the Dough
- 3 3/4 cups all-purpose flour, spooned and leveled (plus extra for dusting)
- 1/2 cup granulated sugar
- 1 tablespoon instant dry yeast
- 1 teaspoon kosher salt
- 3 large eggs, room temperature, lightly beaten
- 1/2 cup whole milk, lukewarm (about 100-110 degrees F)
- 10 tablespoons unsalted butter, softened to room temperature
- Canola oil, for coating the bowl and the loaf pans
For the Chocolate Filling
- 1/2 cup unsalted butter
- 1/4 cup heavy cream
- 6 ounces semisweet chocolate chips
- 1/2 cup powdered sugar
- 1/3 cup unsweetened cocoa powder
- Pinch of salt
For the Syrup Topping
- 1/2 cup water
- 1/2 cup granulated sugar
- 1 teaspoon vanilla extract
Instructions
Make the Dough
- In a large bowl, whisk together the flour, sugar, yeast, and salt. Add the eggs and milk; mix until everything is incorporated and the dough forms a rough ball, about 2-3 minutes.
- Gradually add the softened butter, 1 tablespoon at a time, ensuring each piece is fully incorporated before adding the next. This step will take about 5 minutes.
- Continue kneading the dough for 8-10 minutes until it is smooth, elastic, and no longer sticky.
- Lightly oil a large bowl, place the dough inside, cover with plastic wrap, and let rise at room temperature for 1 hour. It will become puffy. Transfer the covered bowl to the refrigerator and chill for 8 hours or overnight to further rise and develop flavor.
Make the Chocolate Filling
- Combine butter and cream in a small saucepan over medium heat. Once steaming, add chocolate and stir constantly until melted.
- Remove from heat, then whisk in powdered sugar, cocoa powder, and salt. Transfer to a bowl and let cool for about 1 hour until thickened to a spreadable consistency.
Rolling and Shaping
- On a lightly floured surface, punch down the dough and cut it in half evenly. Work with one half at a time, keeping the other refrigerated.
- Roll the dough out to a 12×16-inch rectangle.
- Spread half of the chocolate filling evenly over the dough, leaving a 1/2-inch margin at the top.
- Starting from the short side closest to you, tightly roll the rectangle into a log, pressing to seal the seam. Wrap in plastic wrap and transfer to the fridge. Repeat for the second half of dough.
Prep the Pans
- While the dough logs chill, grease two loaf pans (9×5-inch or 8×4-inch) with oil.
- Line the pans with parchment paper, leaving a few inches of overhang on the long sides for easy removal.
Twist the Babka
- Remove one dough log from the fridge. Using a serrated knife, gently cut it in half lengthwise.
- Position each half parallel with the cut sides up. Twist the halves together a few times, keeping the cut sides facing up. Squeeze the ends together and tuck them under.
Transfer to the Pans
- Carefully transfer the twisted babka into one of the prepared pans.
- Cover with plastic wrap and let rise at room temperature for 1-2 hours until almost doubled in size and puffy.
- Repeat the entire process with the second log of dough.
Preheat Oven and Bake
- 15 minutes before the end of rising, preheat oven to 350°F (175°C) with a rack in the middle.
- Remove plastic wrap from both pans.
- Bake for 30-35 minutes until golden brown. An instant thermometer should read 190°F (88°C).
- Make the Syrup: While babkas bake, combine water and sugar in a small saucepan over medium heat. Bring to a bubble until sugar dissolves, then remove from heat and stir in vanilla. Set aside to cool.
- As soon as babkas are baked, pierce the tops in several places with a fork.
- Using a pastry brush, brush the syrup all over the surface, dividing it equally between both loaves.
Cool and Enjoy
- Let the loaves cool in their pans for 10 minutes to absorb the syrup.
- Using the parchment paper, lift out the loaves and transfer to a wire rack to cool completely. Allow to cool to room temperature before slicing to ensure the filling sets properly.
Notes
Chilling the dough: Chilling the dough in the fridge overnight is ideal and highly recommended for optimal flavor and easier handling. However, you can make the babka the same day if time doesn’t permit, as long as the dough can chill in the fridge for at least 2 hours. The chill time is important as the dough continues to rise and helps increase the flavor. The dough is also easier to work with when it’s cold. Note that the dough can harden when placed in the fridge for a long time. Just leave it at room temperature for 30 to 60 minutes until it’s easy to work with.
Nutrition Information
The nutritional information provided is an automatic calculation and may vary based on the specific products you use and any modifications made to the recipe. If precise nutritional values are crucial for your needs, we recommend calculating them independently.
- Calories: 190 kcal
- Carbohydrates: 23g
- Protein: 3g
- Fat: 10g
- Saturated Fat: 6g
- Polyunsaturated Fat: 1g
- Monounsaturated Fat: 3g
- Trans Fat: 1g
- Cholesterol: 37mg
- Sodium: 83mg
- Potassium: 76mg
- Fiber: 1g
- Sugar: 10g
- Vitamin A: 259 IU
- Vitamin C: 1mg
- Calcium: 17mg
- Iron: 1mg
Did you make this? Leave a rating below!