
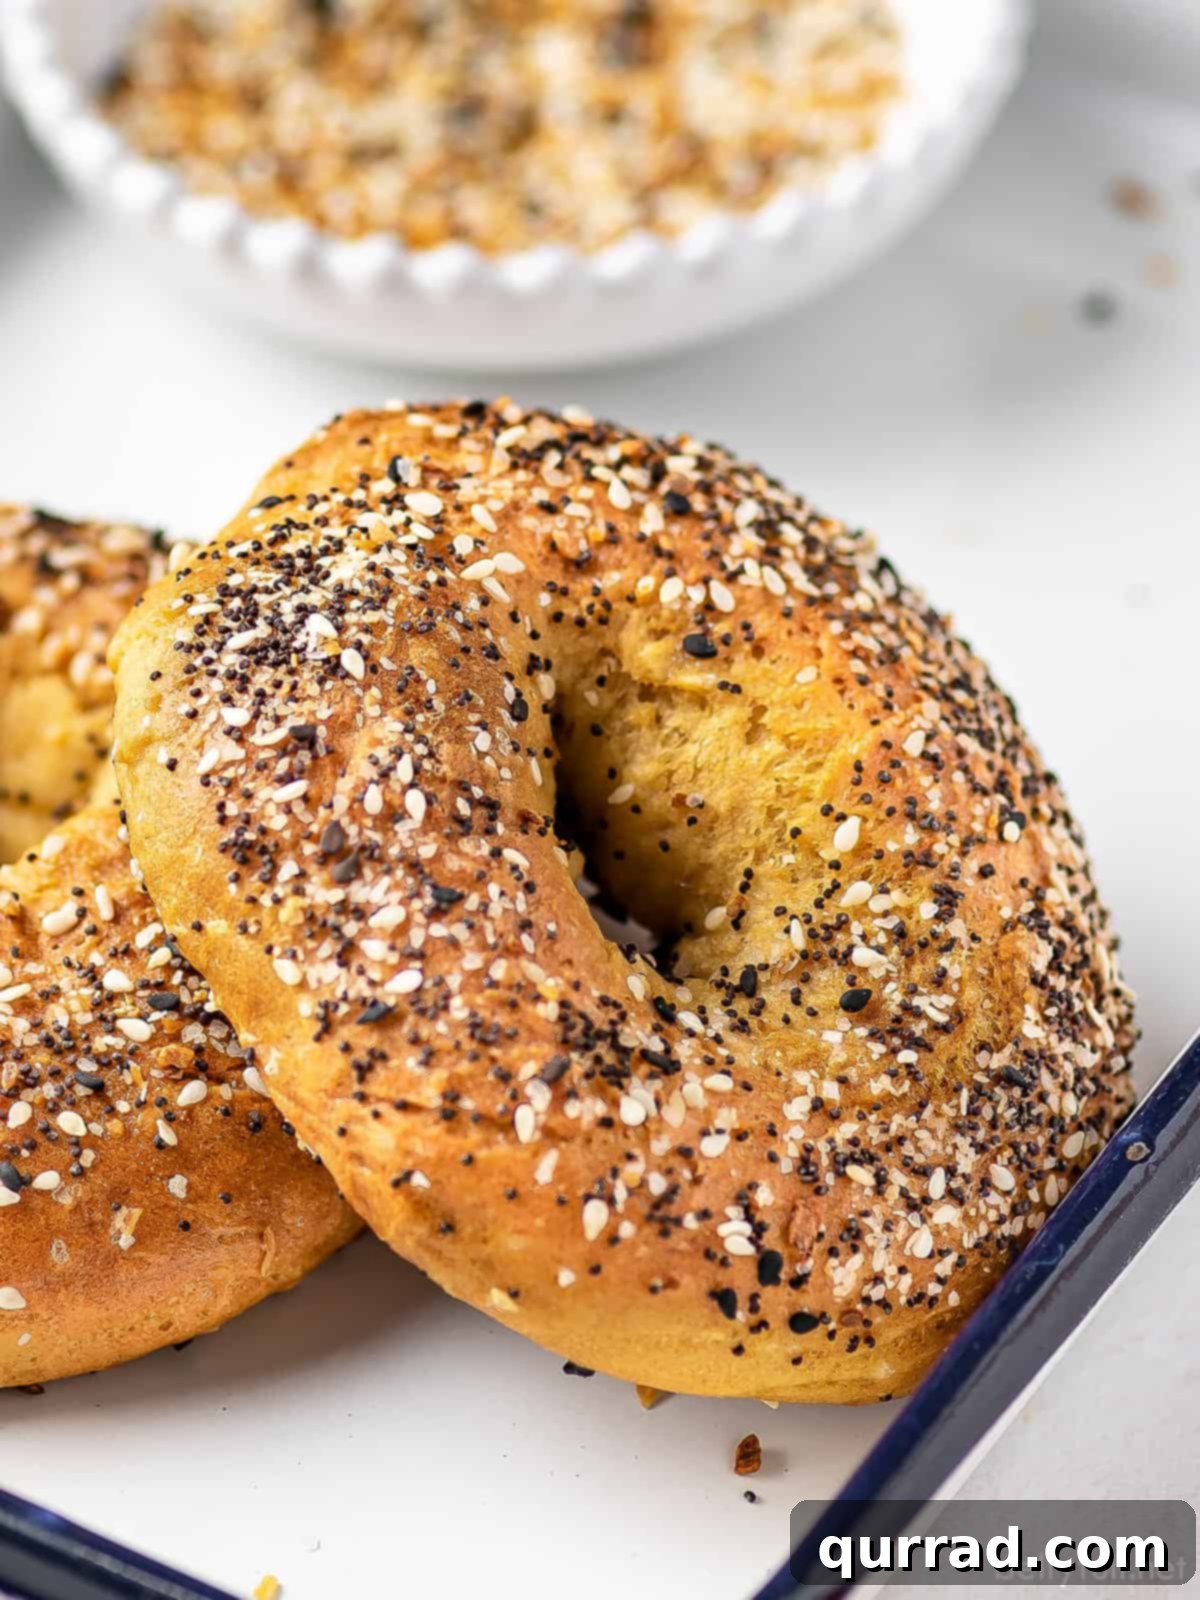
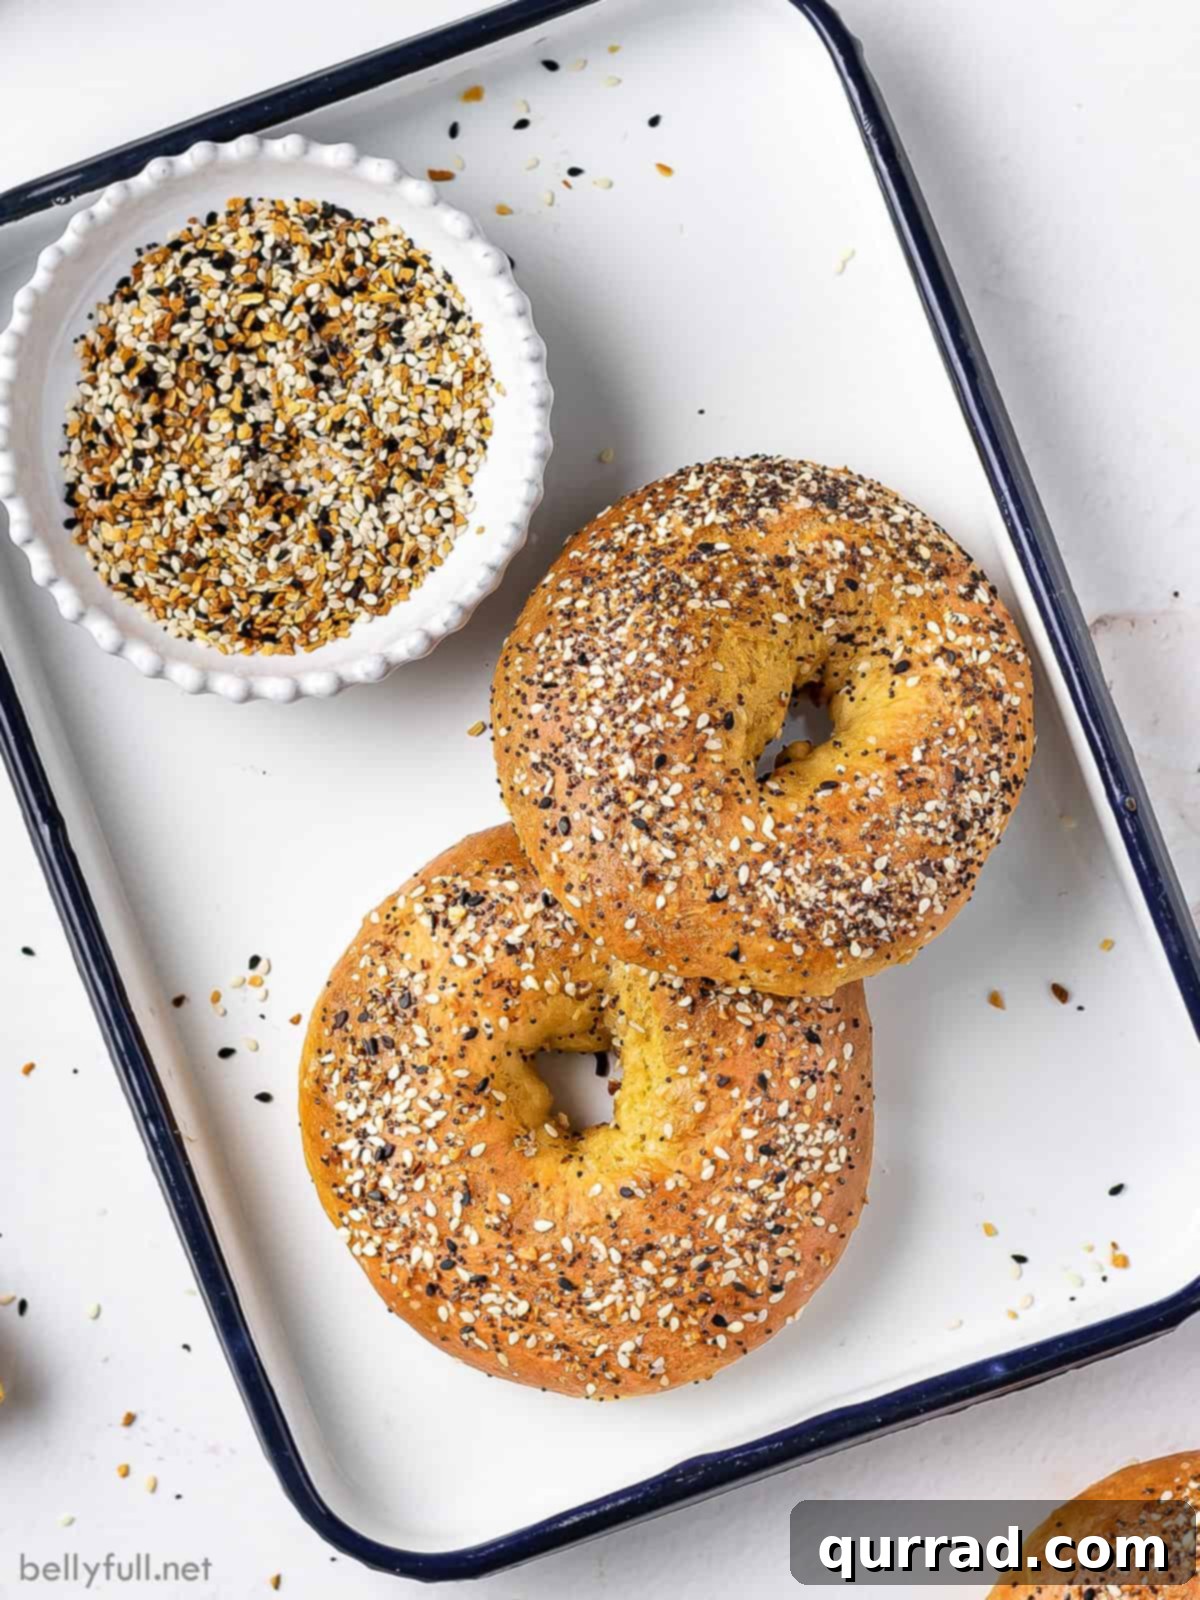
Prepare to have your perception of homemade bagels transformed! This **Easy Bagel Recipe with no yeast** is an absolute game-changer, promising golden perfection on the outside and a wonderfully tender chew on the inside. Crafted with just a handful of staple ingredients, these bagels are so incredibly simple and satisfying that they’ll quickly become a cherished part of your weekly routine. Forget the hassle of waiting for yeast to rise; these delicious homemade bagels come together in a fraction of the time, proving that gourmet taste doesn’t require complex techniques.
5 STAR REVIEW
“Wow! This recipe was super simple and the end product was delicious. I was skeptical because of how easy these were to throw together. I don’t think I’ll ever be able to buy store-bought bagels again. Thanks for this recipe!!!” – Amber
The Easiest No-Yeast Bagel Recipe You’ll Ever Make
Let me introduce you to what has become my latest culinary obsession—this incredibly easy bagel recipe. I find myself whipping up a batch of these delicious bagels at least a few times a week, and for good reason: they are genuinely *that* easy to prepare and *that* good to eat. If you’ve been searching for a reliable, quick, and satisfying homemade bagel recipe, your quest ends here.
While I cherish the memory of authentic, artisanal bagels, especially those from legendary bakeries in New York or Chicago, the reality for many of us is that such indulgences aren’t always accessible. The days of my grandparents bringing enormous bagel hauls are a fond memory. But rather than lament, I discovered a delightful alternative that stands strong in its own right. These homemade, no-yeast bagels offer a taste and texture that truly satisfies, bringing the joy of fresh-baked goods right to your kitchen.
The secret to their simplicity and fantastic texture lies in a common pantry ingredient: Greek yogurt. When I first stumbled upon this **Greek yogurt bagel recipe** several months ago, I was genuinely blown away by the results. The combination of simple ingredients yields a dough that’s easy to work with and bakes into perfectly golden, chewy bagels. It’s now a non-negotiable staple in my weekly breakfast and brunch routine, offering a wholesome and delicious start to any day.
Why Choose No-Yeast Bagels? The Magic Behind the Simplicity
For many home bakers, the thought of working with yeast can be intimidating. The precise temperatures, the waiting, the proofing – it all adds up to a time-consuming process. This **easy no-yeast bagel recipe** removes that barrier entirely, opening up the world of fresh, warm bagels to everyone, regardless of their baking experience. Instead of yeast, we harness the power of baking powder, which reacts with the acidity in Greek yogurt to create a quick rise, giving these bagels their delightful lift and airy interior without any of the fuss.
The beauty of this method extends beyond just speed. It also means you don’t need to plan hours in advance; spontaneous bagel cravings can be satisfied in under an hour from start to finish. This makes it an ideal recipe for busy mornings, impromptu brunches, or simply when you desire a comforting, freshly baked treat. The simplicity of ingredients and the straightforward process ensure a consistently delicious result every time, making it a reliable favorite.
The Indispensable Role of Greek Yogurt
Greek yogurt isn’t just a healthy addition; it’s the cornerstone of this no-yeast bagel recipe. Its thick, creamy consistency and tangy flavor contribute significantly to both the texture and taste of the final product. The yogurt provides the necessary moisture to create a pliable dough, while its acidity activates the baking powder, ensuring the bagels rise beautifully in the oven. Furthermore, Greek yogurt adds a subtle richness and a pleasant tang that elevates the flavor profile, giving these bagels a unique and addictive quality.
Opting for non-fat plain Greek yogurt is crucial for achieving the perfect dough consistency. Its thickness is key; thinner, regular yogurts will make the dough too loose and sticky, challenging to handle and shape. The added protein from the Greek yogurt also lends a slightly chewy texture, mimicking some of the characteristics of traditional bagels while boosting the nutritional value, making these homemade bagels a surprisingly wholesome choice.
Expert Tips & Delicious Variations for Your Homemade Bagels
- Choose the Right Yogurt: Always use **non-fat plain Greek yogurt**. Its thick consistency is essential for the dough’s structure. Brands like Chobani, Fage, and Stoneyfield are excellent choices due to their consistent thickness. Avoid regular yogurt, as its higher water content will result in an overly loose and sticky dough that’s difficult to manage.
- Strain Excess Liquid: If your Greek yogurt appears runny or has any separated liquid (whey) on top, it’s beneficial to strain it first. Simply place the yogurt in a fine-mesh sieve lined with cheesecloth over a bowl for 15-30 minutes to remove excess moisture. This ensures your dough has the ideal consistency.
- Room Temperature Dough: While the dough comes together quickly, allowing it to sit at room temperature for a few minutes before shaping can make it slightly more pliable and easier to work with.
- Don’t Overwork the Dough: Knead just enough until the dough comes together and is smooth. Over-kneading can develop too much gluten, resulting in a tougher bagel. Aim for about 10 gentle turns.
- Creative Toppings: While everything bagel seasoning is highly recommended for its classic flavor and texture, don’t limit yourself! Experiment with sesame seeds, poppy seeds, flaky sea salt, dried garlic or onion flakes, or even cinnamon sugar for a sweet twist.
- Sweet Variations: For a delightful sweet bagel, incorporate a tablespoon of sugar or maple syrup into the dry ingredients. After the egg wash, sprinkle with a mixture of cinnamon and sugar. You can also fold in a handful of raisins or dried cranberries during the kneading process for fruit-filled bagels.
- Savory Additions: Elevate the savory profile by mixing grated cheese (cheddar or Monterey Jack), finely chopped chives, or a pinch of garlic powder directly into the dough before kneading.
Easy No-Yeast Bagel Recipe
10 minutes
25 minutes
35 minutes
4
See below the recipe card for step-by-step images.
Ingredients
- 1 cup all-purpose flour, spooned and leveled (see notes for alternatives)
- 2 tsp baking powder
- ¾ tsp kosher salt, (ensure it’s not table salt, which is saltier)
- 1 cup non-fat plain Greek yogurt
- 1 egg + 2 teaspoons water, lightly beaten to create an egg wash (for golden sheen and topping adhesion)
- 2 to 3 tbsp everything bagel seasoning, for topping (optional, but highly recommended for classic flavor)
Instructions
-
Preheat Oven & Prep Baking Sheet: Preheat your oven to 375°F (190°C) with the oven rack positioned in the upper-middle. Line a baking sheet with parchment paper, then lightly spray it with a nonstick cooking spray to prevent any sticking.
-
Combine Dry Ingredients: In a medium-sized mixing bowl, thoroughly whisk together the all-purpose flour, baking powder, and kosher salt until they are well incorporated. Then, add the Greek yogurt to the dry mixture and use a fork to mix. Continue mixing until the ingredients just come together to form a shaggy, crumbly dough.
-
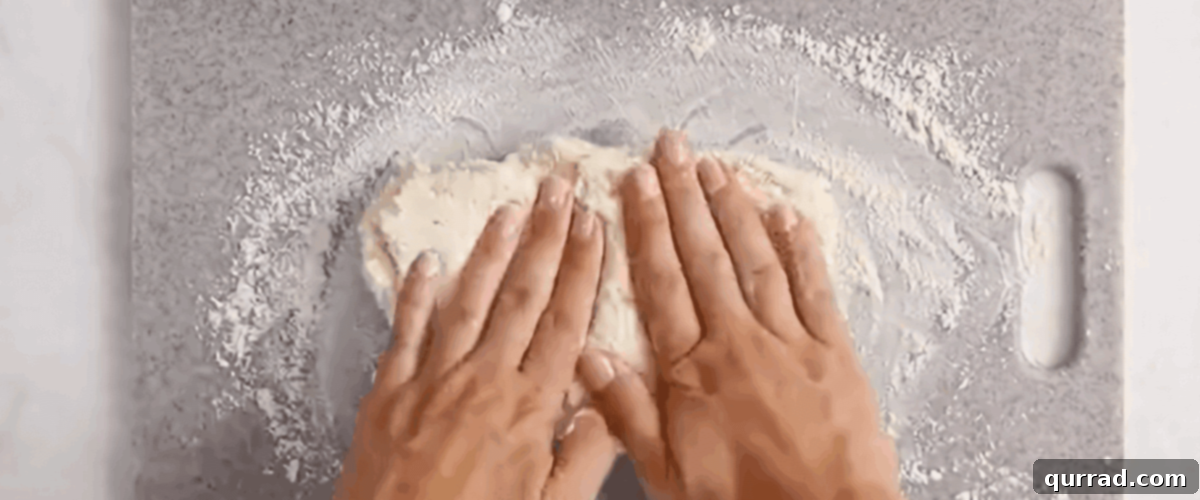
Knead the Dough: Transfer the shaggy dough to a clean work surface that has been lightly dusted with flour. Sprinkle a small amount of flour on top of the dough as well. Gently knead the dough until it fully comes together and no dry crumbs remain. The ideal consistency is tacky but not sticky; it should not adhere to your hands when you pull away. Be careful not to overwork the dough; this step should only take about 10 gentle turns to achieve a smooth consistency.
-
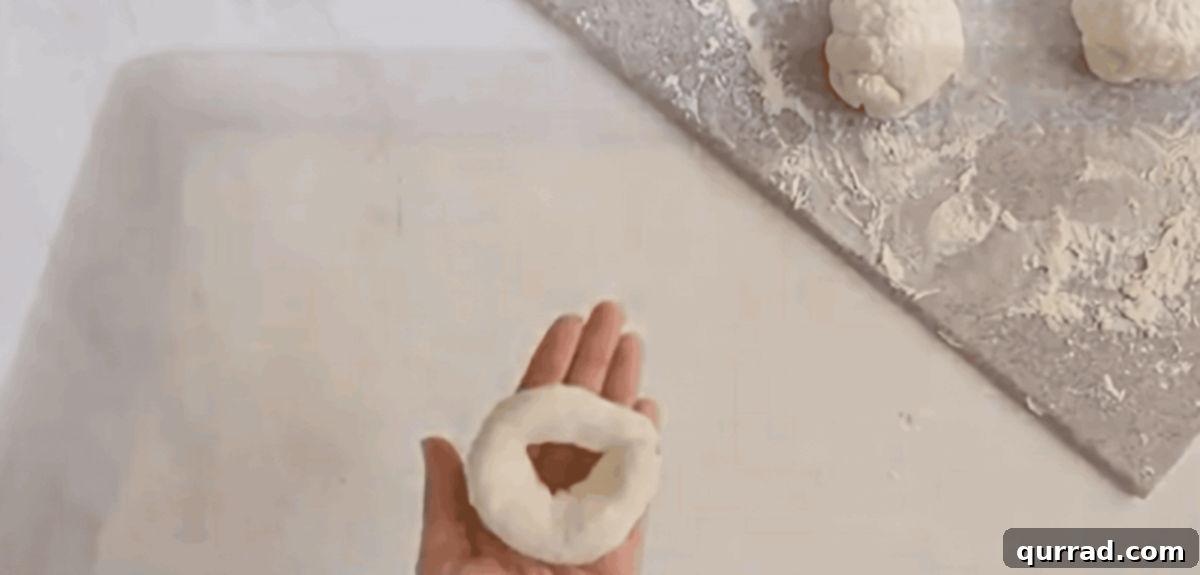
Shape the Bagels: Divide the kneaded dough into 4 equal portions. For classic bagel shape, roll each portion between your hands into a ¾-inch thick rope. Join the ends of the rope and firmly seal them together to form a seamless circle. You may flour your hands as needed to prevent sticking. Alternatively, you can form each portion into a ball, then use your thumb to poke a hole in the center. Gently pull and stretch the dough around the hole until it is uniform and shaped like a traditional bagel.
-
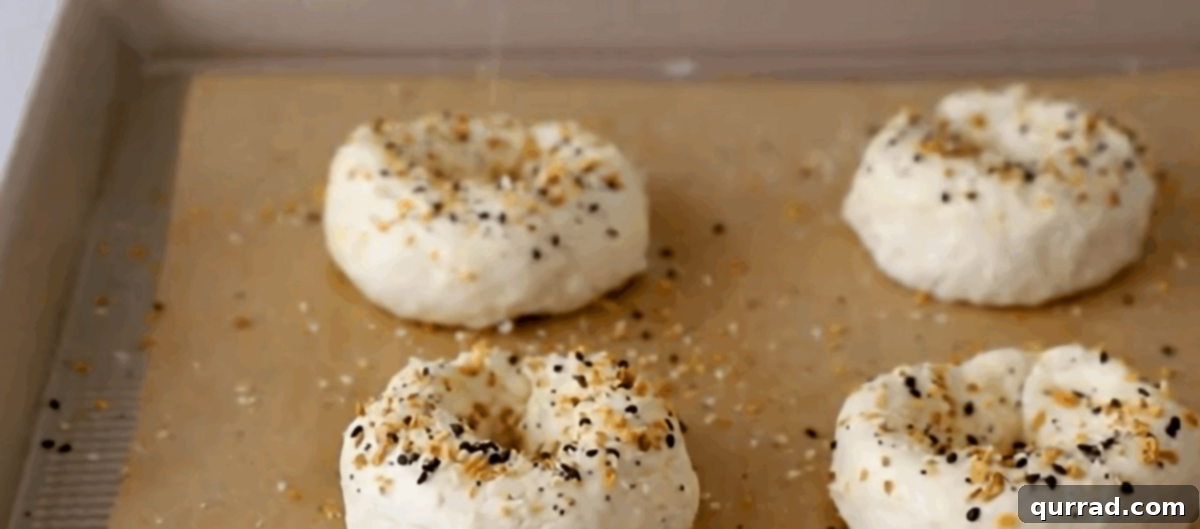
Apply Egg Wash & Seasoning: Place the shaped bagels on the prepared baking sheet. Using a pastry brush, generously brush the top and sides of each bagel with the lightly beaten egg wash. Immediately sprinkle the tops with the everything bagel seasoning, pressing lightly to ensure it adheres well.
-
Bake to Golden Perfection: Bake the bagels on the upper-middle rack of your preheated oven for approximately 25 minutes. Keep a close eye on them during the last few minutes of baking. If the tops begin to brown too quickly, you can loosely tent the baking sheet with aluminum foil to prevent over-browning while allowing the bagels to cook through.
-
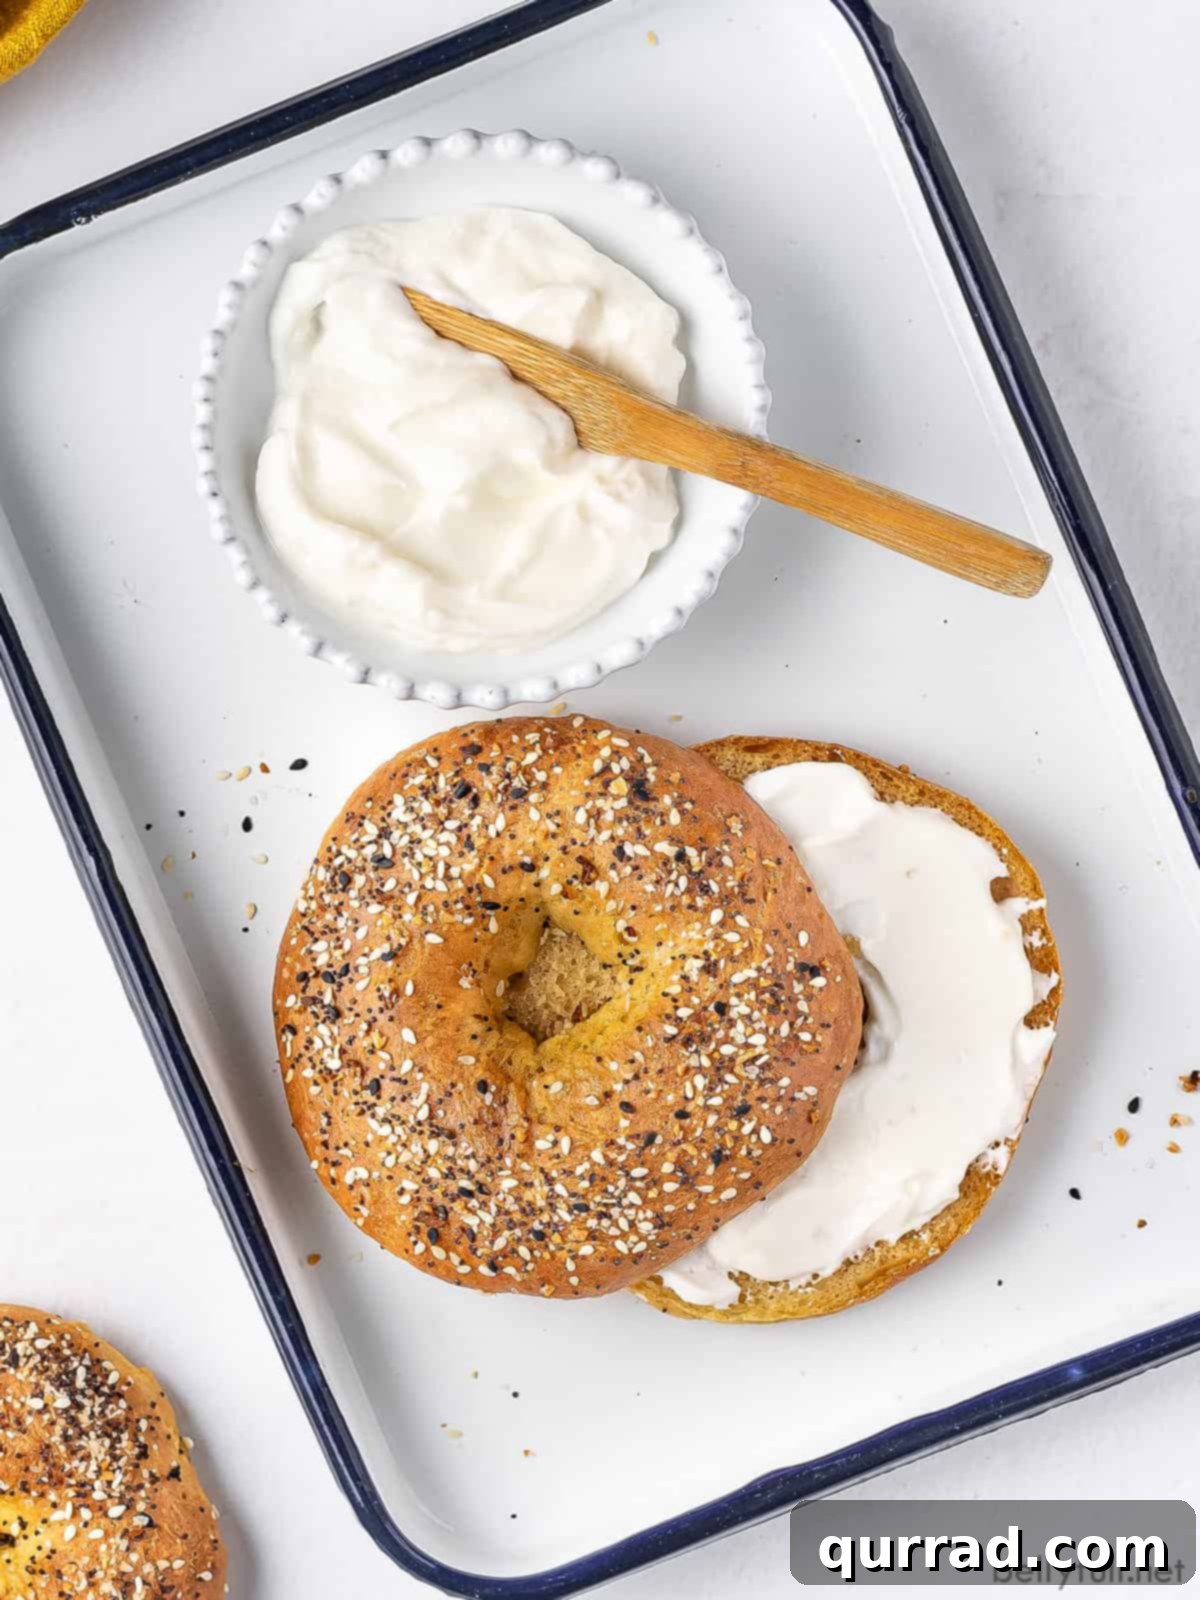
Cool & Serve: Once baked, remove the bagels from the oven and let them cool on the baking sheet or a wire rack for at least 15 minutes before slicing them in half and serving. Cooling allows the interior to set, ensuring a perfect texture.
Video
For a visual guide to making these easy no-yeast bagels, watch our step-by-step video:

Notes for Perfect Bagels
- Self-Rising Flour: If you opt to use self-rising flour, it’s important to **omit the baking powder and salt** from the recipe. Self-rising flour already contains these leavening agents and seasonings, so adding more would alter the balance and texture of your bagels.
- Bread Flour: While we prefer the lighter texture achieved with all-purpose flour for this recipe, you can certainly **swap it with bread flour** if you desire. Using bread flour, which has a higher protein content, will result in a bagel with a more pronounced “chewy” texture, similar to traditional bagels.
- Egg Wash Alternatives: The egg wash serves two primary purposes: it creates a beautiful golden sheen on the bagels and acts as a binder for the toppings. If you have an egg allergy or prefer a vegan option, you can replace the egg wash with a little water or plant-based milk. Simply brush a small amount over the bagels, just enough to help the seasoning adhere. The bagels won’t be quite as shiny but will still be delicious.
- Preventing Dough Stickiness: If your dough feels overly sticky after kneading, resist the urge to add too much extra flour, as this can dry out the bagels. Instead, lightly flour your hands and work surface as needed, ensuring just enough to make the dough manageable. A scraper can also be helpful.
Nutrition
Carbohydrates: 27g |
Protein: 10g |
Fat: 2g |
Saturated Fat: 1g |
Polyunsaturated Fat: 1g |
Monounsaturated Fat: 1g |
Trans Fat: 1g |
Cholesterol: 43mg |
Sodium: 866mg |
Potassium: 321mg |
Fiber: 1g |
Sugar: 2g |
Vitamin A: 61IU |
Calcium: 153mg |
Iron: 2mg
Nutritional information provided is an estimated automatic calculation and can vary based on the exact products you use and any modifications made to the recipe. If these numbers are critically important to your dietary needs, we recommend calculating them independently using your specific ingredients.
Did you make this? Leave a rating below!
Your feedback helps others discover delicious recipes.
How to Make Easy No-Yeast Bagels: A Visual Guide
Follow these illustrated steps to create perfect homemade bagels with ease. Each stage is designed to be straightforward, ensuring success even for novice bakers.
Step 1: Get the oven going and prep a baking sheet
Start by preheating your oven to 375°F (190°C). Position an oven rack in the upper-middle section. Next, lay a piece of parchment paper onto a baking sheet, and lightly spray it with a nonstick cooking spray. This setup ensures your bagels bake evenly and don’t stick.
Step 2: Prepare the dough
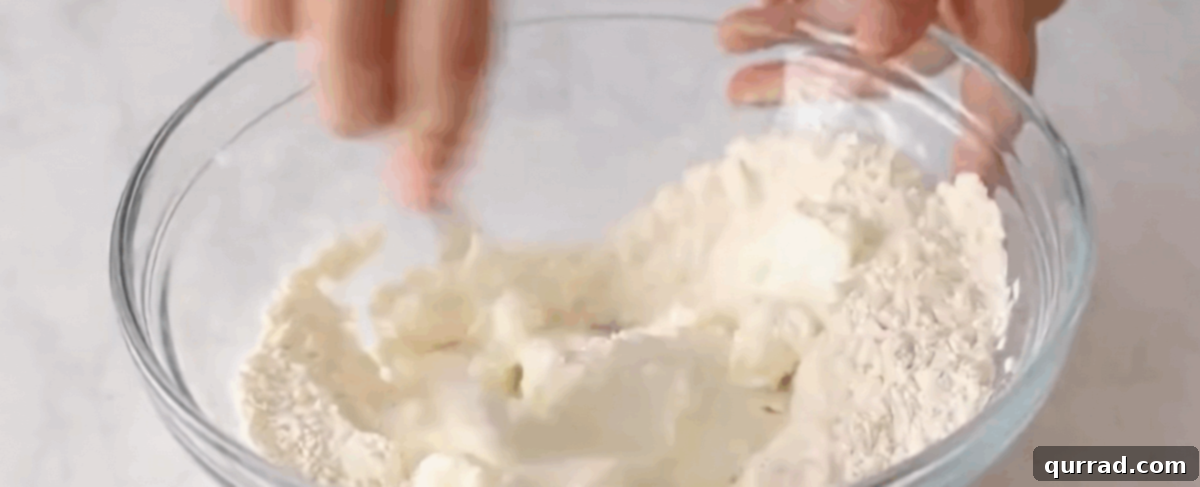
In a medium mixing bowl, combine 1 cup of all-purpose flour, 2 teaspoons of baking powder, and ¾ teaspoon of kosher salt. Whisk these dry ingredients together thoroughly. Then, add 1 cup of non-fat plain Greek yogurt. Mix with a fork until the ingredients combine and form a shaggy, crumbly dough. It won’t look perfectly smooth yet, and that’s exactly what you want.
Step 3: Knead the dough
Transfer the shaggy dough from the bowl to a clean work surface that has been lightly dusted with flour. Sprinkle a small amount of flour on top of the dough. Gently knead the dough until it comes together into a cohesive ball and no crumbs remain. The dough should feel tacky to the touch but should not stick excessively to your hand when pulled away. Be mindful not to overwork the dough; typically, about 10 gentle turns are sufficient to achieve the right consistency without developing too much gluten and making the bagels tough.
Step 4: Shape the dough
Divide the kneaded dough into 4 equal portions. For each portion, you have two primary shaping methods:
- Rope Method: Roll each ball of dough into a ¾-inch thick rope using your hands. Bring the ends of the rope together and firmly pinch and seal them to form a seamless circle. This creates the classic bagel shape.
- Poke-Hole Method: Alternatively, form each dough portion into a smooth ball. Use your thumb to poke a hole directly in the center of the ball. Gently pull and stretch the dough around the hole until it achieves a uniform ring shape, similar to store-bought bagels.
Flour your hands lightly as needed throughout this process to prevent the dough from sticking.
Step 5: Brush with egg wash and season
Arrange the shaped bagels on your prepared baking sheet. In a small bowl, whisk together 1 egg with 2 teaspoons of water to create an egg wash. Using a pastry brush, generously coat the top and sides of each bagel with this mixture. Immediately sprinkle the tops with 2 to 3 tablespoons of everything bagel seasoning. Gently press the seasoning to ensure it adheres well to the sticky egg wash.
Step 6: Bake
Place the baking sheet with the bagels on the upper-middle rack in your preheated oven. Bake for approximately 25 minutes. It’s important to monitor them closely, especially towards the end of the baking time. If you notice the tops browning too quickly, you can loosely tent the baking sheet with a piece of aluminum foil to protect them while the insides finish cooking. The bagels should be beautifully golden brown when done.
Step 7: Cool and slice
Once the bagels are baked to a golden perfection, remove them from the oven. Allow them to cool on the baking sheet or a wire rack for at least 15 minutes before attempting to slice them in half and serve. This cooling period is essential for the interior to set properly, ensuring a tender and enjoyable texture.
Air Fryer Method: Quick & Convenient Bagels
For an even quicker preparation method, these no-yeast bagels can be successfully made in an air fryer. Begin by preheating your air fryer to 280°F (138°C). Carefully place the shaped bagels in a single layer inside the air fryer basket, ensuring they do not touch each other. Depending on the size of your air fryer, you may need to bake them in batches.
Air fry the bagels for 15 to 16 minutes, or until they achieve a beautiful golden brown color. There’s no need to flip them halfway through. Keep in mind that air fryer models can vary significantly in temperature and cooking efficiency, so it’s always a good idea to monitor your bagels closely, especially during your first attempt, and adjust cooking times as needed. Once cooked, let them cool for at least 15 minutes before slicing and enjoying their perfectly crispy exterior and soft interior.
Storing Your Homemade Bagels for Lasting Freshness
Proper storage is key to enjoying your homemade bagels for as long as possible. Whether you’re planning ahead, storing leftovers, or preparing a batch for future cravings, these tips will help maintain their deliciousness.
Make Ahead Dough: If you wish to prepare the dough in advance without baking, simply form it into a ball, wrap it tightly with plastic wrap, and store it in the refrigerator for up to 3 days. When you’re ready to bake, remove the dough from the fridge and allow it to come to room temperature before shaping the bagels and following the baking instructions.
Storing Leftovers at Room Temperature: Any leftover baked bagels are best enjoyed fresh. For short-term storage, wrap them tightly in plastic wrap or place them in an airtight container and store at room temperature for up to one day. This helps to maintain their soft texture.
Refrigerated Storage: For slightly longer storage, you can keep leftover bagels wrapped tightly in plastic wrap and placed in the refrigerator for up to 3 days. To reheat, simply pop them in the oven, a toaster, or an air fryer until warmed through and lightly crispy.
Freezing for Long-Term Enjoyment: These bagels freeze beautifully, making them perfect for meal prep. To freeze, first slice the bagels in half lengthwise. Put the halves back together, then individually wrap each whole bagel tightly in plastic wrap, followed by a layer of aluminum foil for extra protection against freezer burn. They will keep well in the freezer for up to 2 months. When you’re ready to enjoy, thaw them overnight in the refrigerator, then reheat in the oven, toaster, or air fryer until they’re warm and lightly toasted.
Delightful Pairings: What to Serve With Your Homemade Bagels
Like most freshly baked goods, these easy bagels are truly at their peak when enjoyed warm from the oven. Their versatility makes them a perfect canvas for both sweet and savory toppings, transforming a simple breakfast into a memorable meal.
For a timeless classic, slather them generously with a dollop of plain cream cheese. You can elevate this further with a sophisticated cream cheese and lox spread, offering a burst of savory, salty, and tangy flavors. For those with a more adventurous palate, consider a touch of gourmet with a rich prune onion jam or a decadent cinnamon honey butter for a sweet and comforting experience.
Beyond spreads, these bagels are fantastic alongside heartier breakfast or brunch dishes. Imagine them paired with crispy potato latkes or piled high with fluffy scrambled eggs and a slice of cheese. They also make an excellent base for open-faced sandwiches, topped with avocado, tomato, and a sprinkle of chili flakes. Don’t hesitate to get creative with your toppings; the possibilities are endless!
Explore More Homemade Bread Recipes
If you’ve enjoyed the simplicity and satisfaction of making these no-yeast bagels, you might be inspired to try your hand at other homemade bread creations. Baking your own bread is a rewarding experience, and we have plenty of recipes to guide you:
- Classic Challah Bread: A beautiful, braided loaf perfect for holidays or any special occasion.
- Artisan Dutch Oven Bread: Achieve a crusty, chewy loaf with minimal effort using a Dutch oven.
- Easy Focaccia Bread with Pesto: A versatile Italian flatbread, wonderfully aromatic and perfect for dipping.
- Soft & Fluffy Homemade Sandwich Bread: The ultimate staple for fresh sandwiches and toast, far superior to store-bought.
Happy baking, and enjoy the incredible satisfaction of freshly baked goods right from your own kitchen!