

Welcome to the ultimate indulgence: Kitchen Sink Cookies! Forget deciding between sweet or salty, crunchy or chewy – these extraordinary cookies deliver it all in one delightful bite. Loaded with a harmonious blend of crunchy potato chips, salty pretzels, and rich chocolate chips, they are the epitome of a crowd-pleasing treat. Each cookie boasts perfectly crisp edges, a wonderfully soft and chewy center, and an irresistible texture that makes them truly addictive. Get ready to dive into the best of both worlds with this easy and adaptable recipe that promises pure satisfaction!

What Are Kitchen Sink Cookies?
Kitchen Sink Cookies, sometimes affectionately referred to as “Trash Cookies,” are a celebration of culinary creativity and a fantastic way to clear out your pantry! The name comes from the playful idea that you can throw “everything but the kitchen sink” into the dough. While there are certainly limits to what works well, the core concept revolves around combining various sweet and salty mix-ins to create a uniquely textured and flavored cookie.
This particular recipe elevates the classic concept with a perfectly balanced trio of chocolate chips for sweetness, pretzels for a savory crunch, and potato chips for that unexpected salty crispness. Unlike standard cookies, Kitchen Sink Cookies offer a complex flavor profile and an exciting textural journey in every mouthful. They are the ideal treat for those who appreciate a dynamic snacking experience, proving that sometimes, more is indeed more when it comes to deliciousness.
Why You’ll Love This Kitchen Sink Cookie Recipe
This isn’t just another cookie recipe; it’s a game-changer! Here’s why these Kitchen Sink Cookies will quickly become your new favorite:
- The Perfect Balance: We’ve meticulously crafted this recipe to achieve the ultimate sweet and salty equilibrium. No single flavor overpowers the others, resulting in a perfectly harmonious bite every time.
- Unbeatable Texture: Imagine a soft, chewy interior perfectly contrasted with crunchy pretzel bits, crispy potato chip pieces, and gooey melted chocolate. These cookies deliver a satisfying textural symphony that keeps you reaching for more.
- Incredibly Easy to Make: Despite their gourmet appeal, these cookies are surprisingly simple to whip up. Even novice bakers will find success with our clear, step-by-step instructions.
- Customization is Key: While our classic trio is fantastic, this recipe is a blank canvas for your creativity. It’s a wonderful opportunity to experiment with different mix-ins and make the cookies truly your own.
- Crowd-Pleaser Guaranteed: With a little something for everyone, these cookies are a guaranteed hit at parties, potlucks, or family gatherings. They disappear quickly, so consider making a double batch!
Recipe Tips and Variations for the Best Kitchen Sink Cookies
Achieving the perfect Kitchen Sink Cookies is all about balancing flavors and textures. Follow these expert tips and feel free to get creative with your additions!
- Crushing Your Crunchy Bits: When preparing your potato chips and pretzels, aim for small, irregular pieces rather than a fine powder. You want distinct chunks to provide that satisfying crunch and texture in every bite, not just a salty dust. A gentle crush in a Ziploc bag with a rolling pin works perfectly.
- The Art of Not Overbaking: This is crucial for chewy cookies! Our recipe calls for approximately 9 minutes of bake time, which may seem short. The cookies will continue to set as they cool on the baking sheet and then on a wire rack. Pull them from the oven when the edges are just set and lightly golden, but the centers still look slightly soft and underbaked. Overbaking will result in hard, dry cookies.
- Chocolate Chip Exploration: Don’t limit yourself to just semisweet! Experiment with different types of chocolate chips to alter the flavor profile. Milk chocolate will add more sweetness, dark chocolate offers a richer, more intense flavor, and white chocolate can bring a creamy sweetness. Butterscotch chips or even a mix of several types can create an exciting new dynamic. You could also swap them out for toffee bits for a caramelized crunch.
- Alternative Salty Chips: If potato chips aren’t your preference, consider corn chips for a slightly different savory note and crunch, or even tortilla chips for a unique, subtle corn flavor. Just ensure they are plain and unsalted if you want to control the saltiness.
- Nutty or Fruity Additions: Elevate your cookies with the inclusion of nuts or dried fruit. Toasted walnuts or pecans add a lovely earthy flavor and extra crunch. Dried cranberries (craisins), raisins, or chopped dried apricots can introduce a tangy chewiness that beautifully complements the sweet and salty base.
- Boost the Texture: For an even more complex texture, stir in some sweetened shredded coconut flakes for a tropical twist, or old-fashioned oats for a wholesome chewiness. These additions absorb moisture and add a lovely heartiness to the cookies.
- A Pop of Color: Want to make your Kitchen Sink Cookies visually appealing? Mix in some colorful sprinkles, M&M’s, or other candy-coated chocolates. This is especially fun for holidays or birthday celebrations!
- Salt is Key: Don’t skip the sprinkle of sea salt on top before baking! This enhances all the flavors, especially the sweetness of the chocolate and the savory notes of the chips and pretzels, creating a truly gourmet finish.
Easy Kitchen Sink Cookies Recipe
Kitchen Sink Cookies
These delightful Kitchen Sink Cookies, packed with potato chips, pretzels, and chocolate chips, offer the ultimate sweet and salty experience!
Prep Time: 15 mins
Cook Time: 9 mins
Total Time: 24 mins
Yields: 36 cookies

Ingredients
- ¾ cup unsalted butter, room temperature
- ½ cup granulated sugar
- ½ cup brown sugar
- 1 large egg
- 2 tsp vanilla extract
- 2¼ cup all-purpose flour
- 1 tsp baking soda
- ¼ tsp kosher salt
- ⅓ cup crushed potato chips
- ⅓ cup crushed pretzels
- ⅓ cup semisweet chocolate chips
- Sea salt, for sprinkling (optional, but highly recommended)
Instructions
- Preheat your oven to 350°F (175°C). Line two large cookie sheets with parchment paper or silicone baking mats.
- In a large mixing bowl, using an electric mixer, cream together the softened unsalted butter, granulated sugar, and brown sugar until the mixture is light, fluffy, and pale in color. This process usually takes 2-3 minutes.
- Beat in the large egg and vanilla extract until fully incorporated and smooth. Scrape down the sides of the bowl as needed.
- In a separate bowl, whisk together the all-purpose flour, baking soda, and kosher salt. Gradually add the dry ingredients to the wet ingredients, mixing on low speed until just combined. Be careful not to overmix; the dough will be thick.
- Gently fold in the crushed potato chips, crushed pretzels, and semisweet chocolate chips. Mix until they are evenly distributed throughout the dough, but avoid overmixing once the mix-ins are added.
- Using a tablespoon-sized cookie scoop or two spoons, form balls of dough. Place them onto the prepared cookie sheets, ensuring they are about 2 inches apart to allow for spreading. Slightly flatten the top of each dough ball with your palm. Sprinkle a pinch of sea salt on top of each cookie dough ball, if desired.
- Bake in the preheated oven for approximately 9 minutes. For even baking, rotate the cookie sheets halfway through the baking time. Remember, do not overbake! The edges should be set and lightly golden, but the centers should still appear soft.
- Once baked, remove the cookie sheets from the oven and let the cookies cool on the sheets for about 2-3 minutes. This allows them to firm up slightly. Then, carefully transfer the cookies to a wire rack to cool completely. As they cool, they will continue to set, but their centers will remain deliciously soft and chewy.
Video Guide (Optional)
A video tutorial for making these Kitchen Sink Cookies can be found here: Watch Video
Notes
The mix-ins for Kitchen Sink Cookies are very versatile. As long as you maintain similar ratios to those listed in the recipe (about 1 cup total of solid mix-ins per batch), you can experiment with different combinations. Refer to the “Recipe Tips and Variations” section above for numerous substitution ideas.
Nutrition Information
Calories: 104 kcal | Carbohydrates: 14g | Protein: 1g | Fat: 5g | Saturated Fat: 3g | Cholesterol: 16mg | Sodium: 64mg | Potassium: 39mg | Fiber: 1g | Sugar: 6g | Vitamin A: 127IU | Vitamin C: 1mg | Calcium: 7mg | Iron: 1mg
Nutritional information provided is an automatic calculation and may vary based on specific brands and modifications to the recipe. For precise values, it’s recommended to calculate them independently.
How to Make Kitchen Sink Cookies Step by Step
Let’s walk through the process of making these incredible cookies, ensuring you achieve perfect results every time.
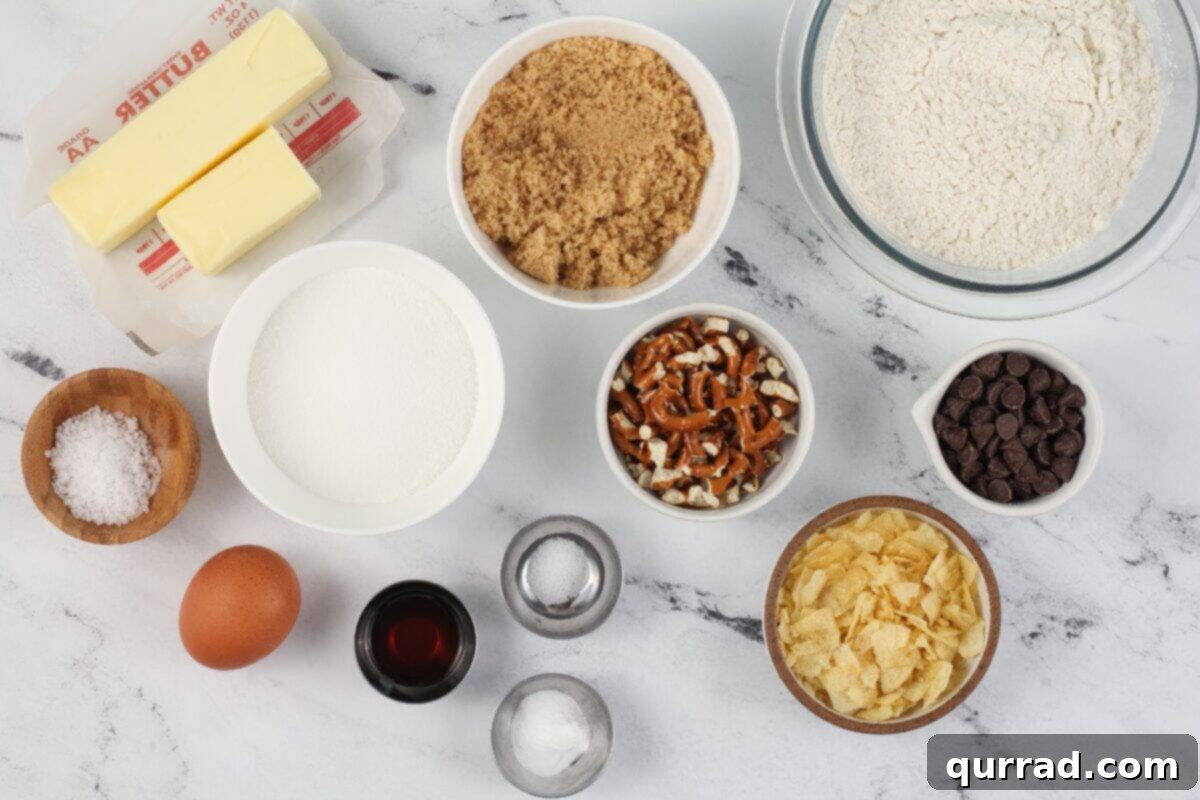
1. Gather Your Ingredients and Prepare Baking Sheets: Before you begin, make sure all your ingredients are measured out and ready to go. This makes the baking process much smoother. Preheat your oven to 350°F (175°C). Line two large baking sheets with parchment paper or silicone mats. This prevents sticking and ensures easy cleanup.
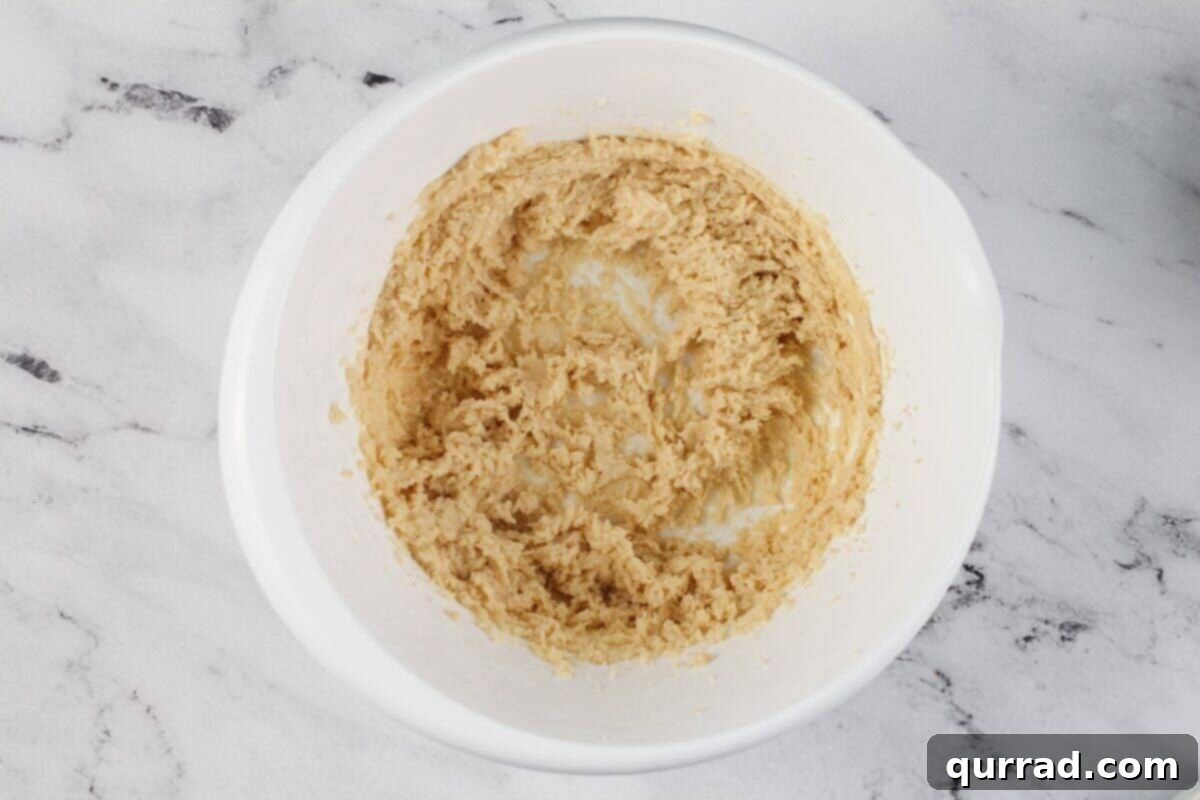
2. Prepare the Cookie Dough Base: In a large mixing bowl, preferably with an electric mixer, cream together ¾ cup of softened unsalted butter with ½ cup of granulated sugar and ½ cup of brown sugar. Beat these together until the mixture is light, fluffy, and noticeably paler in color – this typically takes about 2-3 minutes. This step incorporates air, which contributes to the cookies’ light texture. Next, blend in 1 large egg and 2 teaspoons of vanilla extract until everything is smoothly combined. Don’t forget to scrape down the sides of the bowl to ensure all ingredients are well mixed.
In a separate bowl, combine 2¼ cups of all-purpose flour, 1 teaspoon of baking soda, and ¼ teaspoon of kosher salt. Gradually add these dry ingredients to the wet mixture, mixing on low speed until they are just incorporated. It’s important not to overmix at this stage, as over-developing the gluten can lead to tough cookies. The dough will be quite thick.
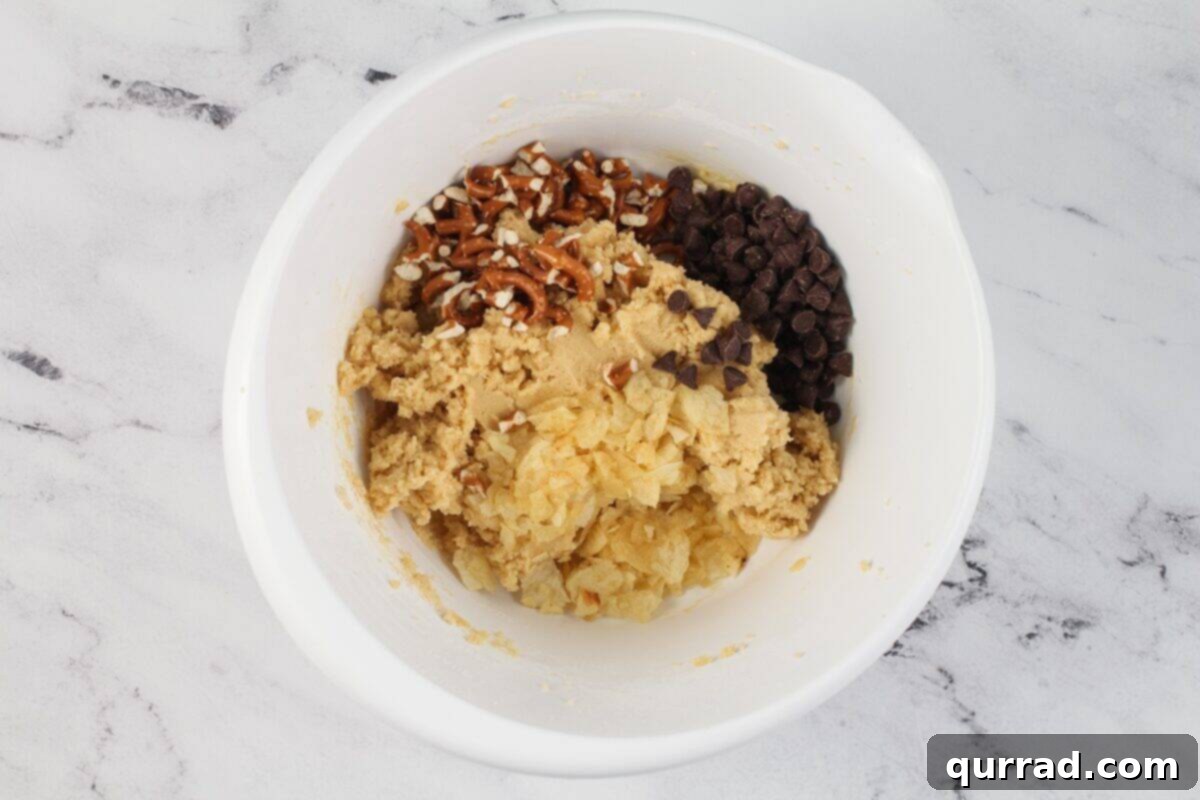
3. Incorporate the Signature Mix-Ins: Now for the “kitchen sink” elements! Gently fold in ⅓ cup of crushed potato chips, ⅓ cup of crushed pretzels, and ⅓ cup of semisweet chocolate chips into the thick cookie dough. Mix just until the additions are evenly distributed throughout the dough. Again, be mindful not to overmix, as this can crush your crunchy elements too much.
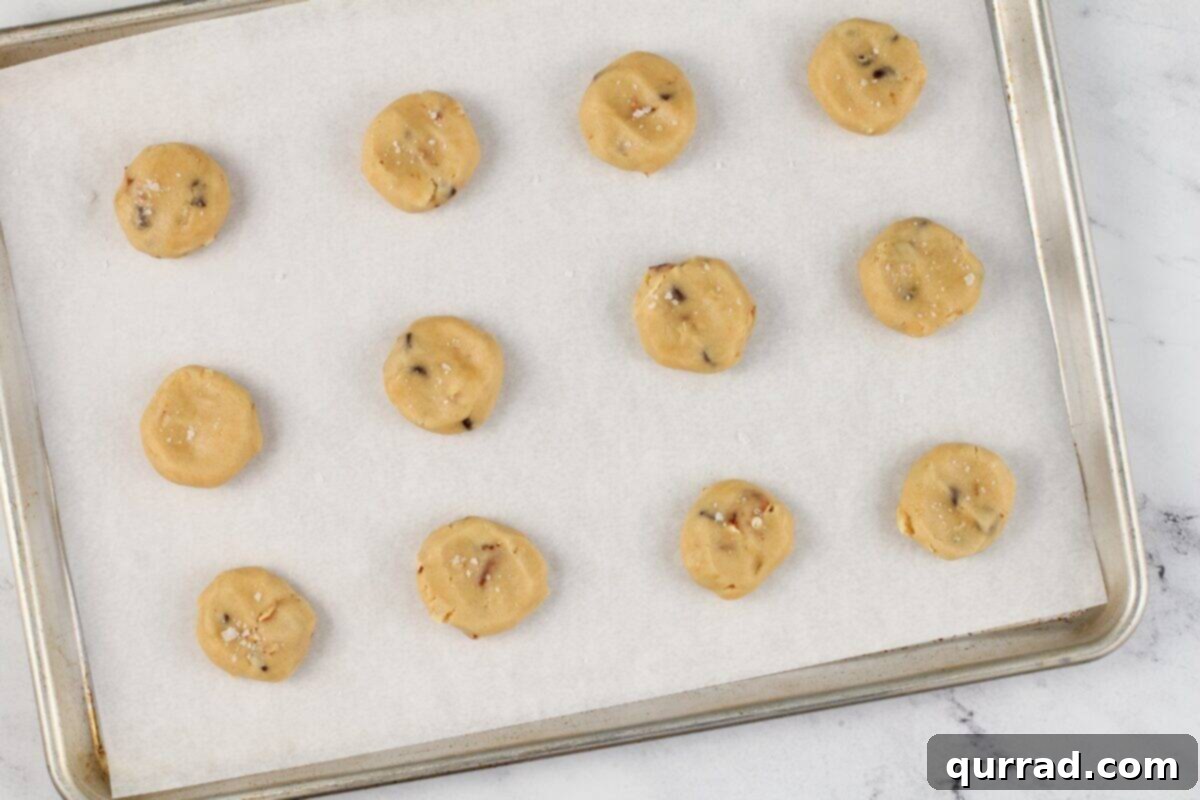
4. Form and Bake the Cookies: Using a tablespoon-sized cookie scoop or two spoons, form uniform balls of dough. This helps ensure even baking. Place these dough balls onto your prepared cookie sheets, leaving about 2 inches between each to allow for proper spreading. Gently press down on each dough ball with your palm to slightly flatten it. This helps achieve those lovely crisp edges. Optionally, sprinkle a small pinch of sea salt on top of each cookie before baking for an extra flavor boost.
Bake the cookies in your preheated oven for approximately 9 minutes. For consistent baking, remember to rotate your cookie sheets halfway through. It’s vital not to overbake; the cookies should appear lightly golden at the edges but still look soft in the center.

5. Cool and Serve Your Delicious Creations: Once baked, remove the cookie sheets from the oven. Let the cookies cool on the baking sheets for a couple of minutes. This short resting period allows them to firm up slightly without becoming hard. Then, carefully transfer the cookies to a wire rack to cool completely. They will continue to set and develop their perfect chewy texture as they cool, ensuring those coveted soft centers.
How To Store Kitchen Sink Cookies for Maximum Freshness
To enjoy your Kitchen Sink Cookies at their best, proper storage is key. Here’s how to keep them fresh, whether you plan to eat them now or save them for later:
- Room Temperature Storage: Baked cookies will remain delightfully fresh for 3-4 days when stored in an airtight container at room temperature. Placing a slice of bread in the container with the cookies can sometimes help keep them softer for longer.
- Freezing Baked Cookies: If you want to extend their shelf life, baked cookies freeze beautifully. Ensure they are completely cool, then arrange them in a single layer on a baking sheet and flash freeze for about an hour until solid. Once firm, transfer them to a freezer-safe resealable plastic bag or airtight container, separating layers with parchment paper to prevent sticking. They will stay fresh for up to 3 weeks. Thaw them at room temperature for an hour or two before serving for the best texture.
- Freezing Cookie Dough: For freshly baked cookies on demand, freezing the dough is an excellent option. Scoop the uncooked dough balls onto a baking sheet and flash freeze until they are completely solid (this usually takes about an hour). Once frozen, transfer the dough balls to a freezer-safe plastic bag. The dough can be stored in the freezer for up to 2 months. When you’re ready to bake, you can either thaw the dough balls at room temperature and bake according to the recipe instructions, or bake them directly from frozen, adding an extra 2 to 3 minutes to the baking time.

What to Serve With Kitchen Sink Cookies
Kitchen Sink Cookies are fantastic on their own, but they also pair wonderfully with a variety of beverages and other desserts. Their complex flavor profile makes them incredibly versatile:
- Classic Milk Pairing: A tall, cold glass of milk is the quintessential companion for any cookie, and these sweet and salty wonders are no exception. The creaminess of the milk perfectly complements the rich flavors of the cookie.
- Coffee or Tea: Enjoy them with your morning coffee or an afternoon cup of tea. The bold flavors of coffee or the subtle notes of tea can highlight different aspects of the cookie’s taste.
- Ice Cream Sundae: Crumble a warm Kitchen Sink Cookie over a scoop of vanilla bean ice cream for an epic dessert. The melting ice cream and crunchy cookie bits create an irresistible combination.
- On a Dessert Platter: For gatherings, I love to feature a diverse array of cookies. These Kitchen Sink Cookies are a perfect addition to a platter alongside other favorites like flourless chocolate cookies, vibrant Jello cookies, or light and zesty lemon meringue cookies. This ensures there’s a delicious option for every palate.
- As a Gift: Package a few freshly baked Kitchen Sink Cookies in a decorative box or bag for a thoughtful homemade gift that anyone will appreciate.
Common Questions About Kitchen Sink Cookies (FAQ)
Got questions? We’ve got answers to help you bake the best Kitchen Sink Cookies.
Can I use salted butter?
While unsalted butter is generally recommended for baking to control the salt content, you can use salted butter. If you do, reduce the amount of added kosher salt in the recipe by half (so use ⅛ tsp instead of ¼ tsp) to avoid making the cookies overly salty.
Why did my cookies spread too much?
Several factors can cause cookies to spread excessively:
- Too much butter: Ensure you measure accurately.
- Warm butter: If your room temperature butter is too soft or slightly melted, it can lead to more spreading.
- Overmixing the dough: This develops the gluten too much.
- Oven temperature issues: An oven that isn’t hot enough can cause cookies to spread before they set. Use an oven thermometer to verify accuracy.
- Not chilling the dough: While not strictly required for this recipe, chilling the dough for 30 minutes can help prevent spreading, especially if your kitchen is warm.
Can I make these gluten-free?
Yes, you can often adapt cookie recipes to be gluten-free. Replace the all-purpose flour with a 1:1 gluten-free baking flour blend that contains xanthan gum. Ensure your potato chips and pretzels are also certified gluten-free, as some brands may contain wheat. Results may vary slightly in texture.
How do I prevent the pretzels and chips from getting soggy?
The key is to not overmix the dough once the inclusions are added. Also, ensure your ingredients like butter are at the correct temperature to create a sturdy dough that encapsulates the crunchy bits. Storing cookies properly in an airtight container also helps maintain their crispness.
What’s the best way to crush potato chips and pretzels?
Place them in a large resealable plastic bag, squeeze out most of the air, and then gently crush them with a rolling pin or the bottom of a heavy glass. Aim for a variety of sizes, from small crumbs to pea-sized pieces, for optimal texture.
Other Easy Cookie Recipes We Love!
- Brown Sugar Cookies – A classic for a reason, with a rich, caramelized flavor.
- Iced Oatmeal Cookies – Chewy, wholesome, and topped with a sweet glaze.
- Flourless Chocolate Cookies – Rich, fudgy, and naturally gluten-free.
- Oreo Stuffed Chocolate Chip Cookies – Two favorite cookies in one amazing treat!
Whether you’re a seasoned baker or just starting, these Kitchen Sink Cookies are guaranteed to bring a smile to your face and delight anyone you share them with. Their unique blend of sweet, salty, and crunchy textures makes them an unforgettable treat. So go ahead, clean out your pantry, get creative with your mix-ins, and bake a batch of these truly irresistible cookies today!