
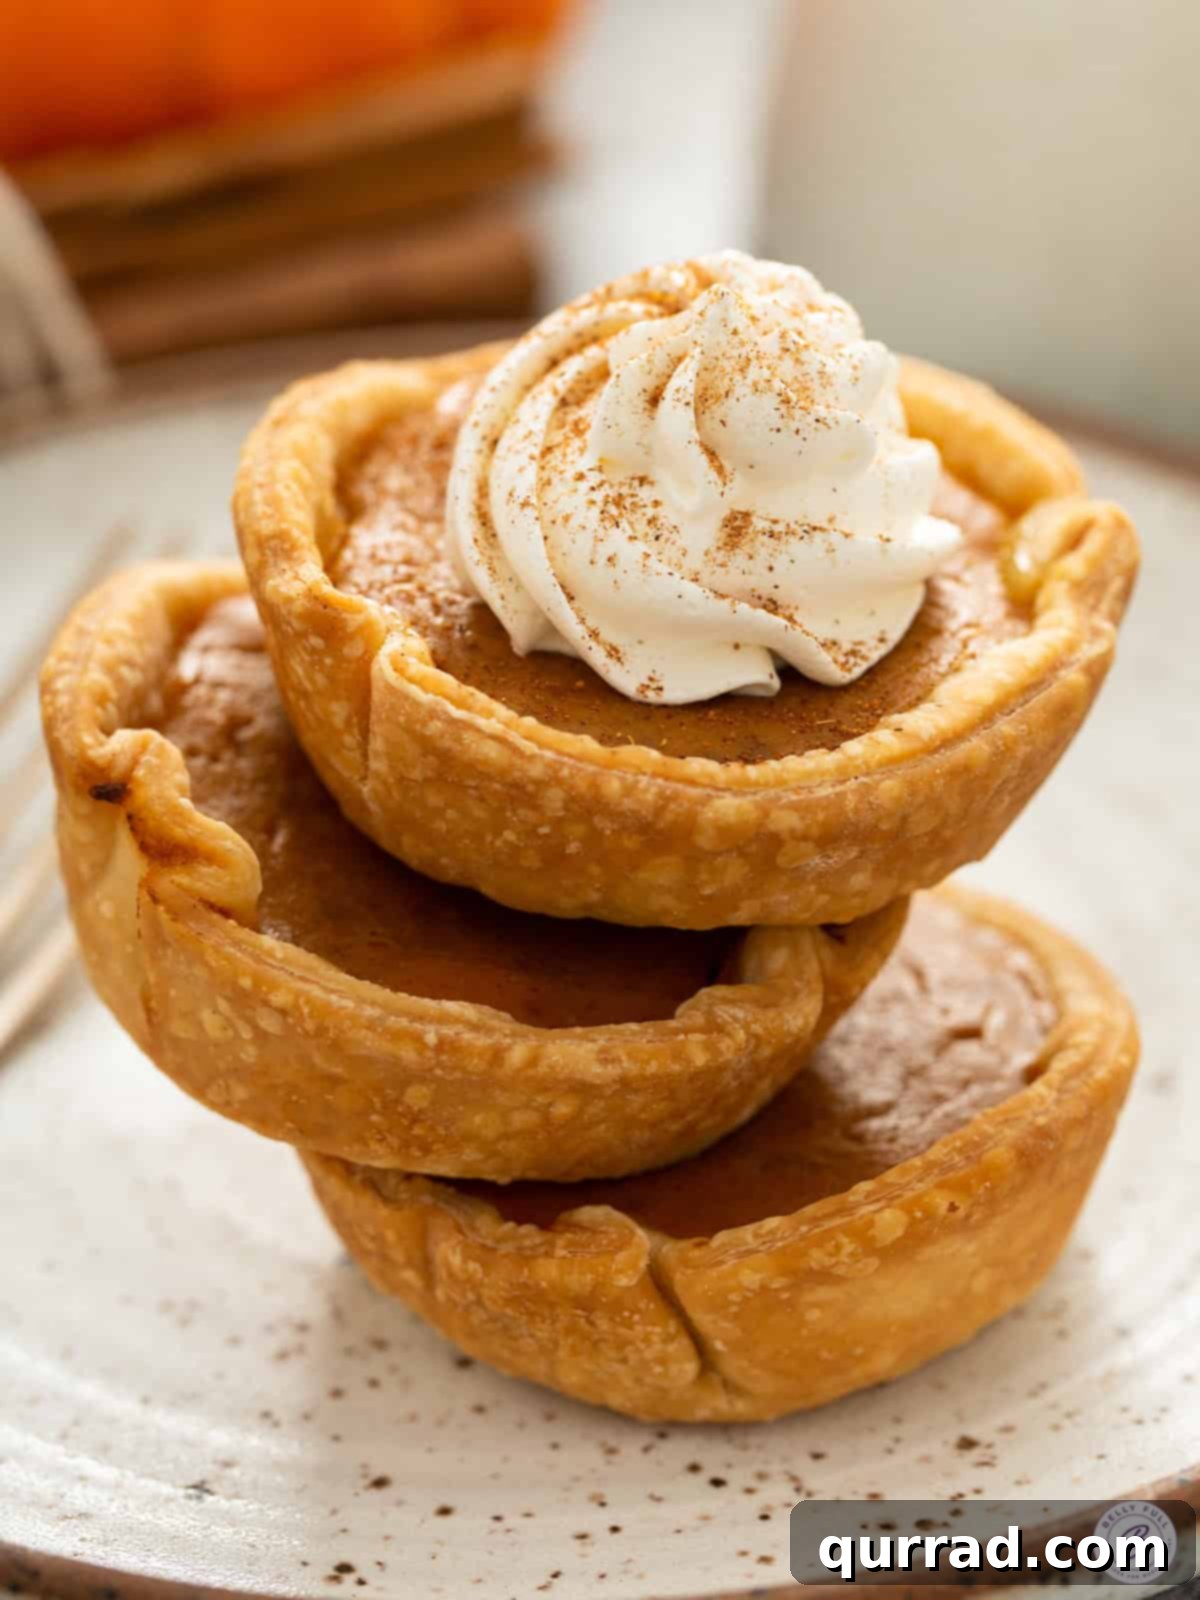
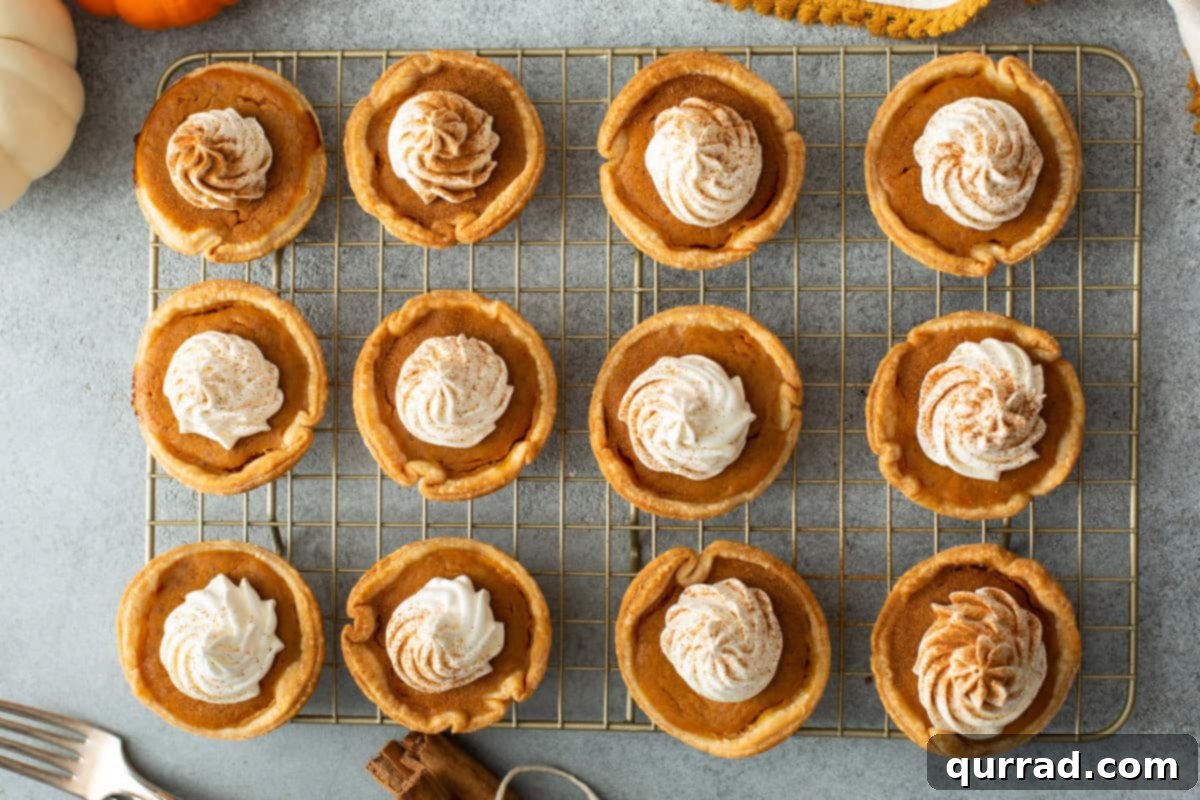
Welcome to the enchanting world of mini desserts, where all the glorious flavors of autumn’s beloved pumpkin pie are encapsulated in perfectly portioned, individual servings. These Mini Pumpkin Pies aren’t just a treat; they’re a celebration in every bite! Designed for convenience and bursting with classic taste, they are incredibly easy to make, effortless to serve, and a pure delight to eat. Whether you’re planning an elaborate Thanksgiving feast, hosting a cozy fall gathering, or simply craving a taste of the season, these charming tarts are an absolute showstopper. Forget the fuss of slicing and serving a traditional pie; these mini versions offer a flawless dessert experience for everyone at the table.
5-STAR REVIEW
Debra says, “Made these for a work potluck and everyone loved them! They were super easy to make too.”
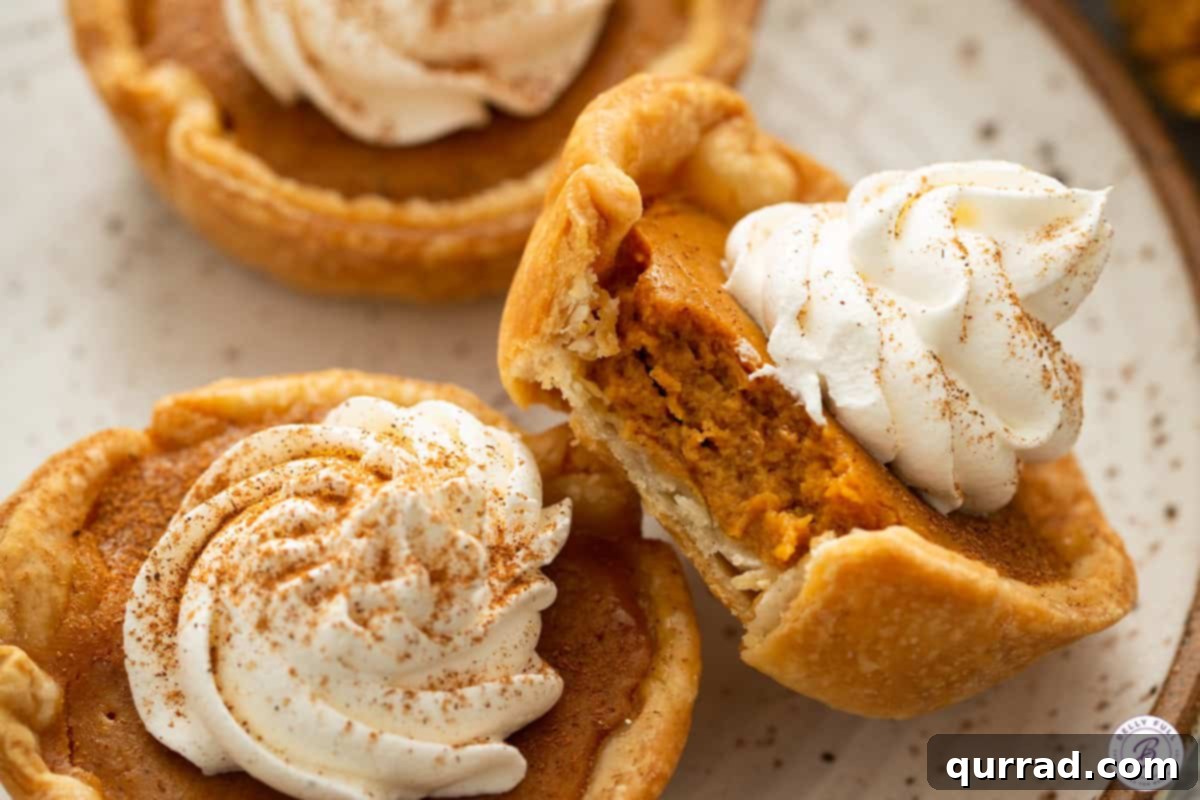
For years, pumpkin pie was often overlooked in our family gatherings. That all changed the moment I introduced these adorable, bite-sized tarts. Now, they’re not just requested; they’re eagerly anticipated every single year, with family members easily devouring several. These Mini Pumpkin Pies truly are the perfect bite, making them ideal for any social event, especially those abundant with various desserts where guests appreciate the chance to sample a little bit of everything without committing to a full slice. If you fall in love with these delightful pumpkin treats, be sure to explore our equally popular Mini Pecan Pies for another sensational individual dessert option!
Why You’ll Love These Mini Pumpkin Pies
These mini pumpkin pies offer numerous advantages over their larger counterparts, making them an unparalleled choice for holiday entertaining or everyday indulgences:
- Perfect Portions: Each pie is individually sized, providing just the right amount of sweet, spiced pumpkin goodness without the need for slicing or worrying about uneven servings.
- Ease of Serving: No messy slices! Simply arrange them on a platter, and let your guests pick their own. This makes dessert service incredibly smooth and stress-free, especially for large gatherings.
- Visually Appealing: Their miniature size makes them incredibly charming and elegant. They add a sophisticated touch to any dessert table or holiday spread, often sparking conversation and admiration.
- Kid-Friendly: Children adore these small treats! Their size makes them easy for little hands to hold and enjoy, making them a hit with younger guests.
- Ideal for Potlucks and Parties: When you’re contributing to a potluck or buffet, individual desserts are always a winner. They’re easy to transport and present beautifully.
- Faster Baking Time: Mini pies bake much quicker than a full-sized pie, saving you valuable time in the kitchen during busy seasons.
Helpful Tips for Success
Crafting the perfect mini pumpkin pie is simpler than you might think, especially with a few insider tips:
- Choose Your Pie Crusts Wisely: You’ll need two standard refrigerated rolled pie crusts. While store-bought crusts are incredibly convenient and work beautifully for this recipe, feel free to use your favorite homemade pie crust recipe if you prefer a from-scratch approach. Just ensure they are rolled thin enough to fit your muffin tins without being too thick.
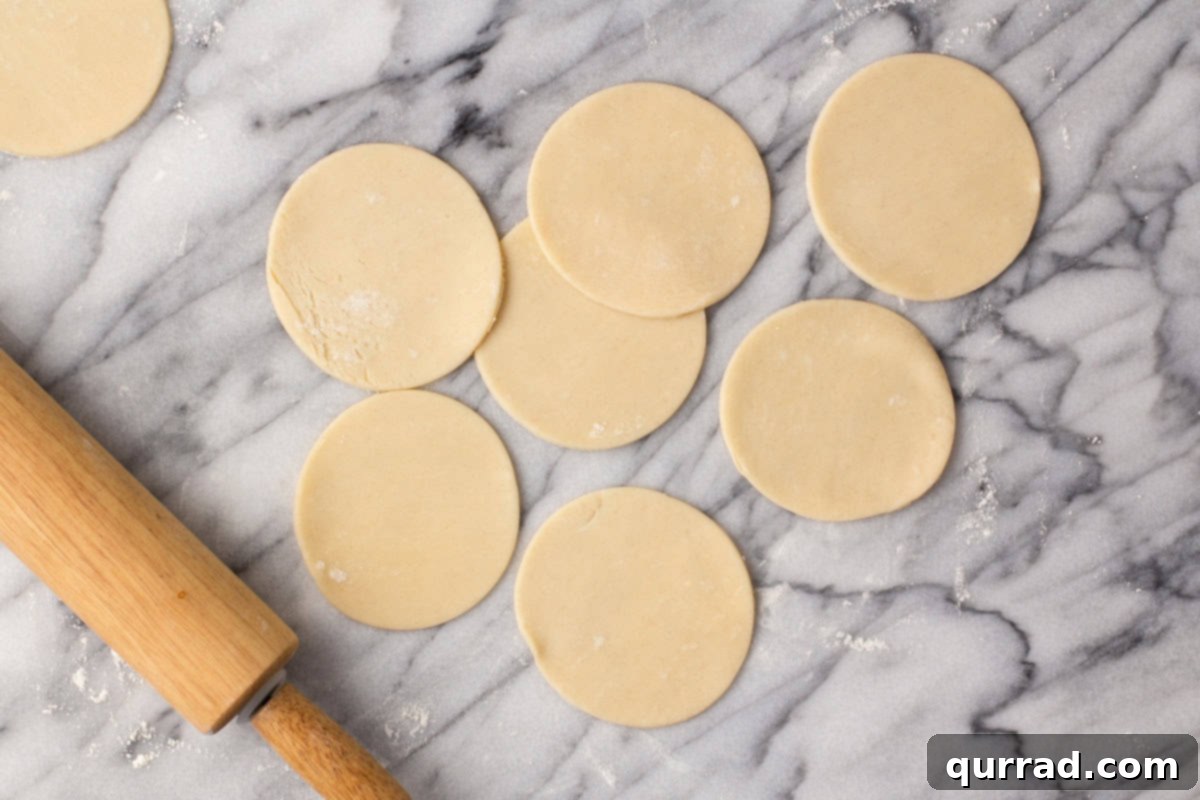
- Precision in Pie Dough Circles: The ideal diameter for your pie dough circles is 3.5 inches. Using a cookie cutter or the rim of a glass of this specific size is crucial. Circles that are too small will result in the filling pooling over the edges, creating a messy bake. If they are too large, you might not have enough filling to fill all 18 crusts adequately, and the crust may be too thick or difficult to fit.
- Standard Muffin Tins are Key: Despite being “mini” pies, this recipe calls for two regular 12-count muffin tins, not mini muffin tins. The 3.5-inch crusts and the volume of filling are designed for standard muffin cavities, ensuring each pie is substantial enough to be a satisfying individual serving.
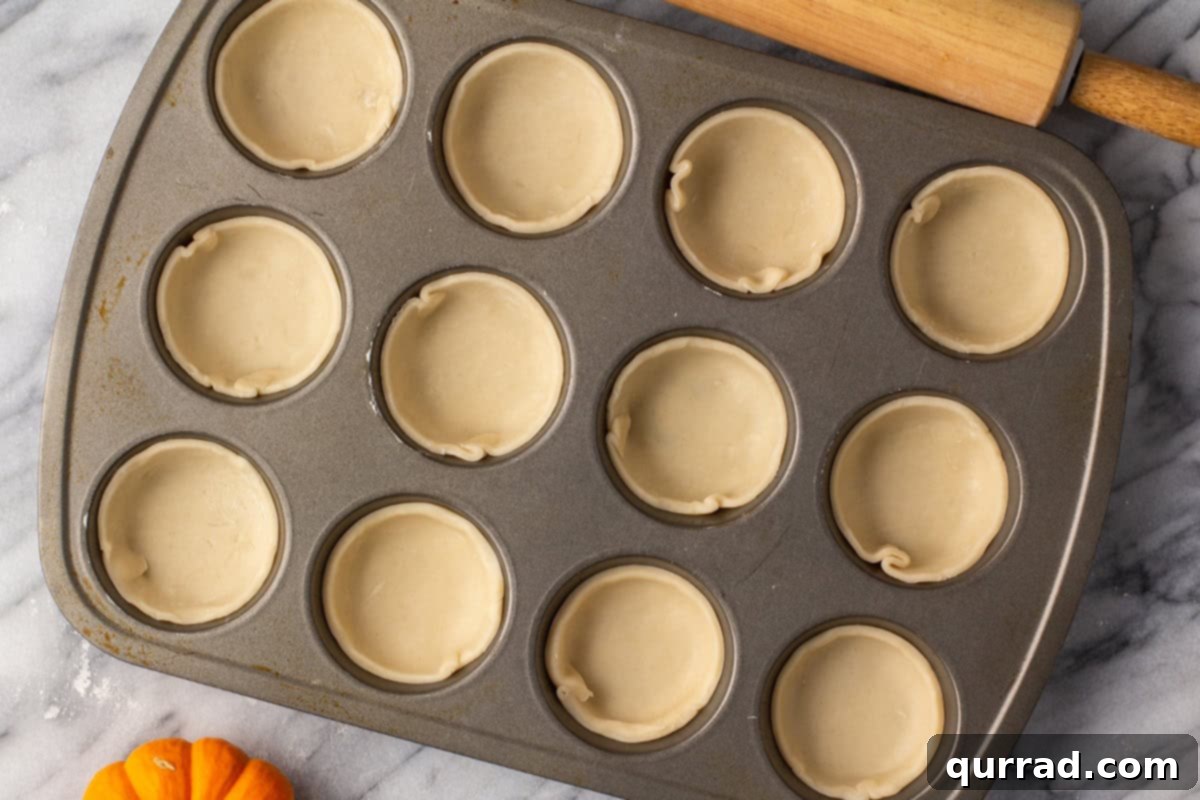
- Prevent Tears in Your Crusts: Before placing the dough in the muffin tins, carefully inspect each circle for any rips or tears. Even a small tear can allow the pumpkin filling to seep through during baking, making the pies stick to the pan and much harder to remove cleanly. Gently press any small tears together or patch them with a tiny piece of scrap dough.
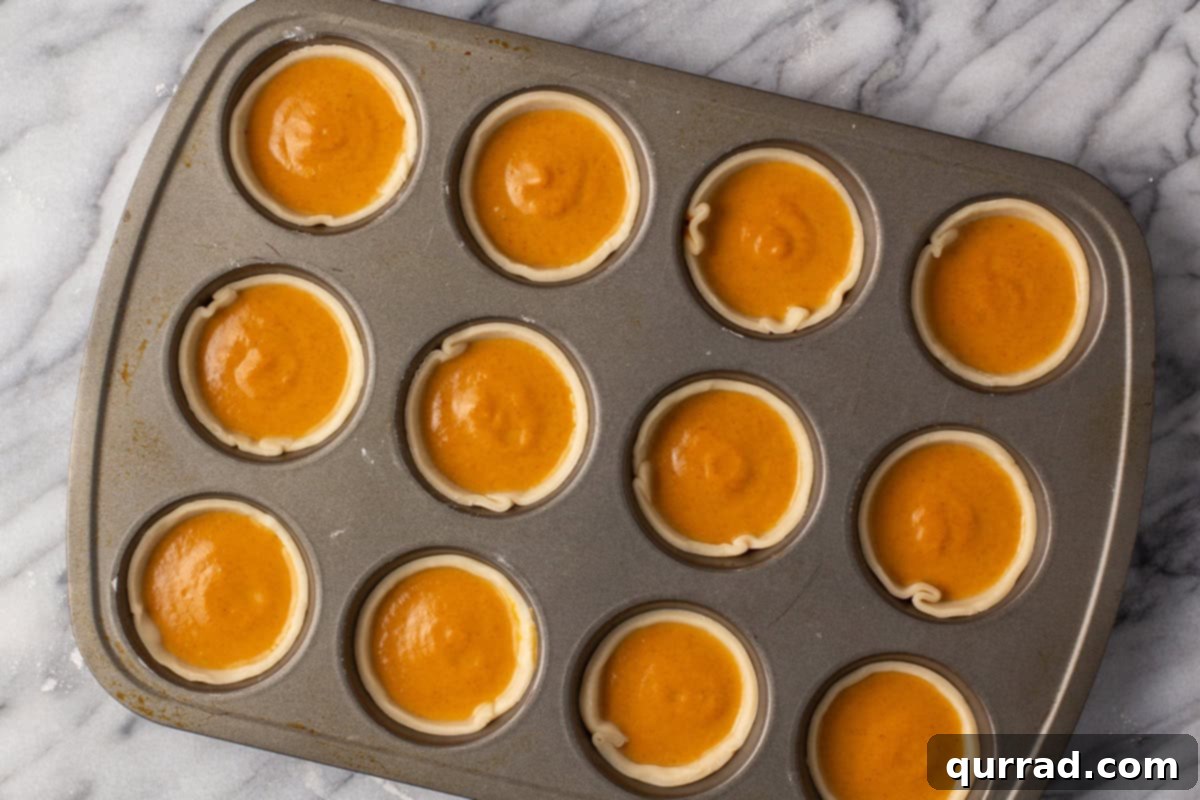
- Avoid Overfilling the Crusts: It’s tempting to fill each crust to the brim, but resist the urge! Overfilling is a common mistake that leads to spillage during baking, creating a sticky mess and potentially affecting the pie’s presentation and texture. Aim for about two tablespoons of filling per crust, leaving a small margin at the top.
- Opt for Canned Pumpkin Puree, Not Pie Filling: This is a critical distinction! Canned pumpkin puree is simply cooked, mashed pumpkin. Pumpkin pie filling, on the other hand, comes pre-spiced and sweetened. Using pie filling instead of puree will result in an overly sweet and potentially unbalanced flavor profile, as this recipe has carefully calibrated spice and sugar amounts.
- Ensure You Buy Evaporated Milk: Double-check your can before you leave the grocery store! Evaporated milk is unsweetened and has about 60% of the water removed, providing a rich, creamy texture and concentrated milk flavor. Sweetened condensed milk is a completely different product, heavily sweetened and much thicker, which would drastically alter the taste and consistency of your pumpkin filling.
Mini Pumpkin Pies
Prep Time: 30 minutes
Cook Time: 18 minutes
Chill Time: 3 hours
Total Time: 3 hours 48 minutes
Yields: 18 mini pies
These delightful Mini Pumpkin Pies capture all the beloved flavors of a classic pumpkin pie, presented in a charming individual serving size. They offer the perfect bite, making them incredibly easy to make, serve, and enjoy at any gathering or special occasion.
Scroll down for step-by-step photos and detailed instructions!
Ingredients
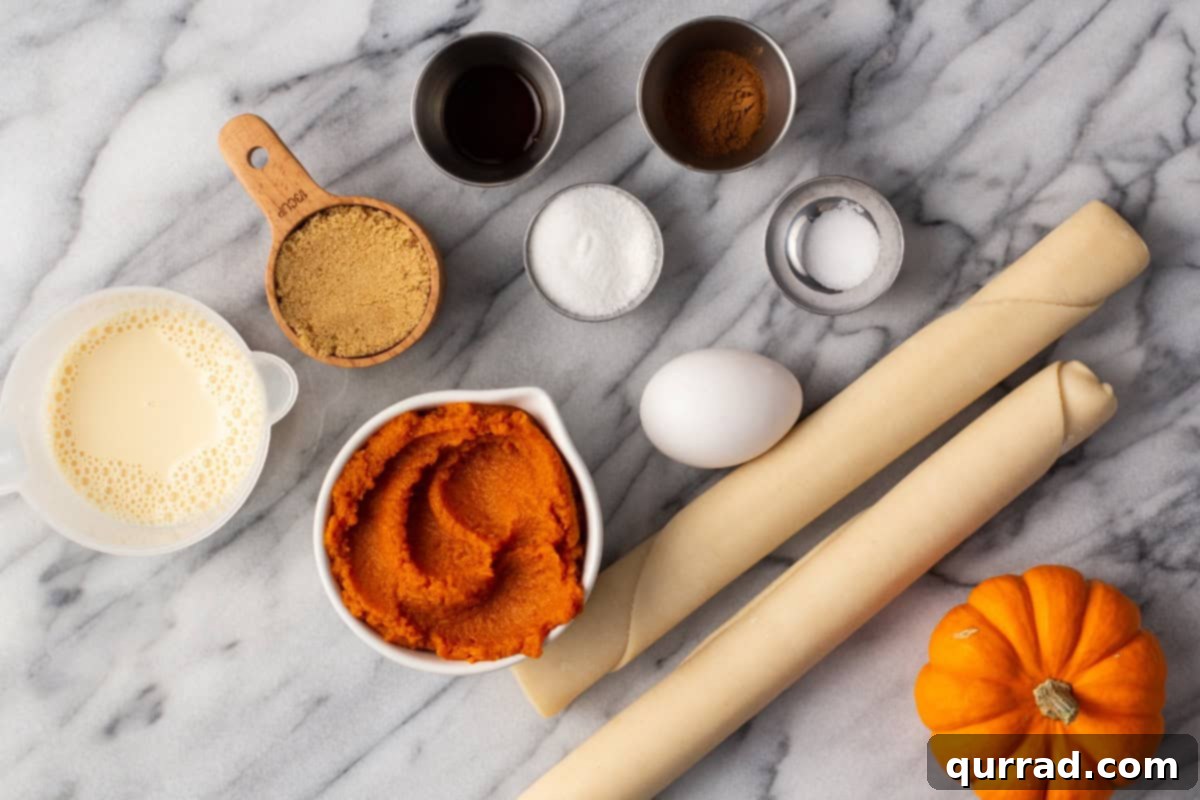
- 2 (9-inch) refrigerated rolled pie crusts (homemade or store-bought)
- 1/3 cup packed brown sugar
- 2 tablespoons granulated sugar
- 1 1/2 teaspoons pumpkin pie spice
- 1/4 teaspoon salt
- 1 cup canned pumpkin puree (make sure it’s pure pumpkin, not pumpkin pie filling)
- 3/4 cup evaporated milk
- 1 large egg
- 1/2 teaspoon vanilla extract
- Homemade whipped cream, for topping (optional)
Instructions
- Preheat your oven to 400°F (200°C). Lightly coat two standard 12-count muffin pans with nonstick cooking spray. This crucial step prevents the pies from sticking and ensures easy removal after baking.
- On a lightly floured surface, carefully roll out both pie crusts to an even 1/8-inch thickness. Using a 3 1/2-inch cookie cutter or the rim of a suitable glass, cut out 18 perfect circles from the dough. If necessary, gently re-roll any scraps of pie dough to cut out additional circles until you have 18 total.
- Place each dough circle into 18 muffin slots. Gently press the dough down and around the sides of each cavity, ensuring it fits snugly and creates a neat crust. Transfer the muffin pans to the refrigerator to chill while you prepare the rich pumpkin filling. Chilling the crusts helps them hold their shape better during baking.
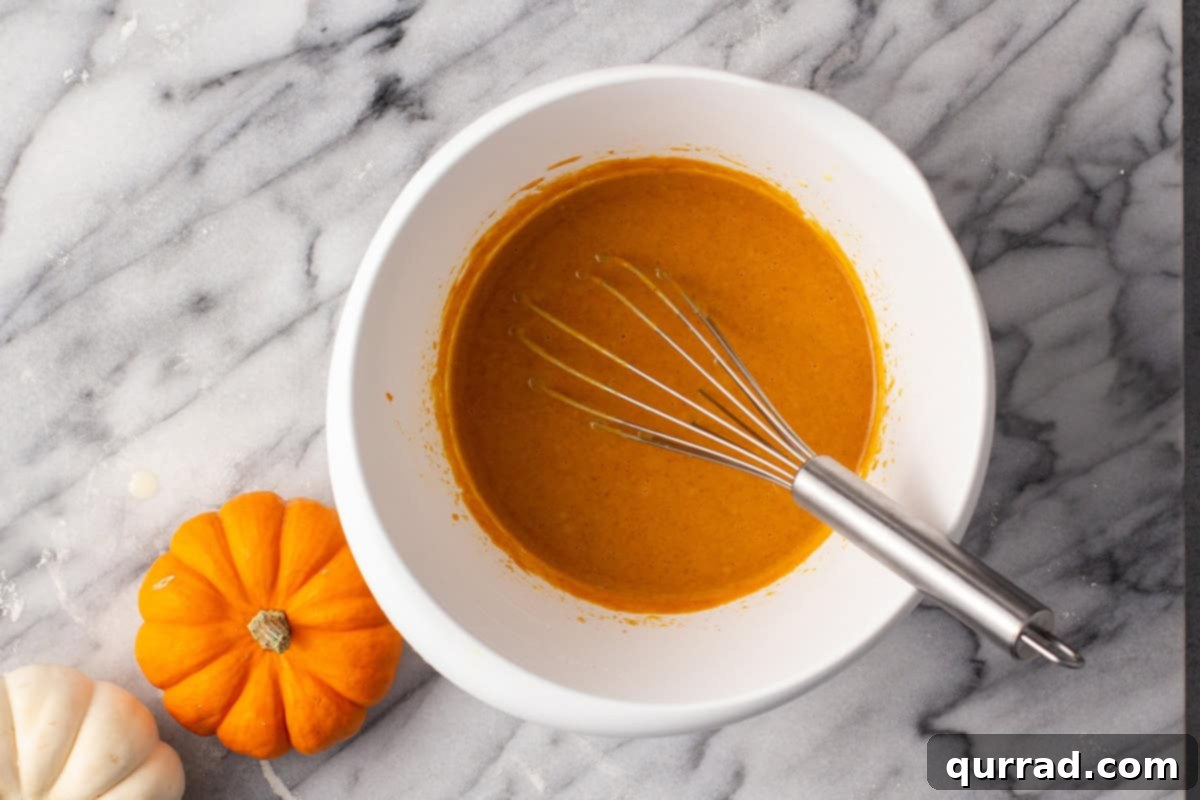
- In a large mixing bowl, whisk together the brown sugar, granulated sugar, pumpkin pie spice, and salt until they are thoroughly combined. This dry mixture creates the perfectly balanced sweet and spicy base for your filling.
- Next, whisk in the canned pumpkin puree, evaporated milk, large egg, and vanilla extract until the mixture is smooth and fully combined. Remember to use pure pumpkin puree, not pre-spiced pumpkin pie filling, to maintain control over the flavor profile.
- Retrieve the chilled muffin pans with the pie crusts from the refrigerator. Evenly distribute the pumpkin pie filling among all 18 pie crusts. Aim for approximately 2 tablespoons of filling per pie crust for consistent results and to prevent overfilling.
- Bake the mini pumpkin pies for 16-20 minutes. Keep a close eye on them during the last few minutes; they are done when the tops of the pies are set (a slight jiggle in the very center is okay) and the crusts are lightly golden brown. Avoid over-baking to maintain a creamy, delicious filling.
- Allow the mini pies to cool completely in the muffin tins on a wire rack. This is important for them to firm up. Once cooled, cover the pans gently with plastic wrap and transfer them to the refrigerator to chill for at least 3 hours, or ideally, overnight. Chilling is crucial for the pies to fully set and for the flavors to meld beautifully.
- Once thoroughly chilled, carefully remove the mini pies from the muffin tins. You can serve them straight from the fridge for a refreshing treat, at room temperature, or even slightly warmed for a comforting dessert. Garnish with a dollop of fresh homemade whipped cream just before serving for an extra touch of indulgence.
Nutrition Information (per 1 pie serving)
Serving: 1 pie | Calories: 148kcal | Carbohydrates: 19g | Protein: 3g | Fat: 7g | Saturated Fat: 3g | Cholesterol: 14mg | Sodium: 140mg | Potassium: 91mg | Fiber: 1g | Sugar: 7g | Vitamin A: 2164IU | Vitamin C: 1mg | Calcium: 43mg | Iron: 1mg
Nutritional information provided is an automatic calculation and should be considered an estimate. Values can vary based on the specific brands and products you use, as well as any modifications made to the recipe. If precise dietary information is critical for your needs, we recommend calculating these values independently using your specific ingredients.
How to Make Mini Pumpkin Pies Step By Step
Visual learners, rejoice! Here’s a step-by-step guide with photos to help you along the way, ensuring your mini pumpkin pies turn out perfectly every time.
Customization and Serving Ideas
While delicious on their own, mini pumpkin pies are incredibly versatile and can be customized to suit any taste or occasion:
- Toppings Galore: Beyond classic whipped cream, consider adding a sprinkle of toasted pecans, a drizzle of caramel sauce, a dusting of freshly grated nutmeg or cinnamon, or even a mini chocolate chip garnish for a fun twist.
- Decorative Crusts: Get creative with your pie crusts! Before baking, you can use small cookie cutters (like mini leaves or stars) to cut out shapes from extra dough and place them on top of the filling for a charming visual.
- Spice It Up: If you love a bolder spice profile, a tiny pinch of ground ginger or cloves can be added to the pumpkin filling alongside the pumpkin pie spice.
- Serving Presentation: Arrange them on a multi-tiered dessert stand for an impressive display, or place them in individual cupcake liners for easy handling. They also pair wonderfully with a scoop of vanilla bean ice cream.
Frequently Asked Questions
Can I use homemade pie crust for these mini pies?
Absolutely! If you prefer making your own pie crust from scratch, this recipe will work beautifully. Just ensure you roll it out to 1/8-inch thickness and cut 3.5-inch circles as specified. Homemade crust can add an extra layer of flaky deliciousness.
What if I don’t have a 3.5-inch cookie cutter?
No problem! The rim of a standard drinking glass or a round bowl with a 3.5-inch diameter can serve as an excellent substitute. Simply press firmly to cut out your dough circles.
How do I prevent a soggy crust?
To help prevent a soggy bottom crust, ensure your pie dough is properly chilled before filling and baking. Also, avoid overfilling the crusts, as excess liquid from the filling can contribute to sogginess. Some bakers also swear by a very thin layer of egg wash or a sprinkle of dry breadcrumbs (before filling) to create a barrier, though it’s not strictly necessary for this recipe if the chilling and filling tips are followed.
Can these mini pumpkin pies be made ahead of time?
Yes, they are an excellent make-ahead dessert! You can bake them completely, cool them, and then refrigerate them for up to 3 days before serving. This makes them perfect for holiday meal prep. Add whipped cream just before serving.
How to Store Mini Pumpkin Pies
Proper storage is essential to keep your mini pumpkin pies fresh and delicious for longer:
- Refrigerator: Once cooled completely after baking, cover the mini pumpkin pies with plastic wrap or transfer them to an airtight container. They should be refrigerated for up to 3 days. This makes them fantastic for preparing ahead of time for any event or enjoying as delightful leftovers. Remember to add any whipped cream toppings right before serving to prevent it from dissolving.
- Freezer: These mini pies freeze wonderfully! After baking and allowing them to cool completely, wrap each pie tightly in plastic wrap, then place them in an airtight freezer-safe container or freezer bag. They can be stored in the freezer for up to 1 month. To serve, simply thaw them overnight in the refrigerator. You can enjoy them chilled, at room temperature, or warm them up slightly in a 350°F (175°C) oven for about 5-8 minutes to crisp up the crust. Always allow them to cool slightly after warming before adding a dollop of fresh whipped cream.
More Pie Recipes to Love
If you’re a pie enthusiast or simply looking for more delightful dessert ideas, explore these other fantastic pie recipes:
- Easy Chocolate Pie: A rich, creamy classic that’s always a crowd-pleaser.
- Air Fryer Apple Hand Pies: Individual apple pies, perfectly crispy and convenient.
- Cranberry Hand Pies: A festive and tangy treat, ideal for the holiday season.
- Pecan Hand Pies: All the nutty, sweet goodness of pecan pie in a portable format.
This Mini Pumpkin Pies recipe was originally published on 11/7/20. It has since been thoroughly retested, reworked, and republished on 10/31/25 to ensure it is better than ever, offering the most delicious and user-friendly experience possible.
We truly hope you enjoy making and sharing this easy and delicious recipe. Don’t forget to give it a review below to let us know what you think! For more culinary inspiration and delightful recipes, be sure to follow Belly Full on TikTok, Instagram, Facebook, Pinterest, and YouTube!