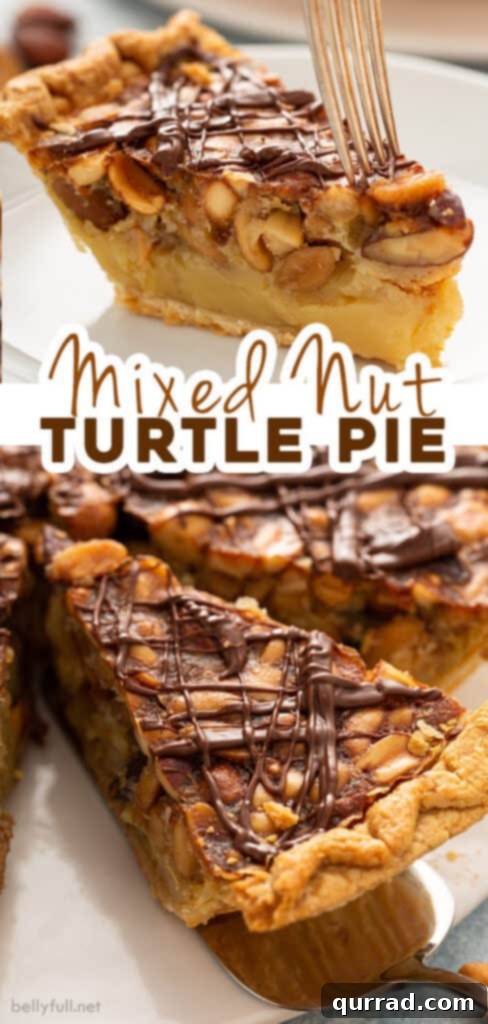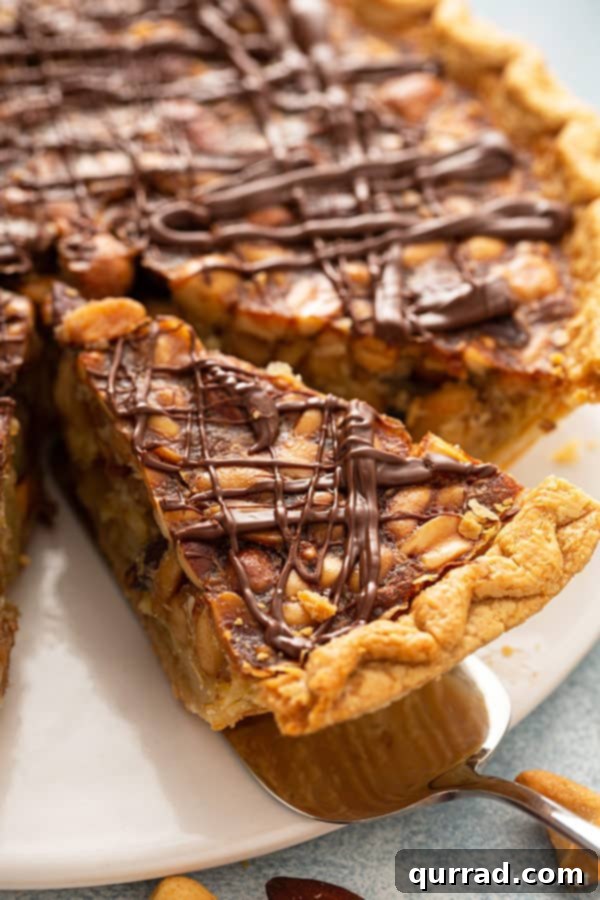
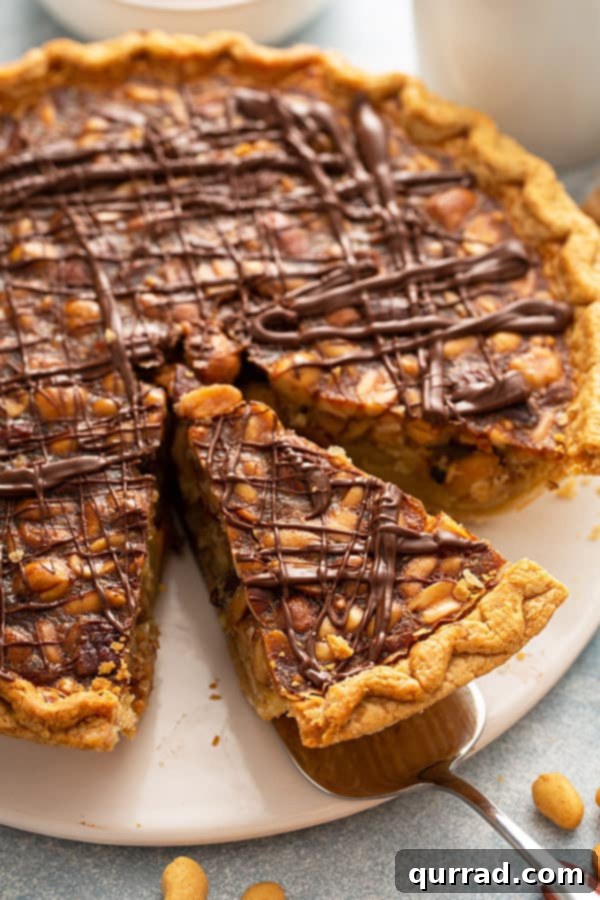
Prepare to be enchanted by this incredibly easy Turtle Pie recipe. It boasts a wonderfully soft, rich custard center, generously studded with a delightful crunch from mixed nuts throughout, and finished with a dreamy drizzle of melted chocolate. Each forkful is a symphony of flavors and textures, so reminiscent of your favorite candy bar that you might just forget it’s a pie! Whether you’re planning a festive holiday dessert or simply seeking a comforting treat for any occasion, this homemade Turtle Pie is guaranteed to impress and satisfy.
What Exactly Is Turtle Pie? A Dive into this Decadent Dessert
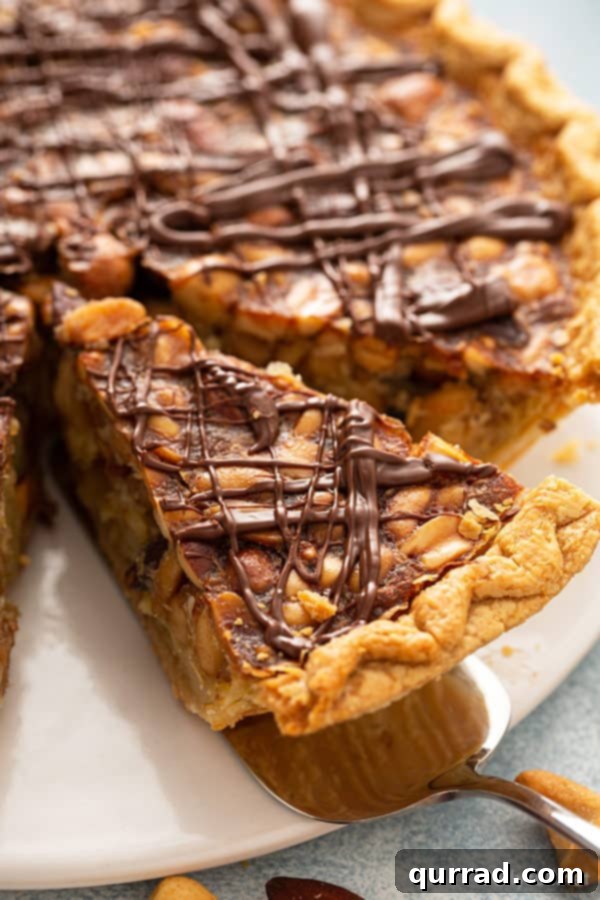
When most people think of “Turtle Pie,” their minds often conjure images of the classic no-bake frozen cream pies, like those from popular brands such as Edwards or Baskin Robbins. These typically feature a luxurious chocolate base, a thick layer of gooey caramel, and are generously topped with crunchy pecans – a direct homage to the beloved Turtles Candy. This confectionary classic combines chocolate, caramel, and nuts (usually pecans) into a delightfully sweet and chewy treat, and the pie versions often aim to replicate that iconic flavor profile in a chilled, creamy format.
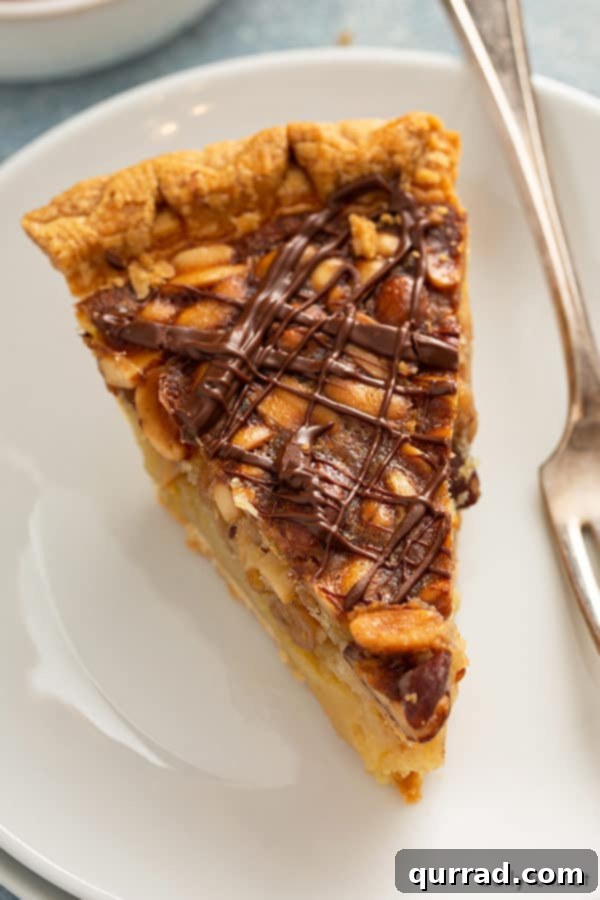
However, our specific Turtle Pie recipe takes a delightful detour from the traditional frozen cream pie. While it embraces the essential elements of chocolate and nuts, it introduces a unique twist: a baked, more custard-like center. This gives the pie a distinct, comforting warmth and a smoother, richer texture that sets it apart. Furthermore, our recipe incorporates the subtle sweetness and depth of pure maple syrup, elevating the flavor profile beyond typical caramel. Instead of just pecans, we use a medley of mixed nuts, distributed throughout the filling, ensuring a satisfying crunch in every bite. The grand finale remains a beautiful drizzle of melted semi-sweet chocolate, unifying all the rich flavors. This rendition isn’t just “different,” it’s absolutely delicious, offering a homely, more sophisticated take on the candy bar-inspired dessert.
Crafting Your Own Turtle Pie: Essential Ingredients and Substitutions
Embarking on the journey to bake your own Turtle Pie is wonderfully straightforward, especially with a few key ingredients that are likely already in your pantry or easily found at your local grocery store. The magic of this recipe lies in its simplicity and the quality of its components. Here’s a breakdown of what you’ll need to create this indulgent dessert, along with some helpful insights and potential substitutions:
The Core Ingredients:
- 9-inch Deep Dish Frozen Pie Shell: For ultimate convenience, a store-bought frozen pie shell is a fantastic shortcut. However, if you prefer a truly homemade touch, a flaky homemade pie crust will elevate the pie even further. Blind-baking your homemade crust briefly can help prevent a soggy bottom.
- Granulated Sugar: Provides the fundamental sweetness for the custard filling. Standard white granulated sugar works perfectly.
- Pure Maple Syrup: This is a crucial flavor component that distinguishes our pie. It adds a nuanced, rich sweetness that is far superior to regular pancake syrup. Ensure you use pure maple syrup for the best results.
- Unsalted Butter: Essential for richness and flavor in the syrup mixture. Using unsalted butter allows you to control the overall saltiness of the pie.
- Large Eggs: The eggs are key to creating the pie’s signature soft, custard-like texture, acting as a binder and providing structure to the filling.
- Lemon Juice: A small amount of lemon juice might seem surprising, but it plays a vital role in balancing the sweetness and adding a subtle brightness that cuts through the richness, preventing the pie from being overly cloying.
- Vanilla Extract: Enhances the overall dessert flavor, adding warmth and depth to the custard. Use good quality pure vanilla extract if possible.
- Kosher Salt: A pinch of salt is crucial for balancing flavors and making the sweetness truly pop. Kosher salt has a clean taste and dissolves well.
- Chopped Salted, Roasted Mixed Nuts: This is where the “turtle” comes in! A generous amount of mixed nuts provides a fantastic crunch and nutty flavor. Using pre-salted and roasted nuts saves time and adds a layer of savory contrast. Pecans, walnuts, and almonds are excellent choices. If you can only find raw nuts, you can easily toast them yourself (see our tips below).
- Semi-Sweet Chocolate Chips: For the iconic chocolate drizzle on top. Semi-sweet offers a perfect balance that complements the pie’s sweetness without being too bitter or too sweet.
Ingredient Spotlight & Tips:
- Maple Syrup Matters: Resist the urge to substitute pure maple syrup with pancake syrup, which is often corn syrup-based and lacks the complex flavor needed for this pie. The pure variety truly makes a difference.
- Nut Variety is Key: While pecans are traditional in Turtle-inspired desserts, using a mix of nuts (like almonds, walnuts, or cashews) adds layers of flavor and texture. If you have nut allergies in your household, consider custom roasting specific nuts that are safe for everyone.
- Chocolate Quality: A good quality semi-sweet chocolate will melt smoother and provide a richer flavor for the drizzle. You can also use dark chocolate for a less sweet, more intense chocolate finish.
Step-by-Step Guide: How to Bake Your Perfect Turtle Pie
Creating this magnificent Turtle Pie is surprisingly simple, particularly if you opt for a pre-made frozen pie shell, which streamlines the process significantly. The detailed instructions below will guide you through each stage, ensuring a smooth baking experience and a truly delightful outcome. Remember, the key to success is careful preparation and allowing ample time for cooling.
1. Preparing Your Oven and Pie Shell:
- Begin by preheating your oven to a precise 350 degrees F (175 degrees C). This ensures the oven is at the correct temperature when your pie is ready to bake, leading to even cooking.
- Place your 9-inch deep dish frozen pie shell onto a sturdy baking sheet. This makes it easier to transfer the pie in and out of the oven and catches any potential spills, keeping your oven clean. Set it aside for now.
2. Crafting the Rich Maple Syrup Mixture:
- In a small, heavy-bottomed saucepan, combine the granulated sugar, pure maple syrup, and unsalted butter.
- Heat the mixture over medium-low heat, stirring occasionally, until it just reaches a simmer and the sugar has completely dissolved. It’s important not to let it boil vigorously; a gentle simmer is sufficient.
- Once the sugar is dissolved, remove the saucepan from the heat and allow the syrup mixture to cool down to room temperature. This step is crucial, as adding hot syrup to the egg mixture could cook the eggs prematurely.
3. Whisking the Custard Base and Adding Nuts:
- While the syrup mixture cools, crack the large eggs into a large mixing bowl. Add the lemon juice, vanilla extract, and kosher salt.
- Whisk these ingredients together until they are well combined and smooth.
- Once the maple syrup mixture has cooled, gradually stir it into the egg mixture until thoroughly incorporated.
- Finally, gently fold in the chopped salted, roasted mixed nuts. Ensure the nuts are evenly distributed throughout the filling.
4. Assembling and Baking to Perfection:
- Carefully pour the complete nut filling into the prepared pie shell on the baking sheet.
- Transfer the baking sheet with the pie to your preheated oven.
- Bake for approximately 1 hour, or until the pie crust turns a beautiful golden brown and the filling is set. To check for doneness, gently shake the pie; the center should have a slight jiggle but not be liquid. If the crust or the top of the pie begins to brown too quickly before the filling is set, loosely cover the edges with a pie crust protector or aluminum foil.
5. The Grand Finale: Cooling and Chocolate Drizzle:
- Once baked, remove the pie from the oven and place it on a wire cooling rack. Allow it to cool completely at room temperature. This step is vital for the custard to fully set and achieve its perfect texture. Rushing this step can result in a runny pie.
- Once the pie is completely cool, prepare your chocolate drizzle. In a small, microwave-safe bowl, melt the semi-sweet chocolate chips. Heat in 30-second intervals, stirring thoroughly after each interval, until the chocolate is smooth and fully melted. Alternatively, you can melt the chocolate using a double boiler method over simmering water.
- Dip the tines of a fork into the melted chocolate and artfully drizzle it back and forth over the cooled pie. The natural variations will create an appealing, rustic design.
- Let the pie stand for about ten minutes, or until the chocolate drizzle has slightly set. Then, it’s ready to slice and savor!
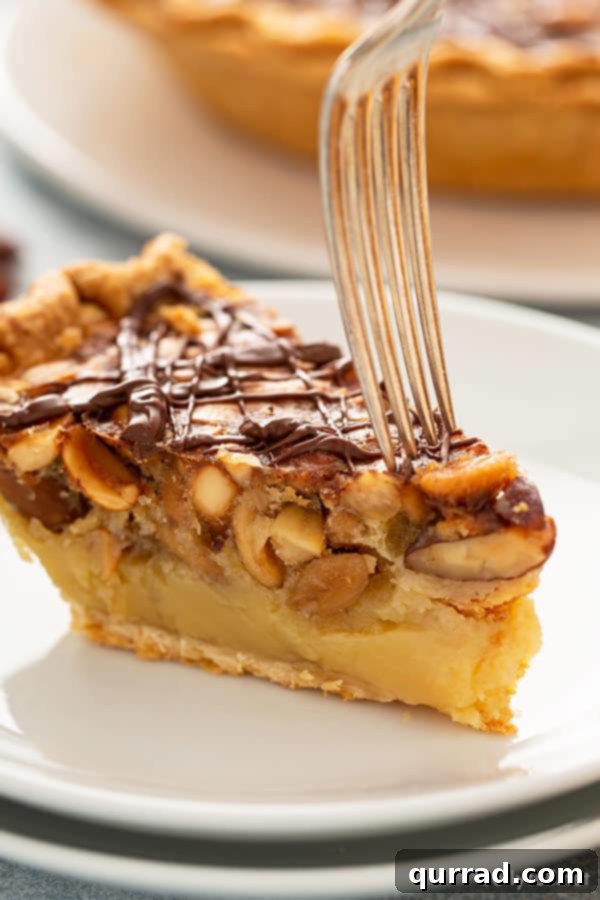
On a personal note, I often find myself wishing my children weren’t allergic to peanuts. This allergy means that finding a ready-made can of mixed nuts that doesn’t include peanuts is nearly impossible. This adds an extra step to my baking process, as I have to purchase individual raw nuts—usually almonds and pecan halves, or sometimes walnuts—and then roast them myself before chopping. It takes a little longer, but honestly, it’s a small price to pay. The joy of being able to create this incredible Turtle Pie recipe, knowing everyone in my family can safely enjoy it, makes every extra minute worth it. For most people, who can simply grab a bag of pre-mixed nuts, this pie is truly super quick to prep!
Perfecting Your Pie: Additional Tips for Success
- Preventing a Soggy Crust: If using a homemade pie crust, consider blind-baking it for about 10-15 minutes before adding the filling. This creates a barrier and helps keep the bottom crust flaky. For a frozen crust, make sure to follow any package instructions regarding pre-baking, though many deep-dish types don’t require it.
- Evenly Toasted Nuts: If roasting your own nuts, spread them in a single layer on a baking sheet and bake at 350°F (175°C) for 5-10 minutes, stirring halfway, until fragrant and lightly golden. Be careful not to burn them!
- Temperature Matters: Ensure your maple syrup mixture truly cools to room temperature before combining with the eggs. This prevents the eggs from scrambling and ensures a smooth custard.
- Patience with Cooling: Don’t underestimate the importance of allowing the pie to cool completely. This is when the custard fully sets and becomes firm enough to slice beautifully.
- Creative Drizzling: For an even more elegant look, you can transfer the melted chocolate to a small piping bag with a tiny hole cut in the tip, or a ziplock bag with a corner snipped off, for a more controlled drizzle.
Storing Your Delicious Chocolate Turtle Pie
Proper storage is key to enjoying your homemade Turtle Pie at its best. This rich, custard-based pie can safely remain at room temperature for up to one day, provided it is well covered with aluminum foil or plastic wrap to prevent it from drying out. After the first day, it’s highly recommended to refrigerate any leftovers. Simply cover the pie tightly and store it in the refrigerator. For optimal taste and texture, this pie is best enjoyed within a couple of days after baking. The longer it sits, whether at room temperature or in the fridge, the more prone it is to drying out.
When it comes to freezing, we generally advise against it for this particular Turtle Pie. The delicate custard filling tends to separate and can become watery or grainy once thawed, significantly compromising its delightful texture. If you anticipate having leftovers, it’s better to enjoy them fresh within a few days or share with friends and family!
Frequently Asked Questions About Turtle Pie
Can I use a homemade pie crust for this recipe?
Absolutely! While a store-bought frozen pie shell offers convenience, a homemade pie crust will undoubtedly enhance the flavor and texture of your Turtle Pie. If you choose to make your own, consider blind baking it for about 10-15 minutes before adding the filling to help prevent a soggy bottom and achieve a perfectly crisp crust.
What kind of mixed nuts are best?
A variety of nuts works wonderfully in this recipe! Pecans and almonds are classic choices and add a lovely crunch. Walnuts, cashews, or even a combination of these will also provide excellent flavor and texture. Using salted, roasted nuts adds an extra layer of savory depth that beautifully complements the sweet custard and chocolate. If you buy raw nuts, remember to toast and lightly salt them yourself before chopping.
Can I use a different type of chocolate for the drizzle?
Yes, you can! Semi-sweet chocolate chips provide a balanced flavor, but feel free to experiment. Dark chocolate chips will give a more intense, less sweet chocolate flavor, while milk chocolate chips will make the pie even sweeter and creamier. Whatever you choose, ensure it’s a good quality chocolate that melts smoothly for the best drizzle.
How do I know when the pie filling is set?
The pie filling is set when the crust is golden brown and the center of the pie has only a slight jiggle when gently shaken. It should not look liquid in the middle. If you insert a knife into the center, it should come out mostly clean. Keep an eye on the edges of the crust; if they’re browning too quickly, cover them with foil or a pie crust shield.
Can I make this Turtle Pie ahead of time?
You can definitely prepare this pie a day in advance. Bake it, allow it to cool completely, then drizzle with chocolate. Cover it tightly and store at room temperature for up to 24 hours, or refrigerate if storing longer. Remember, for the best taste and texture, it’s ideal to consume the pie within two days of baking.
Explore More Decadent Dessert Recipes
If you’ve fallen in love with the comforting charm of homemade pies, you’re in luck! Our kitchen is brimming with a variety of other delightful pie recipes that are just as easy and satisfying as this Turtle Pie. From creamy classics to fruity sensations, there’s a perfect pie for every craving and occasion. Discover your next favorite dessert:
- Easy Chocolate Pie: A silky, rich chocolate filling nestled in a flaky crust – pure bliss for chocolate lovers.
- French Coconut Pie: A delightful and surprisingly simple pie bursting with sweet, tender coconut flavor.
- Mini Pumpkin Pies: Perfect individual servings of fall’s favorite spiced pumpkin dessert, great for entertaining.
- Mini Pecan Pies: All the gooey, nutty goodness of a classic pecan pie, but in charming, bite-sized portions.
- Chocolate Chip Cookie Pie: The ultimate comfort food fusion – a giant chocolate chip cookie baked into a pie crust.
We truly hope you enjoy baking and savoring this incredible Turtle Pie recipe. If you do, please consider leaving a review below – your feedback helps us and other home bakers! Don’t forget to connect with Belly Full on social media to stay updated with our latest delicious creations. Find us on Facebook, Instagram, Pinterest, and YouTube!
Mixed Nut Turtle Pie
15 mins
1 hr
1 hr 15 mins
8

Pin Recipe
Print Recipe
This easy Turtle Pie recipe has a soft custard center, filled with crunchy nuts throughout, and drizzled with melted chocolate. It tastes like a candy bar! Delicious dessert for the holidays or anytime.
Ingredients
- 1 9-inch deep dish frozen pie shell (or homemade)
- 2/3 cup granulated sugar
- 2/3 cup pure maple syrup (not pancake syrup)
- 6 tablespoons unsalted butter
- 4 large eggs
- 1 tablespoon lemon juice
- 1 teaspoon vanilla extract
- 1/2 teaspoon kosher salt
- 2 cups salted, roasted mixed nuts, coarsely chopped
- 2 ounces semi-sweet chocolate chips
Instructions
- Preheat oven to 350 degrees F (175 C). Place the pie shell on a baking sheet; set aside.
- Add the sugar, maple syrup, and butter to a small saucepan; bring to a simmer until the sugar dissolves. Remove from heat and set aside to cool to room temperature.
- In a large bowl, whisk together the eggs, lemon juice, vanilla, and salt. Stir in the cooled syrup mixture, then the nuts.
- Pour the nut filling into the pie shell.
- Bake until the crust is golden and the filling is set, about 1 hour. (If topping or crust begins to brown too quickly, cover with a crust protector or aluminum foil).
- Let cool completely on a wire rack.
- In a small microwave-safe bowl, melt the chocolate chips in 30-second intervals, stirring in between, until smooth. Dip the tines of a fork in the melted chocolate and drizzle over the pie.
- Let stand for about ten minutes until the chocolate sets, then slice and enjoy!
Nutrition Information (Approximate Per Serving)
Carbohydrates: 61g |
Protein: 11g |
Fat: 40g |
Saturated Fat: 13g |
Cholesterol: 116mg |
Sodium: 289mg |
Potassium: 376mg |
Fiber: 4g |
Sugar: 36g |
Vitamin A: 397 IU |
Vitamin C: 1mg |
Calcium: 81mg |
Iron: 3mg
Nutritional information provided is an automatic calculation and can vary based on the exact products you use and any changes you make to the recipe. If these numbers are very important to you, we recommend calculating them yourself using a reliable nutrition tracker.
Did you make this? Leave a rating below!