

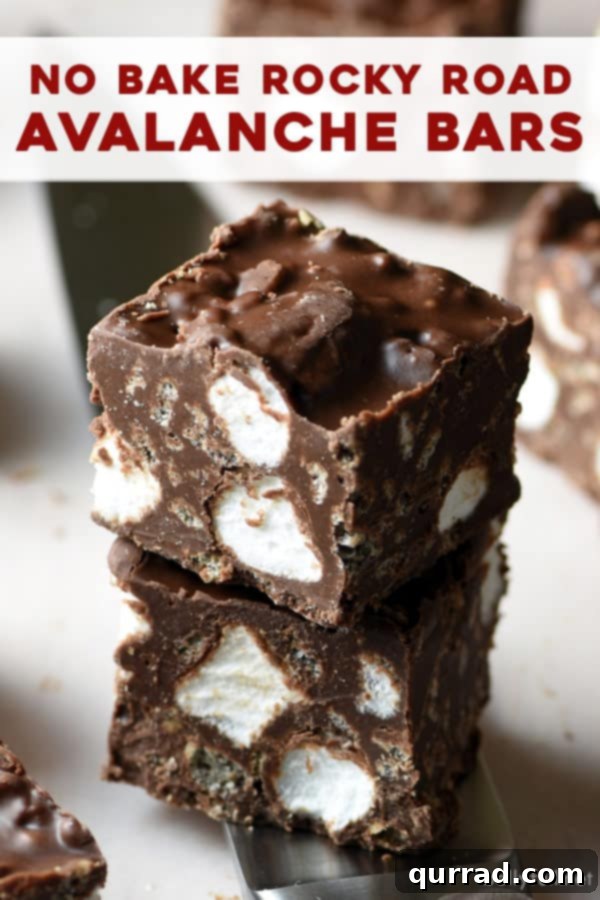
Welcome to the ultimate guide for creating the most irresistibly delicious **Rocky Road Avalanche Bars**! These aren’t just any treats; they are a decadent, no-bake marvel brimming with rich chocolate, creamy nut butter, crispy rice cereal, and fluffy marshmallows. Perfect for satisfying those intense sweet cravings, these bars require minimal effort and no oven, making them an ideal dessert for any occasion, especially when you need a quick, impressive, and utterly delicious treat.

Easy No-Bake Rocky Road Avalanche Bars: Your New Favorite Dessert
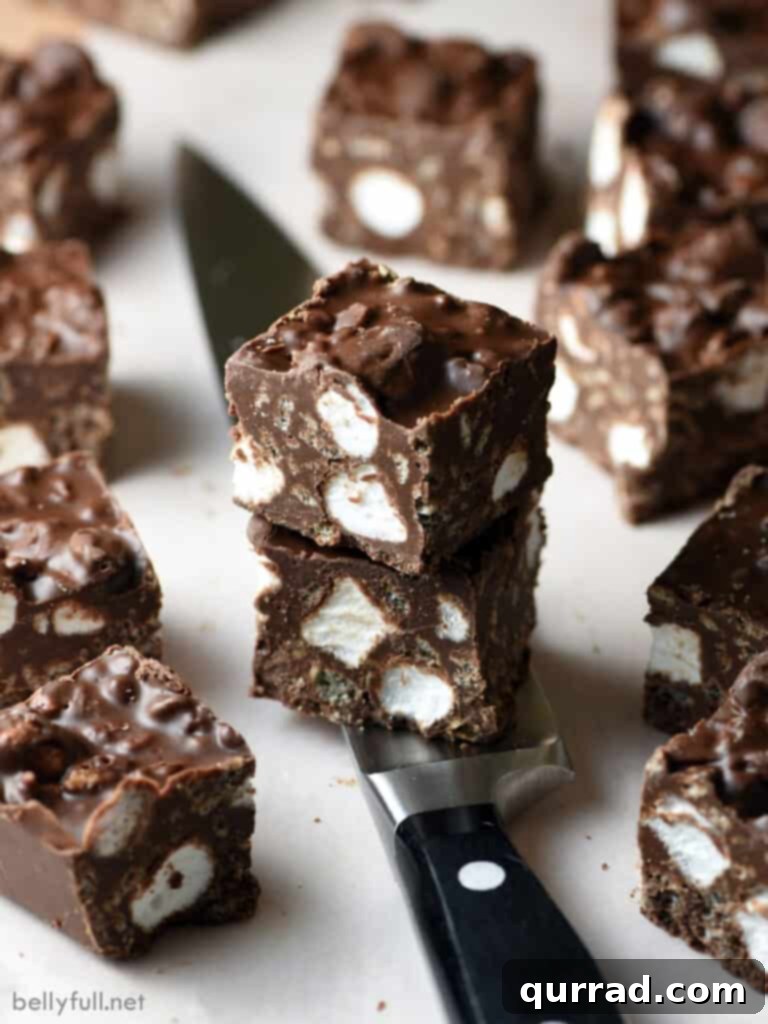
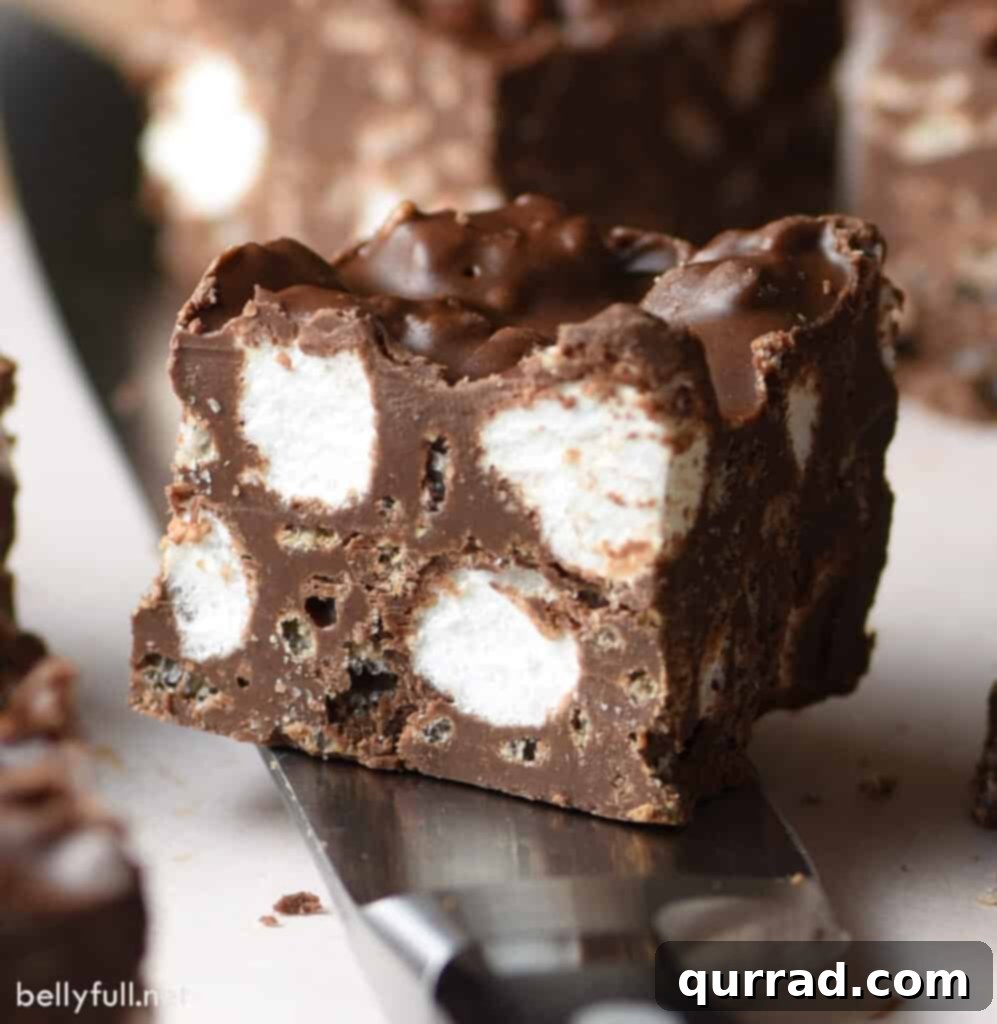
Imagine a dessert so delightful, so packed with flavor and texture, that it’s almost impossible to stop at just one. That’s precisely what you get with these incredible Rocky Road Avalanche Bars. They are a symphony of flavors and textures, featuring three distinct types of silky chocolate harmoniously blended with the satisfying crunch of rice cereal, the pillowy softness of mini marshmallows, and the rich, nutty undertones of your favorite nut butter. This combination creates a truly heavenly experience with every bite – a truly luxurious treat that feels gourmet yet is incredibly simple to make.
Whether you opt for classic peanut butter, smooth almond butter, or a nut-free sunflower butter, the result is consistently phenomenal. My family, especially the kids, goes absolutely wild every time I whip up a batch. These bars are not only dangerously delicious but also incredibly easy to prepare, making them a go-to recipe for busy weekdays, spontaneous gatherings, or whenever you need a sweet escape. The beauty of these bars lies in their no-fuss nature; no baking, no complicated steps, just pure, unadulterated dessert joy.
The Allure of No-Bake Desserts
No-bake desserts hold a special place in the culinary world, offering convenience without compromising on flavor or indulgence. In today’s fast-paced world, finding recipes that deliver maximum deliciousness with minimum effort is a true blessing. These Rocky Road Avalanche Bars embody this philosophy perfectly. They are the ideal solution for those hot summer days when turning on the oven feels like a monumental task, or for busy holiday seasons when oven space is a precious commodity. The ease of preparation also makes them a fantastic project for budding bakers or a quick fix for unexpected guests.
Beyond their convenience, no-bake treats often boast a unique texture – a delightful combination of soft, chewy, and crunchy that stands apart from baked goods. For these Avalanche Bars, the chilling process allows the chocolate to set beautifully, creating a firm yet yielding base that holds all the wonderful mix-ins together. This method ensures that the marshmallows remain soft and chewy, and the rice cereal maintains its satisfying crispness, creating a textural masterpiece that is truly unforgettable.
What Makes Them “Avalanche”?
The name “Avalanche Bars” isn’t just catchy; it perfectly describes the abundant, rich, and overflowing nature of these delightful treats. Imagine an avalanche of all your favorite dessert components cascading together: a generous torrent of various chocolates, a creamy river of nut butter, and a delightful shower of crispy cereal and fluffy marshmallows. Each bite is an explosion of flavor and texture, a truly decadent experience that lives up to its name. It’s a dessert that’s meant to be big, bold, and utterly satisfying, ensuring that every square is packed with an incredible array of goodness.
Essential Ingredients for Your Avalanche Bars
One of the many charms of this recipe is its straightforward ingredient list. You only need a handful of readily available items to create these sensational bars. The quality of your ingredients will shine through, so choose wisely!
- Chocolate-flavored Candiquick candy coating: This provides a smooth, easy-to-melt base and helps the bars set perfectly without tempering. Its mild flavor is a great foundation for the other chocolates.
- Semi-sweet chocolate chips: A classic choice that adds a familiar, rich chocolate flavor. These chips contribute to the overall depth and sweetness of the bars.
- German’s sweet chocolate bar: This unique chocolate brings a distinct, sweet, and slightly complex flavor profile that elevates the bars beyond ordinary. Its richness is a key player in the “avalanche” of chocolate flavor.
- Nut butter: The binding agent and a major flavor contributor. You have options here!
- Peanut butter: For a classic, salty-sweet, nutty taste that pairs perfectly with chocolate.
- Almond butter: Offers a slightly milder, more sophisticated nutty flavor.
- Sunflower butter: An excellent nut-free alternative that provides a similar creamy texture and nutty essence.
Make sure to use a creamy variety for the best texture.
- Crispy rice cereal: The essential crunch factor! Whether you use name-brand Rice Krispies or any off-brand, the airy crispness is vital for contrast against the smooth chocolate and chewy marshmallows.
- Mini marshmallows: These are the iconic “rocky road” component, adding soft, chewy pockets of sweetness throughout the bars. Using mini marshmallows ensures they distribute evenly and melt just enough to become gooey without disappearing entirely.
- Salt: Just a touch of salt is crucial. It doesn’t make the bars taste salty but rather enhances all the sweet and chocolatey flavors, creating a more balanced and complex profile.
How to Make Rocky Road Avalanche Bars: A Step-by-Step Guide
These bars truly are as simple as melting, mixing, and chilling. The process is incredibly forgiving, making it perfect for both novice and experienced dessert makers alike. Here’s how to bring these irresistible treats to life:
- Prepare Your Pan: Start by lining a 9×13-inch baking pan with parchment paper. This crucial step ensures that your bars won’t stick and can be easily lifted out for cutting. Leave a slight overhang on the sides to create “handles” for easy removal.
- Melt the Chocolates: In a large, microwave-safe bowl, combine the chocolate-flavored Candiquick candy coating (broken into sections), semi-sweet chocolate chips, and chunks of German’s sweet chocolate bar. Microwave the mixture at half power in 30-second intervals. After each interval, stir the chocolate thoroughly. Continue this process until the chocolate is completely melted and beautifully smooth. Stirring frequently prevents scorching and ensures even melting. Alternatively, you can use a double boiler method for a more controlled melt.
- Incorporate the Nut Butter: Once the chocolate mixture is smooth and glossy, stir in your chosen nut butter until it is fully incorporated and the mixture is uniform. The nut butter not only adds flavor but also helps create a wonderfully creamy and pliable base.
- Add the Textural Elements: Now for the “rocky road” components! Add the crispy rice cereal, mini marshmallows, and the pinch of salt to the chocolate and nut butter mixture. Gently but thoroughly stir everything together until all the cereal and marshmallows are evenly coated with the chocolate mixture. Be careful not to overmix or crush the cereal.
- Press and Chill: Pour the entire mixture into your prepared 9×13-inch baking pan. Using a spatula or the back of a spoon, gently but firmly press the mixture down into an even layer. This ensures the bars are dense and hold together well.
- Set and Enjoy: Allow the bars to sit in a cool area at room temperature until they are completely firm. This can take a couple of hours. To speed up the process, you can place the pan in the freezer for about 20-30 minutes, or in the refrigerator for 1-2 hours. Once solid, use the parchment paper overhang to lift the entire slab out of the pan. Place it on a cutting board and cut it into desired square pieces. Now they are ready to be devoured!
Tips for Success and Creative Variations
Tips for Perfect Avalanche Bars:
- Even Melting: When melting the chocolate, patience is key. Microwaving at half power and stirring frequently prevents the chocolate from seizing or burning, ensuring a smooth base.
- Gentle Mixing: Once you add the cereal and marshmallows, mix gently. Aggressive stirring can crush the cereal and over-melt the marshmallows, affecting the final texture.
- Firm Press: Pressing the mixture firmly into the pan ensures that your bars are compact and hold their shape once cut.
- Clean Cuts: For perfectly neat squares, use a sharp, warm knife. You can warm your knife by running it under hot water and wiping it dry before each cut.
Creative Variations to Explore:
While the classic recipe is divine, don’t hesitate to get creative and customize your Avalanche Bars:
- Add Extra Crunch: Mix in chopped nuts (peanuts, pecans, walnuts), crushed pretzels, or even some mini chocolate-covered candies for additional texture.
- Flavor Boost: A dash of vanilla extract or a pinch of cinnamon added to the melted chocolate can deepen the flavor profile. For a festive touch, try a few drops of peppermint extract.
- Different Chocolates: Experiment with dark chocolate for a less sweet, more intense flavor, or white chocolate for a creamier, sweeter bar.
- Fruity Twist: Stir in some dried cranberries, cherries, or chopped apricots for a chewy, tangy counterpoint to the sweetness.
- Toffee Bits: For an extra layer of caramel-like sweetness and crunch, sprinkle in some toffee bits.
- Holiday Themed: Use colored sprinkles or different shaped marshmallows to match a holiday or special occasion.
Storage and Longevity
These Rocky Road Avalanche Bars are fantastic for making ahead, and they store wonderfully, allowing you to enjoy them for days to come. Store the bars in an airtight container at room temperature for up to 5 days. If your kitchen is particularly warm, or if you prefer a firmer texture, you can store them in the refrigerator. Just be aware that refrigeration can make the chocolate slightly harder, so you might want to let them sit at room temperature for a few minutes before serving to soften them slightly.
For longer storage, these bars freeze beautifully! Wrap individual bars tightly in plastic wrap, then place them in a freezer-safe bag or container. They can be frozen for up to 3 months. When you’re ready to enjoy, simply thaw them at room temperature for about 30 minutes, or enjoy them straight from the freezer for a super-chilled, chewy treat.
Rocky Road Avalanche Bars
10 mins
20 mins
30 mins
60 little squares
Print Recipe
Ingredients
- 1 pound chocolate-flavored Candiquick candy coating, broken into sections
- 2 cups semisweet chocolate chips
- 4 ounces German’s sweet chocolate bar, broken into chunks
- 16 ounce jar nut butter (such as peanut, almond, or sunflower)
- 3 cups crispy rice cereal
- 3 cups mini marshmallows
- 1/2 teaspoon salt
Instructions
- Line a 9×13-inch baking pan with parchment paper.
- Place candy coating, chocolate chips, and German’s chocolate bar pieces in a large microwave safe bowl. Microwave at half power in 30 second intervals, stirring each time, until melted and smooth.
- Stir in the nut butter. Add the cereal, marshmallows, and salt. Stir to combine.
- Pour mixture into the prepared pan. Allow to sit in a cool area until firm, or place in the freezer for 20 minutes to speed up the process.
- Once solid, cut into cube pieces and enjoy!
Nutrition
Nutritional information given is an automatic calculation and can vary based on the exact products you use and any changes you make to the recipe. If these numbers are very important to you, I would recommend calculating them yourself.
I hope you absolutely adore this delightful and simple recipe! These Rocky Road Avalanche Bars are truly a testament to how easy and rewarding no-bake desserts can be. They are guaranteed to bring smiles and satisfy even the most demanding sweet tooth. Don’t forget to give this recipe a try and share your experience with us!
For more fantastic candy recipes and delicious treats, be sure to explore our other creations:
- Old Fashioned Potato Candy
- Polar Bear Paws (See’s Copycat)
- Turtle Candy
- Saltine Cracker Toffee
- Candied Pecans
We love connecting with our community! Follow Belly Full on Facebook, Instagram, Pinterest, and YouTube for more delicious recipes and culinary inspiration.
Recipe adapted from The Simple Kitchen and Page Street Publishing.