
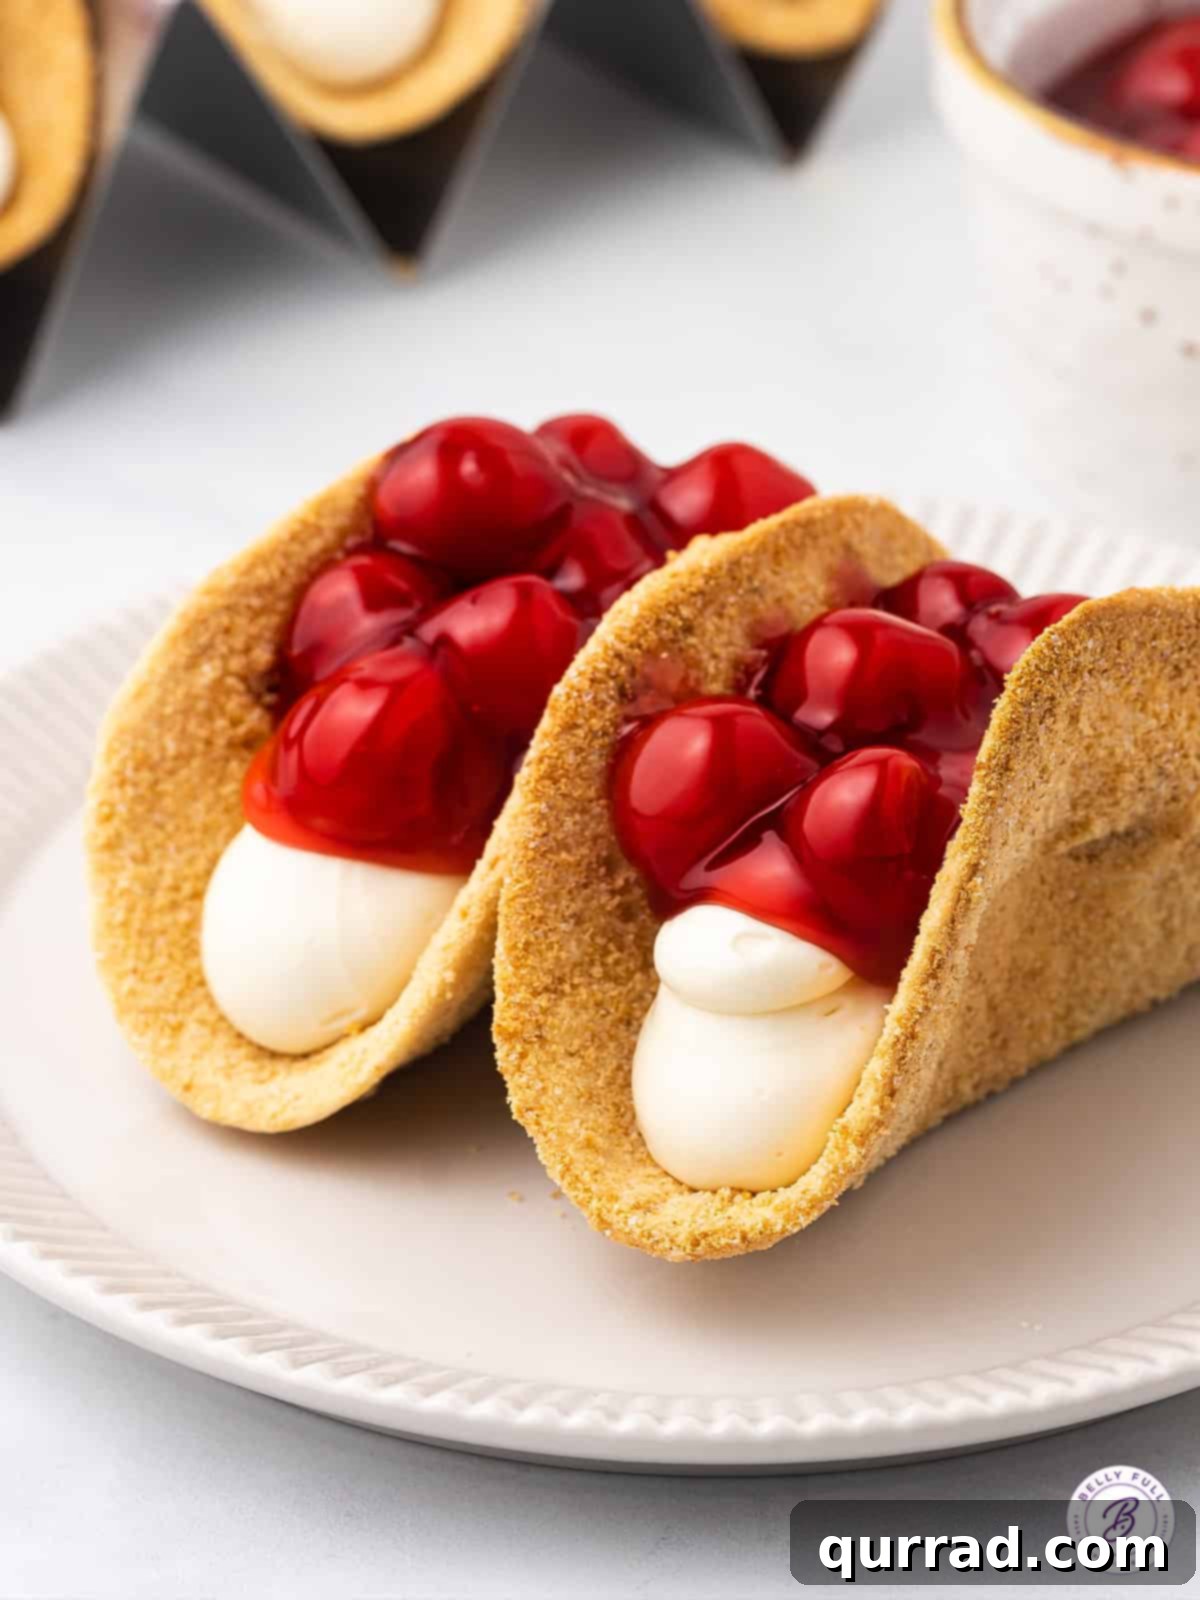
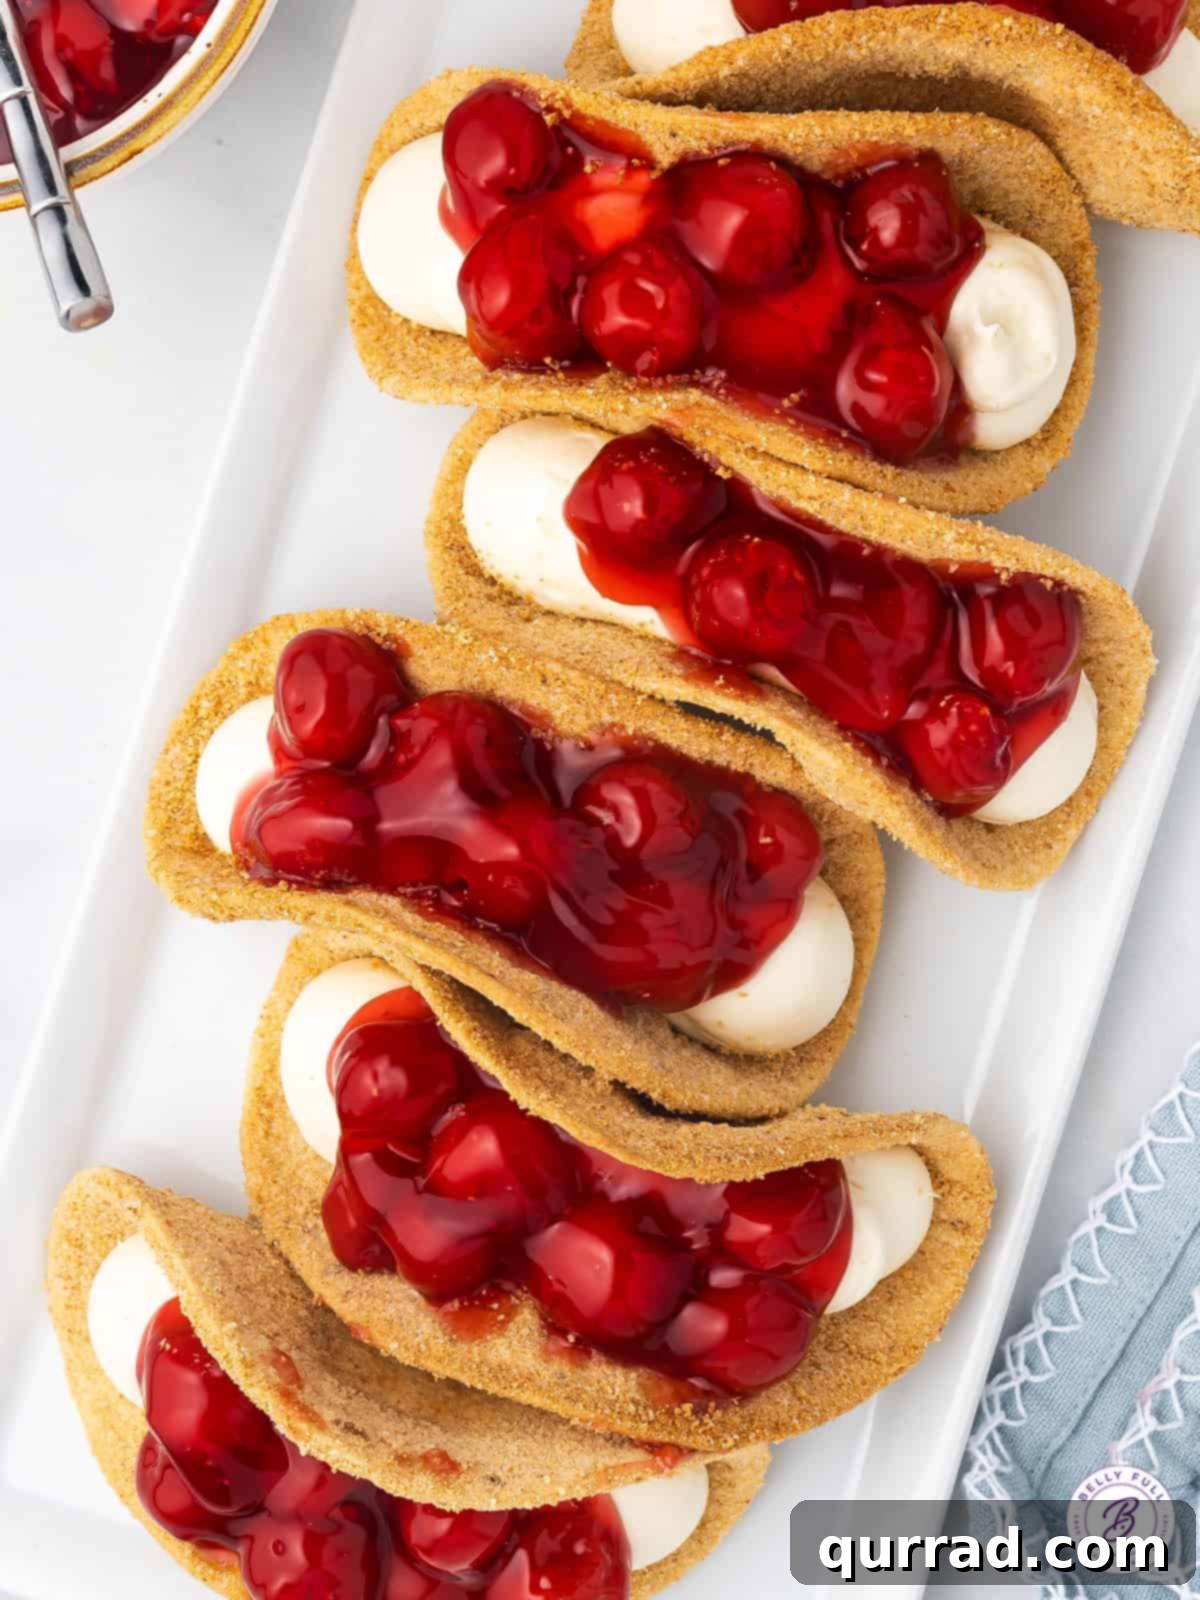
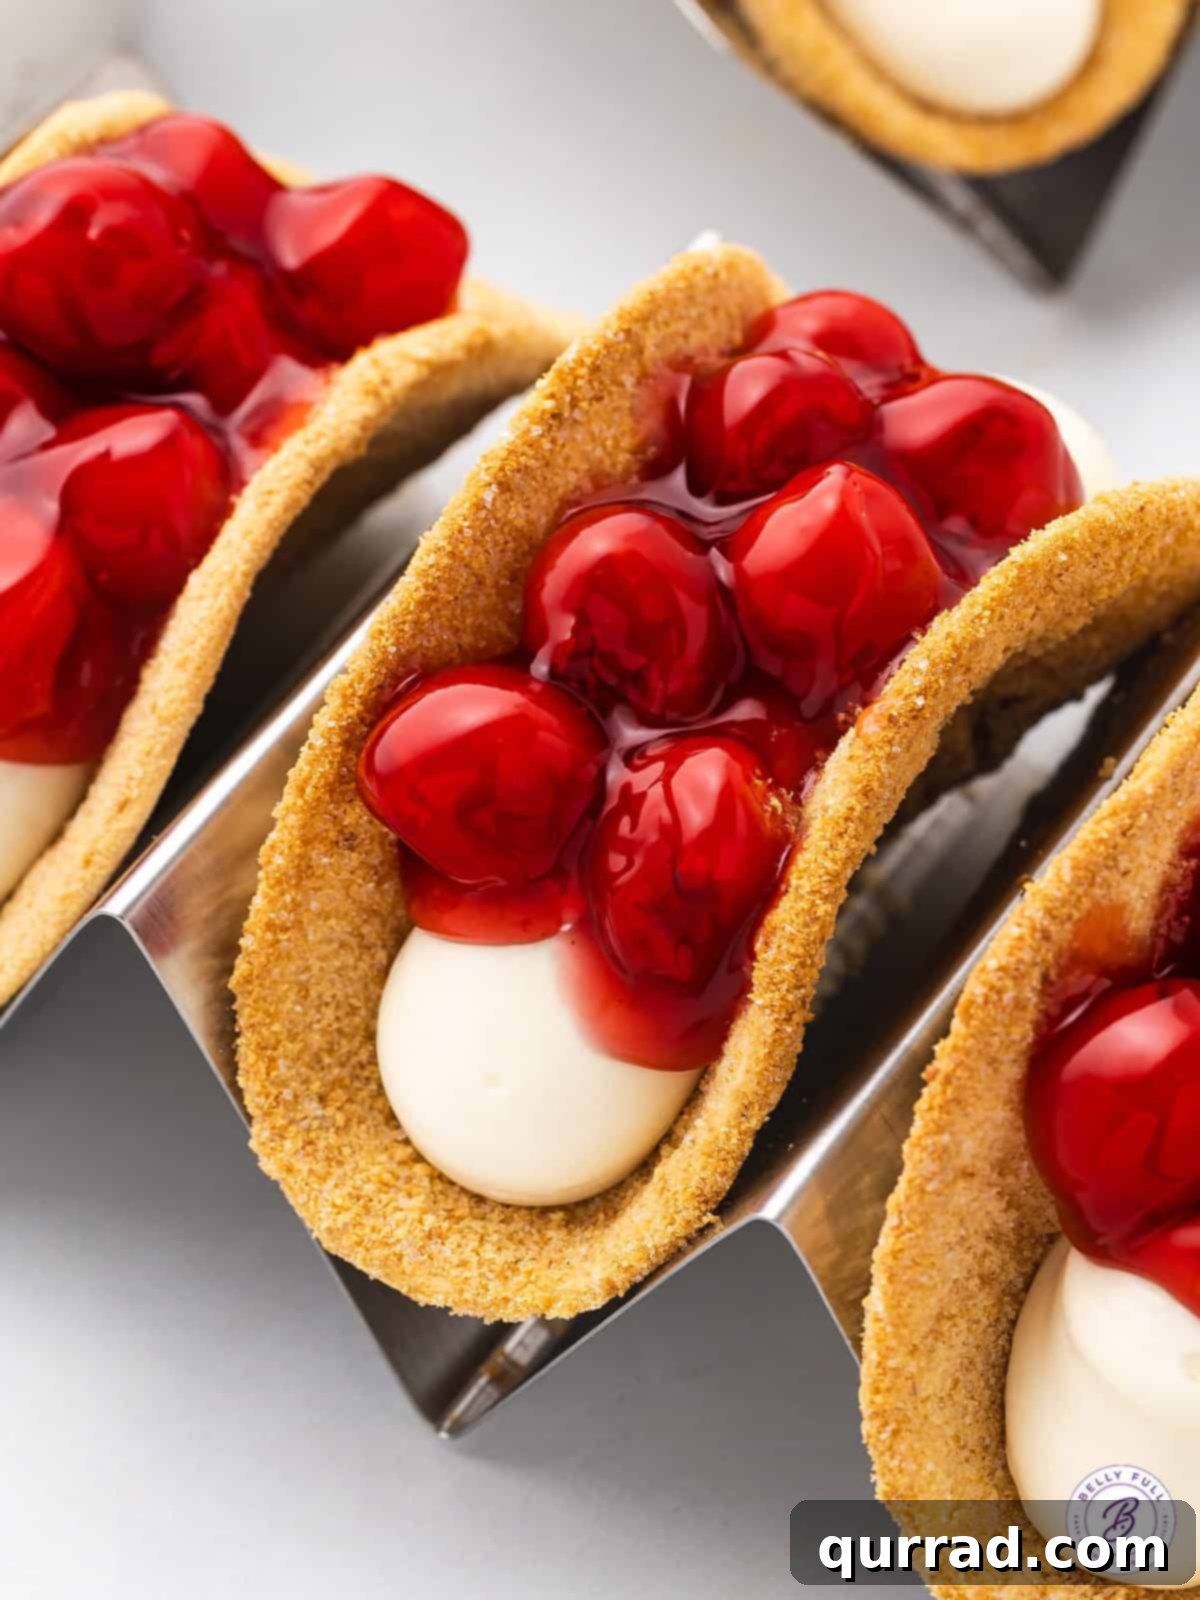
Prepare to have your dessert cravings perfectly satisfied with these extraordinary Cherry Cheesecake Tacos. Imagine the delightful crunch of a subtly sweet tortilla shell, generously filled with a velvety, tangy cream cheese mixture, and crowned with the luscious burst of tart cherry pie filling. This isn’t just a dessert; it’s an experience – a playful fusion of classic cheesecake bliss and handheld taco fun, making it an ideal treat for any occasion. Quick to assemble, incredibly easy to make, and utterly delicious, these dessert tacos are sure to become a new favorite in your recipe collection.
If your heart beats for the iconic flavors of cherry cheesecake, you’re in for a treat. Beyond these fantastic tacos, we invite you to explore more of our beloved cherry cheesecake creations, including our no-bake cherry cheesecake for a traditional twist, cherry cheesecake egg rolls for another fun, crispy indulgence, and charming cherry cheesecake in a jar perfect for individual servings and picnics.
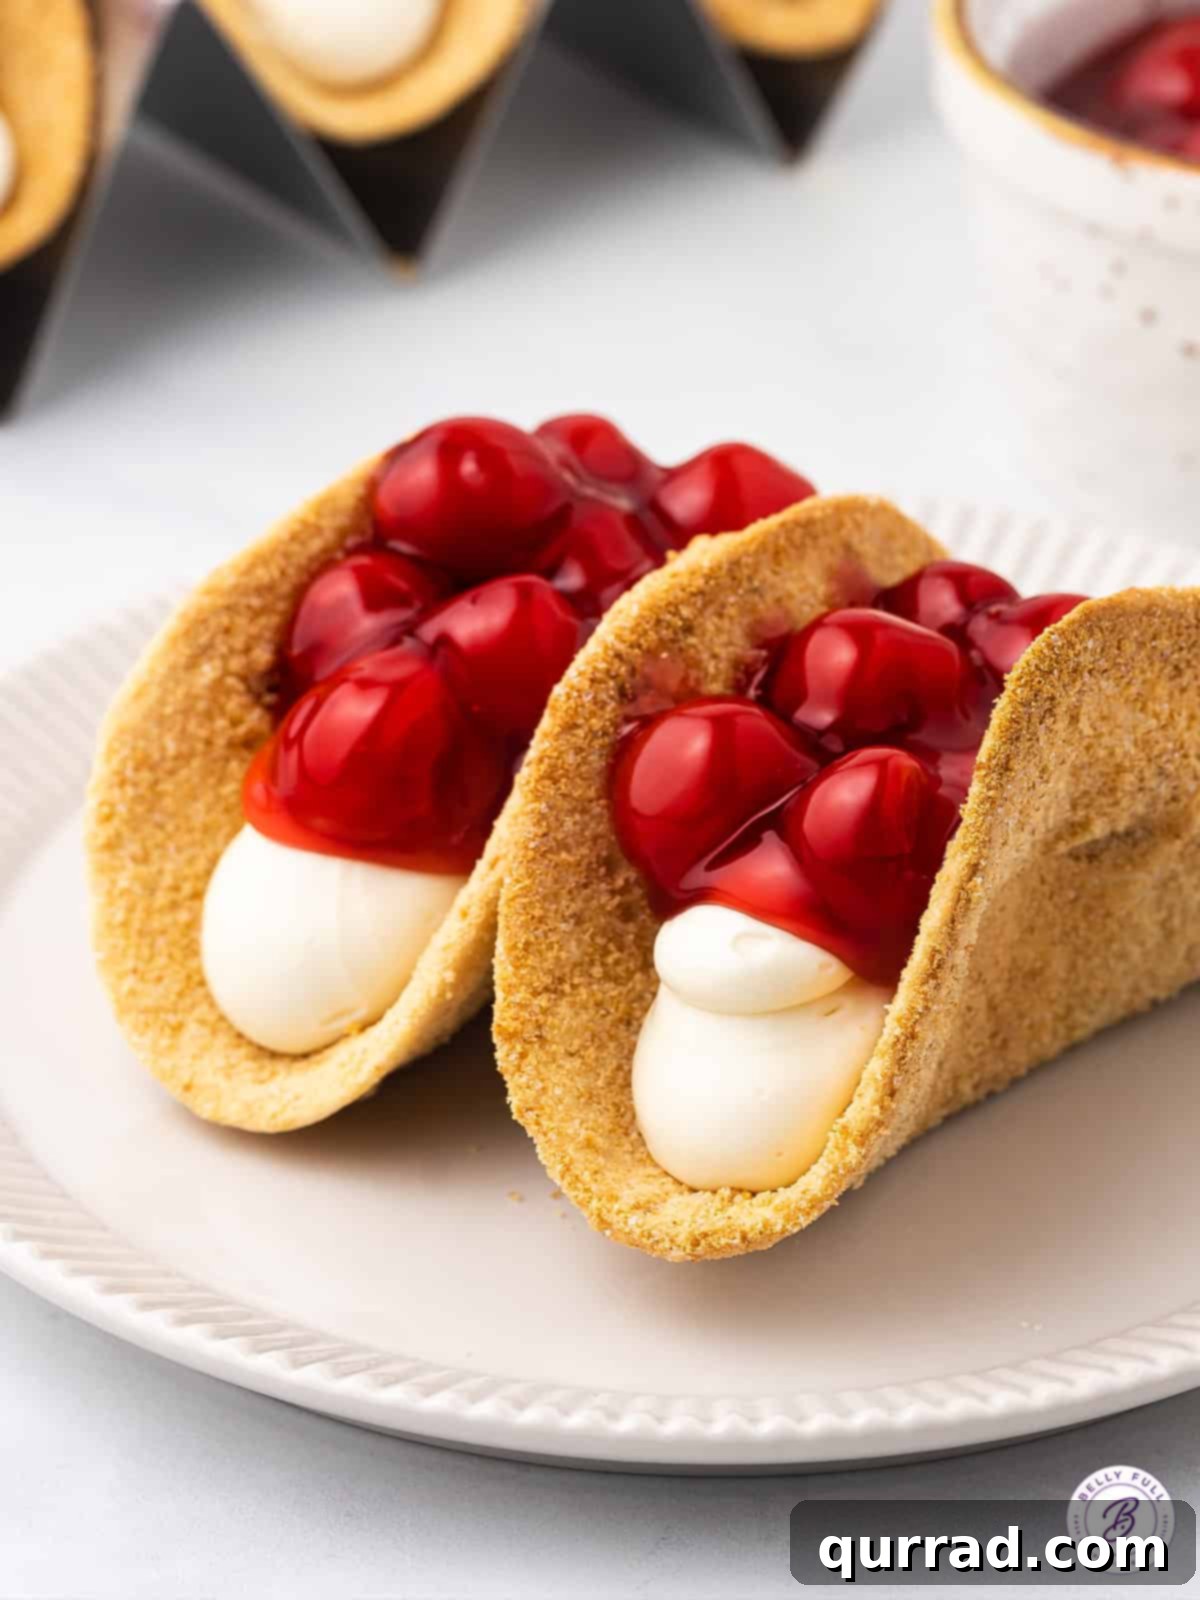
Unforgettable & Effortless Cheesecake Tacos Recipe
Who would have thought that the humble taco shell could be transformed into the ultimate vessel for dessert decadence? This innovative recipe for cherry cheesecake tacos brings together two beloved culinary concepts in a way that’s both surprising and incredibly satisfying. Forget complicated baking processes or lengthy chilling times; these dessert tacos offer all the rich, creamy flavor of a classic cheesecake in a fraction of the time and effort. They’re perfectly portioned, easy to hold, and an absolute joy to share with friends and family. Get ready to impress with this unique and delicious twist on dessert!
Why These Cherry Cheesecake Tacos Will Be Your New Obsession
From the first bite, you’ll understand why these Cherry Cheesecake Tacos are truly special. They deliver an exquisite sensory experience that hits all the right notes, making them a standout dessert:
- A Symphony of Flavors and Textures: Each taco is a masterpiece of balance. You get the refreshing tanginess from the cream cheese, harmoniously complemented by the sweet and slightly tart burst of cherry filling. This is all encased in a sweet, crunchy tortilla shell that provides the perfect contrast, creating an unforgettable bite every time. It’s a multi-dimensional dessert that excites the palate.
- Lightning-Fast & Supremely Easy: In today’s busy world, an incredible dessert that comes together in under 30 minutes is a treasure. These cheesecake tacos demand only a handful of readily available ingredients and straightforward steps, making them an ideal choice for a last-minute craving, an impromptu gathering, or simply a fun weeknight treat. No extensive baking skills required!
- Infinitely Customizable: While cherry is a classic for a reason, the beauty of this recipe lies in its versatility. Don’t limit yourself! Feel free to experiment with a variety of fruit fillings. Imagine the vibrant taste of blueberry pie filling, the summery sweetness of strawberry, the tropical zest of mango, or even the bright, citrusy tang of homemade lemon curd. Each variation promises a unique and equally delicious experience, allowing you to tailor this treat to any preference or season.
- A Fun, Handheld Delight: Moving beyond traditional slice-and-serve desserts, these tacos offer a delightful, interactive eating experience. They’re perfect for parties, picnics, or simply enjoying on the couch without the need for utensils. Their individual serving size also makes them a fantastic option for portion control and easy sharing.
Essential Ingredients You’ll Need to Craft These Dessert Tacos
Creating these irresistible dessert tacos requires a blend of simple, accessible ingredients. The magic happens when these components come together to form the sweet, crunchy shell and the creamy, flavorful filling. Here’s a detailed look at what you’ll need:
- Small Flour Tortillas: Opt for the small 4 to 5-inch street taco size tortillas. Their smaller diameter is perfect for shaping into miniature dessert shells, providing just the right amount of crunch without being overly filling. They are thin enough to crisp up beautifully in the oven.
- Melted Butter: Unsalted melted butter is crucial here. It acts as the adhesive, ensuring that the graham cracker crumbs and sugar adhere perfectly to the tortillas, creating that irresistible sweet and crunchy exterior. It also helps the tortillas crisp up evenly during baking.
- Graham Cracker Crumbs: The secret ingredient that truly transforms these tortillas from savory to sweet. Graham cracker crumbs impart a warm, slightly spiced, and distinctly dessert-like flavor, reminiscent of a classic cheesecake crust. They also contribute significantly to the desired crunchy texture of the taco shell. You can buy pre-crushed crumbs or crush whole graham crackers yourself for a fresher taste.
- Granulated Sugar: A touch of granulated sugar mixed with the graham cracker crumbs enhances the sweetness of the tortilla shells, making them truly dessert-worthy. It caramelizes slightly during baking, adding to the golden-brown crispness.
- Cream Cheese: The very heart of our creamy filling. For the best, smoothest results, it is absolutely essential that your cream cheese is softened to room temperature. Cold cream cheese will result in a lumpy filling that is difficult to beat and pipe. Full-fat cream cheese is recommended for optimal richness and texture.
- Powdered Sugar (Confectioners’ Sugar): This fine sugar dissolves seamlessly into the cream cheese, ensuring a silky-smooth and sweet filling without any grainy texture. Unlike granulated sugar, powdered sugar also contains a small amount of cornstarch, which helps stabilize the filling.
- Vanilla Extract: A classic flavor enhancer, vanilla extract adds a delicate warmth and depth to the cream cheese filling, complementing the other sweet and tangy elements beautifully. Use a good quality pure vanilla extract for the best flavor.
- Cold Heavy Whipping Cream: This is key for creating a light, airy, and stable cream cheese filling. It must be very cold to whip into stiff peaks, which will give the filling its structural integrity and delightful creaminess. Keep it in the fridge until you are ready to use it.
- Cherry Pie Filling: The star topping! You have the flexibility to use your favorite high-quality store-bought cherry pie filling for ultimate convenience, or, for an extra touch of homemade goodness, try our delicious homemade cherry pie filling. The sweet and tart cherries provide that quintessential cheesecake flavor and vibrant color.
How to Effortlessly Assemble Your Cherry Cheesecake Tacos
Making these dessert tacos is a straightforward and enjoyable process. Follow these detailed steps to achieve perfect, crispy shells and a luscious, creamy filling:
- Preheat Your Oven: Begin by preheating your oven to 350 degrees Fahrenheit (175 degrees Celsius). This ensures the oven is at the optimal temperature for crisping the tortillas evenly.
- Prepare the Sweet Coating: In a shallow bowl, combine the graham cracker crumbs and granulated sugar. Stir them together until thoroughly mixed. This will be the sweet, crunchy crust for your taco shells.
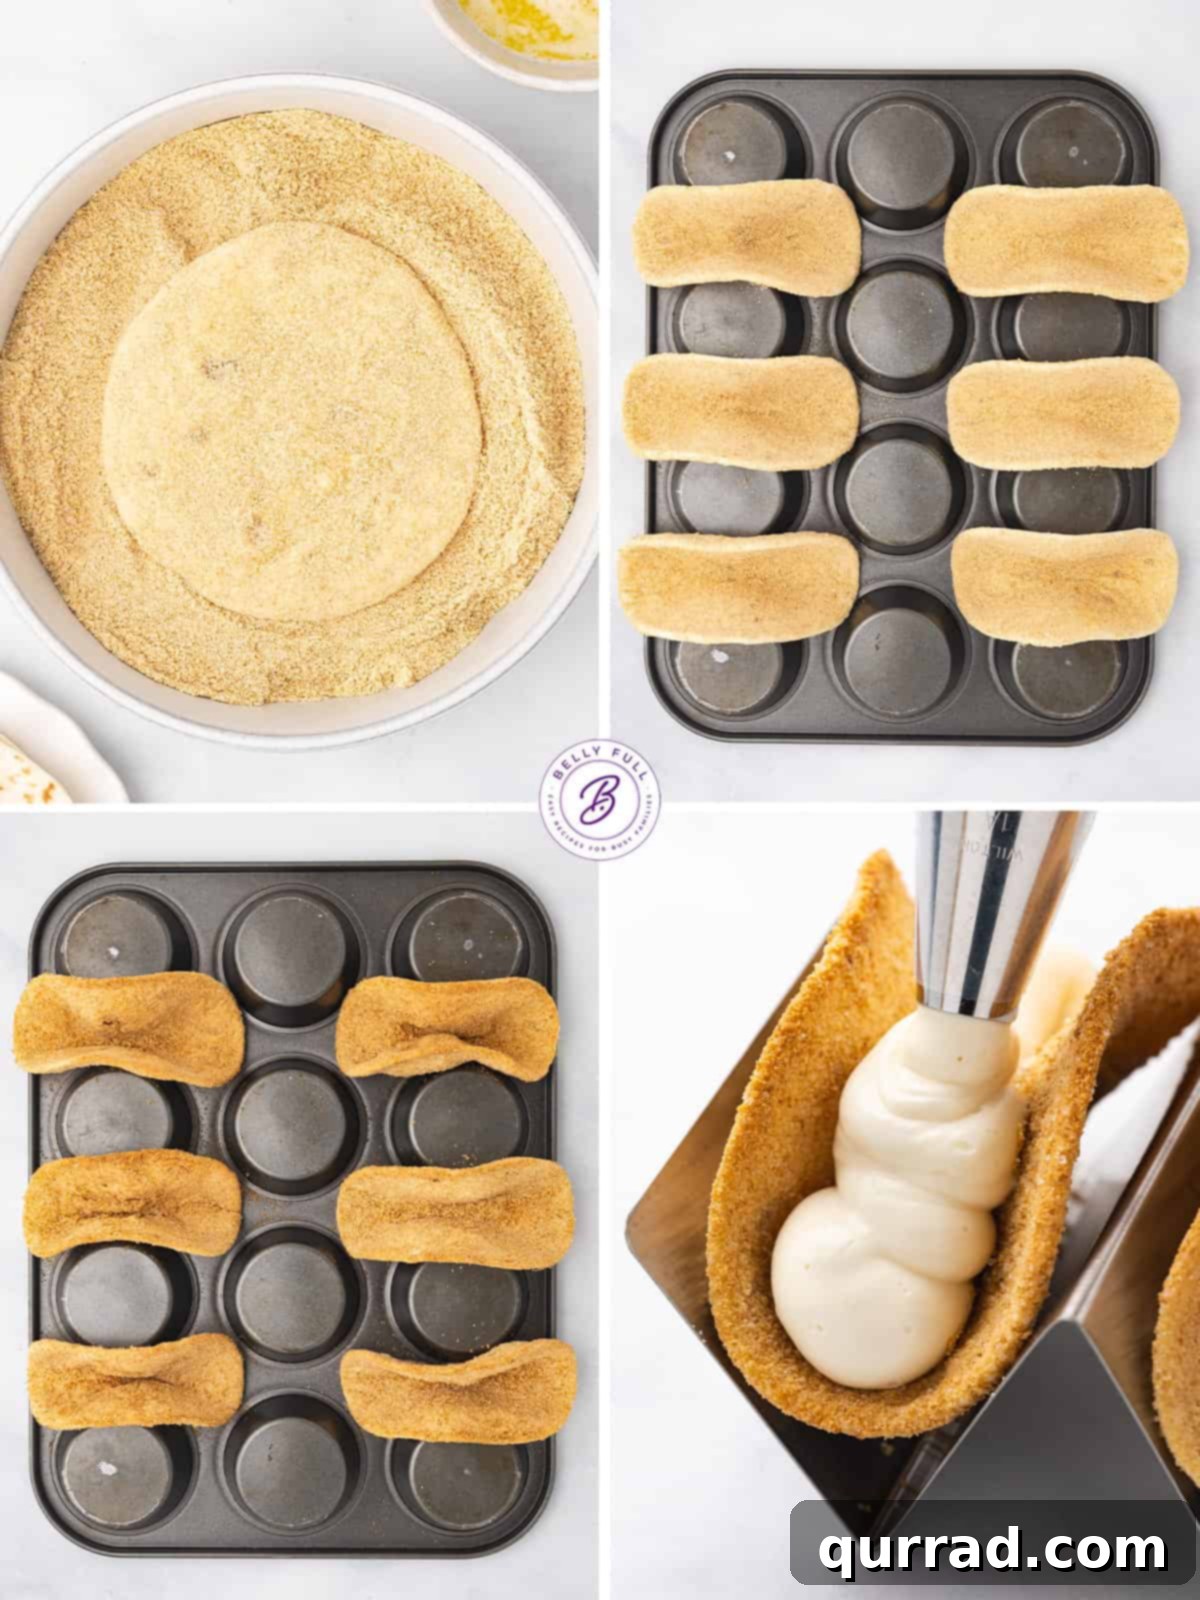
- Coat and Prep Tortillas: Lay a small flour tortilla on a plate. Using a pastry brush, liberally brush both sides of the tortilla with melted butter, ensuring it’s fully coated. Immediately place the buttered tortilla into the graham cracker and sugar mixture, pressing gently to coat both sides completely. Repeat this for all tortillas. Once coated, use a fork to carefully poke several holes across the surface of each tortilla. This crucial step prevents the tortillas from puffing up excessively and ensures they retain their taco shape during baking.
- Bake the Shells to Perfection: Turn a muffin tin upside down. Carefully drape each coated and poked tortilla between the slots of the inverted muffin tin. This clever trick allows them to bake into perfect taco shell shapes. Bake in the preheated oven for 10-12 minutes, or until the tortillas are golden brown and wonderfully crisp. Keep a close eye on them to prevent burning, as ovens can vary. Once baked, remove them from the oven and transfer them to a wire rack to cool completely. It’s vital that the shells are fully cooled before filling, as any residual warmth will melt the delicate cream cheese mixture.
- Craft the Silky Cream Cheese Filling: While your taco shells are cooling, start on the filling. In a large mixing bowl, beat the softened cream cheese with an electric mixer until it is completely smooth and free of any lumps. This may take a couple of minutes. Next, add the powdered sugar and vanilla extract to the cream cheese. Continue beating until the mixture is well combined, light, and creamy. Set this aside.
- Whip the Heavy Cream: In a separate, chilled bowl, pour in the cold heavy whipping cream. Using clean beaters, beat the heavy cream on medium-high speed until stiff peaks form. This means when you lift the beaters, the cream should hold its shape firmly. Be careful not to overbeat, or it might turn grainy.
- Fold the Filling Together: Gently add the whipped cream to the cream cheese mixture. Using a rubber spatula, carefully fold the two mixtures together until just combined. The goal is to retain as much air as possible from the whipped cream, resulting in a light and airy cheesecake filling. Avoid overmixing.
- Assemble Your Masterpieces: Transfer the prepared cheesecake mixture into a piping bag fitted with either a round or a star-tip nozzle. This allows for neat and professional-looking filling. Carefully pipe the cream cheese mixture into each cooled taco shell, filling it about halfway. Finally, top each filled taco with a generous dollop of the luscious cherry pie filling. Serve your Cherry Cheesecake Tacos immediately and savor every sweet, tart, creamy, and crunchy bite!
Expert Tips & Exciting Variations for Your Dessert Tacos
Elevate your Cherry Cheesecake Tacos experience with these helpful tips and creative variations:
- Don’t Skip Poking Holes: This seemingly small step is critical! Poking small holes in your tortillas with a fork before baking prevents them from puffing up into balloons. It allows steam to escape, ensuring your shells bake into that perfectly crisp, flat, and taco-shaped form, ready to hold all that delicious filling.
- Embrace Fruitful Creativity: While cherry is a classic, these dessert tacos are a fantastic canvas for other fruit flavors. Swap out the cherry pie filling for blueberry, strawberry, peach, apple, or even a mixed berry compote. For a tropical twist, try pineapple or mango curd. The possibilities are endless, allowing you to tailor this dessert to seasonal fruits or personal preferences.
- Indulge in Chocolate Cheesecake Filling: For chocolate lovers, a simple addition can transform the filling. Gently fold a tablespoon or two of unsweetened cocoa powder into the cream cheese mixture along with the powdered sugar and vanilla. Adjust to your desired level of chocolate intensity. You could even add a few mini chocolate chips to the filling for extra texture.
- Ensure Tortillas are Completely Cool: Patience is a virtue, especially when it comes to these tacos. After baking, allow your graham cracker-coated tortilla shells to cool completely on a wire rack. If the shells are still warm when you pipe in the cream cheese filling, it will begin to melt, resulting in a runny, messy dessert. Cooling them fully ensures a firm, stable shell and a perfectly set filling.
- The Colder, The Better for Heavy Cream: For guaranteed success when whipping heavy cream, ensure it is as cold as possible. Chilled cream whips up faster and achieves much stiffer, more stable peaks. Keep your heavy cream in the refrigerator right until you’re ready to use it, and if possible, chill your mixing bowl and whisk attachments for 10-15 minutes beforehand. This extra step makes a big difference in the texture of your filling.
- Garnish for Extra Flair: A sprinkle of fresh mint leaves, a dusting of powdered sugar, a few chocolate shavings, or even a dollop of extra whipped cream can add an elegant touch and enhance the visual appeal of your tacos.
- Consider a Different Shell: While flour tortillas work wonderfully, you could also experiment with crispy waffle cone bowls or even thin, baked crepes for a different texture profile.
Video: Crafting Cherry Cheesecake Tacos
Watch this video to see how easily these incredible Cherry Cheesecake Tacos come together, step by step!
Can These Be Prepared in Advance? Storage Suggestions
While the individual components of these Cherry Cheesecake Tacos can certainly be prepped ahead of time, we highly recommend assembling and serving them immediately for the very best experience. The delicate balance of textures and flavors is at its peak when fresh. The sweet, crunchy graham cracker-coated tortillas are at their crispiest just after baking and cooling. Once filled, the moisture from the cream cheese filling will gradually begin to soften the tortilla shells, diminishing their delightful crunch.
However, if you need to do some prep work to save time:
- Tortilla Shells: You can bake the graham cracker-coated tortilla shells a few hours in advance. Allow them to cool completely, then store them uncovered at room temperature to maintain their crispness. Humidity is their enemy!
- Cheesecake Filling: The cream cheese filling can be prepared up to 24 hours in advance. Store it in an airtight container in the refrigerator. When you’re ready to assemble, give it a quick whisk to loosen it slightly if needed, then transfer it to your piping bag.
- Cherry Pie Filling: Store-bought or homemade cherry pie filling can be kept in the refrigerator in an airtight container for several days.
To ensure maximum freshness and the perfect textural contrast, assemble the tacos just before serving. This way, every bite promises that irresistible blend of sweet, tart, creamy, and crunchy.
Explore More Irresistible Cheesecake Desserts
If you’re a true cheesecake aficionado, you’ll love these other fantastic and easy-to-make cheesecake-inspired treats:
- Cheesecake Stuffed Strawberries: Fresh strawberries brimming with a light and creamy cheesecake filling – a perfect bite-sized delight.
- Sopapilla Cheesecake: A warm, comforting dessert combining the flaky goodness of sopapillas with a rich cheesecake layer, often drizzled with honey.
- Oreo Cheesecake: The ultimate indulgence for cookie lovers, featuring a crushed Oreo crust and a creamy cheesecake studded with more Oreo pieces.
- Mini Turtle Cheesecakes: Individual cheesecakes boasting a decadent combination of chocolate, caramel, and pecans.
- Lemon Cheesecake Mousse: A light, airy, and refreshingly tangy dessert that captures the bright flavors of lemon in a cloud-like mousse.
Cherry Cheesecake Tacos
Prep Time: 15 mins
Cook Time: 12 mins
Total Time: 27 mins
Servings: 6 tacos

These Cherry Cheesecake Tacos are the perfect balance of sweet, tart, creamy, and crunchy. Made with tortillas coated in sugar and graham cracker crumbs, cherry pie filling, and a simple cream cheese mixture, they’re quick, easy, fun, and super delicious!
Ingredients
FOR THE TACO SHELLS
- 6 small flour tortillas (4 to 5-inch street tacos)
- 1/4 cup melted butter
- 1 1/2 cups graham cracker crumbs
- 2 tablespoons granulated sugar
FOR THE CHERRY CHEESECAKE FILLING
- 8 ounces cream cheese, softened to room temperature
- 1/2 cup powdered sugar
- 1 teaspoon vanilla extract
- 1/2 cup cold heavy whipping cream
FOR THE CHERRY PIE TOPPING
- 1 cup cherry pie filling (homemade or store-bought)
Instructions
- Preheat the oven to 350 degrees Fahrenheit (175°C).
- In a shallow bowl, mix graham cracker crumbs and granulated sugar until well combined.
- Place a flour tortilla on a plate, and brush both sides with melted butter. Coat both sides of each tortilla with the graham cracker/sugar mix, pressing gently to adhere. Then poke several holes on the surface of the tortillas with a fork to prevent puffing while baking.
- Carefully place each tortilla between the slots of an upside-down muffin tin, shaping them into taco shell forms.
- Bake in the preheated oven for 10-12 minutes or until golden brown and crisp. Remove from the oven and allow to cool completely on a wire rack.
- In a large mixing bowl, beat the softened cream cheese until smooth and creamy. Add the powdered sugar and vanilla extract, and beat until well combined. Set aside.
- In a separate, chilled bowl, add the cold heavy cream and beat until stiff peaks are reached.
- Add the whipped cream to the cream cheese mixture and fold together gently using a spatula until just combined.
- Transfer the cheesecake mixture to a piping bag fitted with a round or star tip nozzle. Pipe the cream cheese mixture into each cooled taco shell, filling them about halfway. Top with a generous dollop of the cherry pie filling. Serve immediately and enjoy!
Video
Notes
- Use your favorite pie filling: Feel free to swap the cherry pie filling for blueberry, strawberry, lemon, apple, or any other fruit filling you prefer. Get creative with your flavors!
- Make chocolate cheesecake filling: For a delicious chocolate twist, add 1-2 tablespoons of unsweetened cocoa powder to the cream cheese filling along with the powdered sugar.
- These are best served immediately: For optimal crispness of the shells and freshness of the filling, these tacos are best enjoyed right after assembly. The sugar-coated tortillas will not stay crisp for too long, and the filling will start to soften the tortilla over time.
- Ensure ingredients are correct temperature: For the cheesecake filling, make sure cream cheese is at room temperature for a smooth consistency, and heavy cream is very cold to achieve stiff peaks.
Nutrition
Calories: 550 kcal |
Carbohydrates: 59 g |
Protein: 7 g |
Fat: 32 g |
Saturated Fat: 18 g |
Polyunsaturated Fat: 2 g |
Monounsaturated Fat: 8 g |
Trans Fat: 0.3 g |
Cholesterol: 81 mg |
Sodium: 551 mg |
Potassium: 188 mg |
Fiber: 2 g |
Sugar: 22 g |
Vitamin A: 1116 IU |
Vitamin C: 2 mg |
Calcium: 117 mg |
Iron: 2 mg
Nutritional information provided is an automatic calculation and can vary based on the exact products you use and any changes you make to the recipe. If these numbers are very important to you, we recommend calculating them yourself using your specific ingredients.
We truly hope you enjoy making and devouring this delightful and easy recipe! Please consider leaving a review below to share your experience. And don’t forget to connect with us and explore more delicious recipes by following Belly Full on TikTok, Facebook, Instagram, Pinterest, and YouTube!