
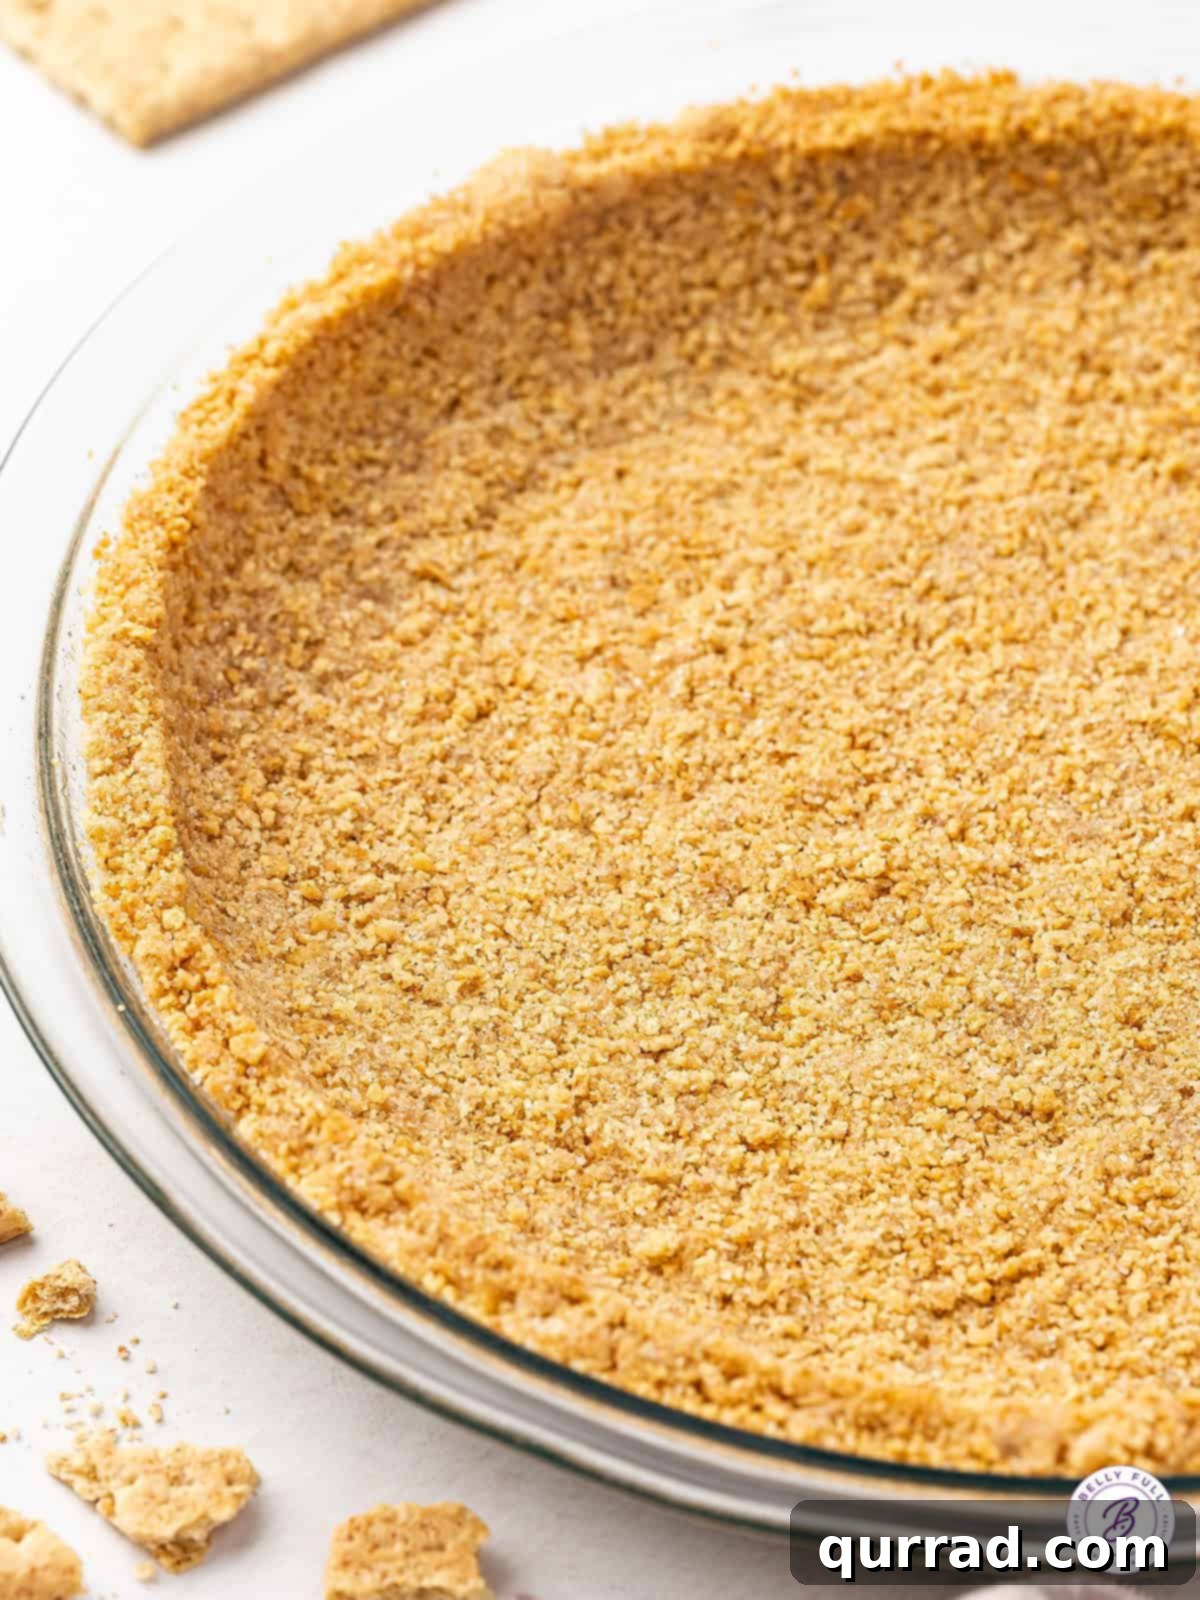
Unlock the secret to perfect desserts with this incredibly easy and utterly delicious Homemade Graham Cracker Crust. Forget those store-bought, often bland and stale alternatives; our recipe promises a buttery, sweet, and perfectly crumbly foundation that holds its shape beautifully every time. Requiring just three simple ingredients and minimal effort, this foolproof crust is your go-to solution for an array of baked or no-bake pies, creamy cheesecakes, and delightful tarts. Once you experience the superior flavor and texture of a crust made from scratch, you’ll wonder why you ever settled for anything less.
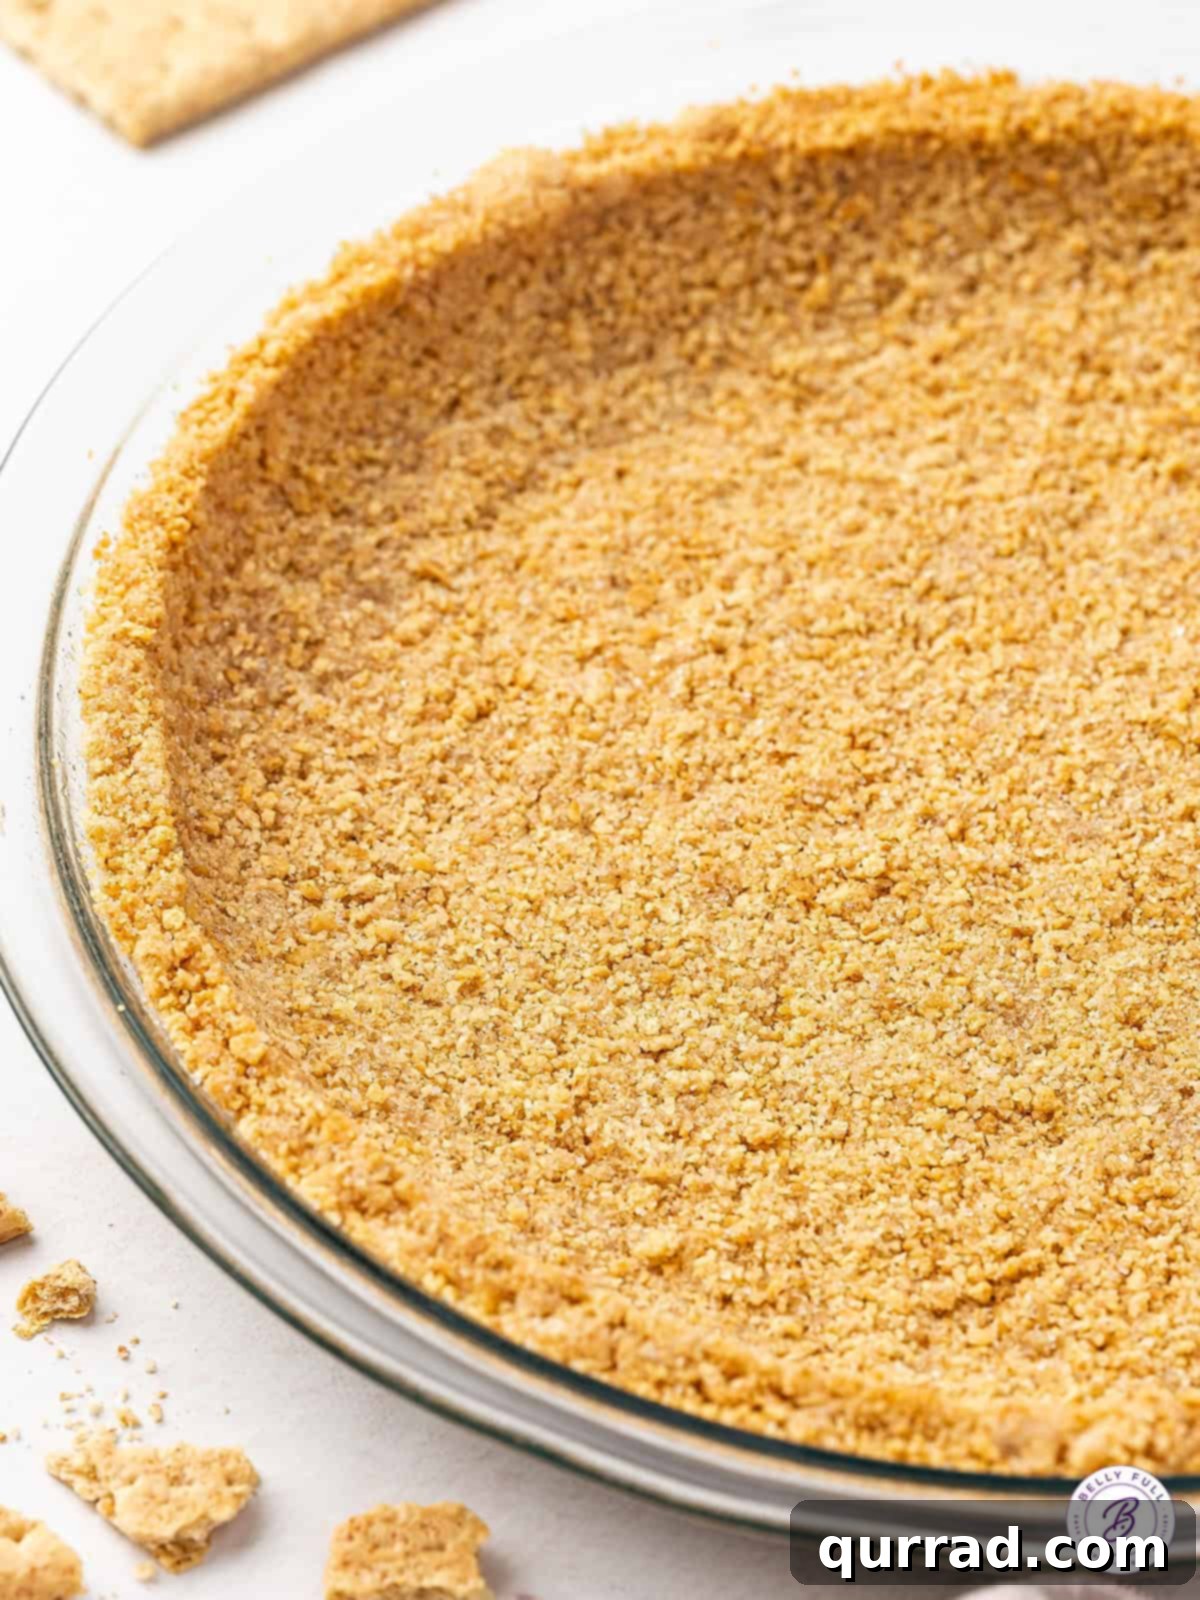
Why Homemade Graham Cracker Crust is Always Best
While the thought of making a traditional pie crust might seem daunting with its requirements for precise measurements, chilling times, and blind baking, a graham cracker crust is a completely different story. It’s incredibly forgiving and straightforward, demanding no complicated rolling or intricate techniques. This simplicity is precisely why it’s a favorite among home bakers and a fantastic entry point for those new to pie making.
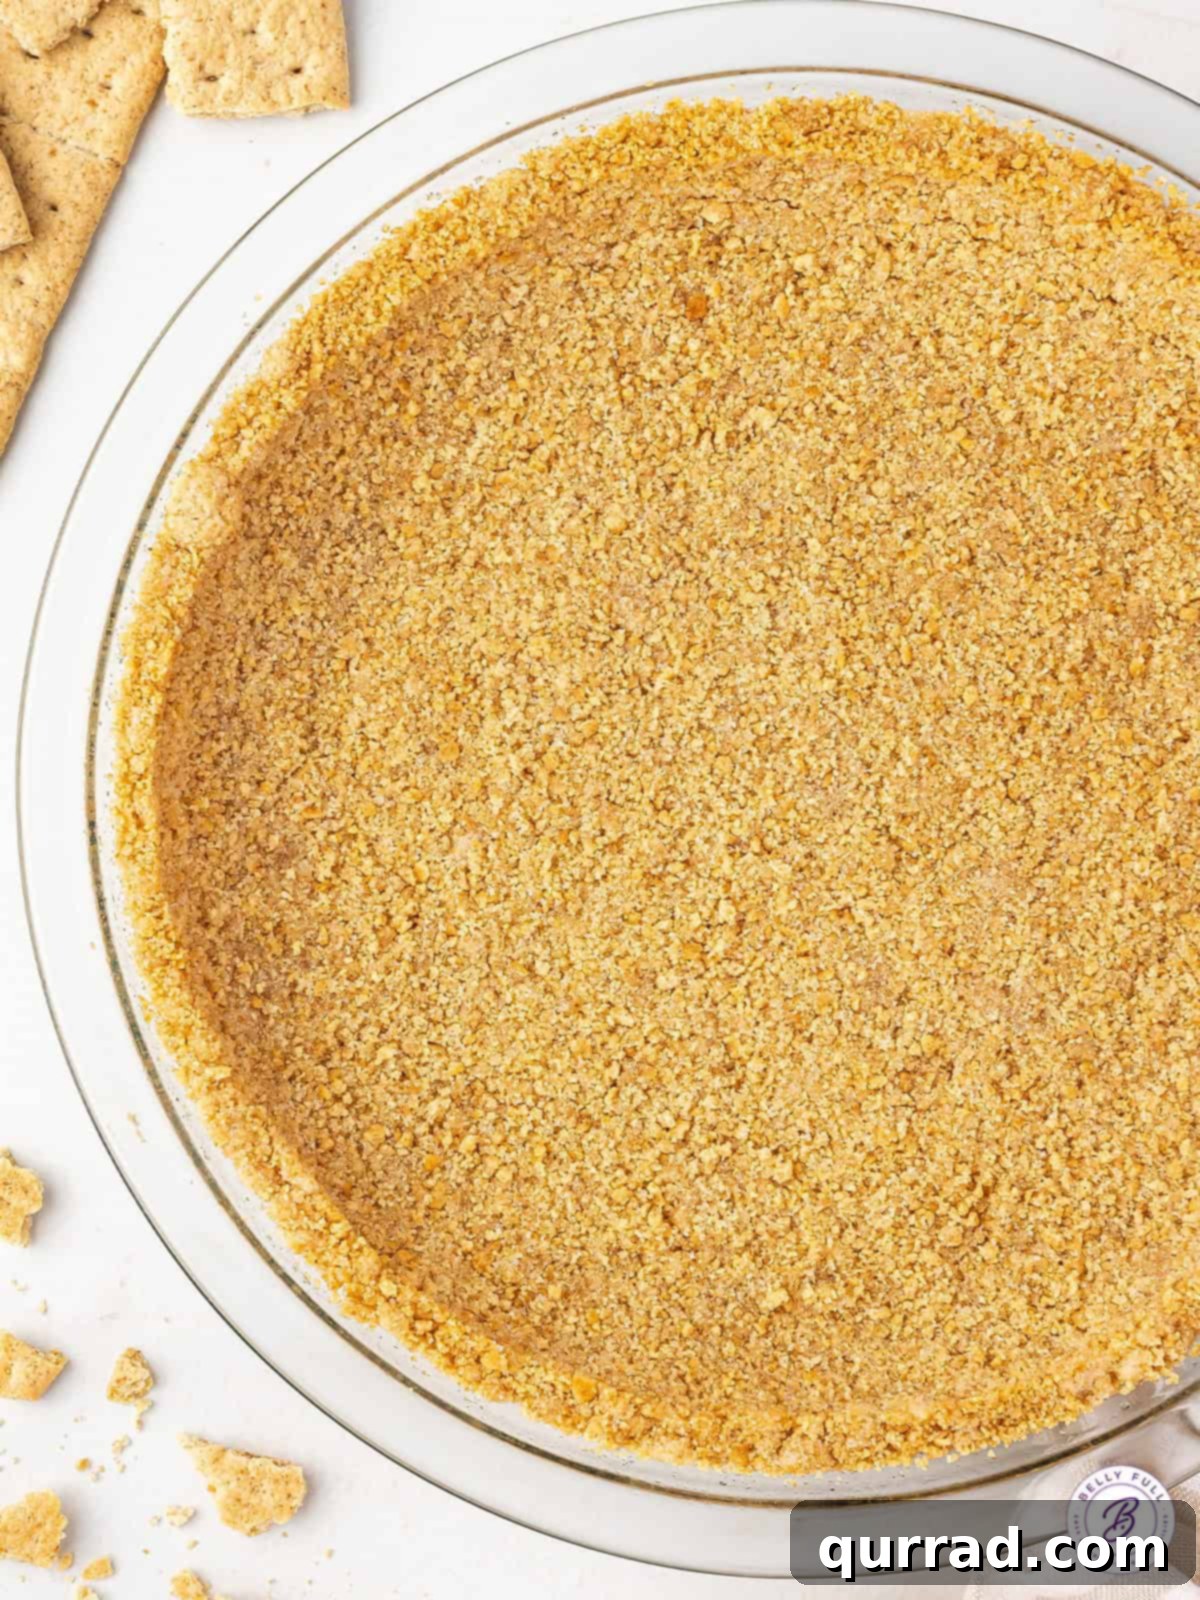
You might be tempted by the convenience of a pre-made graham cracker crust from the grocery store. However, these often fall short in both flavor and texture. They can be disappointingly stale, lacking the rich, fresh taste that truly elevates a dessert. Our homemade graham cracker pie crust, on the other hand, delivers an unparalleled experience. It boasts a perfect balance of sweetness and buttery richness, a delightful golden hue, and a slightly crumbly yet firm texture that consistently holds its shape. The best part? It takes a mere 5 minutes to prepare and just a few minutes in the oven, making it a quick and rewarding endeavor.
In this comprehensive guide, we’ll walk you through the simple three-step process to create a perfect graham cracker crust, complete with expert tips to ensure flawless results every time. Armed with this knowledge, you’ll be ready to craft an endless array of delicious desserts, from luscious fruit pies and tarts to creamy custard pies and decadent cheesecakes.
Essential Ingredients for Your Graham Cracker Crust
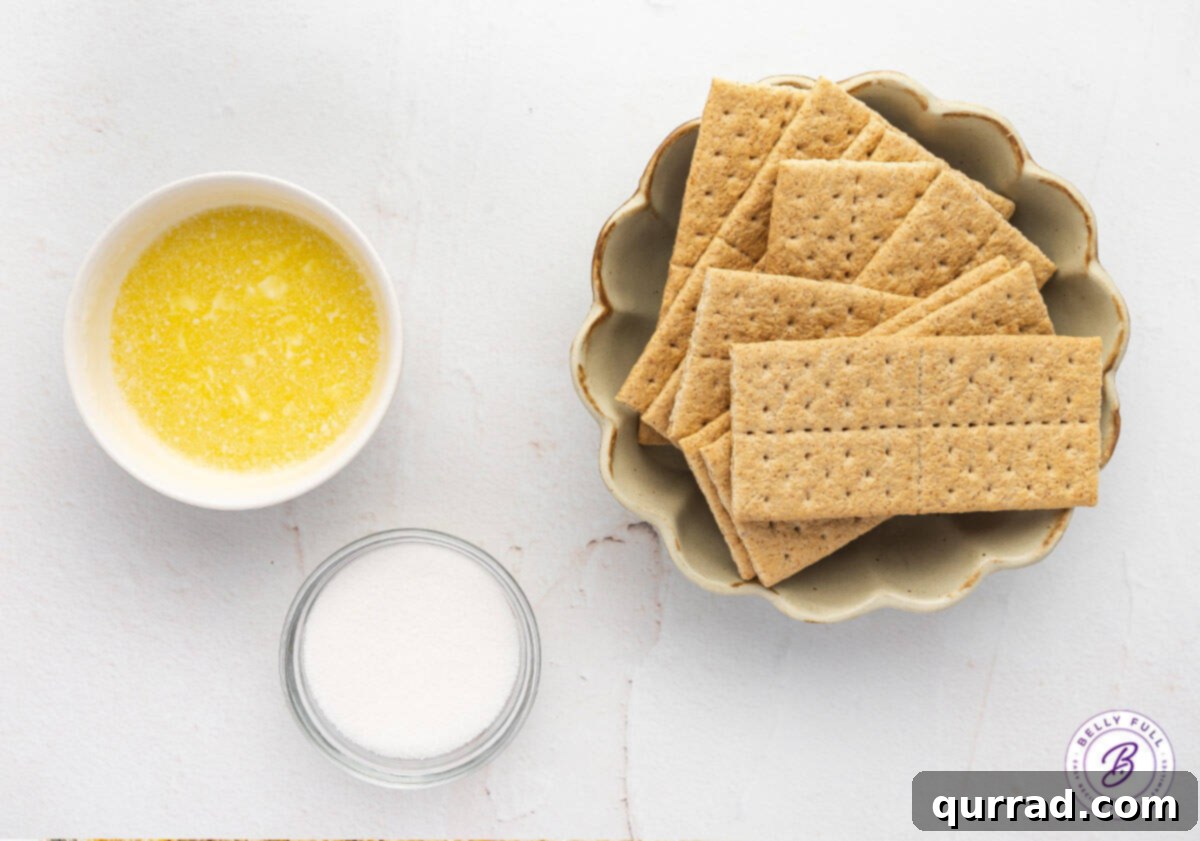
Creating a truly remarkable homemade graham cracker crust requires surprisingly few ingredients – just three staples, in fact! The quality of these components is key to achieving that perfect balance of flavor and structure. You’ll find the precise measurements detailed in the recipe card below.
- Graham Crackers: These are, naturally, the star of our crust! You’ll need approximately 10 to 12 full sheets of graham crackers to yield 1½ cups of fine crumbs. While you can purchase pre-crushed graham cracker crumbs in the baking aisle, making your own ensures optimal freshness and texture. Crushing them yourself also gives you control over the fineness of the crumbs, which is crucial for a well-bound crust.
- Butter: Melted butter is indispensable, serving multiple critical roles. It imparts a rich, decadent flavor and, most importantly, provides the necessary moisture to bind the graham cracker crumbs together, allowing the crust to hold its shape during baking and cooling. We highly recommend using regular salted butter, as the hint of salt perfectly balances the sweetness of the crackers and sugar, creating a more complex flavor profile. If you opt for unsalted butter, be sure to add a generous pinch of fine salt to your mixture to achieve a similar delicious equilibrium.
- Granulated Sugar: A small amount of granulated sugar enhances the overall sweetness and contributes to the golden-brown crispness of the baked crust. Beyond its sweetening properties, sugar also plays a vital role in binding. It helps the melted butter adhere to the graham cracker crumbs, ensuring a cohesive and stable crust. Since graham crackers are inherently sweet, we use a modest amount of added sugar to avoid an overly saccharine result. Feel free to adjust the quantity slightly to suit your personal taste preferences.
Exciting Variations to Elevate Your Crust
While the classic graham cracker crust is undeniably delicious, don’t hesitate to experiment with these simple variations to tailor it to your specific dessert or culinary mood. Each tweak can introduce a wonderful new dimension of flavor and texture:
- Explore Different Graham Cracker Flavors: Beyond the traditional honey graham crackers, many brands offer cinnamon and, if you’re lucky, chocolate varieties. Any of these will work beautifully in this recipe. A chocolate graham cracker crust, for instance, is absolutely divine when paired with chocolate-based desserts or contrasting fruit fillings. For the best consistency and flavor, we often recommend Nabisco Honey Maid brand crackers, known for their sturdy texture.
- Substitute with Other Cookies: If graham crackers aren’t readily available or you simply prefer a different flavor profile, this recipe is incredibly versatile. Vanilla wafer cookies (like Nilla wafers) make an excellent substitute, offering a delicate vanilla flavor. You could also try finely crushed ginger snaps for a spicy kick, chocolate wafers for an intense chocolate base, or even shortbread cookies for a richer, buttery foundation.
- Infuse with Warm Spices: For a cozy, aromatic touch, mix in ½ teaspoon of ground cinnamon with your crumbs and sugar. Nutmeg, cardamom, or a pumpkin pie spice blend would also be fantastic additions, especially for fall-inspired desserts like pumpkin pie or apple crisp.
- Adjust the Sweetness: This recipe calls for ¼ cup of granulated sugar, which provides a balanced sweetness. However, if your filling is particularly sweet or you prefer a less sugary crust, you can easily reduce the granulated sugar to just 2 tablespoons without compromising the crust’s integrity.
- Incorporate Brown Sugar: Swapping a portion or all of the granulated sugar with light brown sugar can add a wonderfully rich, caramel-like depth of flavor to your crust. Brown sugar also contributes to a slightly softer, chewier texture, making it a fantastic option for many desserts.
- Add Citrus Zest: For a bright, zesty aroma, finely grate the zest of half a lemon, lime, or orange into your crumb mixture. This is particularly delightful when making key lime pie or lemon tarts.
- Mix in Finely Ground Nuts: For an extra layer of flavor and crunch, incorporate 2-3 tablespoons of finely ground pecans, walnuts, or almonds into your graham cracker crumbs. This adds a sophisticated touch and complements a wide range of dessert fillings.
How to Master Your Homemade Graham Cracker Crust
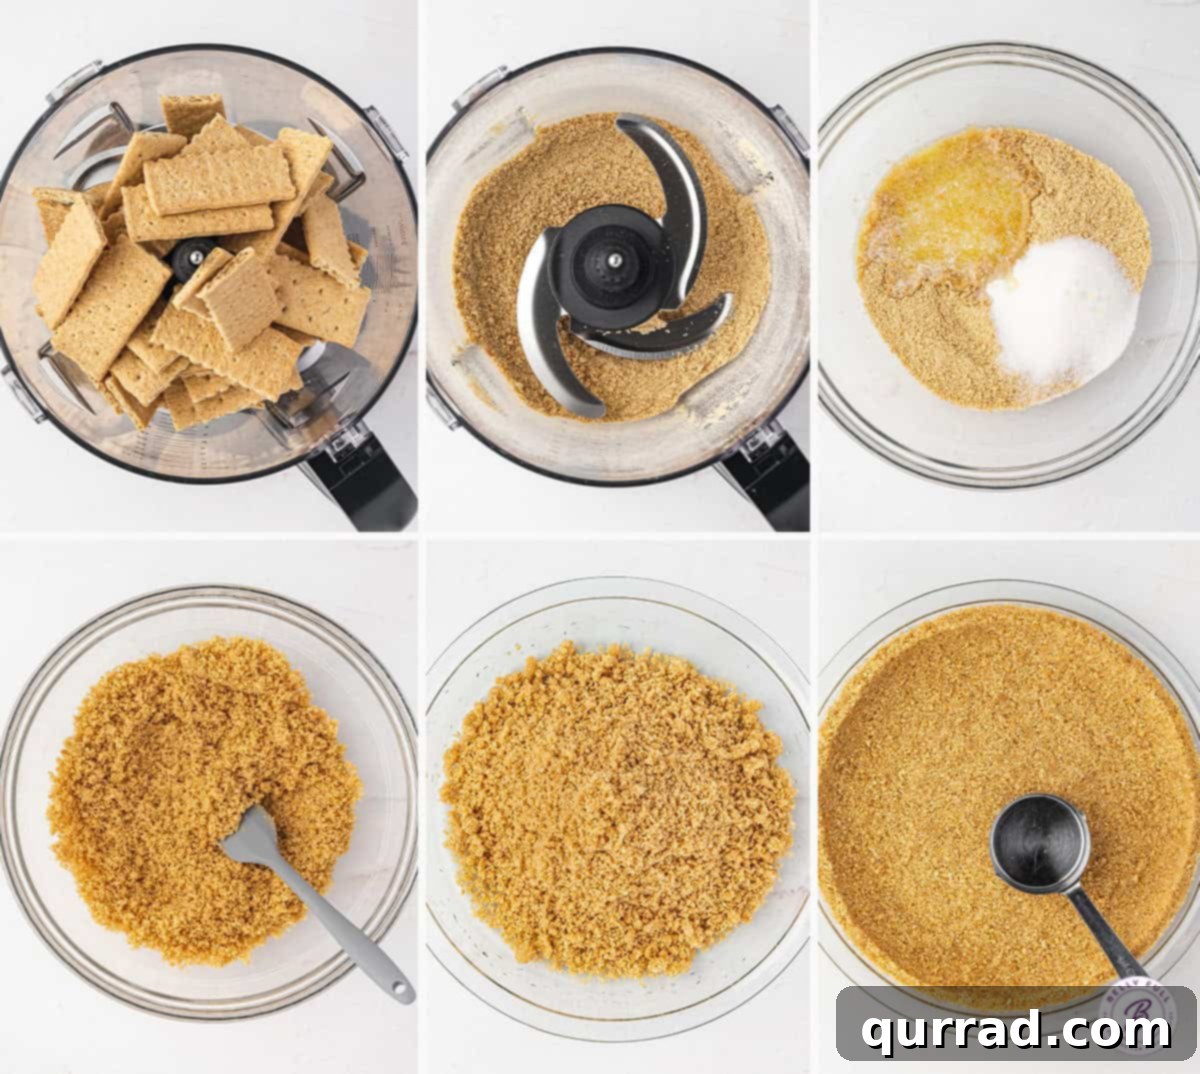
Making this graham cracker crust is a breeze, requiring minimal effort for results that are truly 100% worth it. The process is straightforward: combine your three simple ingredients, press the mixture firmly into your chosen pan, give it a quick bake to set, and then allow it to cool completely before filling. For a detailed, printable version of the complete instructions, refer to the recipe card conveniently located below.
Step-by-Step Guide to Perfection:
- Prepare Your Crackers: Begin by finely crushing your graham crackers. You can achieve this using a food processor for the quickest and most consistent results, pulsing until the crackers resemble coarse sand. Alternatively, place them in a sturdy Ziploc bag and crush them with a rolling pin or the bottom of a heavy glass. The key is to achieve a uniform, fine crumb.
- Combine Ingredients: In a medium-sized bowl, thoroughly combine the finely crushed graham cracker crumbs, melted butter, and granulated sugar. Mix well until all the crumbs are evenly moistened and coated by the butter and sugar. The mixture should clump together when pressed.
- Press into Pan: Pour the crumb mixture into a 9-inch pie plate or springform pan. Start by using your hands to gently but firmly press the mixture across the bottom of the pan, working your way up the sides. Once the base is established, use the bottom of a small, flat-bottomed measuring cup or a sturdy glass to evenly and compactly press the crumbs into place. Apply firm pressure, but avoid pressing so hard that the crust becomes dense or rock-like after baking. Pay special attention to the edges and corners. Finally, use the back of a spoon to round out and smooth the seam where the bottom and sides meet, ensuring a seamless and sturdy connection that prevents crumbling when sliced.
- Bake (or Chill): Follow the baking instructions below based on your dessert type, or simply chill for a no-bake option.
To Bake or Not to Bake? Understanding Your Crust Options
The question of whether to bake your graham cracker crust often depends on the type of dessert you’re preparing and your desired texture. While a no-bake crust is an option, we strongly recommend a quick bake for several compelling reasons. Baking the crust not only helps it to hold together more securely, preventing crumbling when served, but it also deepens the overall flavor of the graham crackers and butter, creating a richer, more toasted taste.
The optimal bake time will vary slightly depending on your final dessert:
- For Baked Fillings: If you plan to use your crust for a dessert that will be baked again with a cooked filling, such as a fruit pie, bake the crust at 350°F (175°C) for 10 minutes. This pre-bake helps set the crust without over-browning it during the second bake.
- For No-Bake Fillings: For desserts that require no further baking, like cold cream or pudding fillings, or a no-bake cheesecake, bake the crust at 350°F (175°C) for 12-14 minutes. This slightly longer bake time ensures a sturdier, crispier crust that is ready to support your filling.
Important: Regardless of whether you pre-bake for a filling or bake fully for a no-bake dessert, it is absolutely crucial that the crust cools completely before you add any filling. Filling a warm crust will result in a soggy bottom, undermining all your hard work.
No-Bake Option: If you absolutely prefer a no-bake crust, or if your recipe specifically calls for it, you can simply chill the pressed crust in the refrigerator for at least 1 hour (or up to several hours) before filling. While this method will make the crust hold together, it won’t offer the same depth of flavor or crispness as a baked crust. Always defer to the instructions of the specific dessert recipe you are following.
Expert Tips for a Foolproof Graham Cracker Crust
Achieving a perfect graham cracker crust is simple when you follow these key tips:
- Choose the Right Graham Crackers: While any brand of graham crackers will technically work, for the best results, we highly recommend using Nabisco Honey Maid brand. In our experience, Nabisco crackers possess a sturdier and crisper texture compared to many generic store brands. This results in a crust that feels less mushy and holds its structure better once combined with butter and baked. However, if Nabisco isn’t available, feel free to use your preferred brand – the core technique remains the same.
- Ensure Accurate Crumb Measurement: This is a crucial step! Due to variations in manufacturing, the size and weight of graham cracker sheets can differ. Historically, 10 full sheets would yield about 1½ cups of crumbs, but now it can take 11 or even 12 sheets, depending on the brand and package. The exact count is less important than the final volume. Aim for precisely 1½ cups of finely crushed graham cracker crumbs. To achieve this, you can crush them in a sturdy Ziploc bag using a rolling pin, but for the most uniform and finest crumbs, a food processor or blender is ideal. The consistency should resemble coarse sand, without large chunks.
- Consider Your Pie Pan Depth: This recipe yields enough mixture for one standard 9-inch pie crust. However, pie pan depths can vary significantly. If your pie pan is particularly shallow, you might find yourself with a small amount of leftover crumbs. Don’t discard them! These can be refrigerated or frozen for future use as a delicious crumble topping for yogurt, ice cream, or another dessert. If you’re baking a larger dessert, such as a 9×13-inch pan, we recommend increasing this recipe by 1.5 times (multiply all ingredients by 1.5) to ensure sufficient coverage and thickness.
- Achieve the Perfect Pack: The way you pack the crumbs is paramount to a stable crust. When you first combine the ingredients, the mixture will appear crumbly and loose. As you begin pressing it into the pie pan, it will start to cohere. Initially, use your hands to apply gentle, even pressure to cover the bottom and sides. Once a base is formed, switch to a small, flat-bottomed measuring cup or a sturdy glass. Use this tool to firmly pack the crumbs, smoothing out the surface and defining the shape. The goal is a compact crust that is sturdy enough to hold its form but not overly dense or hard after baking. A trick to ensure the bottom and sides remain connected and strong is to gently slide the back of a spoon around the inner seam where they meet, rounding it out. This prevents separation and crumbling when you slice your dessert.
- Don’t Let the Butter Solidify: The melted butter is essential for binding. If you allow the crumb mixture to cool too much before pressing it into the pan, the butter will start to solidify. This can prevent the crumbs from adhering properly, making the crust crumbly and difficult to compact. Work relatively quickly once the butter is incorporated, or gently re-warm the mixture if it sits for too long.
Troubleshooting Common Graham Cracker Crust Issues
Even with the simplest recipes, challenges can arise. Here are solutions to common graham cracker crust problems:
My Graham Cracker Crust is Falling Apart!
If your crust isn’t holding together, assuming you’ve followed the ingredient measurements, the culprit is almost always in the packing technique or temperature. The mixture needs to be **firmly packed** into the bottom and up the sides of your pie or springform pan. Don’t be shy with applying pressure, especially with a flat-bottomed measuring cup. Another common issue is that the crumb mixture may have cooled too much before you pressed it into the pan. As melted butter cools, it solidifies. If the butter is too cold, it won’t effectively bind the crumbs, leading to a loose, crumbly crust. If this happens, you can try gently warming the mixture slightly to re-melt the butter before re-pressing.
My Crust is Too Hard/Dense!
While firm packing is essential, excessive force can result in a crust that’s rock-hard and difficult to cut after baking. Apply steady, even pressure, but avoid compacting it to an extreme. The goal is a cohesive crust that still has a slight give.
My Crust is Soggy!
A soggy crust typically occurs if it wasn’t baked (when it should have been) or if a wet filling was added before the crust had completely cooled. Always ensure your crust is thoroughly cooled to room temperature before adding any cold or no-bake fillings. For baked fillings, a pre-bake helps, but don’t overfill with excessively watery ingredients.
Delightful Ways to Use Your Graham Cracker Crust
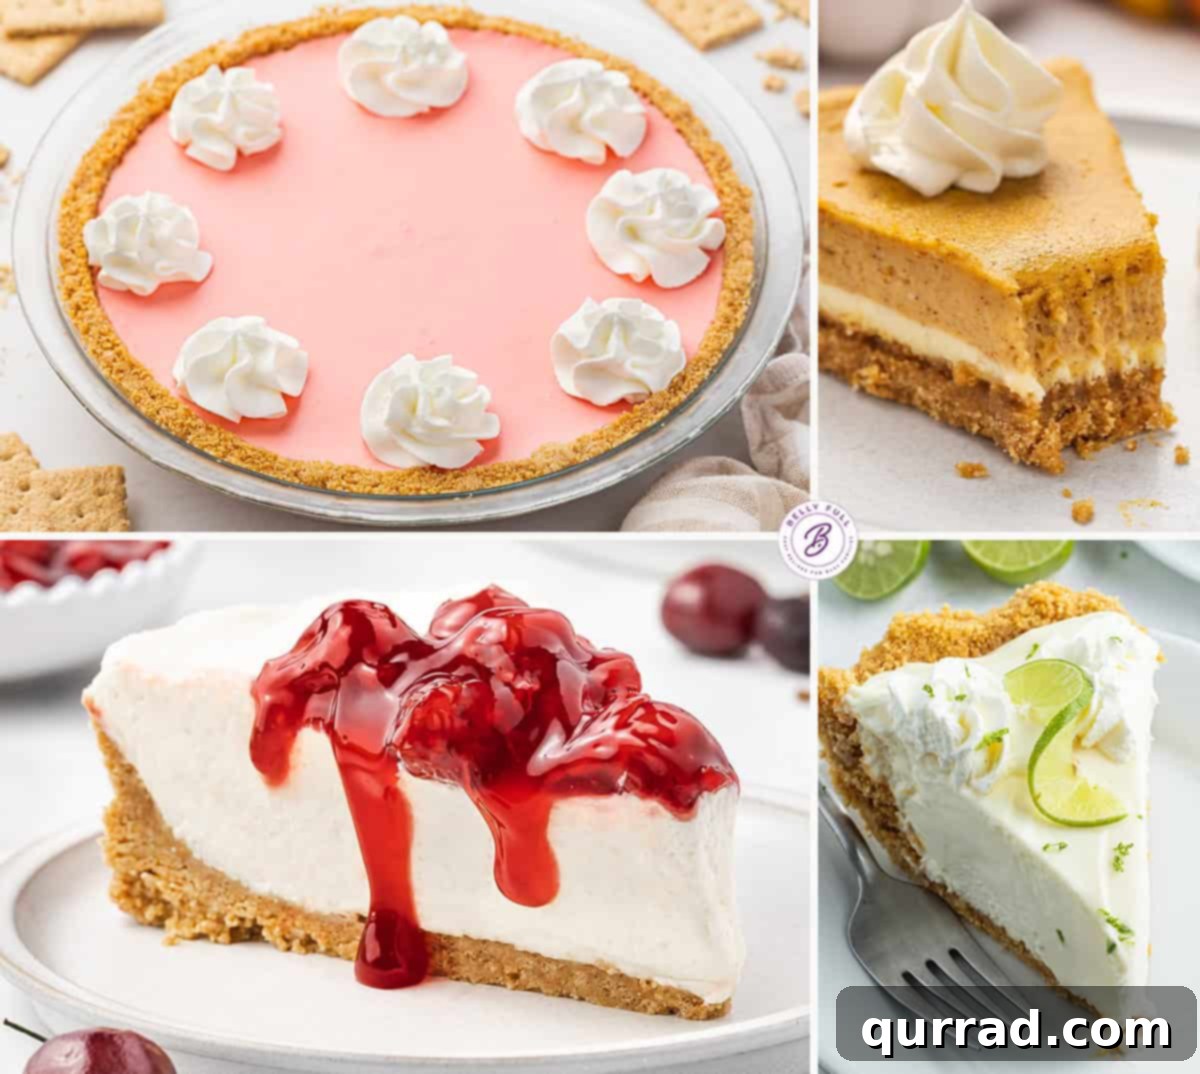
Once you’ve mastered this versatile homemade graham cracker crust, a world of dessert possibilities opens up! Put your freshly baked (or chilled!) crust to spectacular use with a myriad of recipes:
- Cheesecakes: Graham cracker crusts are practically synonymous with cheesecakes. They provide the perfect sturdy and sweet counterpoint to rich, creamy fillings. Try our festive layered pumpkin cheesecake, an ideal showstopper for Thanksgiving or any fall gathering. For warmer weather, our easy no-bake cherry cheesecake or vibrant no-bake apple cheesecake will be absolute crowd-pleasers.
- Pies and Tarts: From creamy chocolate pies to refreshing fruit tarts, this crust serves as a fantastic base. Don’t miss our incredibly simple 6-ingredient no-bake key lime pie, a burst of citrusy sunshine.
- No-Bake Desserts: For those days you want a quick treat without turning on the oven, this crust is your best friend. Our whimsical no-bake jello pie is a fun and colorful option that kids and adults alike adore.
- Individual Servings: Instead of a large pie, press the crumb mixture into muffin tins lined with paper liners for adorable mini cheesecakes or tarts. Perfect for portion control and elegant presentation.
- Dessert Bars: Use this crust as the base for various dessert bars, from lemon bars to chocolate peanut butter bars. Simply press into a square or rectangular baking pan.
- Custard and Pudding Desserts: Any dessert featuring a creamy custard or pudding filling will be beautifully complemented by the sweet, crumbly texture of a graham cracker crust.
Proper Storage for Your Graham Cracker Crust
Preparing your graham cracker crust in advance is a fantastic time-saver. Here’s how to store it properly:
- Refrigerator Storage: If you’re not planning to use your prepared crust immediately, allow it to cool completely to room temperature after baking. Once cooled, cover the pie pan tightly with plastic wrap to prevent it from absorbing refrigerator odors and to maintain freshness. Stored this way, an unfilled baked crust will keep beautifully in the fridge for up to 3 days, ready to be filled when you are.
- Freezer Storage: For longer storage, this crust freezes exceptionally well. Once completely cooled, leave the crust in its pie pan. Tightly wrap the entire pan, first in aluminum foil, and then, if possible, place it inside a large freezer-safe plastic bag. This double layer of protection helps prevent freezer burn. The crust can be kept in the freezer for up to 3 months. When you’re ready to use it, simply thaw the frozen crust in the refrigerator overnight before proceeding with your recipe.
I genuinely hope you cherish this easy and delightful graham cracker crust recipe. It’s a foundational skill that will enhance countless desserts! Please take a moment to leave a review below and share your experience. Don’t forget to follow Belly Full on TikTok, Instagram, Facebook, Pinterest, and YouTube for more culinary inspiration!
Graham Cracker Crust
5
10
15
8
people (1, 9-inch pie shell)
Pin
Ingredients
-
10 to 12
full sheet Graham crackers,
(you need 1 ½ cups of crumbs) -
6
tablespoons
salted butter,
melted -
1/4
cup
granulated sugar
Instructions
-
Preheat the oven to 350 degrees F (175°C).
-
(If making your own crumbs, the number of full sheets will depend on the brand, since manufacturers have changed their size and weights.) Break apart the graham cracker sheets into a food processor or blender. Pulse until a fine, crumbly mixture forms (the consistency of coarse sand.) You should have 1 ½ cups of crumbs. Pulse more sheets, if necessary.
-
In a medium bowl, combine the graham cracker crumbs, butter, and sugar until well combined.
-
Pour the crumb mixture into a 9-inch pie pan. Starting with your hands, apply gentle pressure until the crumbs aren’t loose anymore. Then using a small flat-bottomed measuring cup, pack the crumbs in more (but not too hard or your crust will be dense), smoothing out the surface and to set the shape. The crust needs to be compact but not so tight that it’s hard after baking. Finally, slide a spoon around where the bottom and sides meet, keeping it rounded so it all stays connected and won’t crumble when you go to slice it.
-
Bake for 10 minutes, then let cool completely.
-
Use right away for your favorite pies or store for later.
Notes
Nutrition
Calories:
174
kcal
|
Carbohydrates:
20
g
|
Protein:
1
g
|
Fat:
10
g
|
Saturated Fat:
6
g
|
Polyunsaturated Fat:
0.4
g
|
Monounsaturated Fat:
3
g
|
Trans Fat:
0.3
g
|
Cholesterol:
23
mg
|
Sodium:
183
mg
|
Potassium:
34
mg
|
Fiber:
1
g
|
Sugar:
10
g
|
Vitamin A:
262
IU
|
Calcium:
16
mg
|
Iron:
1
mg
Nutritional information given is an automatic calculation and can vary based on the exact products you use and any changes you make to the recipe. If these numbers are very important to you, I would recommend calculating them yourself.
Did you make this? Leave a rating below!