
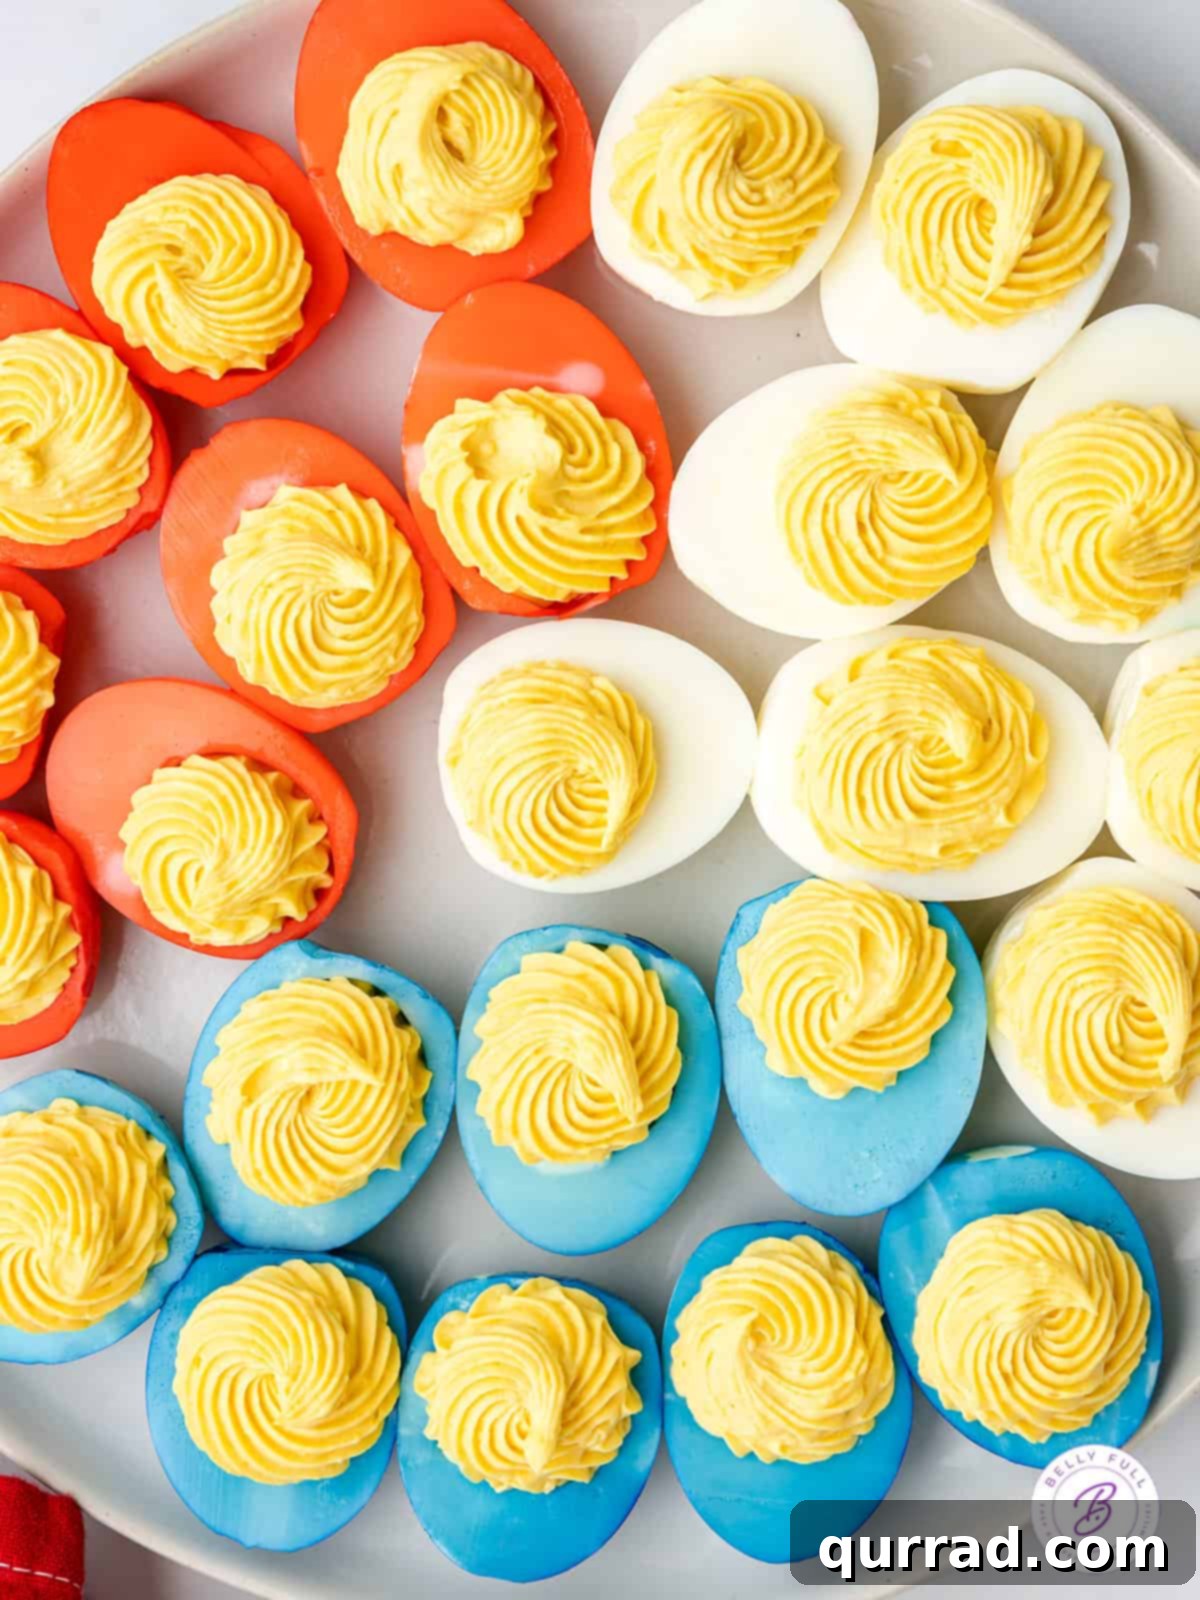
Elevate your holiday celebrations with these vibrant and incredibly delicious Red, White, and Blue Deviled Eggs. Tender, creamy, and visually stunning, these patriotic appetizers are simple to make and guaranteed to be the star of any party, especially for the 4th of July!
Planning a festive gathering? Explore more crowd-pleasing appetizers that your guests will adore, such as our refreshing Cucumber Sandwiches, savory Chicken Salad Pinwheels, and delightfully sweet Sugared Prosecco Grapes. Each recipe offers a unique blend of flavors and textures, perfect for complementing your patriotic deviled eggs.
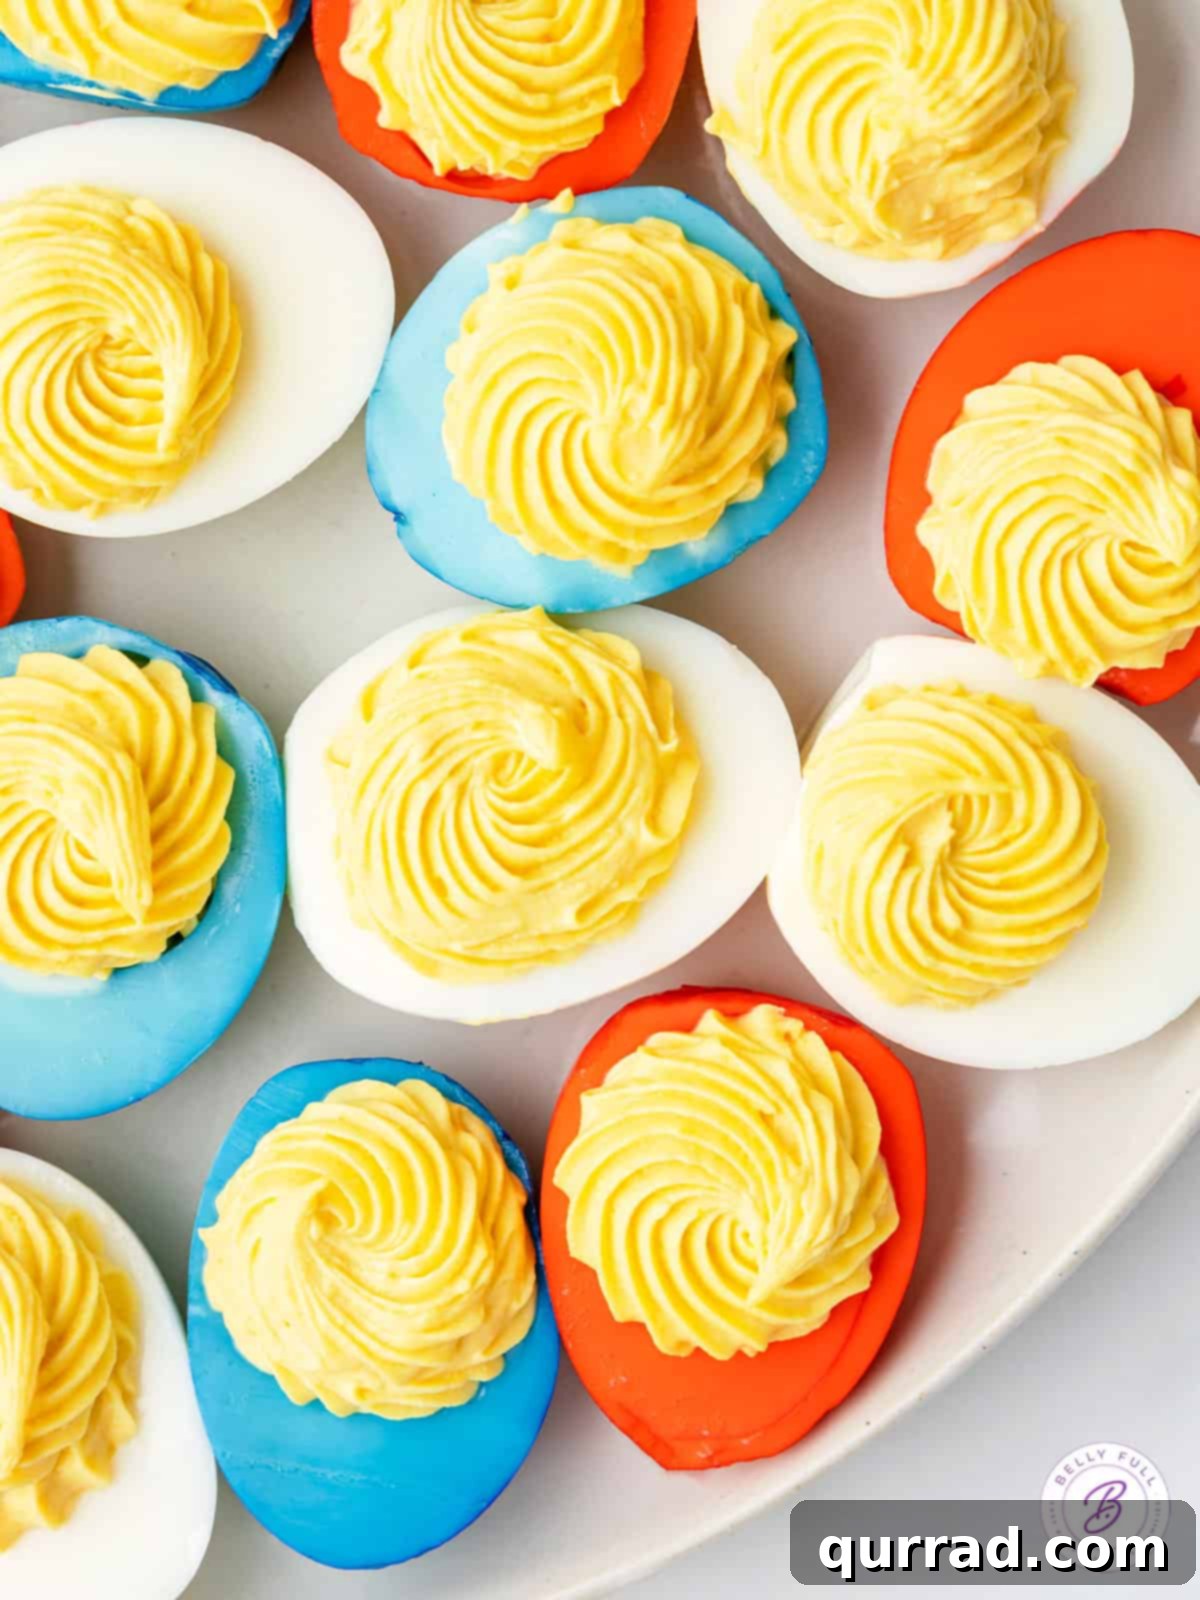
Red, White, and Blue Deviled Eggs: The Ultimate Patriotic Appetizer
Ah, deviled eggs – a culinary classic that transcends occasions, gracing tables at parties, holidays, brunches, and casual get-togethers. They are that quintessential, perfect little bite that consistently delights guests and earns rave reviews. What’s not to love about a creamy, tangy filling nestled within a perfectly cooked egg white?
Understanding the Classic: What Exactly Are Deviled Eggs?
For those new to this delightful appetizer, deviled eggs are essentially hard-boiled eggs that have been halved, with their rich yolks carefully scooped out. The magic happens next: these yolks are then mashed and blended with a symphony of simple yet potent ingredients. Typically, this includes creamy mayonnaise for richness, zesty mustard for a piquant kick, a splash of vinegar for brightness, and a careful blend of seasonings to bring everything together. This luscious mixture is then artfully spooned or piped back into the hollowed-out egg white shells, creating a treat that is both sweet and tangy, utterly creamy, and undeniably amazing. They represent comfort food at its finest, offering a satisfying bite that prepares the palate for more.
A Festive Twist: Why Red, White, and Blue?
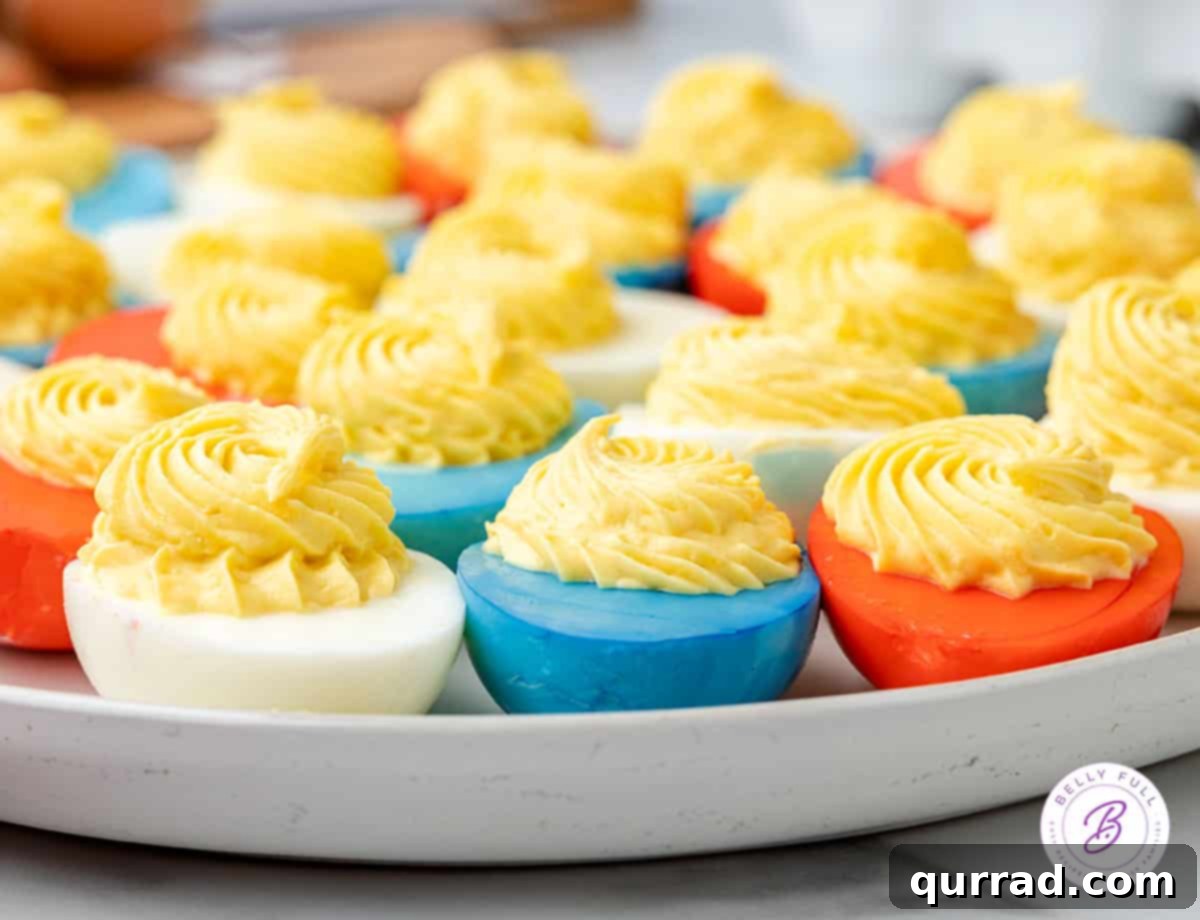
While classic deviled eggs are always a hit, this recipe takes our tried-and-true perfect hard-boiled eggs and our beloved classic deviled eggs recipe and infuses them with a spectacular patriotic flair. By carefully dyeing some of the egg whites red and blue, we transform a traditional snack into a vibrant celebration of colors – perfect for the 4th of July, Memorial Day, Labor Day, or any occasion where you want to show off your national pride. The visual impact alone makes these colored deviled eggs a conversation starter and a feast for the eyes, promising a fun and festive addition to your spread. They are more than just food; they are an edible expression of celebration!
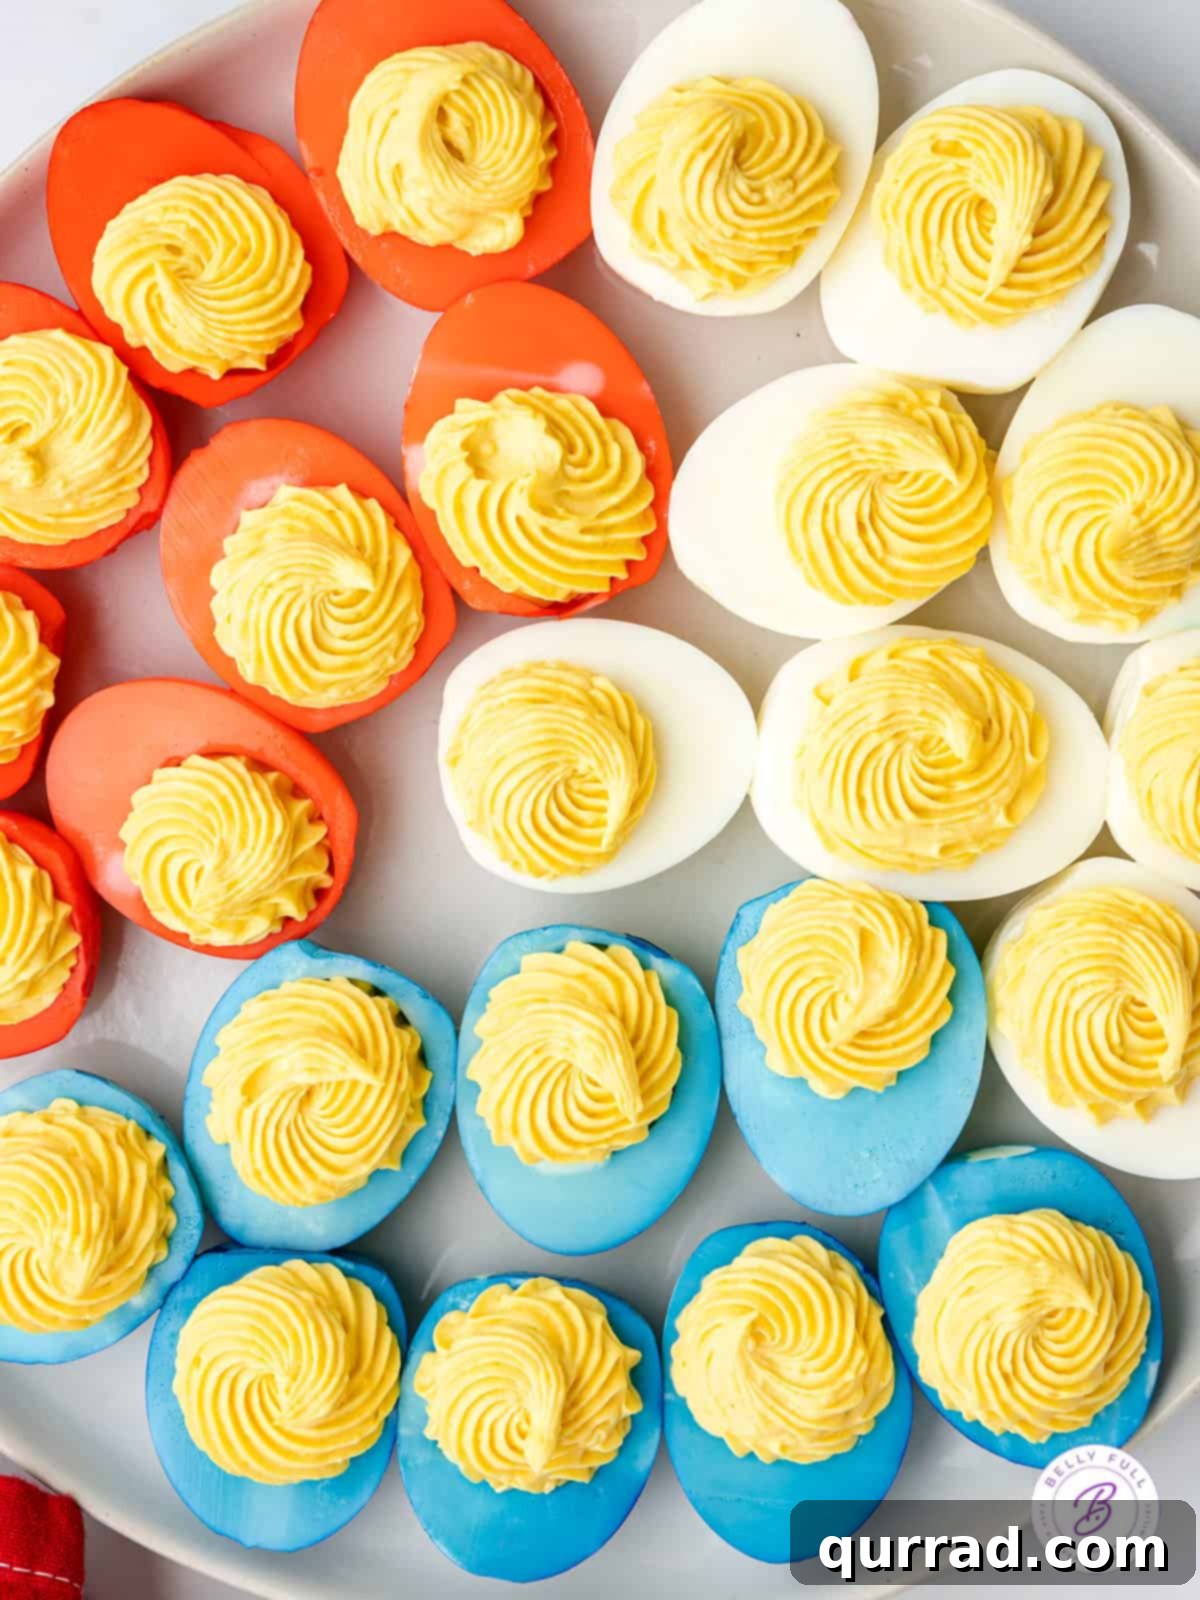
Essential Ingredients for Your Vibrant Deviled Eggs
The beauty of deviled eggs lies in their versatility; while the filling can accommodate numerous mix-ins, you simply can’t go wrong with the time-honored classic flavors. To create these captivating red, white, and blue deviled eggs, you’ll need a selection of fresh, high-quality ingredients that contribute to both taste and visual appeal. Below is a comprehensive list of what you’ll need, along with insights into their roles in creating the perfect bite.
- Large Eggs: The foundation of our recipe. Fresh eggs are great for taste, but eggs that are a week or two old can be easier to peel, making your prep smoother.
- Mayonnaise: This is what gives the filling its signature creamy texture and rich flavor. Choose a good quality mayonnaise for the best results.
- Mustard: Adds a crucial tangy, slightly pungent note that balances the richness of the mayonnaise and yolks. Yellow mustard is classic, but Dijon can add a more sophisticated touch.
- Kosher Salt, Black Pepper, and Cayenne Pepper: These seasonings are vital for enhancing the overall flavor profile. Kosher salt provides a clean salinity, black pepper adds a subtle warmth, and a pinch of cayenne pepper introduces a very mild, delightful heat that awakens the palate without overwhelming it.
- Pickle Relish (Dill or Sweet): While optional, pickle relish is highly recommended. It contributes a wonderful textural element and a burst of sweet or tangy flavor that complements the creamy filling beautifully, adding depth and complexity.
- Smoked Paprika: Primarily used for dusting, smoked paprika not only adds a beautiful reddish-brown color as a garnish but also imparts a subtle smoky aroma that enhances the egg’s natural flavors.
- Water and Vinegar: These two ingredients are crucial for creating the dyeing solution for your egg whites. The vinegar helps the food coloring adhere better and more evenly to the egg whites.
- Red and Blue Food Coloring: Essential for achieving the patriotic hues. Gel food coloring is often preferred over liquid dyes as it provides more intense color with fewer drops, minimizing additional moisture.
Each ingredient plays a specific role, contributing to the overall balance of flavor, texture, and visual appeal of these festive deviled eggs. Don’t be afraid to taste and adjust the seasonings to your preference as you prepare the filling!
Step-by-Step Guide: Crafting Your Festive Deviled Eggs
This beloved appetizer is surprisingly simple to create, requiring only a few straightforward steps. The process is broken down to ensure perfect results every time, from achieving ideal hard-boiled eggs to adding the final patriotic flourish. Here’s a detailed summary of how to make these show-stopping Red, White, and Blue Deviled Eggs:
- Achieving Perfect Hard-Boiled Eggs:
Start by preparing 12 large hard-boiled eggs. Gently place the eggs in a single layer at the bottom of a medium pot. Fill the pot with cold water, ensuring the eggs are covered by at least 1-2 inches of water. Bring the water to a rolling boil over high heat. Once it reaches a vigorous boil, immediately turn off the heat, remove the pot from the burner, cover it tightly, and let the eggs sit undisturbed for exactly 12 minutes. This method helps prevent overcooking and the dreaded green ring around the yolk.
Immediately after 12 minutes, use a slotted spoon to transfer the eggs to a large bowl filled with ice water. Allow them to cool until they are just slightly warm to the touch, which usually takes about 4-5 minutes. This rapid cooling halts the cooking process, makes the eggs easier to peel, and helps achieve that tender texture.
When the eggs are cool, gently tap each egg on the countertop to create small cracks all over its surface. Roll the eggs between your hands to further loosen the shell. For easiest peeling, hold the egg under cold running water and start peeling from the large end where the air pocket is typically located. The running water helps to separate the shell from the egg white, resulting in smooth, beautiful halves.
- Crafting the Creamy Yolk Filling:
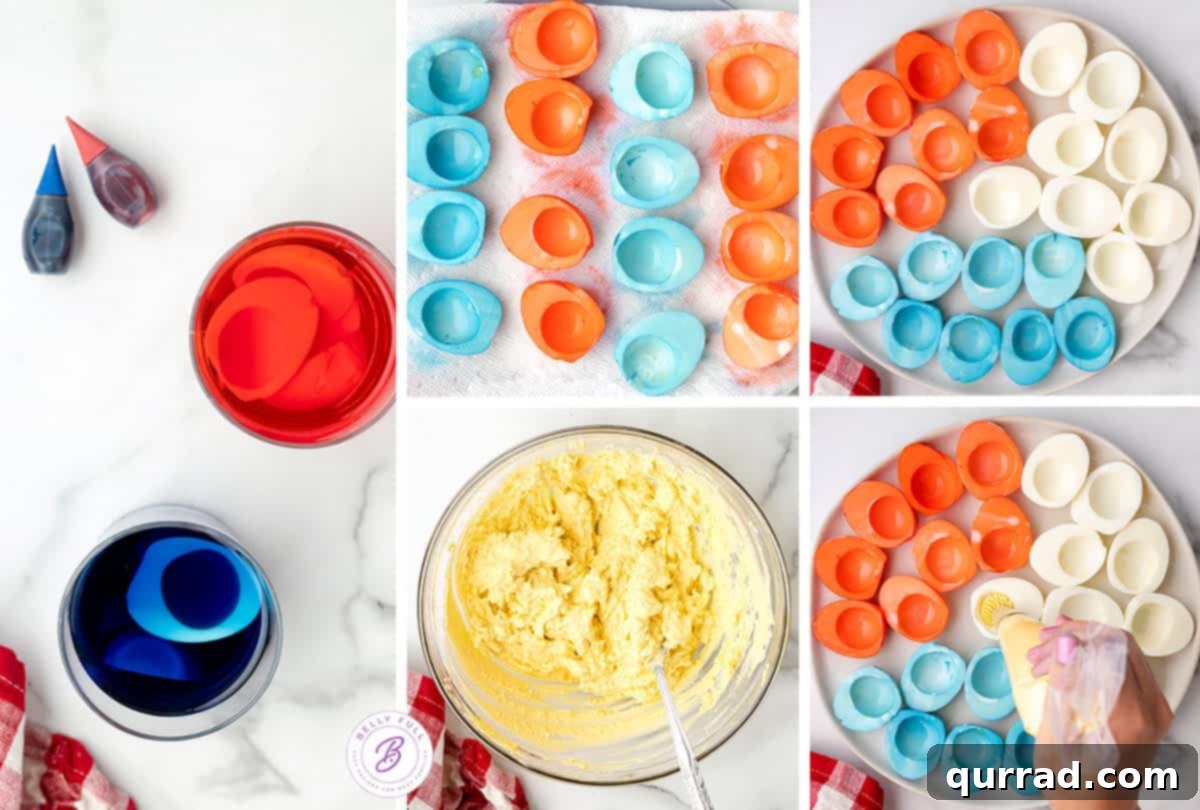
Carefully slice each peeled hard-boiled egg in half lengthwise. Gently scoop out the cooked yolks and place them into a medium mixing bowl. Place the hollowed egg white halves aside. Using a fork, mash the yolks thoroughly until they resemble very fine, uniform crumbs. This ensures a smooth filling. Add the mayonnaise, mustard, pickle relish (if you’re using it), kosher salt, black pepper, and a pinch of cayenne pepper to the mashed yolks. Mix everything together with the fork or a small spatula until the mixture is completely smooth and creamy, with no lumps remaining. For easy piping, spoon the mixture into a plastic ziploc bag, pushing all the filling towards one corner. Set this aside.
- Dyeing the Egg Whites to Perfection:
To create your patriotic colors, divide the 2 cups of water and 2 tablespoons of vinegar into two separate cups. In one cup, add 10-15 drops of blue food coloring. In the second cup, add 20-25 drops of red food coloring. Stir each mixture well to ensure the color is fully dissolved and even. For a striking display, you’ll want 8 red, 8 blue, and 8 white egg white halves (from the 12 eggs, you get 24 halves). Drop 4 egg white halves into each cup of dye. Allow them to sit in the dye for about 1 minute, or longer if you desire a deeper, more intense color. The vinegar helps the color adhere brilliantly. Once your desired color is achieved, carefully remove the colored egg whites with a slotted spoon and place them on a plate lined with paper towels to dry. Repeat this process with 4 more egg whites for each color, leaving 8 of the egg whites undyed for the “white” portion of your display.
- Piping the Filling for a Professional Touch:
Once your egg whites are ready and dried, retrieve the ziploc bag containing the creamy egg yolk mixture. Snip off a small piece from one corner of the bag. This creates a makeshift piping bag. Evenly pipe the rich yolk mixture back into each hollowed-out egg white half – red, white, and blue. Aim for an elegant swirl or a smooth mound, making sure each half is generously filled.
- Garnish and Serve:
For an extra touch of flavor and visual appeal, lightly sprinkle the tops of the filled deviled eggs with smoked paprika, if desired. The paprika adds a subtle smokiness and a beautiful contrast. Arrange your vibrant Red, White, and Blue Deviled Eggs on a platter and serve immediately. Enjoy the oohs and aahs from your delighted guests!
Expert Tips for the Best Deviled Eggs
To ensure your deviled eggs are always a smashing success, consider these expert tips that go beyond the basic instructions:
- Choose the Right Eggs: While fresh eggs are delicious, eggs that are a week or two old tend to peel much more easily after hard-boiling. This can save you a lot of frustration and result in prettier egg white halves.
- Don’t Overcook: Overcooked eggs develop a greenish-gray ring around the yolk, which indicates a reaction between iron in the yolk and sulfur in the white. This doesn’t affect taste significantly, but it’s less appealing. Follow the recommended hard-boiling method precisely.
- Cool Quickly: Transferring eggs immediately to an ice bath after cooking is crucial. It stops the cooking process instantly, preventing that green ring, and makes peeling considerably easier.
- Season to Taste: The amount of mayonnaise, mustard, and seasonings can be adjusted to your personal preference. Taste the yolk mixture before piping and adjust salt, pepper, mustard, or relish as needed. Some people like a sweeter filling, others prefer more tang.
- Piping Bag for Presentation: While a ziploc bag works wonderfully, a professional piping bag with a star tip will give your deviled eggs a more elegant, decorative finish. This can significantly enhance their visual appeal, especially for special occasions.
- Use Gel Food Coloring: Gel food coloring provides a more intense color with fewer drops compared to liquid food coloring, which means less added moisture to your dyeing solution. This helps maintain the integrity of the egg whites.
Make-Ahead Strategies and Storage Tips
Deviled eggs are a fantastic make-ahead appetizer, but a little strategic planning can ensure they taste their freshest and look their best when served. Here’s how to manage preparation and storage:
- Preparing Ahead: Deviled eggs can be prepared 1-2 days in advance, though for optimal freshness and texture, it’s best not to assemble them until closer to serving time. Prepare your hard-boiled egg white halves and the yolk mixture separately. Wrap the egg white halves well in plastic wrap to prevent them from drying out and to avoid any accidental color bleeding if you’ve dyed them. Store the yolk mixture in an airtight container. Keep both components refrigerated. When you’re ready to serve, simply pipe the filling into the egg white halves. This last-minute assembly takes very little time and ensures the eggs are at their peak.
- Optimal Storage: Once assembled, deviled eggs should be consumed within 2 days. Always keep them refrigerated in an airtight container. Exposure to air can dry out the filling and cause the egg whites to become rubbery.
- Safe Transportation: If you’re bringing deviled eggs to a potluck or party, a specialized deviled egg tray is a lifesaver. These trays have individual indentations that keep the eggs from sliding around, getting messy, or being crushed during transport. If you don’t have a specific tray, you can carefully arrange them in a single layer in a container, separating layers with parchment paper, and transporting them in a cooler with ice packs to maintain a safe temperature.
Flavor Variations to Explore
Beyond the classic, and even the patriotic, deviled eggs offer a canvas for endless flavor creativity. Once you’ve mastered the basic technique, feel free to experiment with these exciting variations to keep things interesting:
- Classic Enhancements: Add finely minced celery or red onion for crunch, or a touch of horseradish for a subtle kick. A sprinkle of crumbled cooked bacon or chives on top can also elevate the flavor profile.
- Spicy Kick: Introduce heat by mixing in a dash of hot sauce (like Sriracha), a pinch of chili powder, or finely diced jalapeños to the yolk mixture. Garnish with a thin slice of jalapeño for visual appeal.
- Herbaceous Delights: Incorporate fresh herbs like dill, chives, parsley, or tarragon for a bright, garden-fresh flavor. These pair beautifully with the creamy egg base.
- Creamy Avocado: For a twist, mash a quarter of an avocado into the yolk mixture. This adds a beautiful green hue and an extra layer of creaminess and healthy fats. A squeeze of lime juice will keep the avocado from browning.
- Smoked Salmon: For a gourmet touch, fold in finely chopped smoked salmon into the yolk mixture or top each deviled egg with a small piece of smoked salmon and a sprig of dill.
Frequently Asked Questions (FAQs) About Deviled Eggs
Here are some common questions people ask about making and serving deviled eggs:
- How do I prevent the green ring around the yolk? The green ring is caused by overcooking. Follow the exact hard-boiling method described above: bring water to a boil, turn off heat, cover, and let sit for 12 minutes. Immediately transfer to an ice bath.
- Can I use an air fryer or Instant Pot for hard-boiled eggs? Yes! Both methods work wonderfully for easy-to-peel hard-boiled eggs. Refer to specific appliance instructions for timing, but generally, 5-5-5 (5 min cook, 5 min natural release, 5 min ice bath) for Instant Pot is popular, and 15-17 minutes at 250-275°F for air fryers.
- My deviled egg filling is too thin/thick. What can I do? If too thin, add a bit more mashed yolk or even a teaspoon of cream cheese. If too thick, add a tiny bit more mayonnaise or a splash of milk or pickle juice until desired consistency.
- How do I make the egg whites perfectly smooth after peeling? Ensure your eggs are quickly cooled in an ice bath. When peeling, start from the large end and peel under cool running water. Older eggs (about a week old) also tend to peel cleaner than very fresh eggs.
- Can I freeze deviled eggs? No, deviled eggs do not freeze well. The egg whites become rubbery and watery, and the filling’s texture will separate. It’s best to enjoy them fresh within a couple of days.
More Festive 4th of July Recipes to Complete Your Spread:
No patriotic celebration is complete without a full spread of themed treats! Complement your Red, White, and Blue Deviled Eggs with these other fantastic recipes:
- Red White Blue Jello Poke Cake: A stunning and refreshing dessert that screams patriotism.
- 4th of July Caramel Corn: Sweet and crunchy, perfect for snacking while watching fireworks.
- Red White and Blue Muddy Buddies: An addictive snack mix that’s fun for all ages.
- Frozen Chocolate Banana Pops: A cool and delightful treat, especially on a hot summer day.
- Dessert Fruit Kabobs: Healthy, colorful, and easy to eat, featuring seasonal fruits.
- Red White and Blue Cheesecake Parfaits: Elegant and creamy, layered for a beautiful presentation.
Conclusion: Elevate Your Celebration with Patriotic Perfection
These Red, White, and Blue Deviled Eggs are more than just a recipe; they are a celebration in themselves. With their delightful taste, creamy texture, and striking colors, they are guaranteed to impress your guests and add a festive touch to any patriotic occasion. Easy to make and universally loved, this recipe is sure to become a cherished part of your holiday traditions.
We hope you adore this delicious and easy recipe! Don’t forget to connect with Belly Full on TikTok, Facebook, Instagram, Pinterest, and YouTube for more inspiring recipes and culinary adventures!
Red, White, & Blue Deviled Eggs Recipe
Prepare to dazzle your guests with these festive, easy-to-make patriotic deviled eggs!
Prep Time: 20 minutes | Cook Time: 12 minutes | Cool Time: 5 minutes | Total Time: 37 minutes
Yields: 24 deviled eggs
Ingredients:
- 12 large eggs
- 1/2 cup mayonnaise (good quality recommended)
- 2 teaspoons mustard (yellow or Dijon)
- 1 tablespoon pickle relish (dill or sweet), optional but highly recommended
- 1/2 teaspoon kosher salt (adjust to taste)
- Few grinds of fresh black pepper (adjust to taste)
- Pinch cayenne pepper (for a subtle kick, optional)
- Smoked paprika, for dusting (optional garnish)
- 2 cups water, divided (for dyeing)
- 2 tablespoons vinegar, divided (for dyeing)
- Red and blue food coloring (gel food coloring provides best results)
Instructions:
- Prepare Hard-Boiled Eggs: Gently place eggs in a single layer in a medium pot. Cover with cold water by 1-2 inches. Bring to a rolling boil over high heat. Once boiling, turn off heat, remove from burner, cover, and let sit for 12 minutes.
- Cool Eggs: Immediately transfer eggs to a large bowl of ice water. Let them cool for 4-5 minutes until just slightly warm. Peel by gently tapping on the counter, rolling, and peeling under cold running water, starting from the large end.
- Separate Yolks & Whites: Slice each peeled egg in half lengthwise. Carefully scoop out the yolks into a medium mixing bowl. Set the empty egg white halves aside.
- Make Yolk Filling: Mash yolks thoroughly with a fork until very fine. Add mayonnaise, mustard, pickle relish (if using), salt, black pepper, and cayenne. Mix until completely smooth and creamy. Transfer mixture to a plastic ziploc bag, pushing it into one corner.
- Dye Egg Whites: Divide water and vinegar into two cups. Add 10-15 drops of blue food coloring to one cup, and 20-25 drops of red food coloring to the other. Stir well. Drop 4 egg white halves into each dye cup. Let sit for about 1 minute (or longer for deeper color). Remove to a paper towel-lined plate to dry. Repeat with 4 more egg whites of each color. You should have 8 red, 8 blue, and 8 undyed white egg halves.
- Fill Egg Halves: Snip a small piece off the corner of the ziploc bag with the yolk mixture. Pipe the creamy filling evenly into each colored and uncolored egg white half.
- Garnish & Serve: If desired, garnish with a sprinkle of smoked paprika. Arrange on a platter and serve immediately. Enjoy your patriotic masterpiece!
Nutrition Information (per serving, estimated):
- Calories: 69 kcal
- Carbohydrates: 0.4g
- Protein: 3g
- Fat: 6g
- Saturated Fat: 1g
- Polyunsaturated Fat: 3g
- Monounsaturated Fat: 2g
- Trans Fat: 0.02g
- Cholesterol: 95mg
- Sodium: 126mg
- Potassium: 37mg
- Fiber: 0.03g
- Sugar: 0.1g
- Vitamin A: 139 IU
- Vitamin C: 0.01mg
- Calcium: 15mg
- Iron: 0.5mg
Nutritional information provided is an estimate based on common product values and typical preparations. It can vary significantly based on exact ingredients used and any modifications made to the recipe. If precise nutritional data is critical, independent calculation is recommended.