
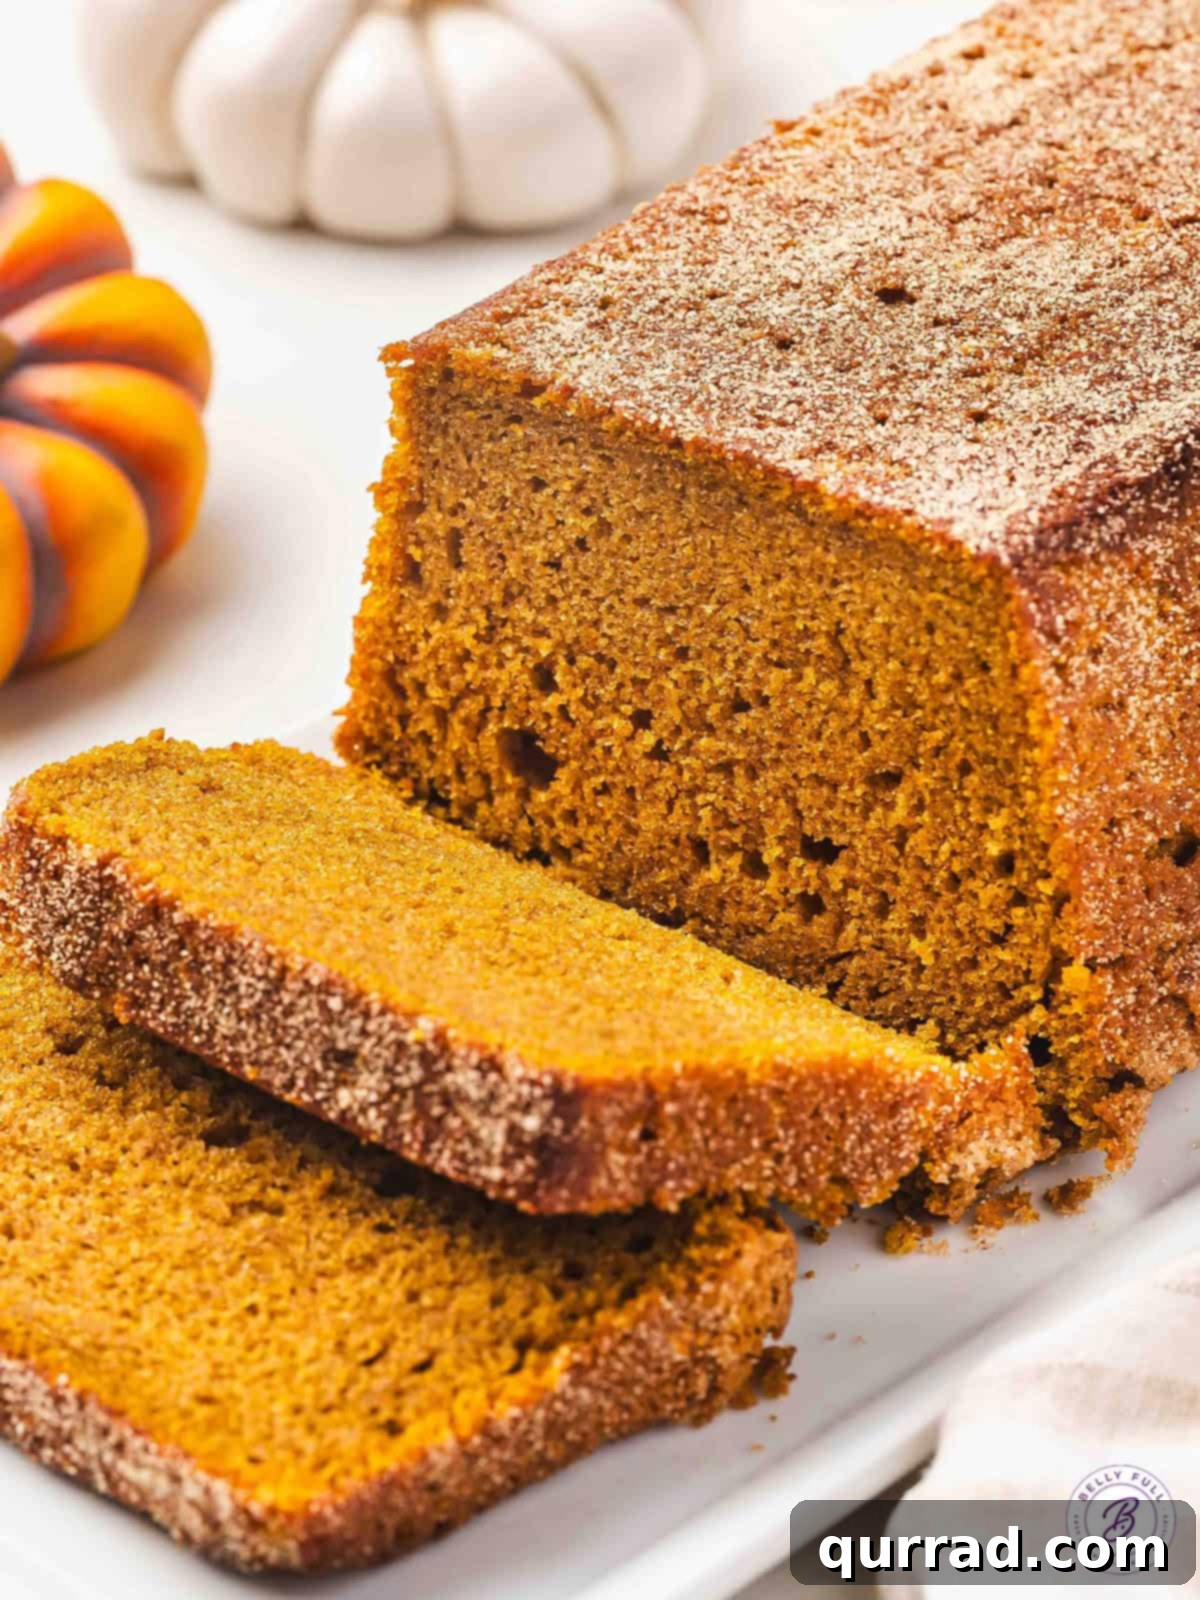
As the leaves begin to turn and a crispness fills the air, there’s a unique comfort that only autumn baking can bring. My kitchen, much like yours, becomes a sanctuary of warm, inviting aromas – pumpkin, cinnamon, and a hint of spice. This year, I’ve taken two beloved classics – the tender crumb of pumpkin bread and the signature crunch of a snickerdoodle cookie – and married them into one extraordinary creation: this incredibly easy Snickerdoodle Pumpkin Bread. It’s a delightful seasonal treat, featuring a soft, moist pumpkin loaf enveloped in an irresistible cinnamon-sugar crust that promises pure coziness with every slice. Imagine starting your day with a warm slice, enjoying it as a delightful dessert, or savoring it as a sweet afternoon snack alongside your favorite cup of coffee or soothing tea. This recipe isn’t just about baking; it’s about embracing the cherished flavors and comforting moments that define the fall season.
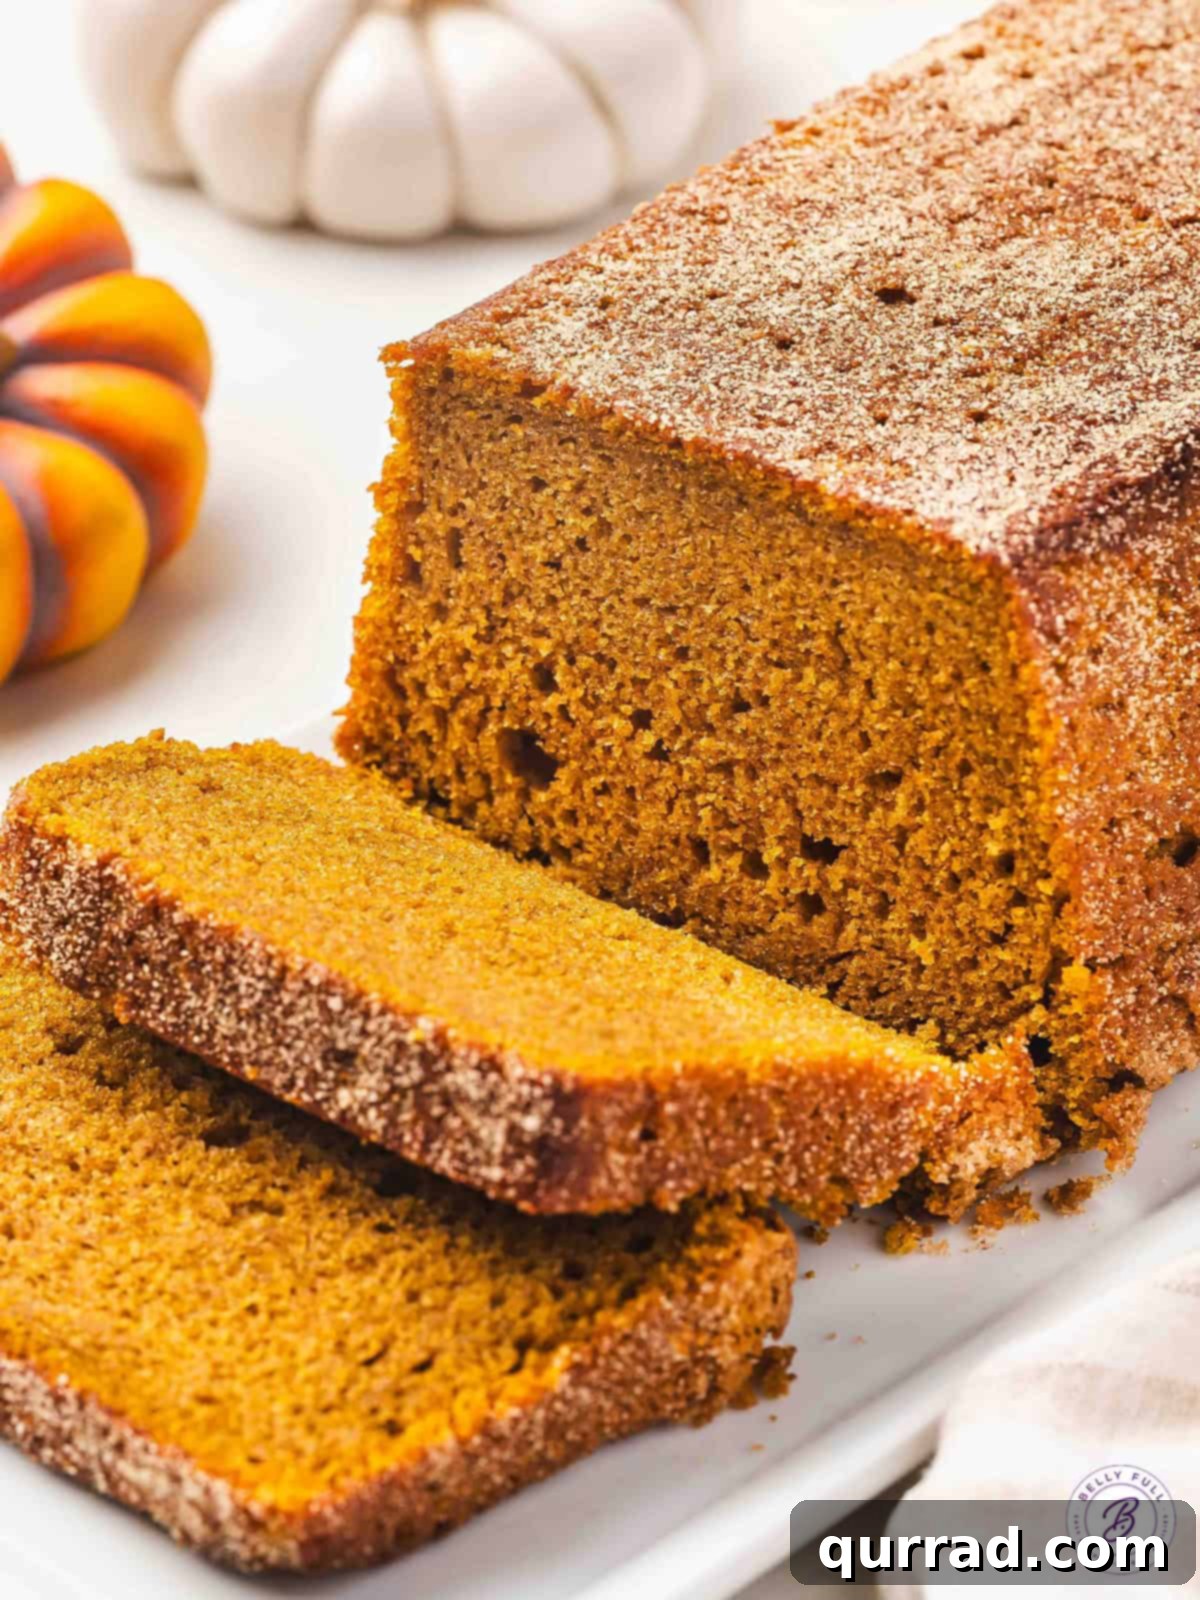
The simplicity of this Snickerdoodle Pumpkin Bread recipe is one of its greatest charms. You don’t need fancy equipment or advanced baking skills to achieve bakery-quality results. All it takes is a single bowl, a trusty whisk, and a handful of pantry staples you likely already have on hand. It masterfully combines the best elements of my favorite snickerdoodle cookies and my go-to pumpkin bread. The magic lies in the exquisite cinnamon-sugar coating that bakes into a delightfully crisp crust, providing a wonderful textural contrast to the incredibly soft, moist, and pumpkin-spiced interior. This bread is special enough to proudly share with guests at any autumn gathering, yet so effortlessly simple that you can whip it up on a lazy weekend afternoon, filling your home with its enchanting aroma.
Snickerdoodle Pumpkin Bread: Your Ultimate Fall Baking Companion
Welcome to the ultimate guide for creating the most delectable Snickerdoodle Pumpkin Bread! This recipe marries the beloved spiced sweetness of snickerdoodle cookies with the comforting warmth of pumpkin bread, creating a seasonal masterpiece perfect for breakfast, dessert, or a delightful snack. Get ready to fill your home with the inviting scents of autumn.
Why You’ll Fall in Love with This Recipe
- Effortless Preparation: Forget complex steps and extensive clean-up. This quick bread comes together in just one bowl, requiring minimal effort and making it ideal for busy schedules.
- Perfect Texture: Experience the best of both worlds – a tender, moist pumpkin interior that melts in your mouth, perfectly complemented by a crisp, cinnamon-sugar crust.
- Unforgettable Flavor: The rich, earthy notes of pumpkin are beautifully enhanced by a generous blend of pumpkin pie spice, while the snickerdoodle-inspired coating adds a bright, warm sweetness that truly sings of autumn.
- Versatile Treat: Whether you serve it warm with a pat of butter, alongside your morning coffee, or as a cozy evening dessert, this bread is a crowd-pleaser for any occasion. It’s also an excellent option for holiday gifting!
Essential Equipment for Snickerdoodle Pumpkin Bread
- 1 9×5-inch Nonstick Loaf Pan: The standard size for perfect baking. A nonstick pan ensures easy release.
- Large Mixing Bowl: For combining wet and dry ingredients.
- Whisk & Spatula: Essential for mixing and folding.
- Wire Rack: For proper cooling, preventing a soggy bottom.
Gather Your Ingredients
For the Cinnamon Sugar Crust
- ¼ cup granulated sugar
- ½ teaspoon cinnamon
- Softened butter (for greasing the pan)
For the Moist Pumpkin Batter
- ½ cup granulated sugar
- ½ cup brown sugar, packed
- ½ cup unsalted butter, melted and slightly cooled
- 2 large eggs, at room temperature
- 1 teaspoon vanilla extract
- 1½ cups all-purpose flour
- 2 teaspoons pumpkin pie spice
- 1 teaspoon baking powder
- ½ teaspoon baking soda
- ½ teaspoon salt
- 1 cup canned pumpkin puree (not pumpkin pie filling)
- ½ cup sour cream, at room temperature
Step-by-Step Instructions for Perfect Snickerdoodle Pumpkin Bread
- Prepare Your Oven and Pan: Preheat your oven to a cozy 350°F (175°C). In a small bowl, whisk together ¼ cup granulated sugar and ½ teaspoon cinnamon to create your snickerdoodle crust mixture. Next, thoroughly grease a 9×5-inch nonstick loaf pan with butter, paying extra attention to all the corners and crevices. Sprinkle the cinnamon-sugar mixture into the greased pan and swirl it around until the entire interior is evenly coated. Gently tap out any excess mixture and set it aside – you’ll use it to sprinkle over the finished loaf for an extra touch of sparkle and flavor.
- Combine Wet Ingredients: In a large mixing bowl, combine the ½ cup granulated sugar, ½ cup brown sugar, ½ cup melted unsalted butter, 2 large eggs, and 1 teaspoon vanilla extract. Whisk these ingredients together until they are well combined, smooth, and creamy. This forms the flavorful base of your pumpkin bread.
- Incorporate Dry Ingredients: Over the same large bowl of wet ingredients, sift in 1½ cups all-purpose flour, 2 teaspoons pumpkin pie spice, 1 teaspoon baking powder, ½ teaspoon baking soda, and ½ teaspoon salt. Sifting helps prevent lumps and ensures a light, tender crumb. Stir the mixture gently with your whisk or a spatula just until the dry and wet ingredients are *just* incorporated. A few small lumps are perfectly fine and even desirable; overmixing can lead to a dense, tough bread.
- Fold in Pumpkin and Sour Cream: Add the 1 cup of canned pumpkin puree and ½ cup of sour cream to the batter. Using a spatula, gently fold these ingredients into the mixture until they are just combined and no streaks of pumpkin or sour cream remain. Again, be mindful not to overmix, as this is crucial for achieving that wonderfully soft and tender texture in your baked bread.
- Bake to Golden Perfection: Carefully pour the prepared batter into your cinnamon-sugar coated loaf pan, spreading it evenly with a spatula. Place the pan in your preheated oven and bake for approximately 50 to 60 minutes. Begin checking for doneness around the 50-minute mark by inserting a wooden skewer or toothpick into the very center of the loaf. It should come out clean or with only a few moist crumbs attached. If you notice the top browning too quickly during baking, you can loosely tent the loaf with aluminum foil to prevent over-browning while the inside continues to cook.
- Cool and Serve: Once baked, remove the loaf from the oven and allow it to cool in the pan for about 15 minutes. This cooling period is important as it allows the bread to set and prevents it from falling apart when removed. After 15 minutes, carefully invert the pan to release the bread onto a wire rack. Let it cool completely on the rack. Just before slicing, sprinkle the reserved cinnamon-sugar mixture over the top for that classic snickerdoodle finish. Slice and savor your homemade Snickerdoodle Pumpkin Bread warm or at room temperature. Enjoy every delicious bite!
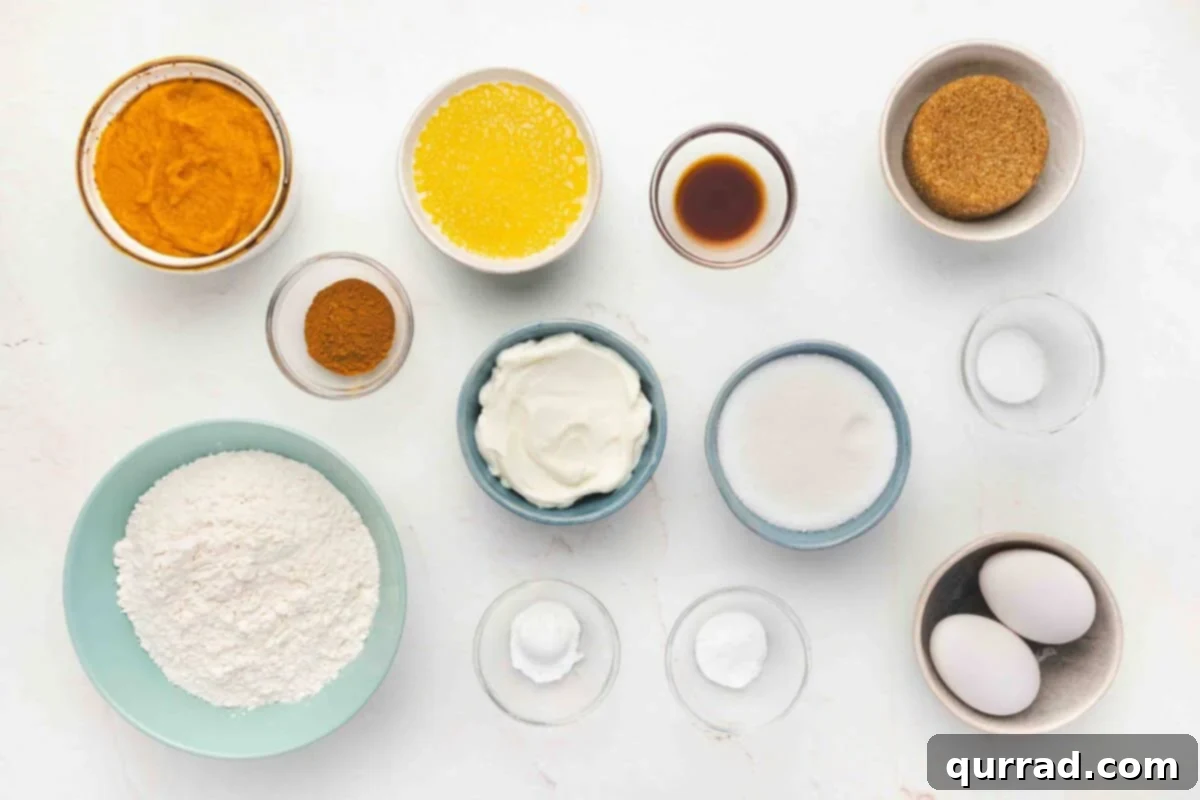
Step 1: Gather Your Ingredients and Preheat. Start by assembling all your ingredients to ensure a smooth baking process. This also gives cold ingredients like eggs a chance to come to room temperature, which helps them incorporate better into the batter, leading to a more consistent texture in your finished bread. Preheat your oven to 350°F (175°C).
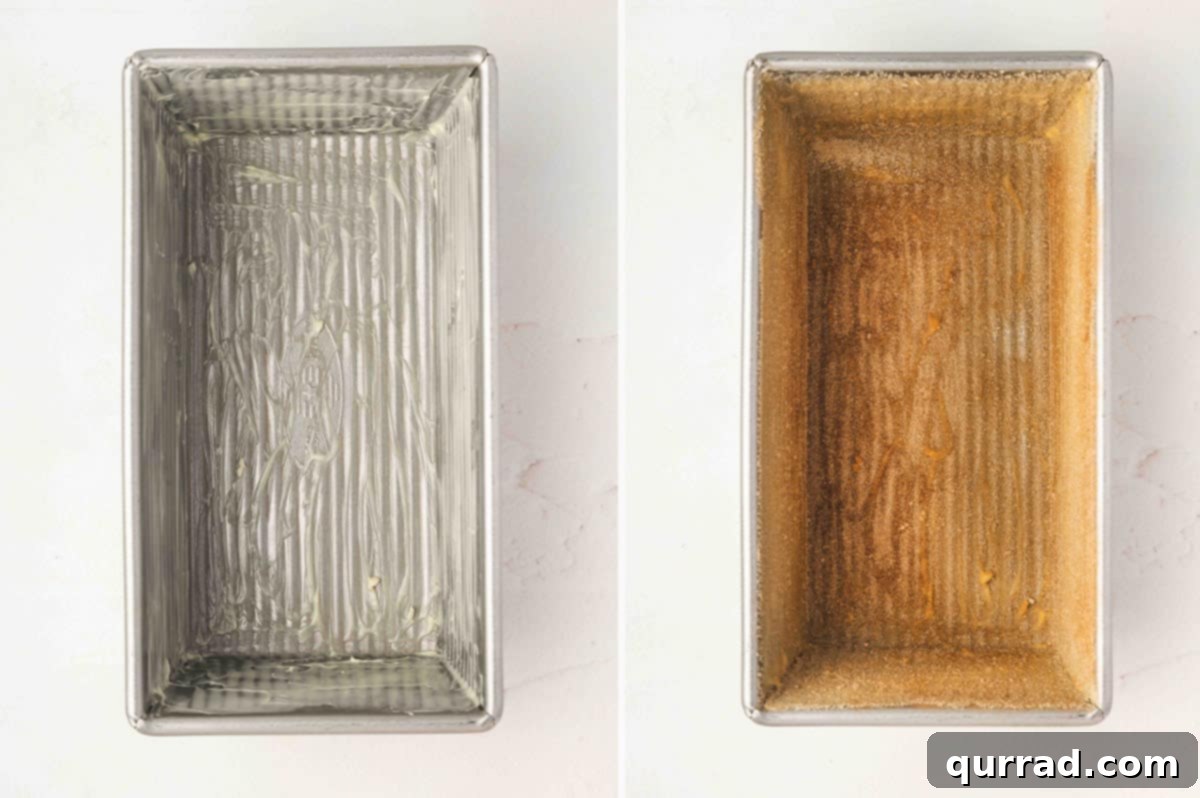
Step 2: Prepare the Cinnamon-Sugar Crumb. In a small bowl, whisk together ¼ cup granulated sugar and ½ teaspoon cinnamon. This fragrant mixture will form the signature snickerdoodle crust. Generously grease a 9×5-inch nonstick loaf pan with softened butter, ensuring every inch—bottom, sides, and especially the corners—is well coated. This step is crucial for achieving an even, golden crust and easy removal of the baked bread. Pour the cinnamon-sugar mixture into the greased pan and gently tilt and rotate the pan until the entire interior is evenly coated. Tap out any excess cinnamon-sugar and reserve it. This reserved mixture will be sprinkled on top of your warm, baked loaf for an extra burst of flavor and a beautiful presentation.
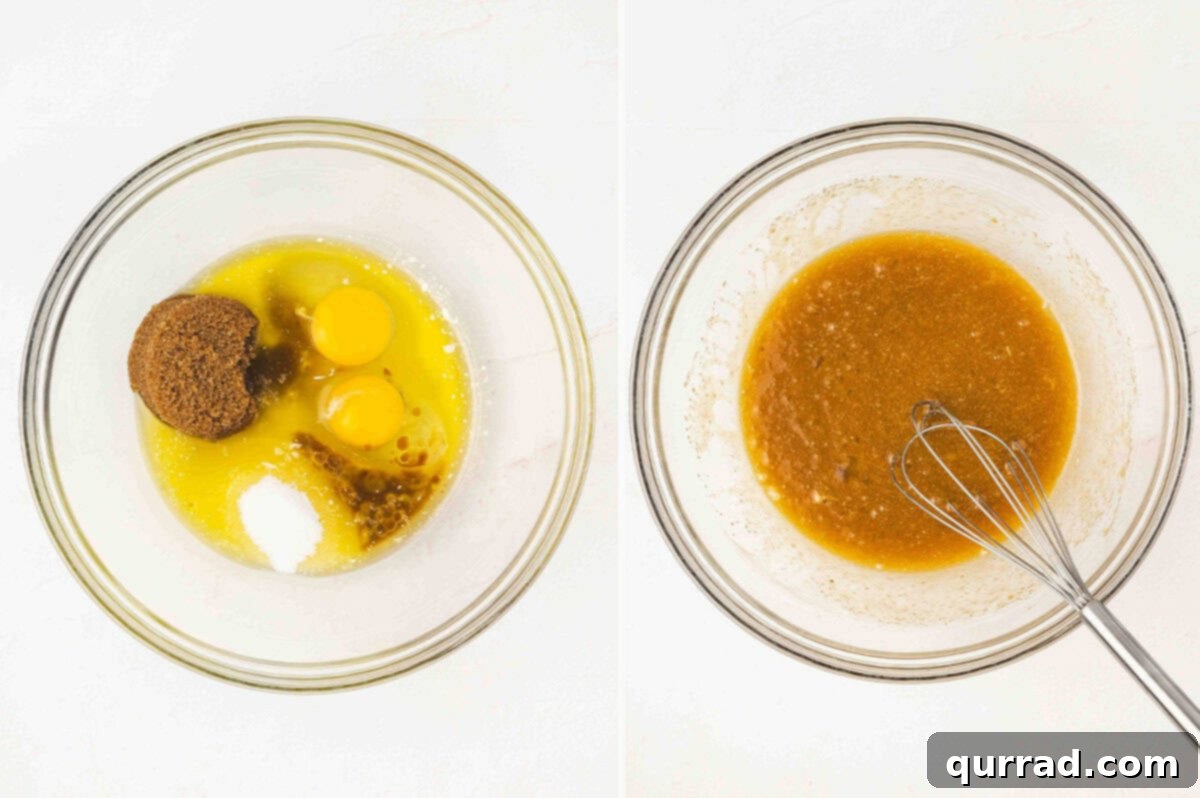
Step 3: Mix the Liquid Base. In a spacious mixing bowl, combine ½ cup granulated sugar, ½ cup packed brown sugar, ½ cup melted unsalted butter (ensure it’s cooled slightly to avoid cooking the eggs), 2 large eggs, and 1 teaspoon of pure vanilla extract. Use a whisk to vigorously combine these ingredients until the mixture is smooth, uniformly colored, and well emulsified. This stage creates the sweet, rich foundation for your pumpkin bread, ensuring all the initial flavors are perfectly blended.
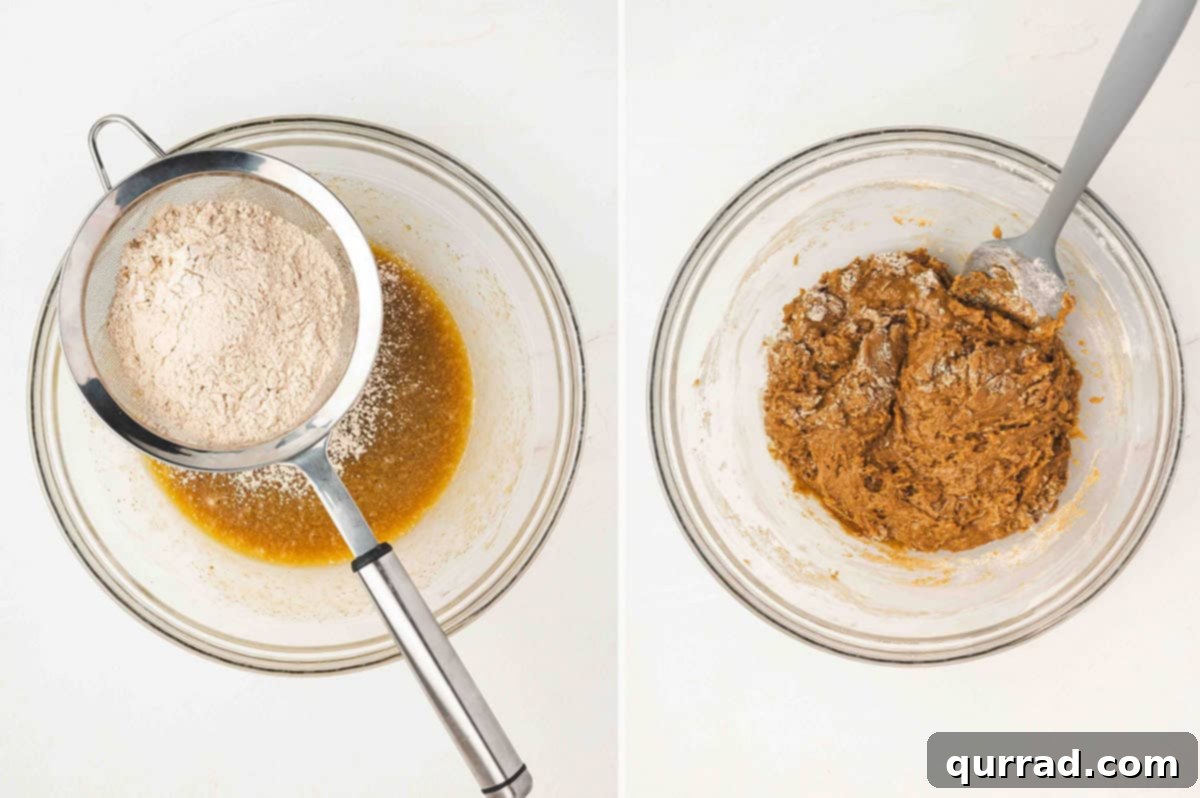
Step 4: Incorporate Dry Ingredients for Structure. Directly over your bowl of wet ingredients, sift together 1½ cups all-purpose flour, 2 teaspoons pumpkin pie spice, 1 teaspoon baking powder, ½ teaspoon baking soda, and ½ teaspoon salt. Sifting is an important step as it aerates the flour and dry ingredients, preventing lumps and ensuring they distribute evenly throughout the batter. Gently stir the mixture using a spatula or a whisk until the dry ingredients are *just* incorporated. Remember the golden rule of quick breads: avoid overmixing! Overmixing develops gluten, which can result in a tough and chewy loaf instead of the desired tender crumb. A few small lumps are perfectly normal and will disappear during baking.
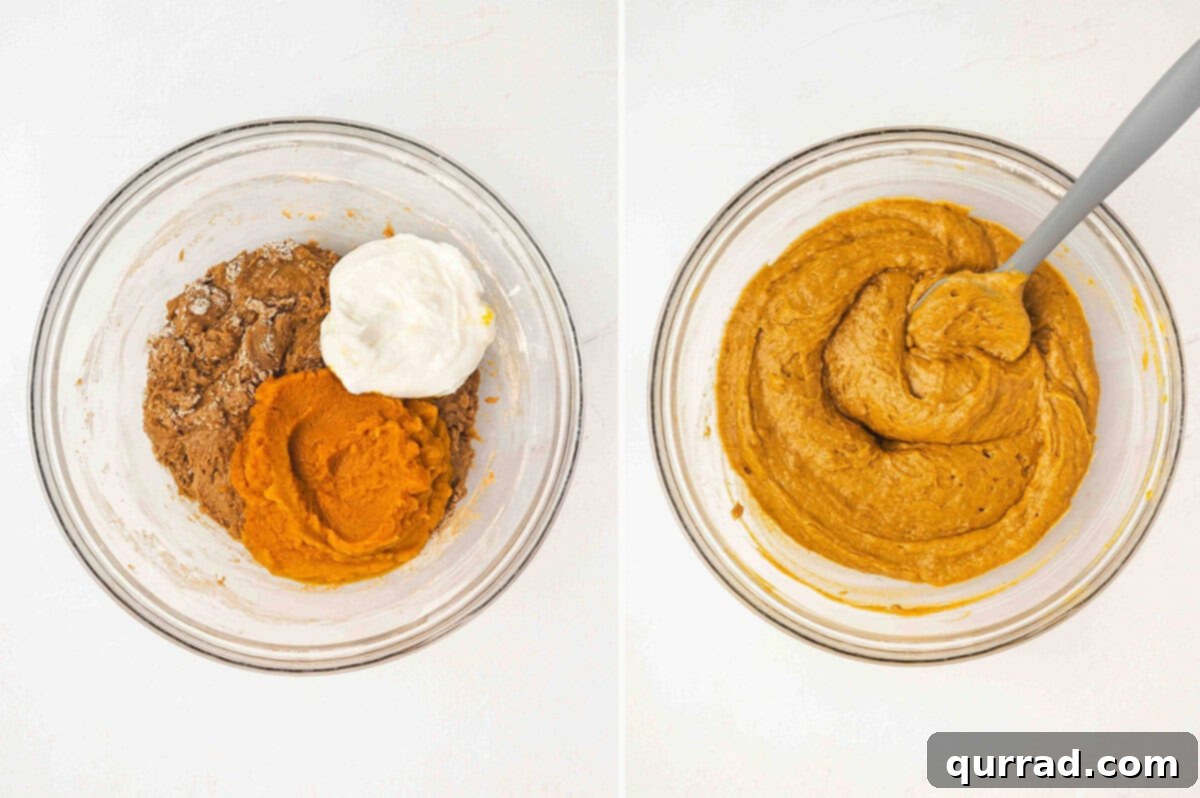
Step 5: Add the Richness. Now, gently fold in 1 cup of canned pumpkin puree (make sure it’s 100% pumpkin, not pie filling) and ½ cup of sour cream. Sour cream adds an incredible amount of moisture and tenderness to the bread, creating a delicate crumb. Continue to fold carefully until the batter is smooth and there are no visible streaks of pumpkin or sour cream. This final mixing step should also be done with a light hand to maintain the tender quality of the bread.
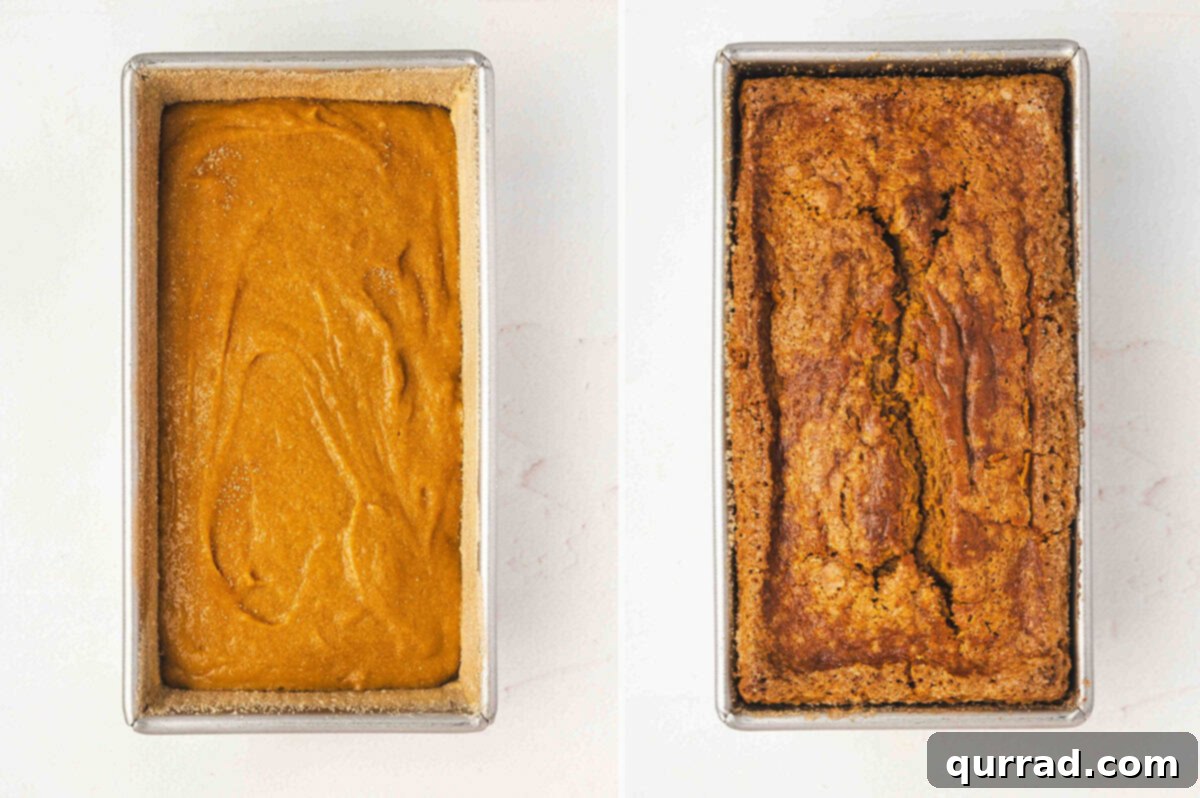
Step 6: Bake Until Golden. Pour the perfectly mixed batter evenly into your prepared loaf pan. You can use a spatula to gently smooth the top. Transfer the pan to your preheated oven and bake for approximately 50 to 60 minutes. The baking time can vary slightly depending on your oven, so it’s best to start checking around the 50-minute mark. To test for doneness, insert a wooden toothpick or a thin skewer into the very center of the loaf; it should come out clean or with only a few moist crumbs attached. If the top of your loaf begins to brown too quickly before the inside is fully cooked, loosely tent it with aluminum foil. This prevents the top from burning while allowing the interior to continue baking to perfection.
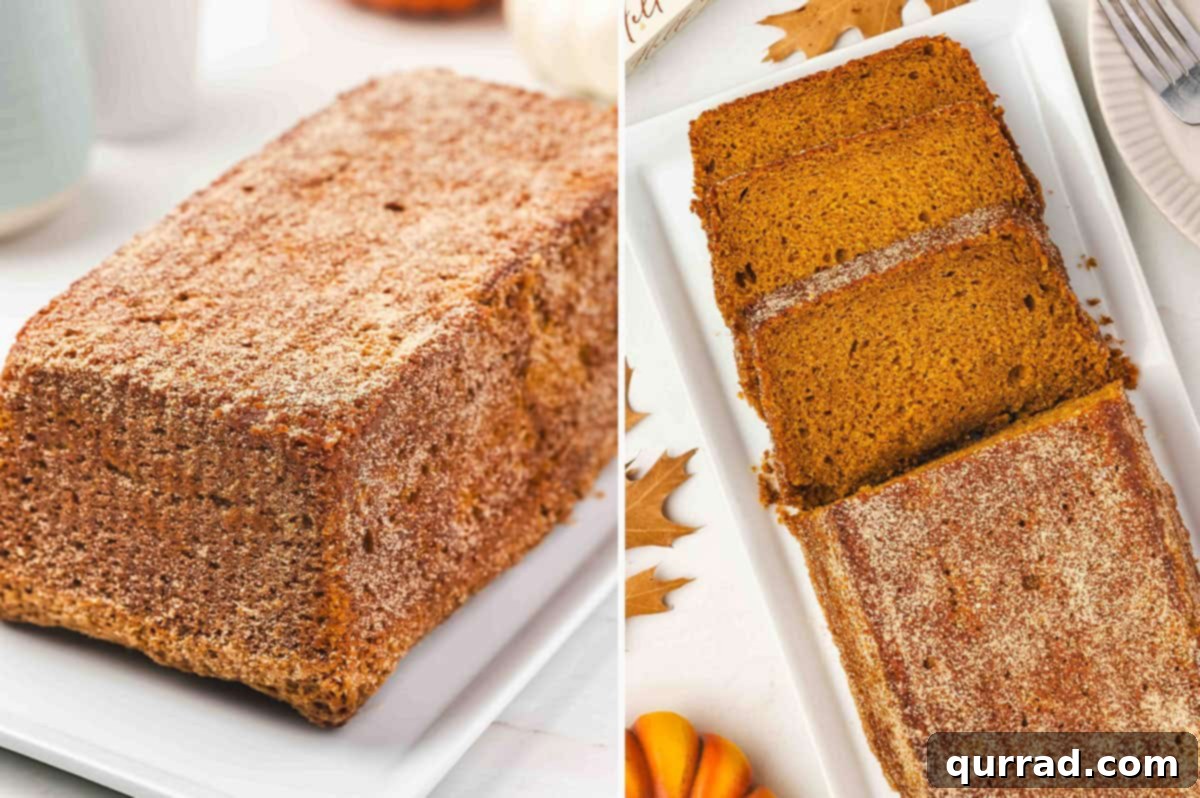
Step 7: Cool, Garnish, and Serve. Once baked, resist the urge to slice immediately! Allow the bread to cool in the pan for about 15 minutes. This crucial cooling period allows the bread to firm up and continue cooking slightly (carryover cooking). After 15 minutes, carefully transfer the loaf from the pan to a wire rack to cool completely. Cooling on a wire rack ensures air circulates around all sides, preventing a soggy bottom. Once fully cooled or just slightly warm, sprinkle the remaining reserved cinnamon-sugar mixture generously over the top of the loaf. Slice into thick, inviting pieces and enjoy your magnificent Snickerdoodle Pumpkin Bread! It’s fantastic served warm or at room temperature, making it a versatile treat for any time of day.
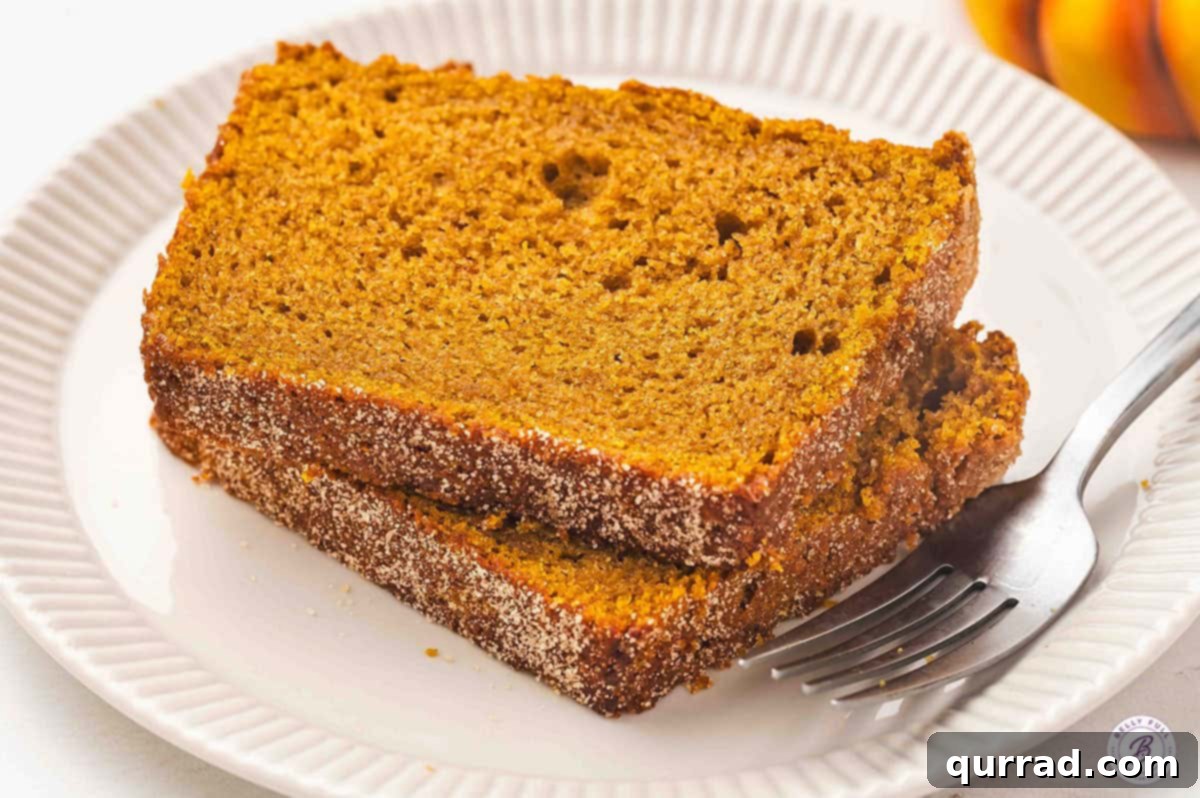
Helpful Baking Tips for Success
- Don’t Overmix: This is perhaps the most important rule for quick breads. Overmixing develops the gluten in the flour, which can lead to a dense, tough, and chewy loaf instead of a light, tender crumb. Stir the wet and dry ingredients together just until they are combined. A few small lumps are perfectly normal and will disappear during baking.
- Ensure Proper Doneness: An undercooked loaf will often puff up significantly in the oven and then sink dramatically as it cools, resulting in a gummy center. To check for doneness, insert a wooden skewer or toothpick into the very center of the loaf. It should come out clean or with only a few moist crumbs attached. If it comes out wet with raw batter, continue baking for a few more minutes and test again.
- Avoid Excess Liquid in Pumpkin Puree: Canned pumpkin puree can sometimes be a bit watery, especially after sitting for a while. Excess liquid can make your bread heavy or gummy. If your pumpkin puree seems overly wet, you can gently blot it with a paper towel or strain it through a fine-mesh sieve for a few minutes before adding it to the batter. This ensures your bread has the perfect moist texture without being waterlogged.
- Rest Before Slicing: Patience is key! Allow the bread to cool in the pan for about 15 minutes after it comes out of the oven. This initial cooling period allows the loaf to firm up and continue cooking slightly (carryover cooking). After 15 minutes, transfer it to a wire rack to cool completely. Slicing too early can cause the loaf to crumble or become soggy inside, as the steam needs time to escape and the internal structure needs to set.
- Room Temperature Ingredients: For the best results, ensure your eggs and sour cream are at room temperature. Room temperature ingredients emulsify more easily, creating a smoother, more uniform batter and a more consistent final texture in your bread.
Recipe Variations to Inspire Your Creativity
While this Snickerdoodle Pumpkin Bread is perfect as is, it also serves as a fantastic base for your own creative additions. Experiment with these variations to customize your loaf:
- Nutty Crunch: For an added layer of texture and earthy flavor, gently fold in ½ cup of chopped pecans, walnuts, or even candied walnuts into the batter after combining the wet and dry ingredients.
- Chocolate Lover’s Dream: Introduce a touch of decadence by mixing in ½ cup of chocolate chips (mini or regular, dark or semi-sweet) into the batter. The chocolate pairs wonderfully with pumpkin and cinnamon.
- Fruity Twist: For a hint of tartness and chewiness, add ¼ cup of dried cranberries or chopped dried apricots to the batter.
- Streusel Topping: Instead of reserving cinnamon-sugar for sprinkling, consider a streusel topping. Combine ¼ cup flour, 2 tablespoons brown sugar, ½ teaspoon cinnamon, and 2 tablespoons cold butter (cut into small pieces). Mix with your fingertips until crumbly and sprinkle over the batter before baking.
- Cream Cheese Swirl: For an extra layer of richness, swirl in a softened cream cheese mixture (4 oz cream cheese, 2 tbsp sugar, 1 egg yolk, ½ tsp vanilla) into the center of the batter before baking.
Perfect Serving Suggestions for Every Occasion
This versatile Snickerdoodle Pumpkin Bread is a delight at any time of day, and its cozy flavor profile lends itself to many serving possibilities:
- Classic Breakfast: A warm, thick slice with your morning coffee or tea is a truly comforting way to start the day. Add a pat of unsalted butter that gently melts into the warm bread.
- Elevated Brunch: Serve it alongside a fruit platter and a side of crispy bacon or sausage for a complete and festive brunch spread.
- Sweet Afternoon Treat: Enjoy a slice as a mid-afternoon pick-me-up, especially when paired with a chai latte or a soothing herbal tea.
- Decadent Dessert: Top a warm slice with a scoop of vanilla bean ice cream or a dollop of fresh whipped cream for an indulgent dessert. A drizzle of caramel sauce can take it to the next level.
- Special Spreads: Take your serving up a notch with a generous spread of homemade bourbon honey butter or light and airy whipped maple butter. These rich, flavored butters complement the pumpkin and cinnamon beautifully.
- Thoughtful Gift: Wrap a freshly baked loaf in parchment paper and a festive ribbon for a thoughtful homemade gift for friends, family, or neighbors. The enticing pumpkin-cinnamon scent it fills the house with makes it an especially welcome present.
How to Properly Store Your Snickerdoodle Pumpkin Bread
To keep your delicious Snickerdoodle Pumpkin Bread fresh and flavorful for as long as possible, proper storage is key. Here’s how:
- At Room Temperature (Countertop): Once the loaf has completely cooled (this is important to prevent condensation and sogginess), store it in an airtight container or wrap it tightly in plastic wrap. It will stay wonderfully fresh on your countertop for up to 3 days. For best results, avoid cutting the entire loaf at once; slice only what you intend to eat, as whole loaves tend to stay moist longer.
- Refrigeration: If you want to extend its freshness, you can store the bread in an airtight container in the refrigerator for up to 5 days. While refrigeration can sometimes alter the texture slightly, warming a slice briefly in the microwave can often bring back its tender quality.
- Freezing for Long-Term Enjoyment: This pumpkin bread freezes beautifully! You can freeze individual slices or the entire loaf.
- For individual slices: Wrap each slice tightly in plastic wrap, then place them in a freezer-safe bag or container.
- For a whole loaf: Wrap the cooled loaf tightly in plastic wrap, then wrap it again securely in aluminum foil. This double layer of protection helps prevent freezer burn.
Frozen Snickerdoodle Pumpkin Bread will maintain its quality for up to three months. To thaw, simply transfer it to the refrigerator overnight. For a quick thaw and warm treat, individual slices can be heated in the microwave for about 15-30 seconds, bringing back that delightful fresh-baked flavor and softness.
More Easy Pumpkin and Fall Baking Recipes to Explore
If you’re loving the cozy flavors of autumn, you’ll want to try these other delightful fall baking recipes:
- Apple Fritter Rings
- Pumpkin Sheet Cake
- Pumpkin Dump Cake
- Pumpkin Spice Muffins
- Apple Crisp
Final Thoughts on This Autumnal Delight
I genuinely hope you cherish this easy and incredibly satisfying Snickerdoodle Pumpkin Bread recipe as much as I do. It truly captures the essence of fall baking, bringing warmth, comfort, and irresistible flavors into your home. Don’t forget to leave a review below to let me know how it turned out for you! Your feedback is always appreciated. For more delicious recipes and kitchen inspiration, be sure to follow Belly Full on TikTok, Instagram, Facebook, Pinterest, and YouTube!