

There’s a magical sweetness that only truly comes from homemade treats, and these rich, creamy, and unbelievably fluffy Homemade Marshmallows are no exception. Far superior to anything you’ll find in a store, these gourmet delights are surprisingly easy to make and an absolute joy to eat. Imagine biting into a cloud of vanilla-infused sweetness that melts delicately on your tongue – that’s the experience awaiting you. For an extra touch of love, we’ve shaped ours into adorable hearts, making them perfect for sharing with special someone or adding a festive touch to any occasion.
These delightful marshmallows aren’t just a standalone treat; they’re incredibly versatile. Elevate your winter hot chocolate to a luxurious beverage, transforming it from ordinary to extraordinary. Use them in decadent hot cocoa cookies, create gourmet s’mores that will be the envy of every campfire, or simply savor them as a light, sweet indulgence after dinner. Once you taste the difference, you’ll wonder why you ever settled for store-bought.
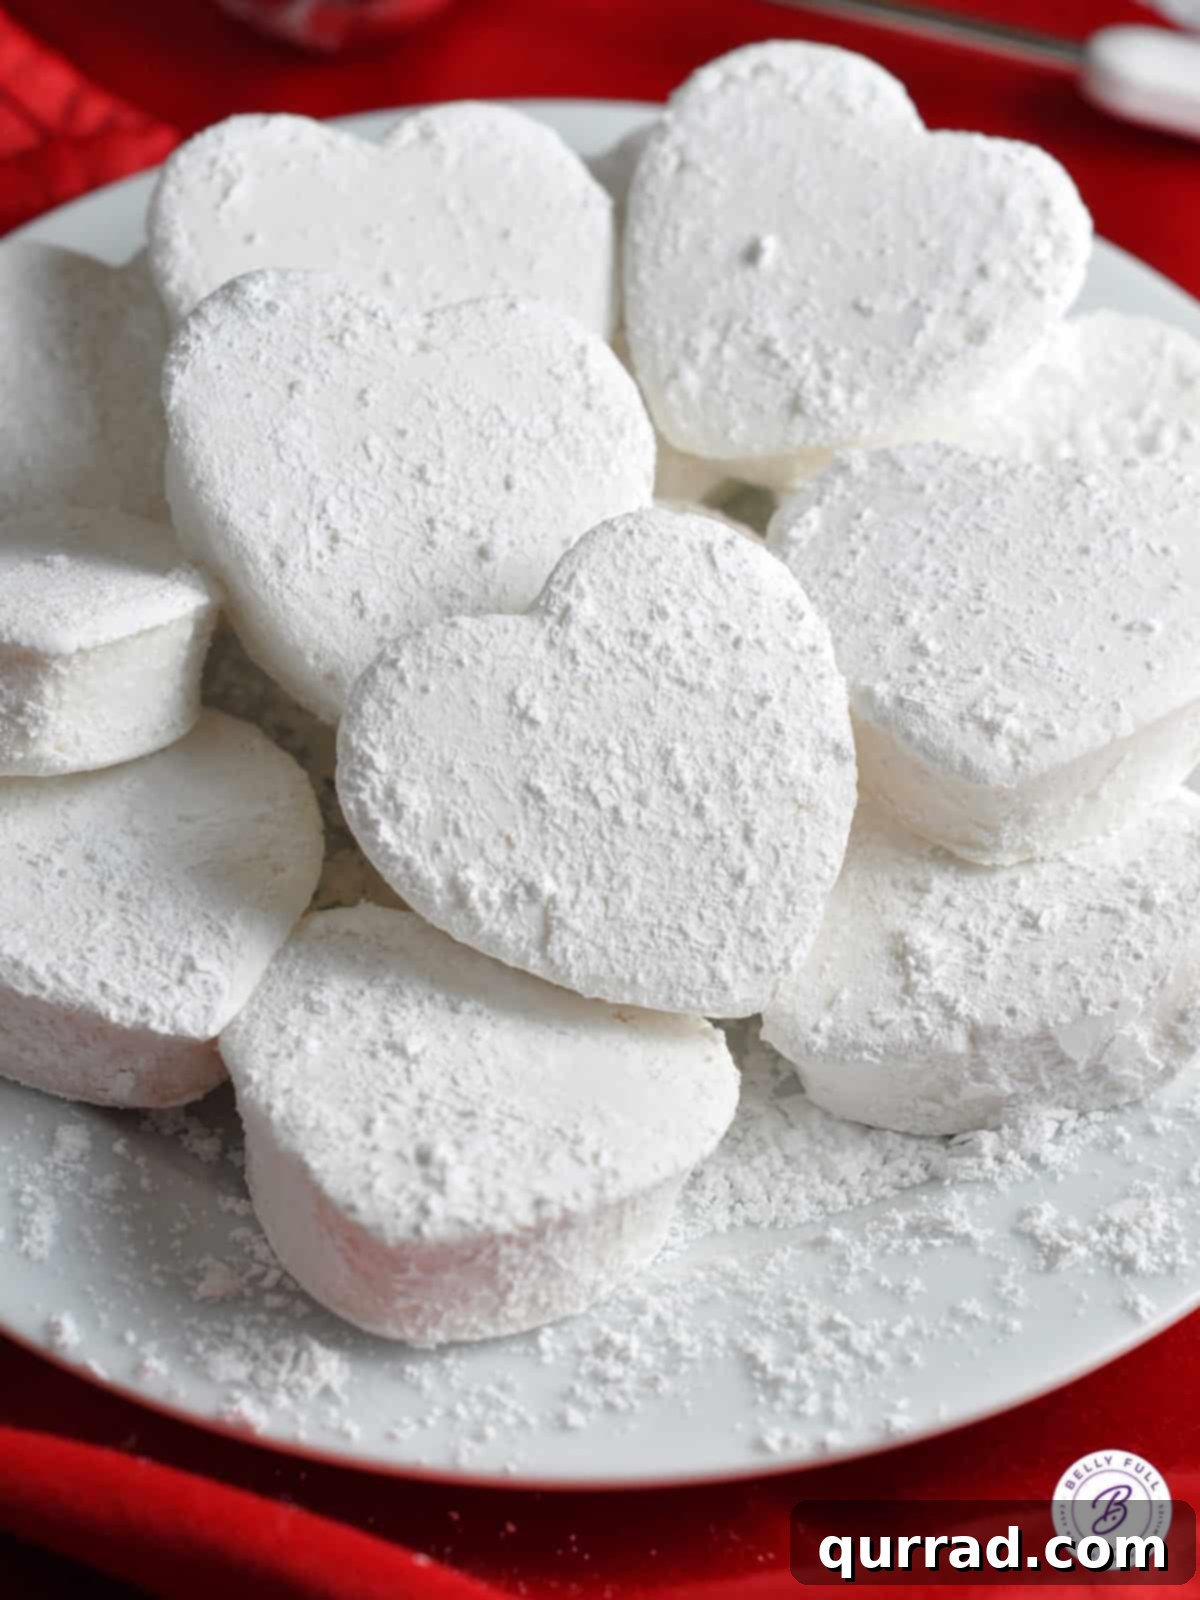
Unlocking the Secret to Easy Homemade Marshmallows
You might be asking yourself, “Why go through the effort of making marshmallows from scratch?” And it’s a valid question! The answer, however, is simple and profound: homemade marshmallows are incomparably better than their mass-produced counterparts. They are, quite frankly, barely the same food. Store-bought marshmallows often contain stabilizers and artificial flavors, resulting in a rubbery texture and bland taste. Homemade versions, on the other hand, boast an ethereal fluffiness, a melt-in-your-mouth tenderness, and a rich, pure flavor that’s nothing short of blissful. Plus, the process itself is incredibly rewarding and, dare we say, fun!
Crafting marshmallows from scratch is a culinary adventure that yields amazing results. While there are several methods, the most common and often recommended approach involves using a stand mixer equipped with a whisk attachment. This powerful tool ensures your marshmallow mixture achieves the incredibly thick, airy consistency needed for that perfect chew. However, don’t let the lack of a stand mixer deter you! A heavy-duty handheld mixer can be just as effective, though it might require a little more arm strength and a slightly longer whipping time—typically between 8-10 minutes. When using a handheld mixer, remember to stabilize your mixing bowl to prevent it from sliding around, ensuring a safer and more efficient process.
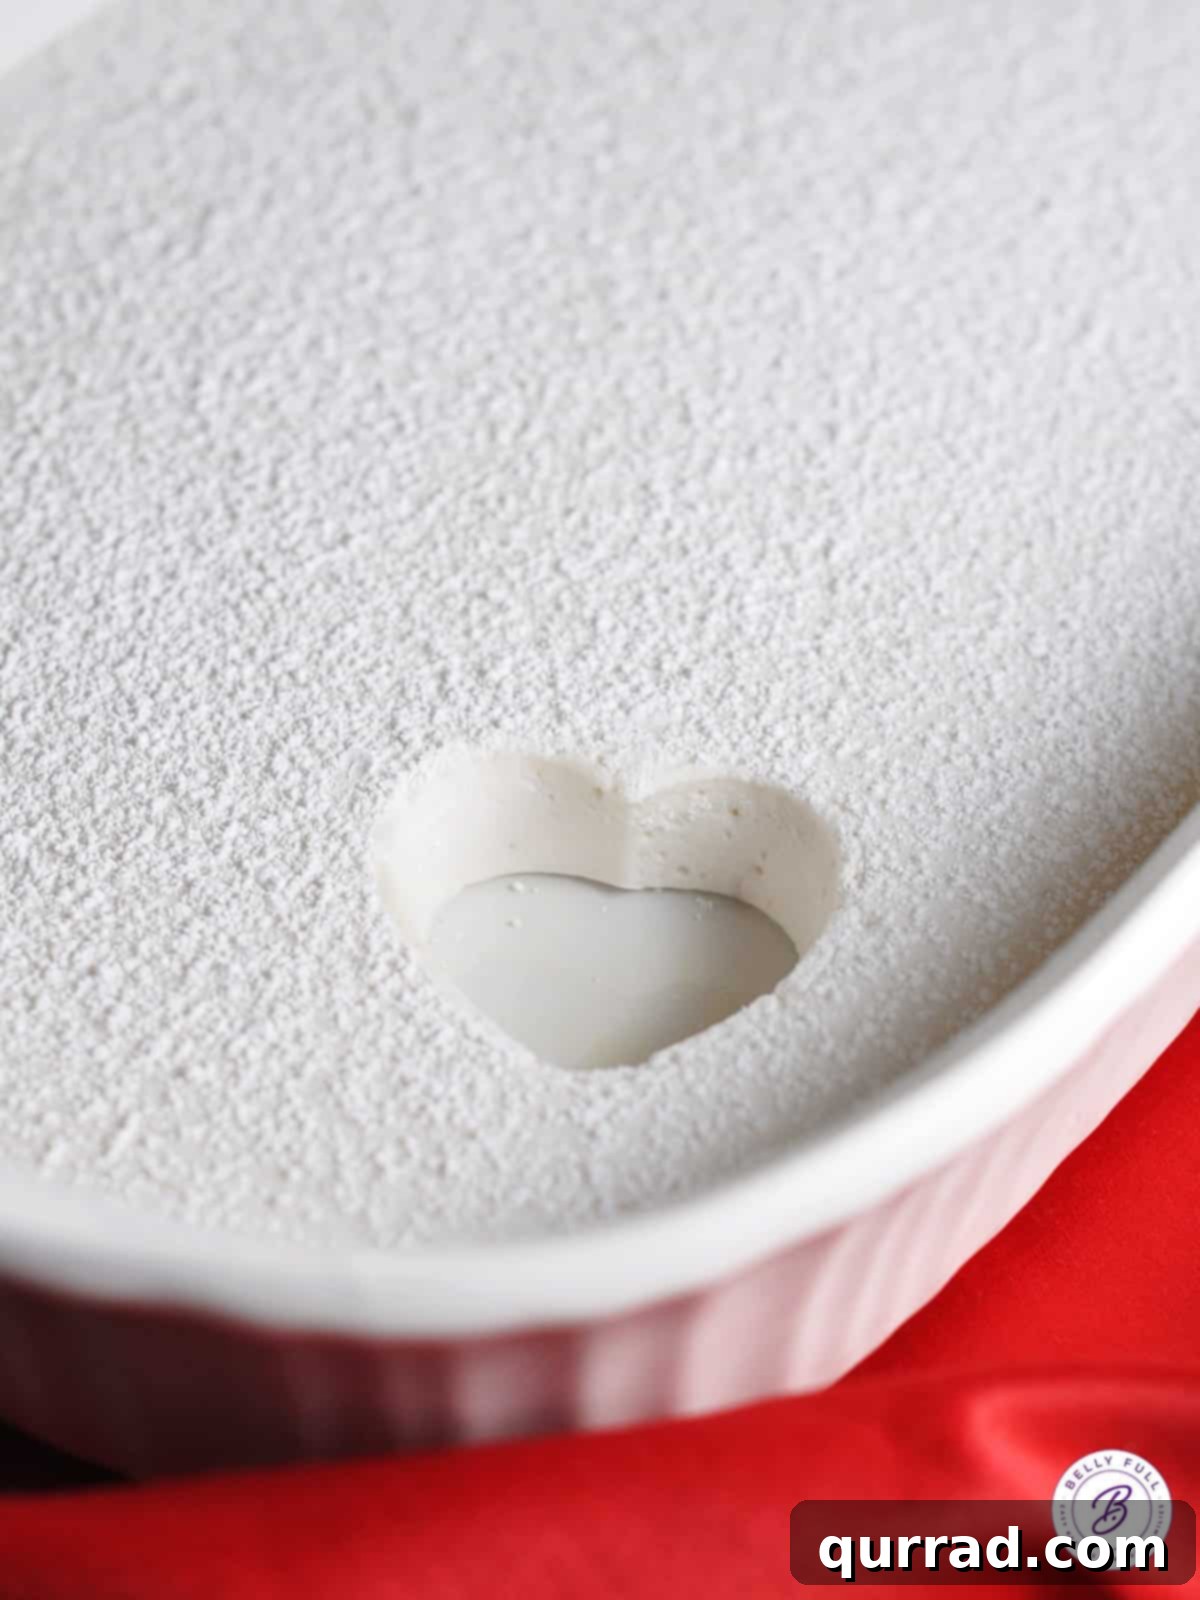
Once your marshmallow mixture is whipped to perfection, the setting process begins. Some traditional methods suggest covering the mixture in plastic wrap and allowing it to set at room temperature, then inverting the block onto a sugared surface before cutting. My personal preference, however, involves chilling the mixture in the refrigerator. This method simplifies the cutting process, allowing you to easily slice or use cookie cutters directly in the pan for beautifully shaped marshmallows. The chilled setting offers a firmer, less sticky slab, making precise cuts a breeze.
Essential Ingredients for Perfect Homemade Marshmallows
Creating these delightful homemade marshmallows requires a few key ingredients, each playing a crucial role in achieving that signature fluffy, stretchy, and sweet texture. While the full measurements are detailed in the printable recipe card below, here’s a breakdown of what you’ll need and why:
- Unflavored Gelatin: This is the backbone of your marshmallows. Gelatin provides the essential structure that binds all the sugar and flavor together, giving the marshmallow its characteristic stretchy, gooey, and bouncy texture. Without it, you’d just have a very sweet syrup! Using good quality unflavored gelatin ensures a neutral taste profile, allowing other flavors to shine.
- Light Corn Syrup: A non-negotiable ingredient in marshmallow making. Corn syrup acts as a vital stabilizer, preventing the granulated sugar from crystallizing as it cooks. Without corn syrup, your marshmallows could become grainy or brittle. It ensures a smooth, pliable texture.
- Cool Water: Used to hydrate the gelatin and dissolve the sugars, creating the base for your sugar syrup. The coolness of the water is important for effectively “blooming” the gelatin.
- Granulated Sugar: This provides the bulk of the sweetness and contributes to the marshmallow’s structure once cooked into a syrup. Its role is fundamental to the candy’s overall composition.
- Powdered Sugar: Essential for coating the finished marshmallows. It prevents them from sticking to each other, to your hands, and to the cutting surface, making them easy to handle and enjoy.
- Salt: Just a pinch of salt makes a world of difference. It balances the intense sweetness of the sugars and enhances the overall flavor profile, adding depth and complexity to each bite.
- Vanilla Extract: The classic flavor for marshmallows. High-quality vanilla extract infuses your marshmallows with a warm, comforting aroma and taste that is universally loved. Consider pure vanilla extract for the best results.
Unleash Your Creativity: Exciting Marshmallow Variations
One of the greatest joys of making marshmallows at home is the endless potential for customization. While classic vanilla is always a hit, don’t hesitate to experiment and make these treats truly your own. Here are some fantastic recipe variations to inspire your inner confectioner:
- Add a Splash of Color: Transform your marshmallows from simple white clouds into vibrant, eye-catching treats. A few drops of food coloring added to the mixture during the whipping process can create stunning results. Imagine soft pink hearts for Valentine’s Day, pastel blues or yellows for a baby shower, or festive reds and greens for the holidays. Gel food coloring provides the most vivid hues without altering the texture.
- Experiment with Flavors: Beyond vanilla, a world of flavor extracts awaits!
- Minty Fresh: Add a teaspoon of peppermint extract for a refreshing twist, perfect for pairing with hot chocolate or for holiday gifting.
- Nutty Notes: Almond extract offers a sophisticated, slightly nutty flavor that complements the sweetness beautifully. Hazelnut or pistachio extracts could also be intriguing.
- Citrus Zest: Lemon, orange, or lime zest (or extracts) can add a bright, tangy counterpoint to the sweetness, creating a surprisingly refreshing marshmallow.
- Coffee Lovers: A teaspoon of espresso powder or coffee extract can give your marshmallows a rich, complex flavor, ideal for pairing with coffee or as an adult treat.
- Fruity Fun: Consider berry extracts like raspberry or strawberry for a summery vibe.
Remember to start with a small amount (1/2 teaspoon) and taste, adjusting as needed, as extracts can be potent.
- Get Creative with Shapes and Sizes: Don’t limit yourself to squares!
- Holiday Fun: Use cookie cutters to create themed shapes for different holidays – stars for Christmas, pumpkins for Halloween, or shamrocks for St. Patrick’s Day.
- Party Perfection: For birthdays or themed parties, use cutters relevant to the celebration.
- Tiny Toppers: For an elegant touch, cut tiny squares or circles to float in espresso or specialty cocktails.
- Giant S’mores: Cut larger squares for epic s’mores, ensuring a perfect marshmallow-to-graham-cracker ratio.
Just make sure your cookie cutters are greased to prevent sticking.
- Add Inclusions: Mix in mini chocolate chips, sprinkles, or finely chopped nuts into the marshmallow mixture before pouring it into the pan for added texture and flavor.

Your Step-by-Step Guide to Crafting Homemade Marshmallows
Making marshmallows from scratch might seem daunting, but it’s much simpler than you think! With a little patience and the right technique, you’ll be enjoying these fluffy delights in no time. Here’s a detailed breakdown of the process:
- Prepare Your Pan: Begin by lightly coating a 9×13-inch baking dish with nonstick cooking spray. For best results, use a glass or ceramic dish, as they tend to hold temperature more consistently. Set aside.
- Proof the Gelatin: In the bowl of a stand mixer (or a large mixing bowl if using a handheld mixer), sprinkle the unflavored gelatin powder evenly over 1/2 cup of cool water. Allow the gelatin to “bloom” or soak for about 5-10 minutes. It will become thick and gummy. This step is crucial for the gelatin to properly dissolve later and create the desired texture.
- Craft the Sugar Syrup: In a small, deep saucepan, combine the granulated sugar, light corn syrup, salt, and the remaining 1/2 cup of cool water. Place the saucepan over medium heat, stirring gently until the sugar completely dissolves. Once dissolved, increase the heat to high and bring the mixture to a rapid, rolling boil. Allow it to boil vigorously, without stirring, for exactly 1 minute. Using a candy thermometer here is highly recommended; the syrup should reach 240°F (115°C) for perfect consistency. Immediately remove the saucepan from the heat once the time is up or the temperature is reached.
- Combine and Whip: With your stand mixer on low speed and fitted with the whisk attachment, slowly and carefully pour the hot sugar syrup into the softened gelatin mixture. Be cautious as the syrup is extremely hot. Once all the syrup has been added, increase the mixer speed to high. Whip the mixture continuously for approximately 5-10 minutes, or until it becomes very thick, fluffy, and has cooled to a lukewarm temperature. It should look like a glossy, incredibly voluminous cloud. Add in the vanilla extract during the last minute of whipping and beat until fully incorporated.
- Pour and Chill: Swiftly pour the whipped marshmallow mixture into your prepared baking dish. Use a greased spatula to spread it evenly into all corners of the pan. Promptly sprinkle 1/4 cup of powdered sugar over the entire surface of the marshmallow slab. This initial dusting helps prevent sticking. Place the uncovered dish into the refrigerator for at least 3 hours, or ideally, overnight, to allow the marshmallows to fully set and firm up.
- Cut and Coat: Once the marshmallow is completely firm, remove the dish from the refrigerator. Lightly grease your chosen cookie cutter (heart-shaped, in this case) with a little nonstick spray or oil. Press the cutter firmly into the marshmallow slab, then gently lift and separate the shapes. Repeat until you’ve cut all the marshmallows. Place the cut heart-shaped marshmallows into a bowl containing the remaining 1/4 cup of powdered sugar. Gently toss them to ensure all sides are thoroughly coated. Shake off any excess powdered sugar.
- Enjoy Your Creation: Your homemade marshmallows are now ready to be enjoyed! Savor them on their own as a sweet treat, or drop them into a mug of warm hot cocoa for an instant upgrade.
Video: Homemade Marshmallows Visual Guide
For a complete visual walkthrough of the process, watch our detailed video guide below. Seeing each step demonstrated can provide extra confidence and clarify any questions you might have about achieving the perfect consistency and technique for your homemade marshmallows.
Storing Your Homemade Marshmallows for Optimal Freshness
Proper storage is key to enjoying your homemade marshmallows at their best. While they are so delicious you might finish them quickly, here’s how to keep them fresh:
- Shelf Life: These delectable homemade marshmallows are truly at their peak when enjoyed within 1-2 days of making them. However, you can store them in an airtight container at cool room temperature for up to 4 days. To prevent them from sticking together, separate layers with parchment paper. Over time, the powdered sugar coating may dissolve, so a fresh dusting can easily “freshen them up” if needed before serving.
- Refrigerator and Freezer: It’s generally not recommended to store homemade marshmallows in the refrigerator or freezer. The cold temperatures can cause them to harden significantly. When they thaw or warm up, they tend to become excessively sticky or even melt, losing their desired fluffy texture. Enjoy them at room temperature for the best experience.
More Sweet Treats to Explore!
If you’ve enjoyed making these delightful marshmallows, you might love exploring some of our other fantastic sweet treat recipes:
- Crockpot Candy
- Popcorn Balls
- Potato Candy
- Candied Pecans
- Polar Bear Paws
- Cream Cheese Mints
Homemade Marshmallows
Pin
Ingredients
- 3 packages unflavored gelatin, (1/4-ounce each)
- 1 cup cool water, divided
- 1 & 1/2 cups granulated sugar
- 1 cup light corn syrup
- 1/8 teaspoon salt
- 1 tablespoon vanilla extract
- 1/2 cup powdered sugar, divided
Instructions
- Coat a 9×13 baking dish with nonstick spray (glass or ceramic is best.)
- In a bowl of a stand mixer, combine the gelatin and 1/2 cup cool water. Let soak.
- In a small, deep saucepan, combine the sugar, corn syrup, salt, and 1/2 cup cool water. Cook the mixture over medium heat, stirring, until the sugar completely dissolves. Raise the heat to high and bring to a rapid boil. Allow to boil, without stirring, for 1 minute. Remove from the heat.
- With the mixer on low speed fitted with the whisk attachment, slowly pour the sugar syrup into the softened gelatin. Increase the speed to high, and whip until the mixture is very thick and fluffy, and has cooled to lukewarm, about 5-10 minutes. Add in the vanilla and beat to incorporate.
- Pour the marshmallow mixture into the baking dish and spread evenly using a greased spatula. Sprinkle 1/4 cup powdered sugar over the top, and place in the refrigerator, uncovered, for at least 3 hours (or overnight) before cutting.
- Use a greased cookie cutter to make heart shapes and gently separate. Place heart shaped marshmallows in a bowl with 1/4 cup powdered sugar and gently toss to coat them on all sides. Shake off any excess.
- Enjoy on their own or in a cup of hot cocoa!
Video
Notes
Change the flavor. Add in some peppermint or almond extract for a different flavor.
Make different shapes. Cut into varying shapes and sizes for different holidays or gatherings.
Nutrition
Serving: 1 marshmallow |
Calories: 74 kcal |
Carbohydrates: 17g |
Protein: 2g |
Fat: 1g |
Saturated Fat: 1g |
Sodium: 19mg |
Sugar: 17g |
Calcium: 3mg |
Iron: 1mg
Nutritional information given is an automatic calculation and can vary based on the exact products you use and any changes you make to the recipe. If these numbers are very important to you, I would recommend calculating them yourself.
I hope you love this delicious and easy recipe – be sure to give it a review below! Also, don’t forget to follow Belly Full on TikTok, Facebook, Instagram, Pinterest, and YouTube for more amazing recipes and culinary inspiration!