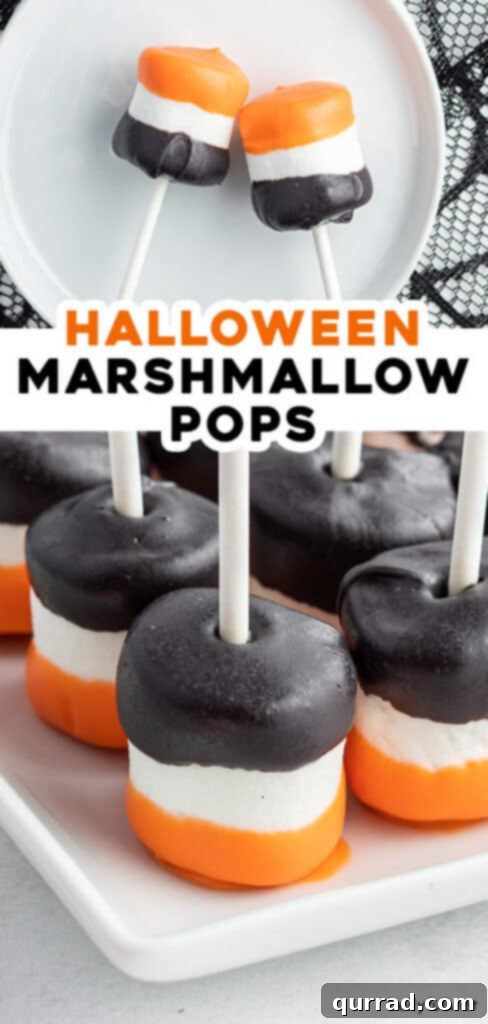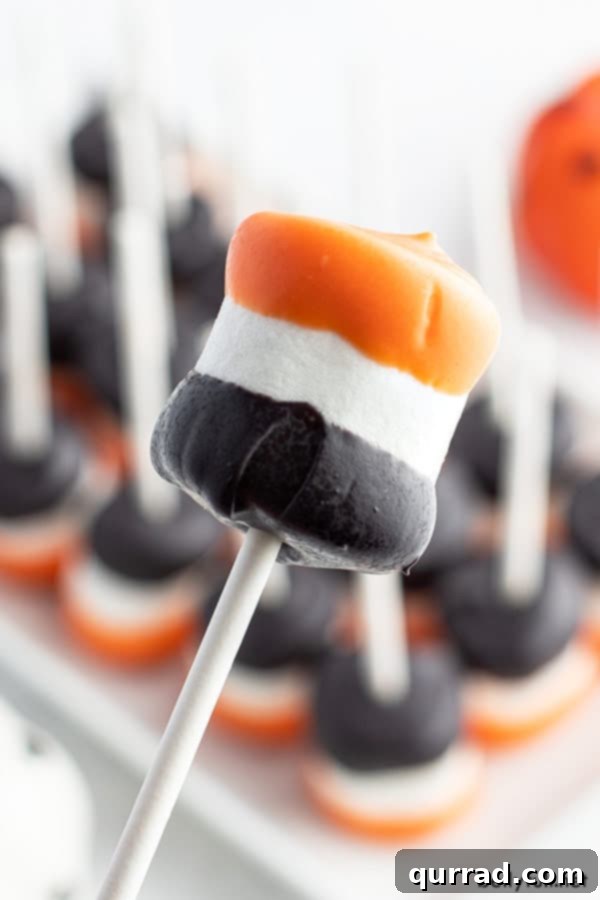
As the leaves begin to turn and a crisp chill fills the air, the anticipation for Halloween grows! It’s a season of spooky delights, creative costumes, and, of course, delicious treats. If you’re searching for an exceptionally easy, delightfully fun, and utterly scrumptious Halloween no-bake creation, look no further than these vibrant Marshmallow Pops. They feature fluffy marshmallows expertly placed on lollipop sticks, beautifully adorned with classic orange and black candy melts, making them a festive and effortless addition to any Halloween celebration.
These charming confectionery sticks are more than just a sweet bite; they are a canvas for creativity, a perfect activity for little hands, and a fantastic party favor. Forget complicated baking projects; these marshmallow pops promise maximum festive impact with minimal fuss, leaving you more time to enjoy the spooky season with your loved ones.
And if you happen to have a treasure trove of leftover Skittles candy from your trick-or-treating haul, be sure to check out these irresistible Skittles Marshmallow Pops for another burst of fruity flavor and color!
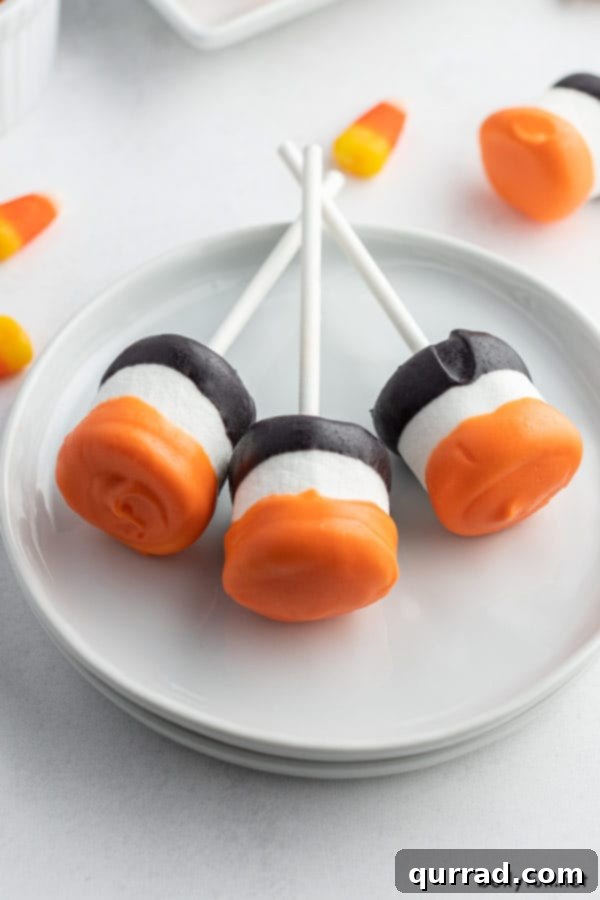
Are you eager to conjure up a festive Halloween treat that will captivate your family and guests? These delightful Marshmallow Pops are your answer! Their vibrant colors and simple elegance make them an instant hit, perfect for school parties, neighborhood get-togethers, or just a fun afternoon activity at home.
Marshmallows on a stick have long been a beloved indulgence, frequently spotted at bustling theme parks, quaint candy shops, and festive fairs. Their universal appeal lies in their simplicity and the pure joy they evoke. But why venture out when you can recreate this magic in your own kitchen? These chocolate-dipped marshmallow pops are incredibly simple to prepare, transforming ordinary marshmallows into extraordinary Halloween delights. What’s even better is that they are an ideal project for kids. With just a little supervision, your children can take pride in creating their very own spooky sweet masterpieces!
Essential Ingredients for Spooky Sweet Marshmallow Pops
Creating these enchanting Halloween Marshmallow Pops requires only a handful of readily available ingredients. The beauty of this recipe lies in its simplicity, making it accessible for even the most novice of kitchen adventurers. Here’s a breakdown of what you’ll need to gather to bring these delightful treats to life:
- Black candy melts: These are crucial for achieving the iconic Halloween colors. Candy melts are specifically designed to melt smoothly and harden quickly, providing a vibrant, opaque coating that holds its shape beautifully. They are much easier to work with than traditional chocolate for this purpose, as they don’t require tempering.
- Orange candy melts: Complementing the black, orange candy melts complete the classic Halloween aesthetic. Choose high-quality candy melts for the best flavor and melting consistency.
- Large marshmallows: The star of the show! Large marshmallows provide an ample surface area for dipping and decorating, making them easy to handle and creating a satisfying bite. Ensure they are fresh and soft for the best texture.
- Lollipop sticks (4-inches long): These sturdy sticks are perfect for holding your marshmallow pops. Their length provides a comfortable grip for dipping and enjoying. You can find them in the baking aisle of most grocery stores or craft shops.
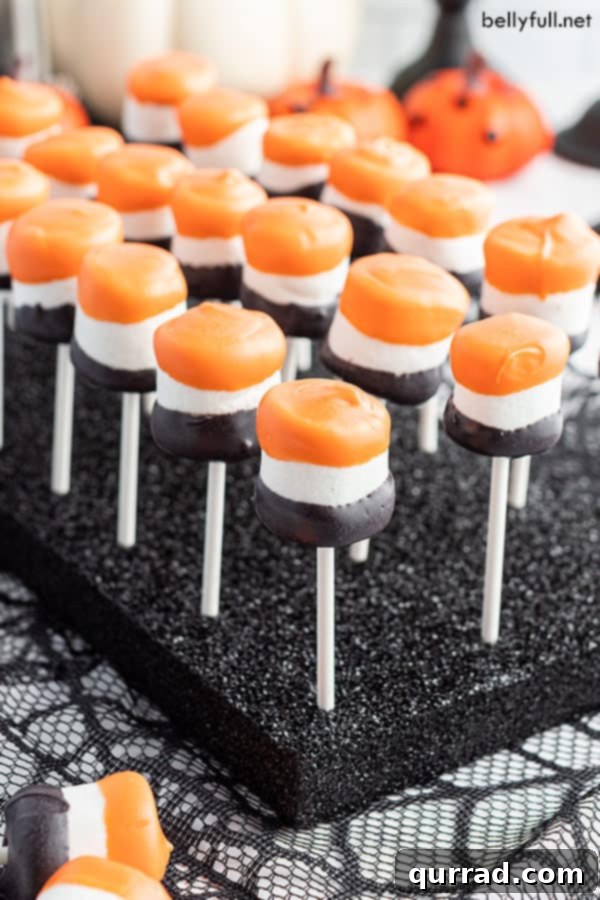
- A large piece of styrofoam: An often-overlooked but essential piece of “equipment.” A styrofoam block provides a stable base to stand your newly dipped marshmallow pops upright as they set, preventing them from sticking to a flat surface and ensuring a perfectly smooth finish.
Crafting Your Halloween Marshmallow Pops: A Simple Step-by-Step Guide
These marshmallow pops are remarkably straightforward to create, making them an ideal project for a fun afternoon activity. With just a few simple steps, you’ll have a batch of festive treats ready to impress. Here’s a detailed guide to ensure your success:
- Prepare your workspace: Begin by lining a baking sheet with parchment paper. This will be where your freshly dipped marshmallows rest initially. Next, carefully insert a lollipop stick about three-quarters of the way deep into each marshmallow. Then, gently remove the stick. This pre-poking step creates a clear path, preventing the marshmallow from tearing or splitting when the stick is reinserted later, especially after the first candy layer has begun to set. Set these prepared marshmallows aside.
- Melt the black candy melts: Following the package instructions, carefully melt the black candy melts. This can typically be done in a microwave in short intervals (30 seconds at a time, stirring between each) or over a double boiler. Stir continuously until the candy melts are completely smooth and free of lumps. The consistency should be fluid enough for dipping but not too thin.
- Dip the first layer (black): Take a marshmallow and hold it by the sides (not the pre-poked hole). Dip the side of the marshmallow with the pre-made hole into the melted black candy melts. Gently swirl and rotate the marshmallow over the bowl, allowing any excess candy coating to drip off. A light tap against the side of the bowl can help achieve a smooth, even coating.
- Set the black layer: Carefully place the dipped marshmallows onto your prepared baking sheet, ensuring the black-dipped side faces upwards. Now, reinsert the lollipop stick back into each marshmallow’s pre-made hole. Transfer the baking sheet to the refrigerator for approximately 5 minutes to allow the black candy coating to dry and set completely. This quick chill ensures a firm base for your next layer.
- Melt the orange candy melts: While the black layer is setting, melt the orange candy melts using the same method as the black ones – microwave in intervals or a double boiler – until smooth and creamy.
- Dip the second layer (orange): Once the black coating is completely dry and firm to the touch, retrieve the marshmallows from the refrigerator. Holding each marshmallow by the already set black sides (not by the lollipop stick to avoid smudges), dip the undipped portion into the melted orange candy coating. Again, gently wriggle and rotate the marshmallow over the bowl to shake off any excess coating, striving for a clean line where the two colors meet.
- Final setting: Immediately after dipping, place the marshmallow pops (lollipop stick side down) into your large piece of styrofoam. The styrofoam will hold them upright, preventing any flattening or smudging as the orange candy sets. Return the styrofoam board with the marshmallow pops to the refrigerator for an additional 5-10 minutes, or until the orange coating is completely firm and dry.
These pops are not just a treat; they’re a sweet craft! Depending on their age, your kids will love helping with the dipping and decorating, or even taking charge of the whole process themselves, fostering their creativity and culinary confidence.
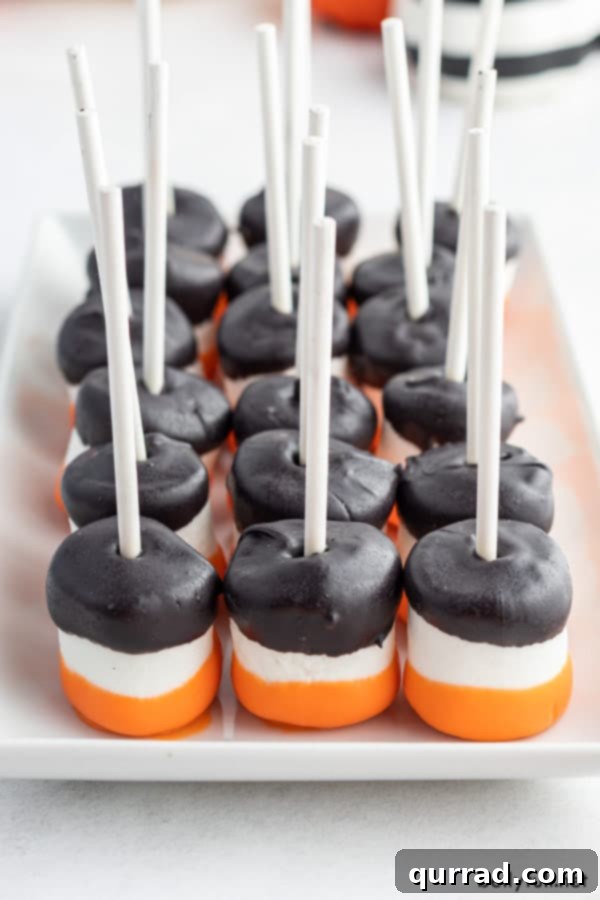
Unleash Your Creativity: Exciting Recipe Variations and Decoration Ideas
One of the most enjoyable aspects of making Marshmallow Pops is the endless possibilities for customization. While the classic orange and black stripes are perfect for Halloween, don’t hesitate to let your imagination run wild with these exciting variations:
- Add some sparkle and crunch: Before the candy melts completely dry and set, gently roll or sprinkle your pops with colorful Halloween-themed sprinkles, edible glitter, or finely crushed cookie crumbs (like Oreo crumbs for a spooky “dirt” effect!). This adds texture, visual appeal, and an extra layer of flavor.
- Bold color blocking: Instead of striped pops, consider coating the entire marshmallow in a single color – all black for a mysterious look, or all orange for a vibrant pumpkin theme. You can also dip them halfway in one color, then halfway in another to create a striking two-tone effect without the distinct stripe.
- Alternative sticks: For a delightful salty and sweet contrast, replace the traditional lollipop stick with a long pretzel stick. This not only offers a different flavor profile but also adds another layer of crunch. Just make sure the pretzel sticks are sturdy enough to hold the marshmallow.
- Seasonal and celebratory colors: The versatility of these pops extends far beyond Halloween! Alter the candy melt colors to suit any occasion. Think red and green for Christmas festivities, pastels for Easter or spring parties, blue and pink for a baby shower, or even school colors and sports team colors for themed events. The possibilities are truly endless, making these a year-round favorite.
- Edible artistry: Once your candy melts have fully set, use edible food markers to draw spooky faces, cobwebs, or intricate patterns on your pops. This is a fantastic way to personalize each treat and engage kids in the decorating process.
- Drizzle and design: After the main candy melt layers have set, melt a contrasting color of candy melt (or even white chocolate) and drizzle it over the pops in a zigzag pattern for an elegant finish. You can also use a small piping bag or a fork to create spiderweb designs.
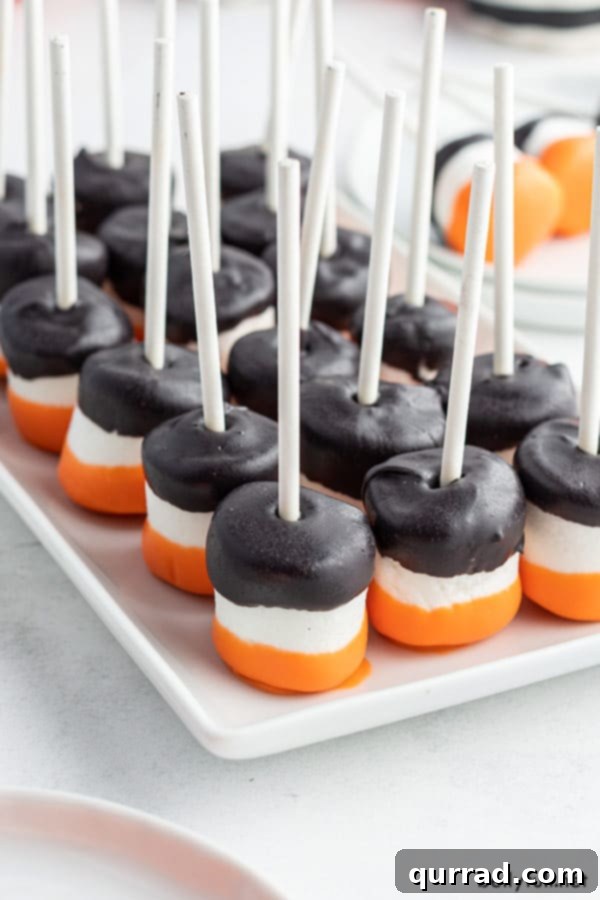
Optimizing Storage: Keeping Your Marshmallow Pops Fresh
One of the many benefits of these delightful Marshmallow Pops is that they can be prepared in advance, which is incredibly convenient if you’re planning a Halloween party or need them for a specific event. Proper storage is key to maintaining their freshness and appealing texture.
To keep your marshmallow pops in their prime, store them in a tightly covered, airtight storage container. They will remain fresh and delicious for up to 1 week when kept at room temperature. It’s crucial to select a cool, dry spot for storage. Marshmallows and candy melts are sensitive to environmental conditions, so keep them away from any direct heat sources, such as sunny windows or warm kitchen appliances, and avoid areas with high moisture. Both heat and humidity can cause the candy coating to become sticky or melt, and the marshmallows themselves can lose their delightful fluffiness.
When Are Marshmallow Pops Past Their Prime? Spotting Spoilage
While marshmallow pops are a relatively stable treat, they do have a shelf life. It’s important to know how to identify when they are no longer at their best to ensure a pleasant eating experience. The primary indicator that your marshmallow pops are going bad is a change in the marshmallow’s texture.
As marshmallows age, they tend to dry out. When this happens, they lose their soft, chewy, and fluffy consistency, becoming noticeably hard and sometimes brittle. While consuming them when they’re merely dry is unlikely to cause harm, their taste and texture will be far from ideal. The candy coating might also become less vibrant or even slightly crumbly. For the best enjoyment, if you notice the marshmallows have become very hard or the texture is otherwise unappealing, it’s best to discard them and whip up a fresh batch. Given how easy they are to make, starting anew is always a good option!
To Freeze or Not to Freeze: The Marshmallow Pop Dilemma
Technically, marshmallows themselves can be frozen, and many people successfully store plain marshmallows in the freezer to extend their shelf life. However, when it comes to marshmallow pops – specifically those coated in candy melts – freezing isn’t recommended for optimal enjoyment. This particular treat simply doesn’t fare well in the freezer for a few important reasons.
When frozen, the marshmallow core tends to become excessively hard, losing that signature soft, fluffy, and slightly yielding texture that makes these pops so delightful. Upon thawing, the marshmallow can sometimes become chewy in an unpleasant way, or even a bit gummy. Furthermore, the candy melt coating, while durable, can sometimes develop condensation or become slightly tacky after freezing and thawing, affecting its appearance and texture. To truly savor the light, airy marshmallow and the smooth, crisp candy coating, it’s best to enjoy these treats fresh or stored at room temperature as advised.
Beyond Halloween: Versatility for Any Celebration
While these marshmallow pops are undeniably a showstopper for Halloween with their iconic black and orange colors, their appeal isn’t limited to just one holiday. Their simple charm and customizable nature make them fantastic for a wide array of celebrations throughout the year.
Imagine them adorned in bright pastels for Easter or spring gatherings, vibrant reds and blues for Fourth of July picnics, or elegant whites and golds for New Year’s Eve. They are absolutely ideal for birthday parties – simply choose colors that match the birthday theme! They also make wonderful holiday treats, adding a splash of festive cheer to any dessert table.
Beyond being a delightful dessert, marshmallow pops excel as thoughtful and personalized party favors. Wrap them individually in small, clear plastic bags, tie them with a festive ribbon, and you have charming, homemade gifts that guests of all ages will adore. They’re also a popular choice for school fundraisers, bake sales, or as a sweet surprise for teachers and classmates. Their portability and minimal mess make them a win-win for any event where a simple, yet impressive, treat is desired.
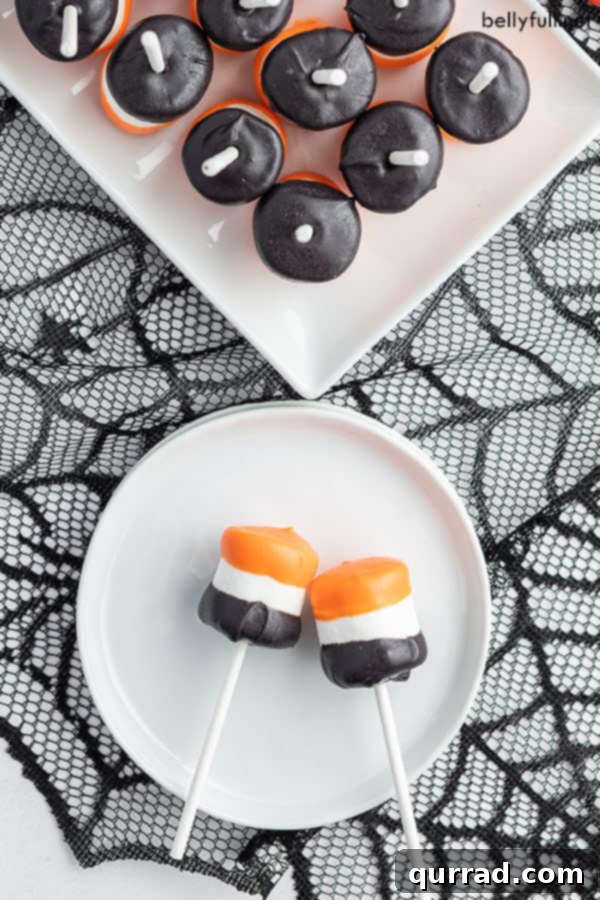
More Spooktacular Halloween Recipes to Try
If you’re in the mood for even more festive fun in the kitchen this Halloween, here are some other incredible recipes that are sure to be a hit with ghouls and goblins alike:
- Mummy Oreo Balls
- Mummy Hot Dogs
- Candy Corn Pretzel Bark
- Monster Munch
- Halloween Pretzel Rods
- Witches Brew
Halloween Marshmallow Pops
25 Pops
Equipment
- 25 lollipop sticks (4-inches long)
- Large piece of styrofoam
Ingredients
- 6 ounces black candy melts
- 6 ounces orange candy melts
- 25 large marshmallows
Instructions
- Line a cookie sheet with foil or parchment paper; set aside. Insert a lollipop stick 3/4 deep into each marshmallow and take out again. This creates a pilot hole.
- Melt the black candy melts according to package instructions (microwave in short bursts or use a double boiler) until smooth.
- Dip the side of the marshmallow with the pre-made hole into the melted black candy coating. Hold the marshmallow over the bowl and gently wriggle it around until excess candy coating has been tapped off.
- Place marshmallows on the cookie sheet with the dipped side up and insert the lollipop stick back into each pre-made hole. Place in the refrigerator for 5 minutes to dry and set.
- Melt the orange candy melts using the same method as the black, until smooth.
- Once the black coating is completely dry, hold the marshmallow by the set black sides (to avoid disturbing the coating) and dip the remaining undipped portion into the orange melted candy coating. Gently wriggle around to shake off excess coating.
- Place the marshmallow pops (lollipop stick side down) on your styrofoam board; put back into the refrigerator for 5-10 more minutes to set completely.
Notes
These treats can be stored in a tightly covered, airtight container for up to 1 week at room temperature. Keep them away from any direct heat sources or moisture, as these conditions can cause the marshmallows and candy coating to melt or become sticky.
Nutrition
Calories: 52 kcal |
Carbohydrates: 9 g |
Protein: 1 g |
Fat: 2 g |
Saturated Fat: 2 g |
Sodium: 12 mg |
Sugar: 8 g |
Iron: 1 mg
Nutritional information provided is an automatic calculation and may vary based on the specific products used and any modifications made to the recipe. If precise nutritional values are critical, independent calculation is recommended.