
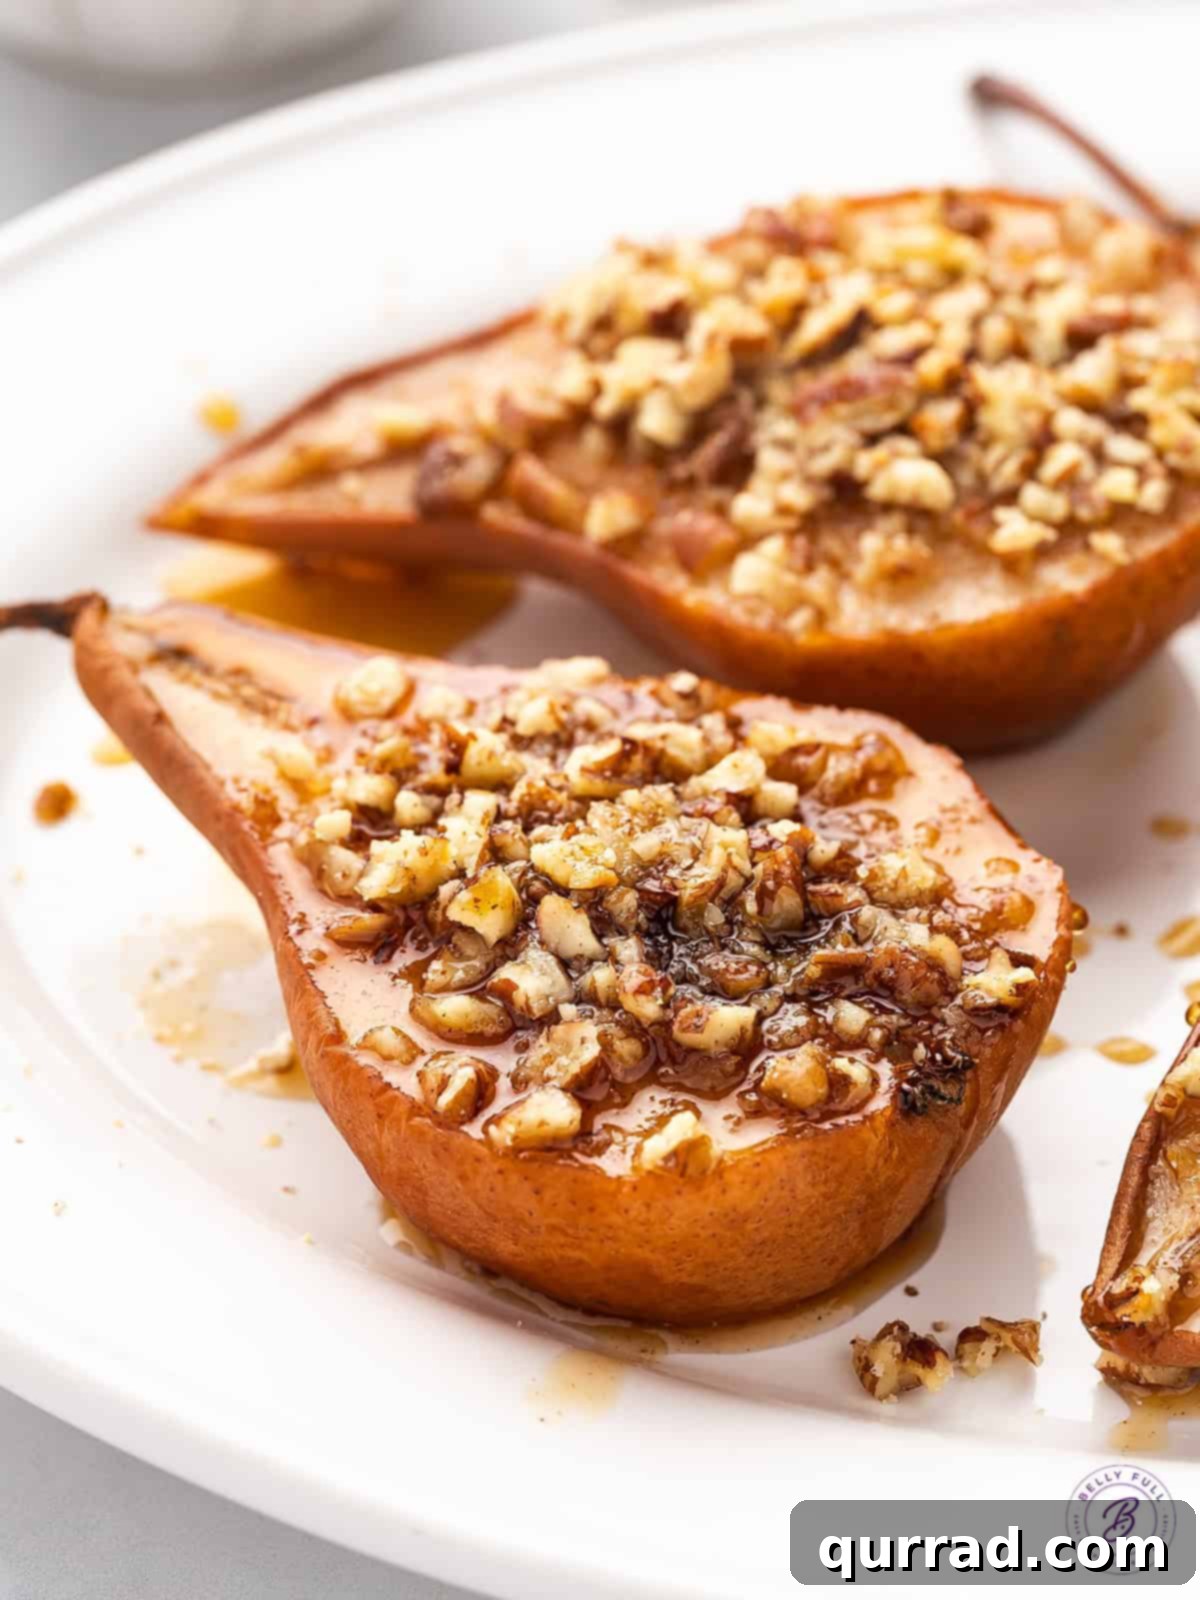
Delightfully warm, perfectly spiced, and wonderfully sweet, these Baked Pears are an absolute dream for any season, but especially comforting during fall and winter. Requiring just a handful of simple, wholesome ingredients and minimal effort, this recipe transforms humble pears into an elegant and comforting dessert. Whether you’re looking for an easy weeknight treat, a healthier alternative to heavier sweets, or an impressive dish for a casual gathering, these honey-kissed pears, topped with crunchy pecans, are sure to become a seasonal favorite. Imagine serving them fresh from the oven, with a luscious scoop of vanilla ice cream melting into the warm fruit, or a dollop of freshly whipped cream for an extra touch of indulgence. This recipe proves that sometimes, the simplest ingredients create the most memorable and satisfying flavors.
Easy Baked Pears Recipe: A Quintessential Fall Dessert
Pears, with their delicate sweetness, subtle floral notes, and wonderfully tender texture, are often an underrated fruit in the culinary world. They tend to be overshadowed by other popular fall and winter fruits, like crisp apples or vibrant oranges, despite their inherent versatility and exquisite flavor profile that is perfectly suited for autumnal recipes. From crunchy pear crisps and refreshing pear salads to elegant tarts, pears can be incorporated into a myriad of dishes. However, it is in their baked form that their true potential for comfort and flavor truly shines, bringing out their natural sugars and creating a wonderfully fragrant and satisfying treat.
This easy baked pears recipe isn’t just a dessert; it’s an experience, a warm hug on a crisp autumn evening. It offers a delightful and lighter alternative to classic baked apples, with a unique flavor and texture all its own. What makes these baked pears truly stand out is their remarkable simplicity and the depth of flavor achieved with minimal effort. Using just five core ingredients – fresh, ripe pears, golden honey, warm spices like cinnamon and nutmeg, and crunchy pecans – you can create a dessert that tastes far more complex and indulgent than its preparation suggests. The gentle baking process tenderizes the pears beautifully, allowing them to absorb the aromatic honey-spice syrup, while the pecans add a satisfying textural contrast and a rich, nutty flavor. This naturally gluten-free and relatively light dessert is perfect for both an intimate family dinner and a more elaborate dinner party, offering an impressive presentation without the fuss. The enchanting aroma filling your kitchen as these pears bake is an added bonus, setting the perfect cozy atmosphere.
Baked Pears with Honey and Pecans
Discover the joy of simplicity with these perfectly spiced, honey-sweetened baked pears, crowned with crunchy pecans. An effortless yet elegant fall dessert, ideal for any occasion. Pair them with a scoop of vanilla ice cream or a dollop of whipped cream for an unforgettable treat!
Ingredients
- 4 large ripe but firm pears, washed and thoroughly dried (Bosc, Bartlett, Anjou, Asian, or Seckel pears are excellent choices for baking, but feel free to use your favorite variety!)
- 1/3 cup honey, (pure maple syrup can be used as a delicious vegan alternative)
- 1 tsp pure vanilla extract
- ½ tsp ground cinnamon
- pinch of ground nutmeg
- ½ cup chopped pecans, walnuts, almonds, sunflower seeds, or even rolled oats also work wonderfully for a crunchy topping
- Vanilla ice cream, plain Greek yogurt, or homemade whipped cream, for serving (optional, but highly recommended!)
Instructions
- Prepare Your Oven and Baking Dish: Begin by preheating your oven to 350°F (175°C). While the oven heats, prepare your baking vessel. Lightly coat a 13×9 inch baking dish or a similar oven-safe pan with nonstick cooking spray. This crucial step prevents the pears from sticking and ensures an easy cleanup.
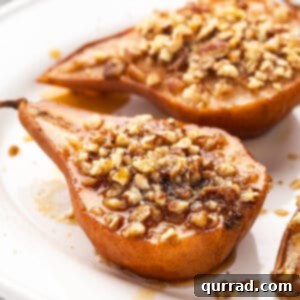
- Prepare the Pears for Baking: Take each washed and dried pear and carefully slice it in half vertically, from the stem all the way down to the base. To ensure the pear halves sit flat and remain stable in your baking dish during cooking, gently cut a small, thin sliver off the rounded underside of each half. This creates a flat base, preventing them from wobbling. Next, using a small measuring spoon, a melon baller, or even a small cookie scoop, meticulously scoop out the seeds and the fibrous core from the center of each pear half. This creates a neat well, perfect for holding the flavorful honey-spice mixture. Arrange these prepared pear halves, cut-side up, in a single layer within your greased baking dish.
- Whisk Together the Honey-Spice Mixture: In a small bowl, combine the rich and sweet honey (or pure maple syrup if preferred), the fragrant vanilla extract, the warming ground cinnamon, and a delicate pinch of ground nutmeg. Using a whisk, thoroughly combine these ingredients until they are well incorporated and form a smooth, aromatic syrup. This delightful mixture will be the core flavor that infuses your baked pears.
- Drizzle with Flavor and Top with Crunch: Generously drizzle most of the prepared honey-spice mixture over the cut surfaces of the pear halves arranged in the baking dish. Ensure each pear half gets a good coating. It’s important to reserve approximately 2 tablespoons of this delicious mixture; you will use this for a final, fresh drizzle over the pears after they are baked, adding an extra layer of moisture and a burst of flavor. Finally, evenly sprinkle the chopped pecans over the pears, ensuring each half receives a delightful crunchy topping that will toast beautifully in the oven.
- Bake to Golden Perfection: Carefully transfer the baking dish into your preheated oven. Bake for approximately 35 minutes. Keep in mind that the exact baking time may vary slightly depending on the size, ripeness, and specific variety of your pears. The pears are done when they are wonderfully tender when gently pierced with a fork and display a lovely, light golden-brown hue around their edges. Your kitchen will also be filled with an irresistibly sweet and spicy aroma, signaling that perfection is near!
- Cool, Serve, and Enjoy: Once baked to your desired tenderness, carefully remove the dish from the oven. Allow the baked pears to cool slightly in the dish for a few minutes. This brief resting period helps the flavors to meld beautifully and makes the pears easier to handle. Serve the pears warm, drizzled with the remaining reserved honey-spice mixture. For the ultimate dessert experience, pair them with a scoop of creamy vanilla ice cream, a dollop of fresh plain Greek yogurt for a healthier twist, or a cloud of homemade whipped cream. Get ready to savor your homemade, comforting, and absolutely irresistible fall treat!
Nutrition Information (per serving)
Please note: The nutritional information provided below is an automatic calculation and serves as an estimate. Values can vary based on the exact products you use, specific brands, and any modifications you make to the recipe. If precise nutritional data is critical for your dietary needs, we recommend calculating them yourself using the specific ingredients you consume.
- Calories: 285 kcal
- Carbohydrates: 53g
- Protein: 2g
- Fat: 10g
- Saturated Fat: 1g
- Polyunsaturated Fat: 3g
- Monounsaturated Fat: 6g
- Sodium: 3mg
- Potassium: 280mg
- Fiber: 7g
- Sugar: 41g
- Vitamin A: 53IU
- Vitamin C: 8mg
- Calcium: 30mg
- Iron: 1mg
Loved this recipe? Share your experience!
We’d be thrilled to hear how your baked pears turned out! Please consider leaving a rating and comment below to share your thoughts and tips with our community.
Crafting the Perfect Baked Pears: A Visual & Detailed Guide
Creating these delightful baked pears is incredibly straightforward, making them an accessible and rewarding recipe even for novice bakers. The secret to success lies in selecting the right pears and following a few simple steps to ensure they come out tender, flavorful, and beautifully caramelized. Let’s walk through the process, ensuring every pear half is destined for deliciousness:
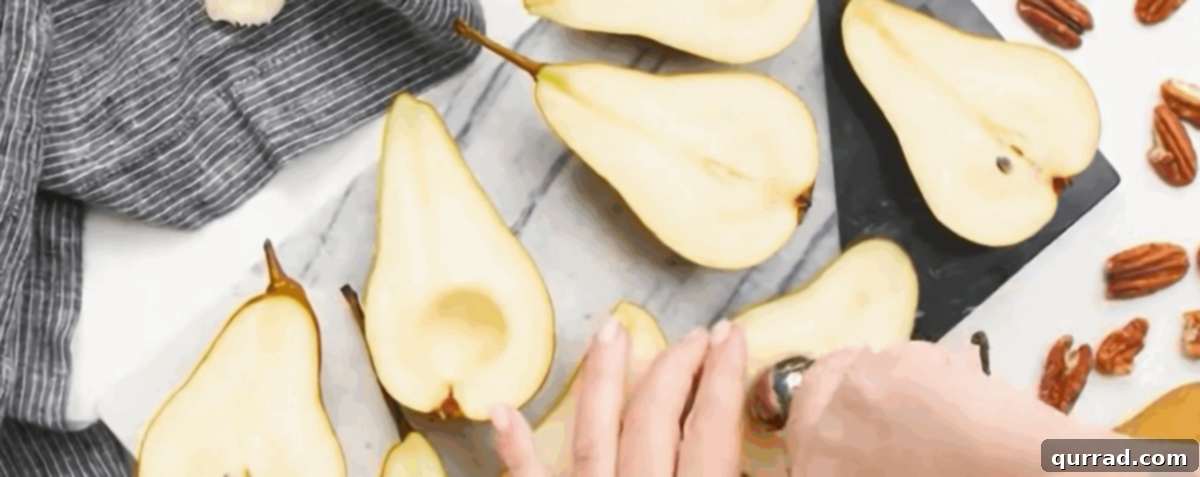
Step 1: Preparing Your Pears and Oven. To begin, preheat your oven to a cozy 350°F (175°C). While the oven gets to temperature, turn your attention to the stars of the show: the pears. Wash and thoroughly dry your chosen fruit. Next, carefully slice each pear in half lengthwise, starting from the stem and cutting straight down through the core. This creates two symmetrical halves. To ensure that these pear halves lay perfectly flat and stable in your baking dish, preventing any unwanted wobbling and promoting even cooking, gently slice a thin sliver off the rounded underside of each half. This small cut creates a flat base, allowing them to sit securely. Now, using a small measuring spoon, a melon baller, or even a miniature cookie scoop, meticulously remove the seeds and the fibrous core from the center of each pear half. This action creates a perfect little well, which will later cradle the flavorful honey-spice mixture. Once prepared, arrange these pear halves, cut-side up, in your lightly greased 13×9 inch baking dish.
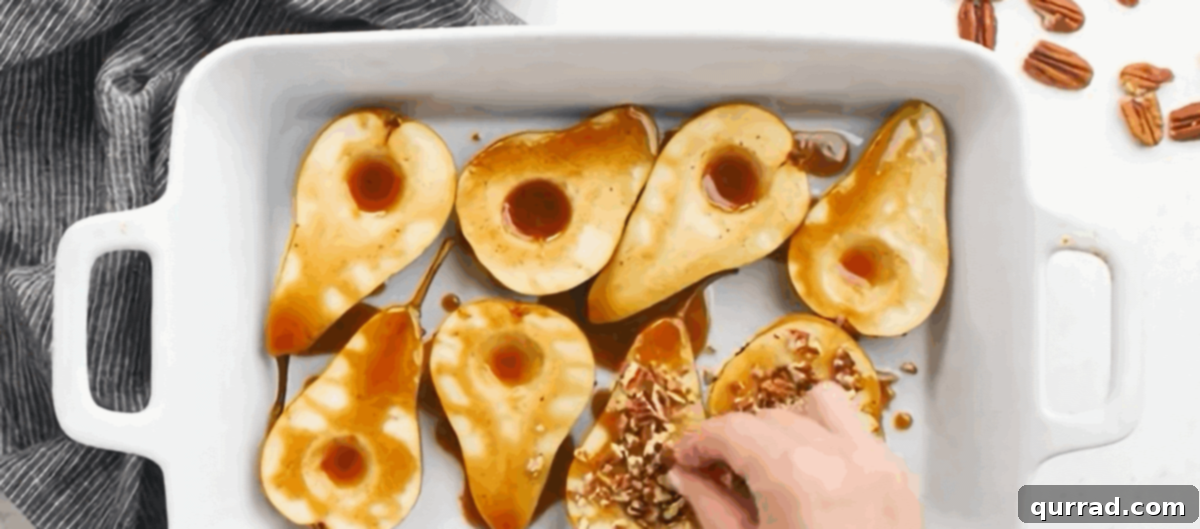
Step 2: Drizzling with Flavor and Baking to Perfection. In a small, clean bowl, combine the liquid gold that is honey, the fragrant pure vanilla extract, the warming notes of ground cinnamon, and a delicate pinch of ground nutmeg. Whisk these ingredients together until they are thoroughly blended, forming a smooth and aromatic syrup that will infuse your pears with incredible fall flavors. Now, generously drizzle the majority of this aromatic mixture over the cut surfaces of the pear halves in the baking dish. Be strategic here: remember to reserve about 2 tablespoons of this luscious syrup – this is your secret weapon for a final flourish after baking, adding an extra layer of moisture and a burst of fresh flavor. Once the pears are beautifully coated, evenly sprinkle the chopped pecans over each half. The nuts will toast beautifully in the oven, adding a delightful crunch and a rich, earthy flavor that complements the sweet pears perfectly. Carefully transfer the prepared baking dish to your preheated oven and bake for approximately 35 minutes, or until the pears are wonderfully tender when gently poked with a fork and show a lovely light browning around their edges. The intoxicating aroma permeating your kitchen will undoubtedly build anticipation!
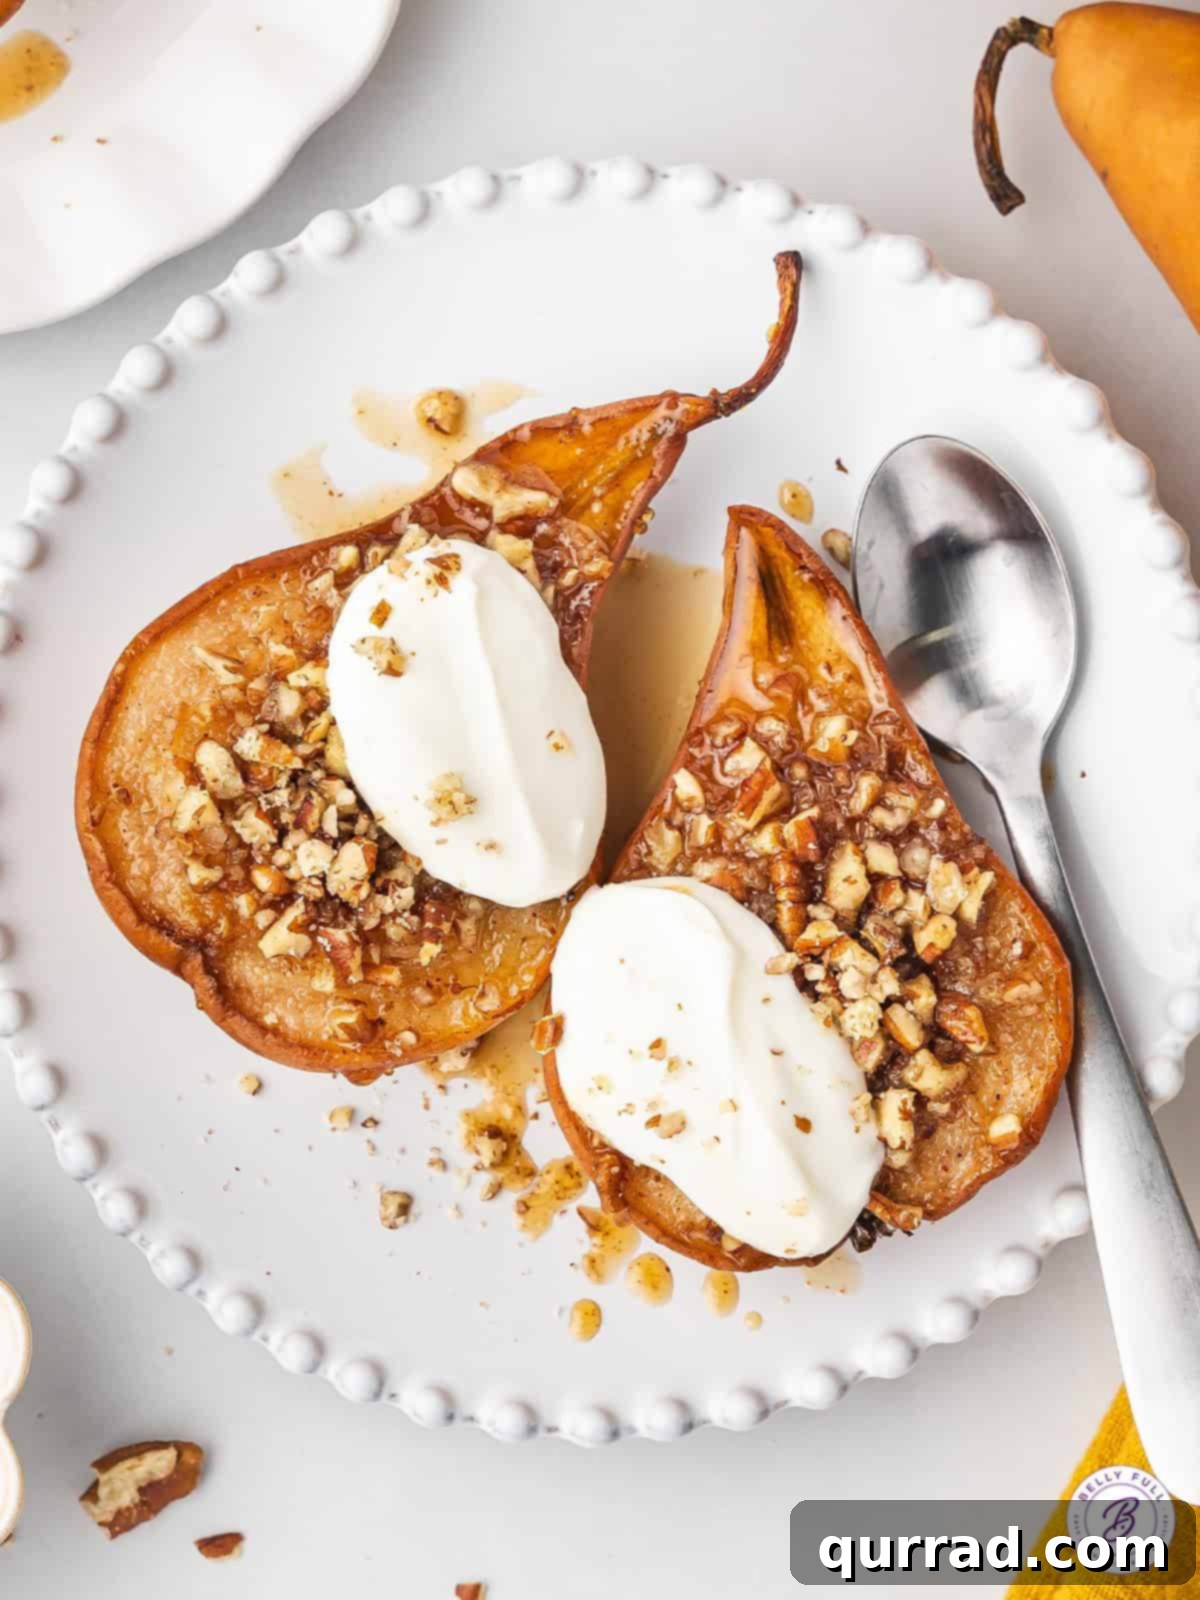
Step 3: Cooling and Serving Your Masterpiece. Once your baked pears have reached their golden, tender perfection, carefully remove the dish from the oven. Resist the urge to dive in immediately! Allow the pears to cool slightly in the dish for a few minutes. This brief resting period is crucial as it allows the delicious flavors to meld and deepen, and also makes the pears easier to handle without falling apart. Once slightly cooled, transfer them to individual serving plates. Now for the grand finale: take that reserved honey-spice mixture and drizzle it generously over the top of each warm pear half for an extra burst of sweetness and aroma. These baked pears are absolutely heavenly on their own, offering a pure and wholesome dessert experience. However, they truly sing when accompanied by a scoop of creamy vanilla ice cream, a dollop of plain Greek yogurt for a healthier and tangier twist, or a cloud of homemade whipped cream. Get ready to enjoy a simple yet incredibly impressive fall dessert that will surely receive rave reviews!
Choosing, Storing, and Reheating Your Baked Pears
To achieve the best possible results with this delightful baked pear recipe, selecting the right pears is a crucial first step. When you’re at the grocery store or farmer’s market, opt for varieties that are known to hold their shape well during baking. Excellent choices include Bosc, Anjou, Bartlett, Comice, or even firmer Asian pears. Look for pears that are ripe but still firm to the touch; when you gently press near the stem, it should yield slightly. Avoid overly soft or bruised fruit, as they tend to become mushy and lose their appealing texture when baked. If your pears are still quite firm upon purchase, allow them to ripen on your counter for a few days until they reach the ideal firmness. For an even richer, more authentic flavor profile, consider using organic pears, which often boast a more intense sweetness and fragrance.
While these baked pears are undeniably at their absolute peak when enjoyed warm, fresh from the oven, any leftovers can certainly be saved and savored later. To store them properly, first allow any remaining baked pears to cool completely to room temperature. This is important to prevent condensation from forming inside the container, which can lead to sogginess. Once cooled, carefully transfer the pear halves to an airtight container. Store them in the refrigerator for up to 2-3 days. This method ensures they retain their moisture and delicate flavor without spoiling. For longer storage, you could potentially freeze baked pears, although their texture might become slightly softer upon thawing. If you choose to freeze, arrange the cooled pears on a baking sheet to freeze individually until solid, then transfer them to a freezer-safe bag or container for up to 2 months. Thaw them in the refrigerator overnight before reheating.
When you’re ready to enjoy your stored baked pears, gently reheating them will bring back much of their original warmth and comforting appeal. The microwave offers the quickest and most convenient reheating method: simply place the pear halves on a microwave-safe plate and heat for 30-60 seconds, or until they are warmed through to your liking. If you prefer a slightly crisper exterior, especially if your pears were topped with nuts, you can reheat them in a preheated oven at 300°F (150°C) for about 10-15 minutes, or until they are warm and the nuts regain some of their crunch. A toaster oven also works wonderfully for individual servings. Remember, whether reheating from the fridge or freezer, a fresh drizzle of the reserved honey-spice mixture (if you have any left, or make a fresh small batch!), or a fresh dollop of ice cream, yogurt, or whipped cream after reheating will revitalize their flavor and presentation, making them feel freshly prepared.
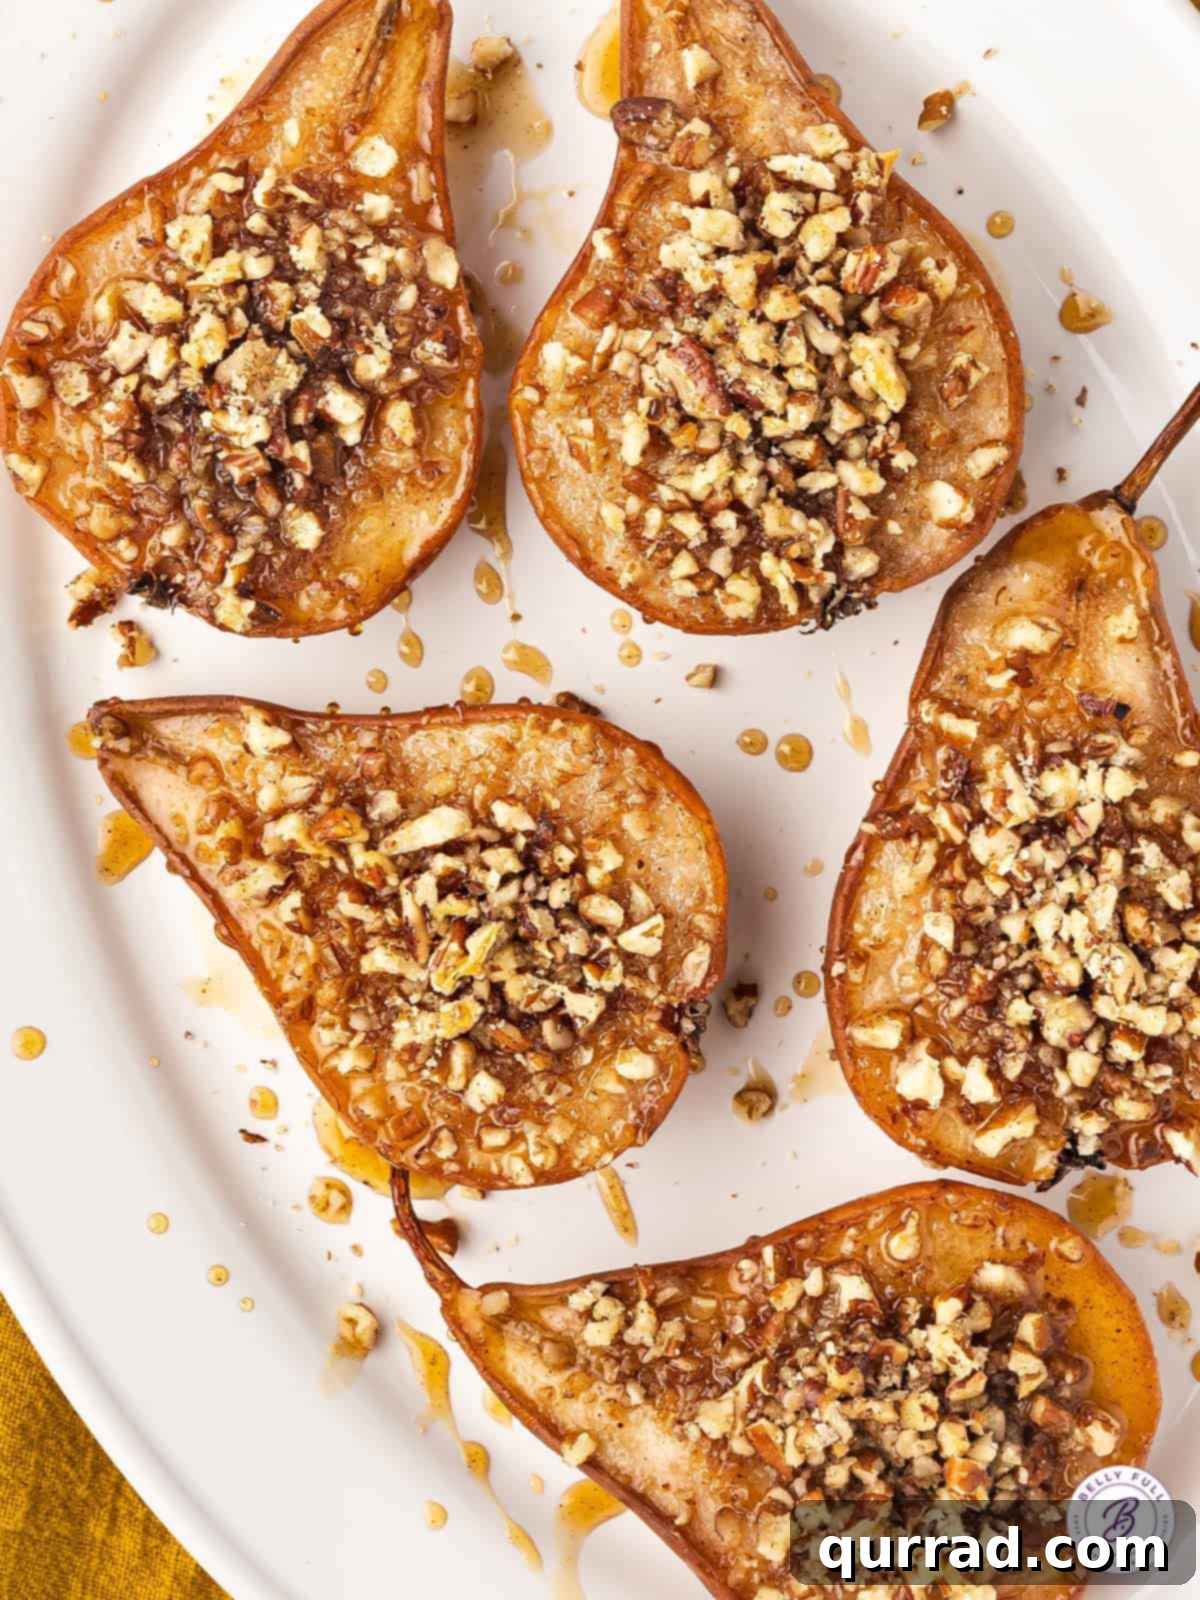
Serving Suggestions and Creative Variations
The inherent beauty of these baked pears lies not only in their ease of preparation but also in their remarkable versatility, making them suitable for a wide range of occasions and capable of adapting to various dietary preferences. While a classic scoop of creamy vanilla ice cream is undeniably a perfect pairing – its cool, smooth texture delightfully contrasting with the warm, spiced fruit – don’t hesitate to explore other equally delightful serving options. A generous dollop of homemade whipped cream adds a light, airy sweetness and a touch of elegance. For those seeking a healthier or protein-rich alternative, a spoonful of plain Greek yogurt offers a refreshing tang that beautifully complements the sweet pears, making them an excellent choice even for a sophisticated breakfast or brunch item. If you enjoy a bit of textural complexity and added goodness, a sprinkle of homemade granola or toasted oats can be a fantastic addition, especially when serving them alongside your morning coffee or as a light afternoon snack.
Thinking beyond traditional dessert, these baked pears can also serve as a sophisticated component on a seasonal cheese board, offering a naturally sweet and spiced counterpoint to sharp cheeses, salty charcuterie, and crusty bread. If you’re hosting a gathering during the cooler months, consider pairing these warm treats with festive, seasonal beverages. The comforting warm spices infused in the pears would beautifully complement a vibrant cranberry Moscow mule for a lively touch, or the rich, cozy notes of a classic hot buttered rum, creating a truly memorable autumnal or winter experience for your guests.
Beyond the serving suggestions, this baked pear recipe is incredibly adaptable, inviting you to experiment with various customizations to suit your personal taste. Feel free to experiment with different nuts: chopped walnuts, slivered almonds, pistachios, or even a delightful mix of your favorite seeds can easily replace pecans, each offering a unique flavor and crunch. For an extra layer of bright, zesty flavor, a fine sprinkle of orange or lemon zest can be added to the honey mixture, which beautifully complements the natural sweetness of the pears and the warmth of the spices. You could also infuse the honey with a sprig of fresh rosemary or thyme during the whisking stage for a subtle, herbaceous undertone that adds an unexpected gourmet touch. For an even more decadent and luxurious texture, a small pat of unsalted butter placed in the hollow of each pear before baking will melt down, creating an even richer, more luscious syrup. If you prefer a more pronounced spice profile, don’t shy away from adding a tiny pinch of ground ginger, allspice, or cardamom to the honey mixture. To make this recipe completely vegan, simply swap the honey for an equal amount of pure maple syrup, and ensure any accompanying ice cream or whipped cream is dairy-free. The possibilities for customization are truly endless, allowing you to tailor this simple yet elegant dish to your precise preferences and the specific occasion.
Frequently Asked Questions (FAQs)
Here are some common questions about making delicious baked pears, along with helpful answers to guide your culinary journey:
- What kind of pears are best for baking?
- For baking, you generally want pears that are ripe but still firm. This ensures they hold their shape beautifully and don’t turn to mush during the cooking process. Excellent choices include Bosc (known for holding its shape), Anjou, Bartlett, Comice, and even the crisp Asian pear varieties. Avoid overly soft or mealy pears for baking.
- Can I make baked pears ahead of time?
- While baked pears are truly at their most delightful when served warm and fresh from the oven, you can certainly bake them up to 1 day in advance. After baking, allow the pears to cool completely to room temperature before transferring them to an airtight container. Store them in the refrigerator. Gentle reheating instructions are provided below.
- What if I don’t have pecans? Are there good substitutes?
- Absolutely! If pecans aren’t available or you prefer a different nut, chopped walnuts, almonds (sliced or slivered), or even pistachios would make excellent substitutes, providing a similar delightful crunch and nutty flavor. For a nut-free option, a sprinkle of rolled oats or a crunchy granola mix works wonderfully.
- Is this recipe considered healthy?
- Baked pears are a relatively healthy dessert option, especially when compared to many other sweet treats. Pears themselves are rich in dietary fiber, vitamins (like Vitamin C and K), and antioxidants. This recipe utilizes natural sweeteners like honey and healthy fats from pecans. You can make it even healthier by serving it with plain Greek yogurt instead of ice cream, or by slightly reducing the amount of honey to your taste.
- Can I use a different sweetener instead of honey?
- Yes, you certainly can! Pure maple syrup is an excellent and popular alternative, especially if you’re looking for a vegan option or a slightly different, earthy flavor profile. Agave nectar could also be used, though it’s typically sweeter than honey or maple syrup, so you might use a little less.
- How do I know when the pears are done baking?
- The pears are perfectly baked when they are tender when pierced with a fork but still retain their shape. They should have a slightly softened flesh and often show a lovely, light browning around their edges. It’s important to avoid overbaking, as this can cause them to become too soft or mushy.
More Delightful Fruit Dessert Recipes to Explore
If you’ve enjoyed the wholesome goodness and comforting flavors of these baked pears and are looking for more fruit-centric desserts to brighten your table, we invite you to explore some of our other delicious and easy recipes. From vibrant crumbles to effortless dump cakes, there’s a fruity treat for every occasion and palate:
- Strawberry Rhubarb Crumble: A classic and beloved combination of tart rhubarb and sweet, juicy strawberries, baked to perfection under a rich, buttery, and crisp crumble topping.
- Peach Dump Cake: An incredibly easy, minimal-effort, and wonderfully comforting dessert where sweet canned peaches meet a simple cake mix for a deliciously moist and tender treat.
- Blackberry Peach Crisp: A harmonious blend of juicy, slightly tart blackberries and ripe, sweet peaches baked under a golden-brown, crispy oat topping that’s utterly irresistible.
- Berries and Cream Mini Fruit Tarts: Adorable, individual-sized tarts featuring a delicate crust, filled with smooth, creamy goodness and generously topped with an assortment of colorful fresh berries, perfect for entertaining.