
Welcome to the world of the A to Z Quick Bread – an extraordinary recipe that promises not just a delightful treat, but an adventure in culinary creativity. This isn’t just any quick bread; it’s a testament to versatility, convenience, and pure deliciousness. Designed to yield two perfect loaves, it offers the ultimate flexibility: enjoy one immediately, sharing its warmth and aroma, and effortlessly freeze the other to savor at a later date. What truly sets this recipe apart is its ingenious “A to Z” concept, allowing for an endless array of flavor combinations. From classic fruit and nut pairings to inventive savory twists, each bake can transform into a completely different, exciting creation, ensuring you never tire of its charm. It’s more than a recipe; it’s a blank canvas for your baking imagination, making it an indispensable addition to any home baker’s repertoire.
The Storied Origin: An Award-Winning A to Z Bread
The legacy of this remarkable quick bread traces back to 1976, when Hazel Gentry of Walnut Creek, California, first unveiled her groundbreaking “A to Z Bread” recipe. What began as a single concept quickly evolved into a collection of not one, but 33 distinct bread variations, captivating the hearts and palates of everyone who tasted them. Its exceptional quality and adaptability earned it prestigious awards, cementing its status as a beloved classic.
The popularity of Hazel Gentry’s creation truly soared within the Diablo Symphony Association. Members were so enamored with its versatility and deliciousness that they made it the star of their grand annual reception. Imagine: 400 guests, each presented with a slice of this magnificent bread, offered in a dazzling array of its many “A to Z” permutations. It was a culinary spectacle, demonstrating the boundless possibilities hidden within this single, brilliant recipe.
My personal journey with this quick bread began in childhood, when my mom discovered the original newspaper article featuring Hazel Gentry’s recipe. It quickly became a staple in our home, a comforting presence through countless seasons and celebrations. Over the years, she baked it so often that the recipe card, worn with love and use, became almost sacred. Eventually, I “confiscated” it for myself, and since then, it has become such an ingrained part of my own baking routine that I rarely need to consult the written instructions anymore.
During my daughter’s early years, I frequently brought fresh loaves of this quick bread to playdates. The response was always overwhelmingly positive; parents were constantly asking for the recipe. This enthusiastic demand, driven by the sheer appeal and versatility of this humble quick bread, ultimately served as the profound inspiration for launching BellyFull.net, my platform for sharing delicious and accessible recipes with the world. This bread, in essence, is where it all began, a cornerstone of my culinary journey and a testament to the power of a truly great recipe.
Why You’ll Absolutely Love This A to Z Quick Bread
This isn’t just another quick bread recipe; it’s a culinary MVP that brings joy and convenience to any occasion. Here’s why the A to Z Quick Bread will quickly become one of your most cherished and frequently used recipes:
- The Ultimate Potluck & Gathering Go-To: When it comes to contributing to a potluck, school event, or family gathering, this quick bread is my absolute first choice. Its universally appealing flavors (especially with the customization options) and attractive presentation make it a guaranteed crowd-pleaser. It travels well, holds its shape, and is easy to serve, making your life simpler when you need to bring a dish that truly shines.
- Remarkably Portable: Whether you’re packing lunches, heading out for a picnic, or simply need a snack on the go, this bread is your ideal companion. Its sturdy yet tender texture means it won’t crumble easily, and its self-contained nature eliminates the need for extra utensils or plates. Wrap individual slices for convenient, mess-free enjoyment anywhere.
- Customizable Slice Sizes for Every Craving: One of its best features is the flexibility in serving. You can slice it into thick, hearty pieces for a satisfying breakfast or dessert, or cut it into smaller, dainty squares perfect for a snack cake, tea time, or for little hands. This adaptability ensures it fits perfectly into any eating occasion or preference.
- Freezer-Friendly for Future Enjoyment: The recipe yields two generous loaves, offering incredible convenience. The ability to bake one now and freeze the other for later is a game-changer for meal prep and spontaneous cravings. Imagine having a homemade treat ready to thaw whenever unexpected guests arrive, or when you simply need a comforting slice without the effort of baking from scratch. It saves time and ensures you always have a delicious option at hand.
- Endless Combinations: A Different “Cake” Every Time: This is where the “A to Z” magic truly comes alive. With countless mix-in possibilities, you can genuinely create a unique flavor profile with every batch. From sweet to savory, fruity to nutty, the bread transforms based on your chosen additions. This ensures that the recipe never gets boring and constantly encourages culinary experimentation, making it feel like you’re baking a brand new cake each time you use it.
Proper Storage and Freezing for Maximum Freshness
Ensuring your A to Z Quick Bread stays fresh and delicious is key to enjoying its wonderful flavors over time. Here’s a comprehensive guide to proper storage, whether you plan to enjoy it within days or save it for weeks to come:
- Countertop and Refrigerator Storage: Once baked and completely cooled, your quick bread can be stored at room temperature for 2-3 days. To maintain its freshness and prevent it from drying out, it’s crucial to wrap the loaf tightly in plastic wrap or aluminum foil. For an even longer shelf life, especially in warmer climates or if your bread contains fresh fruit, refrigerating it is recommended. Tightly wrapped and stored in the fridge, the bread will remain moist and flavorful for an additional 3-4 days, extending its life to roughly a week from baking. Always ensure it’s well-sealed to prevent it from absorbing refrigerator odors.
- Freezing for Long-Term Enjoyment: The A to Z Quick Bread freezes exceptionally well, making it perfect for meal prepping or simply having a homemade treat readily available. To freeze a loaf, first ensure it is completely cooled. Then, wrap the entire loaf tightly in a layer of plastic wrap, followed by a layer of aluminum foil. This double layer provides excellent protection against freezer burn. For added security, place the wrapped loaf into a freezer-safe plastic bag or an airtight container. Properly frozen, this quick bread can maintain its quality for up to 2 months. When you’re ready to enjoy it, simply transfer the frozen loaf to the refrigerator overnight to thaw gradually. For a quicker thaw, you can unwrap it and let it sit at room temperature for a few hours, or even gently warm slices in a microwave or oven for a delightful, fresh-baked taste and texture.
The A to Z Concept: Your Creative Playground
The true genius of this quick bread lies in its “A to Z” flexibility. This means you can customize it with a delightful array of mix-ins, creating a truly unique bread every time you bake. The original recipe calls for a total of 2 cups for your “A to Z” additions, and a fantastic guideline is to use a mixture of 1 cup wet ingredients and 1 cup dry ingredients to achieve the perfect balance of moisture and texture.
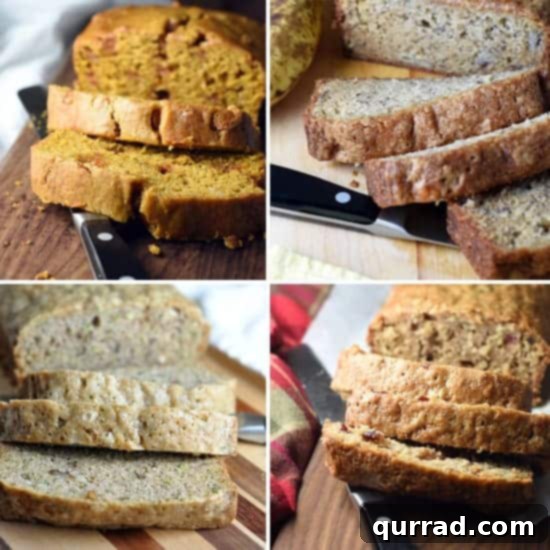
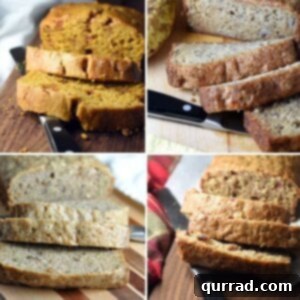
Here are some of my favorite tried-and-true combinations, as featured in the images, to get you started:
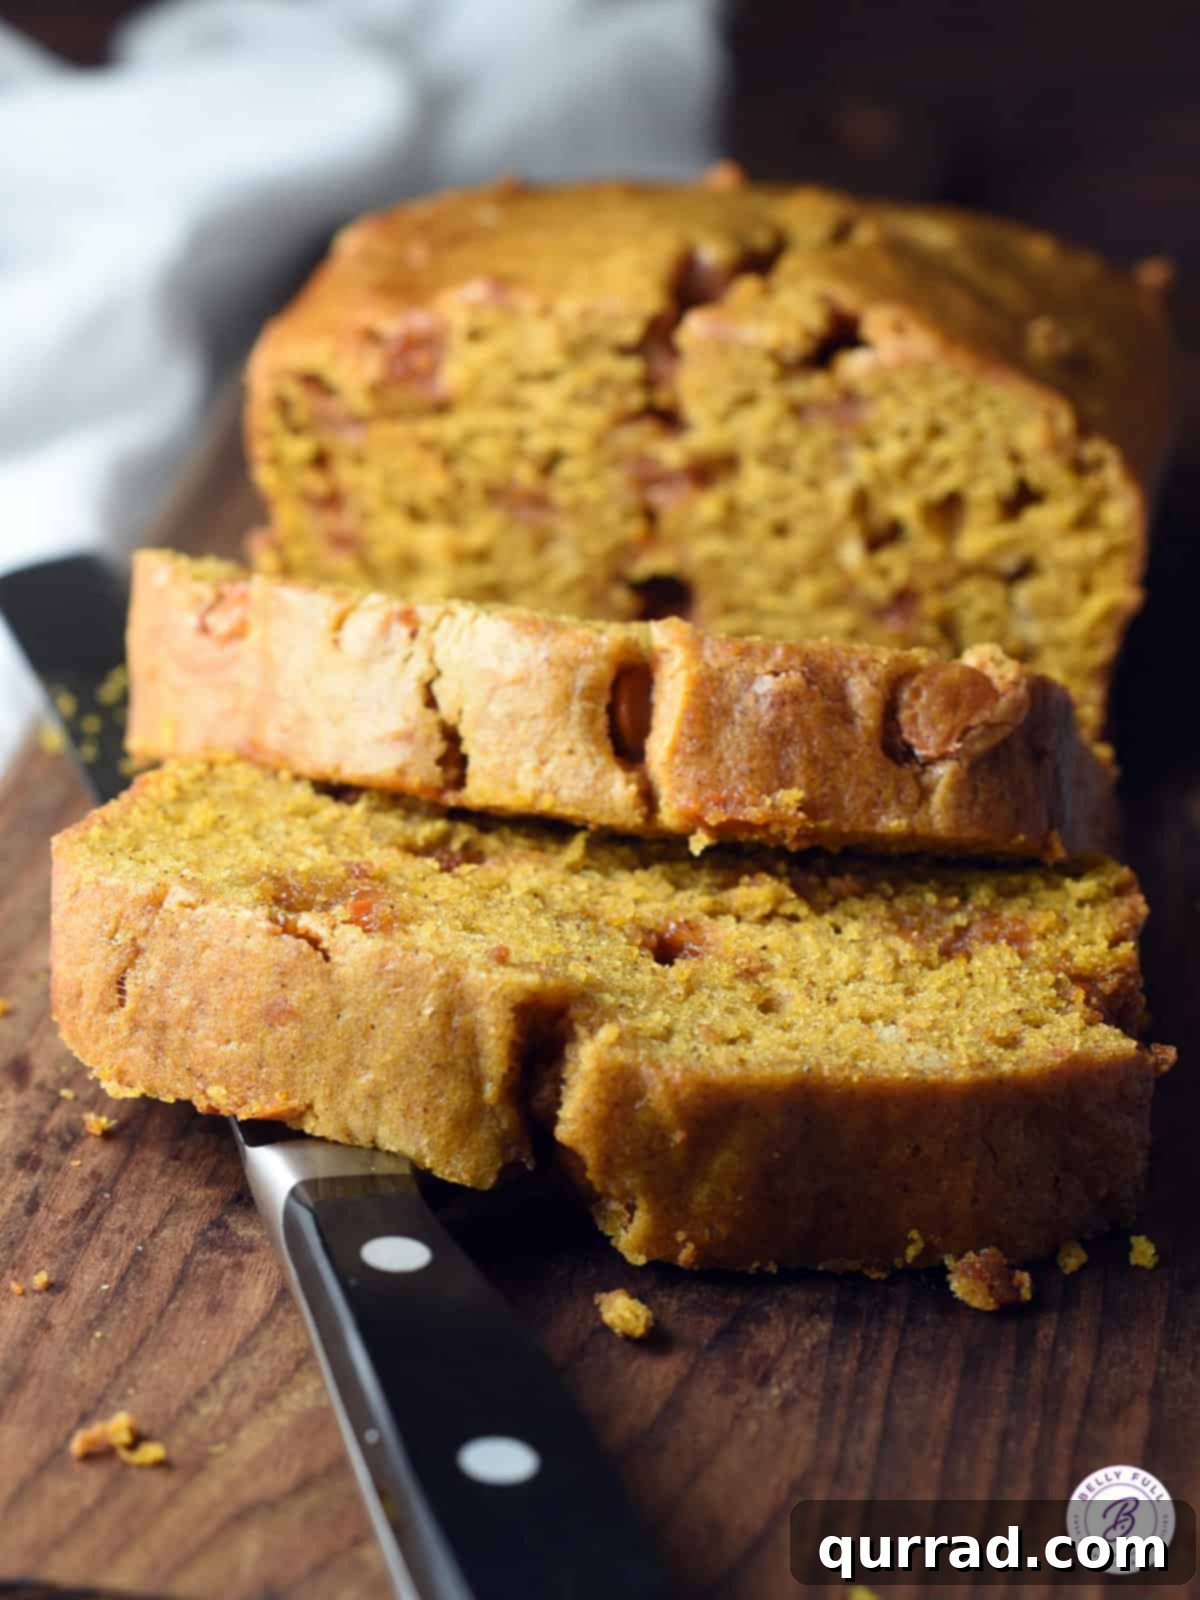
- Pumpkin Butterscotch Bread: A comforting autumn delight using 1 cup of canned pumpkin and 1 cup of rich butterscotch chips. The creamy pumpkin pairs beautifully with the sweet, caramel notes of butterscotch.
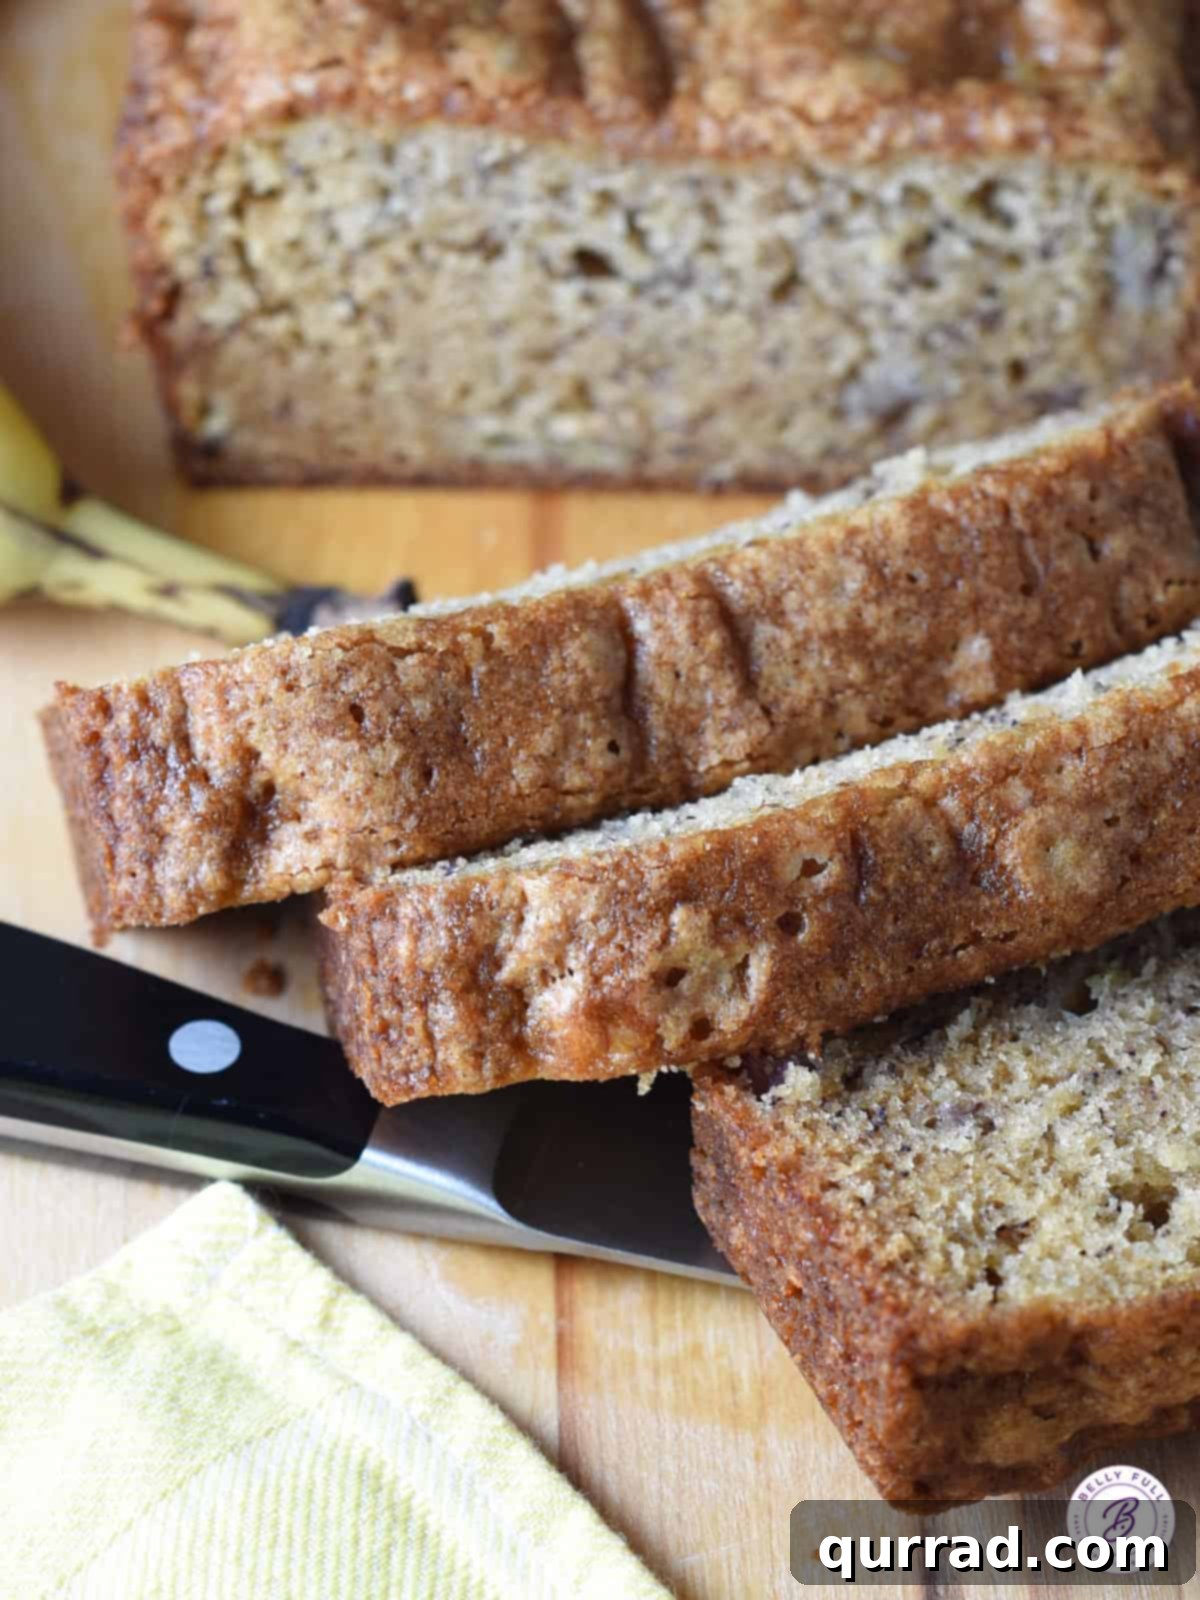
- Banana Chocolate Chip Bread: A timeless classic, combining 1 cup of mashed banana with 1 cup of mini chocolate chips. The natural sweetness of banana and the melty chocolate create an irresistible treat.
- Zucchini Walnut Bread: A wonderfully moist and wholesome option, featuring 1 cup of grated zucchini (ensure excess water is squeezed out) and 1 cup of crunchy chopped walnuts.
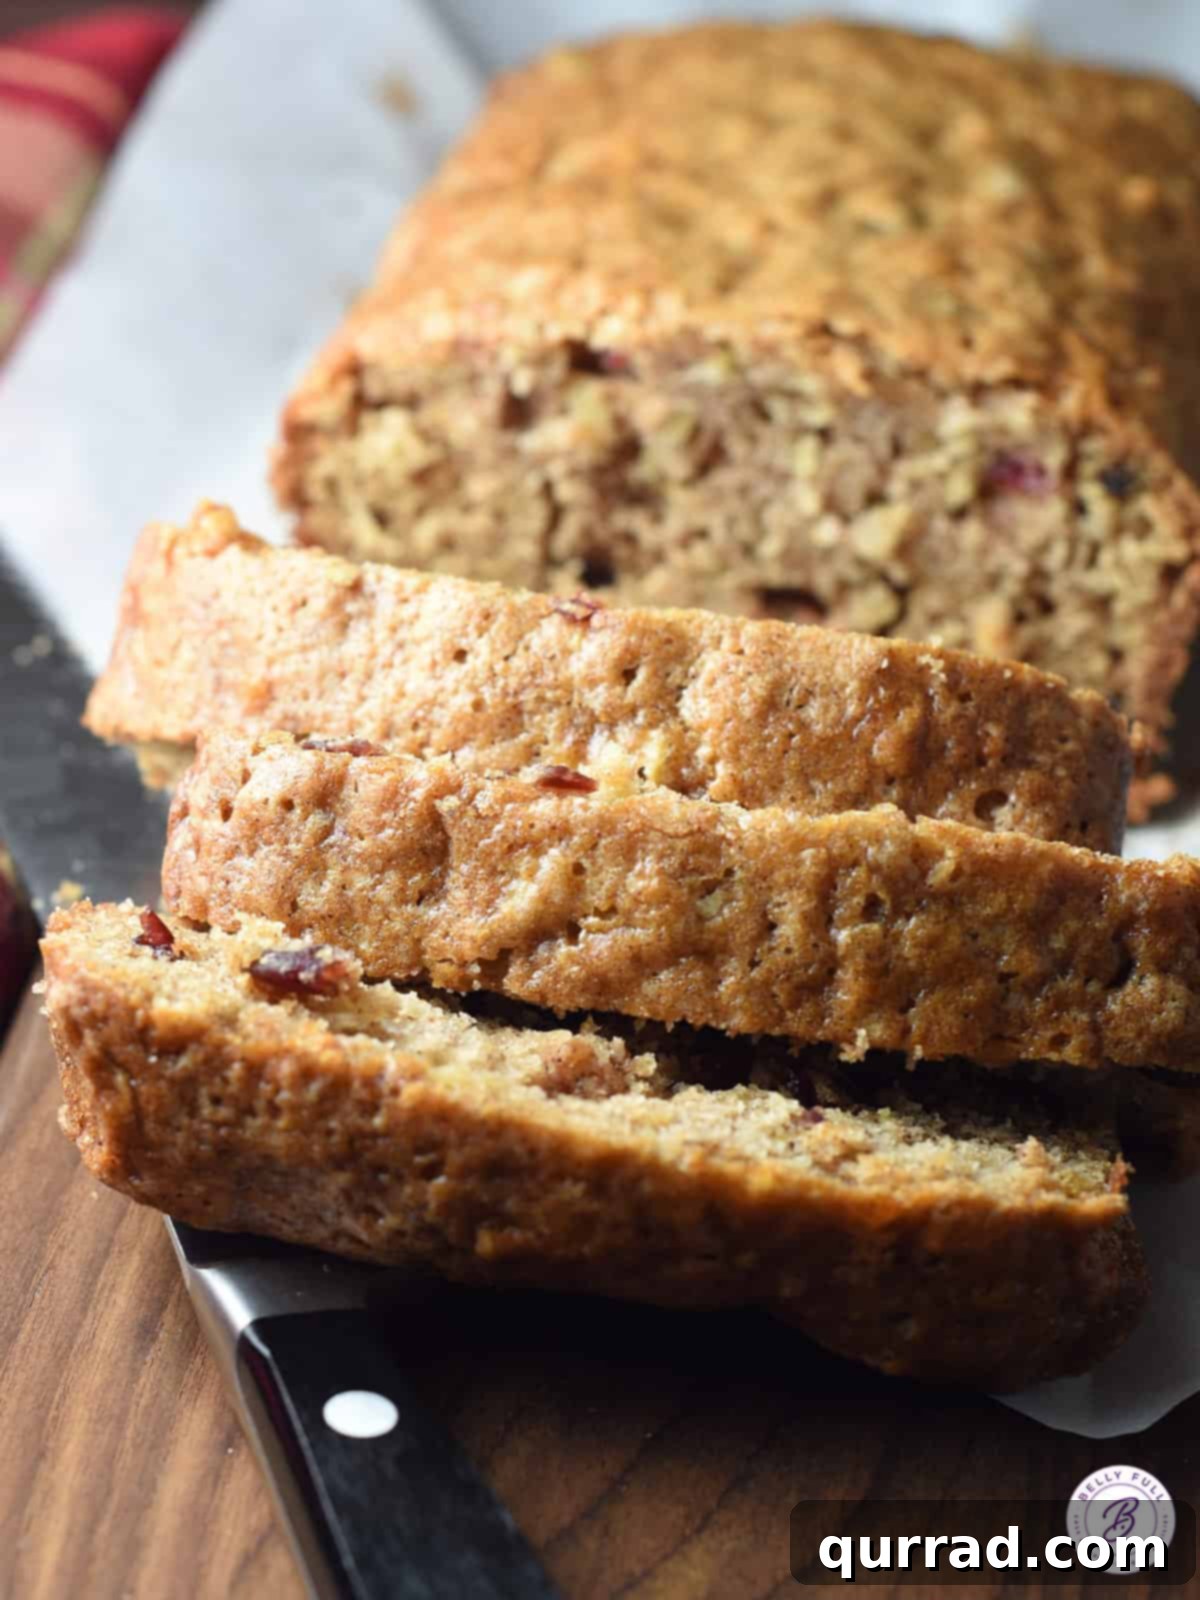
- Apple Cranberry Bread: A vibrant and tangy combination, made with 1 cup of grated apple and 1 cup of sweet-tart dried cranberries. Perfect for a refreshing twist.
But don’t stop there! The possibilities truly are endless. Here’s the original complete list of *A-Z suggestions from Hazel Gentry herself. Remember to aim for a mixture of 1 cup wet ingredients and 1 cup dry ingredients, totaling 2 cups, for optimal results:
Wet Ingredient Ideas (approx. 1 cup total, adjust moisture as needed):
- Apples – grated (moisture-rich, adds natural sweetness)
- Applesauce – (adds moisture and natural sweetness, can reduce oil slightly)
- Apricots – chopped (fresh or rehydrated dried, brings a tangy sweetness)
- Bananas – mashed (the classic for moist, flavorful quick bread)
- Carrots – grated (adds color, moisture, and earthy sweetness)
- Cherries – pitted and chopped (fresh or frozen, bright and tart)
- Figs – finely chopped (rich, sweet, and chewy)
- Grapes – seedless (adds bursts of juicy sweetness)
- Honey – (if using, consider reducing granulated sugar by about 1 cup to prevent over-sweetening)
- Lemons – (use only 1/2 cup of juice and zest for a bright, citrusy flavor)
- Marmalade – (omit 1 cup of granulated sugar if using a full cup of marmalade)
- Mincemeat – (omit 1 cup of granulated sugar due to its inherent sweetness)
- Oranges – chopped (adds citrus zest and juice for vibrant flavor)
- Peaches – fresh or canned, chopped (sweet and tender, great for summer)
- Pears – chopped (subtle sweetness and delicate texture)
- Pineapple – crushed, well drained (tropical flavor, ensure excess liquid is removed)
- Prunes – chopped (use only 1 cup total, for a rich, deep sweetness)
- Pumpkin – canned (adds incredible moisture and a classic fall flavor)
- Raspberries – (fresh or drained frozen, adds a tart and fruity note)
- Rhubarb – finely chopped (tangy and unique, pairs well with ginger or strawberries)
- Strawberries – fresh or drained frozen (sweet and juicy, a refreshing choice)
- Sweet potato – grated coarsely (earthy and moist, similar to pumpkin)
- Tapioca – cooked (adds a unique chewiness)
- Tomatoes – (if using, consider reducing sugar to 1/2 cup, for a savory twist)
- Yams – plain or flavored (can be mashed or grated, similar to sweet potato)
- Zucchini – grated, excess water removed (classic for moist bread, undetectable flavor)
Dry Ingredient Ideas (approx. 1 cup total, for texture and additional flavor):
- Apricots – dried, finely chopped (chewy texture, concentrated sweetness)
- Butterscotch Chips – (rich, sweet, and buttery bursts of flavor)
- Chocolate Chips – (milk, dark, or white, a universally loved addition)
- Coconut – flaked (adds tropical flavor and texture)
- Dates – pitted and chopped (natural sweetness and chewy texture)
- Nuts – chopped (walnuts, pecans, almonds, adds crunch and richness)
- Raisins – (classic chewy sweetness)
*Please note that I have not personally tried every combination on this extensive list. They are suggestions from the original recipe to spark your creativity. Always consider the moisture content of your wet ingredients and adjust your dry ingredient mix-ins accordingly for the best texture.
Experiment, mix and match, and discover your own award-winning combinations! That’s the true beauty of Hazel Gentry’s brilliant A to Z Quick Bread.
Essential Ingredients for Your A to Z Quick Bread
To embark on your A to Z Quick Bread journey, you’ll need a combination of pantry staples and your chosen customizable “A to Z” additions. Here’s what goes into making this versatile delight:
Dry Ingredients:
- 3 cups all-purpose flour: The structural base of our bread.
- 1 teaspoon salt: Enhances all the other flavors.
- 1 teaspoon baking soda: A leavening agent that reacts with acidic ingredients (like some A to Z choices) to help the bread rise.
- 1 teaspoon baking powder: Another leavening agent, providing extra lift and a tender crumb.
- 3 teaspoons cinnamon: Adds a warm, aromatic spice that complements most sweet quick bread variations. Feel free to adjust or swap for other spices like nutmeg, allspice, or ginger depending on your A to Z choices.
Wet Ingredients & Sweeteners:
- 3 large eggs: Bind the ingredients together and contribute to moisture and richness.
- 1 cup vegetable oil: Provides essential moisture, leading to a tender and soft crumb. You can also use other neutral oils like canola or grapeseed.
- 3 teaspoons vanilla extract: A crucial flavor enhancer that adds depth and warmth.
- 2 cups granulated sugar: Sweetens the bread and helps with browning.
Customizable A to Z Additions:
- 1/2 cup chopped nuts: Optional, but adds a delightful crunch and nutty flavor. Walnuts or pecans are excellent choices.
- 2 cups A to Z* (as described above – typically 1 cup wet + 1 cup dry, e.g., mashed banana + chocolate chips, or grated pumpkin + butterscotch chips): This is where your creativity shines! Choose your favorite combination from the extensive list to make this bread uniquely yours.
Gathering all your ingredients before you begin ensures a smooth and enjoyable baking process. Don’t be afraid to experiment with the spices and A to Z additions to truly make this recipe your own!
Step-by-Step Baking Guide
Creating your delicious A to Z Quick Bread is a straightforward process. Follow these simple instructions for perfect results every time:
-
Prepare Your Oven and Pans: Begin by preheating your oven to 325 degrees F (160 degrees C). This lower temperature helps ensure the bread cooks evenly without drying out. Next, prepare 2 (9×5-inch) loaf pans. For easy removal and cleanup, line each pan with parchment paper, allowing a slight overhang on the sides. This creates “handles” to lift the baked loaves out effortlessly. If you don’t have parchment paper, grease and flour the pans thoroughly.
-
Combine Dry and Wet Ingredients: In a large mixing bowl, thoroughly whisk together all the dry ingredients: the all-purpose flour, salt, baking soda, baking powder, and cinnamon. Whisking ensures they are well combined and evenly distributed. In a separate bowl (or directly into the dry ingredients if your bowl is large enough), add the wet ingredients: eggs, vegetable oil, vanilla extract, and granulated sugar. Mix these until they are just incorporated. Be careful not to overmix at this stage; a few lumps are perfectly fine.
-
Stir in Your A to Z Choices: Gently fold in your chosen chopped nuts (if using) and your “A to Z” ingredients (the 2 cups of wet and dry combinations, like mashed banana and chocolate chips). Stir just until everything is combined. Overmixing the batter once the wet and dry ingredients meet can develop the gluten in the flour, leading to a tougher bread, so mix with a light hand.
-
Bake to Perfection: Divide the batter equally between your two prepared loaf pans. Place them in the preheated oven and bake for approximately 1 hour. Baking time can vary slightly depending on your oven and the moisture content of your A to Z additions. To test for doneness, insert a wooden toothpick or a thin skewer into the center of a loaf. If it comes out clean or with a few moist crumbs attached (but no wet batter), your quick bread is ready.
-
Cool and Enjoy: Once baked, carefully remove the loaf pans from the oven. Let the breads cool in their pans for about 10-15 minutes. This allows them to firm up slightly before you attempt to remove them. Then, using the parchment paper overhang as handles (or carefully inverting if no parchment), lift or turn the loaves out onto a wire rack to cool completely. Slicing warm bread is tempting, but allowing it to cool fully will result in cleaner slices and a better texture. Once cooled, slice and enjoy your personalized A to Z Quick Bread!
Pro Tips for Quick Bread Perfection
Achieving a consistently perfect quick bread every time requires a few key insights. Here are some pro tips to elevate your A to Z Quick Bread from great to absolutely exceptional:
- Do Not Overmix: This is arguably the most crucial rule for quick breads. Once you combine the wet and dry ingredients, mix just until no streaks of dry flour remain. Overmixing develops the gluten in the flour, leading to a tough, dense, and chewy bread instead of a light, tender crumb. A few small lumps in the batter are perfectly acceptable!
- Room Temperature Ingredients: For eggs and any dairy ingredients (if you were to add them, like buttermilk in other quick bread recipes), ensure they are at room temperature. This allows them to emulsify more easily with the other ingredients, creating a smoother, more uniform batter and a finer crumb.
- Accurate Measuring: Especially for flour, use the spoon-and-level method. Spoon flour into your measuring cup until it overflows, then level it off with a straight edge (like the back of a knife). Scooping directly from the bag can compact the flour, leading to too much flour and a dry, dense bread.
- Doneness Test is Key: Ovens can vary significantly. While the baking time is a good guideline, always rely on the toothpick test. If the toothpick comes out clean, or with just a few moist crumbs (but no wet batter), your bread is done. If it comes out wet, continue baking in 5-minute increments until fully cooked.
- Cool Completely Before Slicing: It’s hard to resist a warm slice of fresh quick bread, but allowing it to cool completely on a wire rack is vital. As it cools, the bread continues to set, and the internal moisture distributes evenly. Slicing it too soon can result in a gummy texture and crumbly slices.
- Proper Pan Preparation: Lining your loaf pans with parchment paper is highly recommended. Not only does it prevent sticking, but the overhang acts as a sling, making it incredibly easy to lift the baked loaves out of the pans without damaging them. If using cooking spray or butter and flour, ensure you cover every nook and cranny.
- Balance Your “A to Z” Additions: When choosing your wet and dry mix-ins, consider their moisture content. If using very wet ingredients (like crushed pineapple or extra mashed banana), ensure they are well-drained or increase your dry mix-in slightly to maintain the right batter consistency. Conversely, if your chosen ingredients are drier, you might need to adjust slightly. The 1 cup wet + 1 cup dry guideline is a fantastic starting point.
- Spiced to Perfection: Don’t be limited by cinnamon. Depending on your A to Z choices, consider adding nutmeg, allspice, ginger, cardamom, or even a hint of cloves to complement your selected flavors beautifully.
Frequently Asked Questions About A to Z Quick Bread
Here are answers to some common questions you might have about making this versatile quick bread:
Why is my quick bread dry or crumbly?
A dry or crumbly quick bread is usually a result of overmixing the batter or adding too much flour. Overmixing develops gluten, making the bread tough, while excess flour absorbs too much moisture. Ensure you measure flour correctly using the spoon-and-level method and mix only until the ingredients are just combined, leaving a few lumps.
Why did my quick bread sink in the middle?
A sunken center can happen for several reasons: the oven door was opened too soon during baking, the bread was underbaked (not cooked all the way through), too much leavening agent was used, or the batter had too much moisture from your “A to Z” additions. Ensure your oven temperature is accurate, don’t open the oven door for at least the first 40-45 minutes, and check for doneness with a toothpick in the center.
Can I make muffins instead of loaves?
Absolutely! This recipe can easily be adapted for muffins. Fill greased or paper-lined muffin tins about two-thirds full. The baking time will be significantly shorter, usually around 20-25 minutes at the same 325°F (160°C) temperature, or sometimes slightly higher at 350°F (175°C) for quicker baking. Keep an eye on them and test for doneness with a toothpick.
Can I reduce the sugar in the recipe?
While you can slightly reduce the sugar, it’s not always recommended to make drastic changes, as sugar contributes to moisture, texture, and browning, not just sweetness. Reducing it by 1/4 to 1/2 cup might be acceptable, but any more could significantly alter the bread’s consistency and shelf life. If your “A to Z” additions are very sweet (like dried fruits), you could consider a slight reduction.
What kind of nuts work best?
Walnuts and pecans are classic choices for quick breads, offering a delightful crunch and nutty flavor that complements many “A to Z” combinations. Almonds or even macadamia nuts could also be delicious, depending on your chosen mix-ins. Feel free to toast them lightly before adding for enhanced flavor!
How do I prevent the “A to Z” mix-ins from sinking to the bottom?
If your mix-ins (like chocolate chips or dried fruit) tend to sink, try tossing them lightly with a tablespoon or two of the dry flour mixture before adding them to the batter. This light coating helps them suspend more evenly throughout the bread during baking.
Serving Suggestions: Beyond the Slice
While a simple slice of A to Z Quick Bread is a delight on its own, here are some ideas to elevate your serving experience:
- Classic with Coffee or Tea: The perfect companion for your morning coffee or afternoon tea.
- Breakfast Boost: Enjoy a slice with a dollop of Greek yogurt and fresh berries for a wholesome start to your day.
- Sweet Dessert: Warm a slice slightly and serve it with a scoop of vanilla ice cream, a drizzle of caramel sauce, or a dusting of powdered sugar.
- Cream Cheese Spread: A lightly toasted slice spread with softened cream cheese makes for a heavenly treat. Add a sprinkle of cinnamon for extra flair.
- Compote Companion: Serve alongside a spoonful of homemade fruit compote (berry, apple, or peach) for an added layer of freshness and flavor.
- Nut Butter Power-Up: For a more substantial snack, spread a slice with your favorite almond, peanut, or cashew butter.
Discover More Quick Bread Recipes:
If you’ve fallen in love with the ease and deliciousness of quick breads, be sure to explore these other fantastic recipes:
- Ultimate Banana Bread
- Date Nut Bread
- Zucchini Bread
- Lemon Blueberry Bread
- Cheese Bread
The Ultimate A to Z Quick Bread Recipe Summary
This A to Z Quick Bread is an incredibly easy, portable, and versatile quick bread that yields two generous loaves, making it perfect for enjoying one now and freezing the other for later. With its endless combinations, it truly transforms into a different, exciting cake every time you bake!
Prep Time: 15 minutes
Cook Time: 1 hour
Total Time: 1 hour 15 minutes
Servings: 8-10 slices per loaf (16-20 total)
Ingredients:
- 3 cups all-purpose flour
- 1 teaspoon salt
- 1 teaspoon baking soda
- 1 teaspoon baking powder
- 3 teaspoons cinnamon
- 3 large eggs
- 1 cup vegetable oil
- 3 teaspoons vanilla extract
- 2 cups granulated sugar
- 1/2 cup chopped nuts (optional, e.g., walnuts, pecans)
- 2 cups A to Z mix-ins (e.g., 1 cup wet + 1 cup dry, like mashed banana & mini chocolate chips, or canned pumpkin & butterscotch chips)
Instructions:
- Preheat oven to 325 degrees F (160°C). Line 2 (9×5-inch) loaf pans with parchment paper, leaving a slight overhang for easy removal.
- In a large bowl, whisk together the dry ingredients: flour, salt, baking soda, baking powder, and cinnamon.
- In a separate bowl, or directly into the dry ingredients, add the eggs, oil, vanilla, and sugar; mix until just incorporated.
- Stir in the chopped nuts (if using) and your chosen 2 cups of A to Z mix-ins. Mix gently until just combined. Do not overmix.
- Pour the batter equally into the prepared loaf pans.
- Bake for 1 hour, or until a toothpick inserted in the center of a loaf comes out clean.
- Carefully remove the loaves from the pans and let them cool completely on a wire rack before slicing and serving.
Notes:
My favorite combinations of A to Z, as featured:
- 1 cup canned pumpkin and 1 cup butterscotch chips
- 1 cup mashed banana and 1 cup mini chocolate chips
- 1 cup grated zucchini (excess water removed) and 1 cup chopped walnuts
- 1 cup grated apple and 1 cup dried cranberries
HERE’S THE ORIGINAL COMPLETE LIST OF *A-Z – Use a mixture of 1 cup wet ingredients and 1 cup dry ingredients of the following, to equal 2 cups:
*I have not tried many of these. They are merely suggestions.
- Apples – grated
- Applesauce
- Apricots – dried, finely chopped
- Apricots – chopped
- Bananas – mashed
- Blueberries
- Butterscotch Chips
- Carrots – grated
- Cherries – pitted and chopped
- Chocolate Chips
- Coconut – flaked
- Dates – pitted and chopped
- Eggplant – ground up (use with caution, experiment!)
- Figs – finely chopped
- Grapes – seedless
- Honey – omit 1 cup of sugar if using
- Lemons – use only 1/2 juice
- Marmalade – omit 1 cup of sugar if using
- Mincemeat – omit 1 cup of sugar if using
- Oranges – chopped
- Peaches – fresh or canned, chopped
- Peppermint – use only 1/2 cup for strong flavor
- Pears – chopped
- Pineapple – crushed, well drained
- Prunes – chopped (use only 1 cup total)
- Pumpkin – canned
- Raisins
- Raspberries
- Rhubarb, – finely chopped
- Strawberries – fresh or drained frozen
- Sweet potato – grated coarsely
- Tapioca – cooked
- Tomatoes – use 1/2 cup sugar only if using for a savory bread
- Yams – Plain or flavored
- Zucchini – grated, excess water removed
Nutrition facts calculated without A to Z mix-ins. These values can vary greatly depending on your chosen additions.
Nutrition Information (approximate, per serving without A to Z mix-ins):
Calories: 685kcal | Carbohydrates: 88g | Protein: 8g | Fat: 34g | Saturated Fat: 5g | Polyunsaturated Fat: 20g | Monounsaturated Fat: 8g | Trans Fat: 0.2g | Cholesterol: 70mg | Sodium: 456mg | Potassium: 165mg | Fiber: 2g | Sugar: 50g | Vitamin A: 105IU | Vitamin C: 0.1mg | Calcium: 55mg | Iron: 3mg
Nutritional information provided is an automatic calculation and can vary based on the exact products you use and any changes you make to the recipe. If these numbers are very important to you, I would recommend calculating them yourself.
We truly hope you enjoy this delicious and incredibly versatile A to Z Quick Bread recipe! It’s a favorite for a reason, offering endless possibilities for every taste and occasion. We’d love to hear about your unique flavor combinations and how this bread brightened your day. Be sure to give it a review below and share your experience!
Don’t forget to follow Belly Full on TikTok, Facebook, Instagram, Pinterest, and YouTube for more mouth-watering recipes and culinary inspiration!