
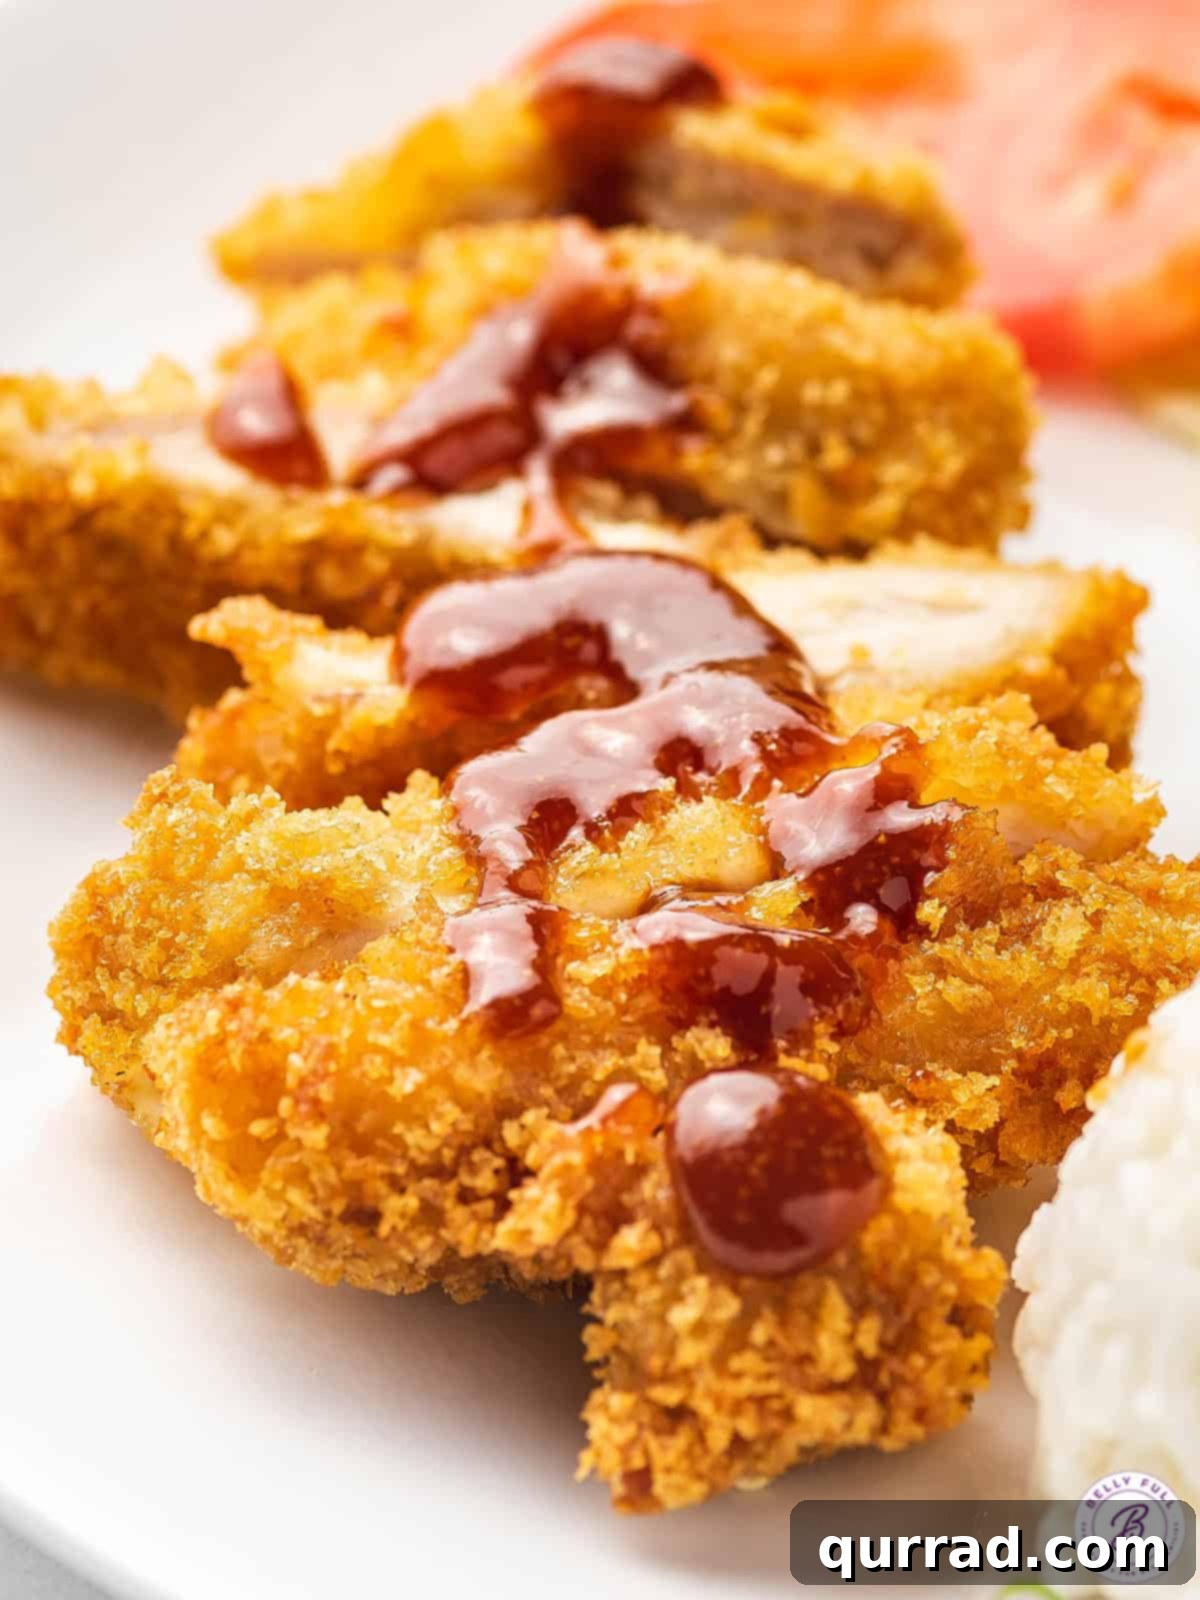
Crispy, succulent, and utterly delicious – Chicken Katsu has captured hearts and palates worldwide. This iconic Japanese dish, featuring a golden-fried chicken cutlet encased in a perfectly crisp panko crust, is a true culinary delight. Whether you’ve savored it in a bustling Japanese restaurant or are eager to recreate its magic at home, this guide will walk you through crafting the ultimate homemade Chicken Katsu, complete with that irresistible sweet and tangy tonkatsu sauce. Prepare to impress your taste buds with every crunchy bite!
Unveiling the Charm of Japanese Chicken Katsu
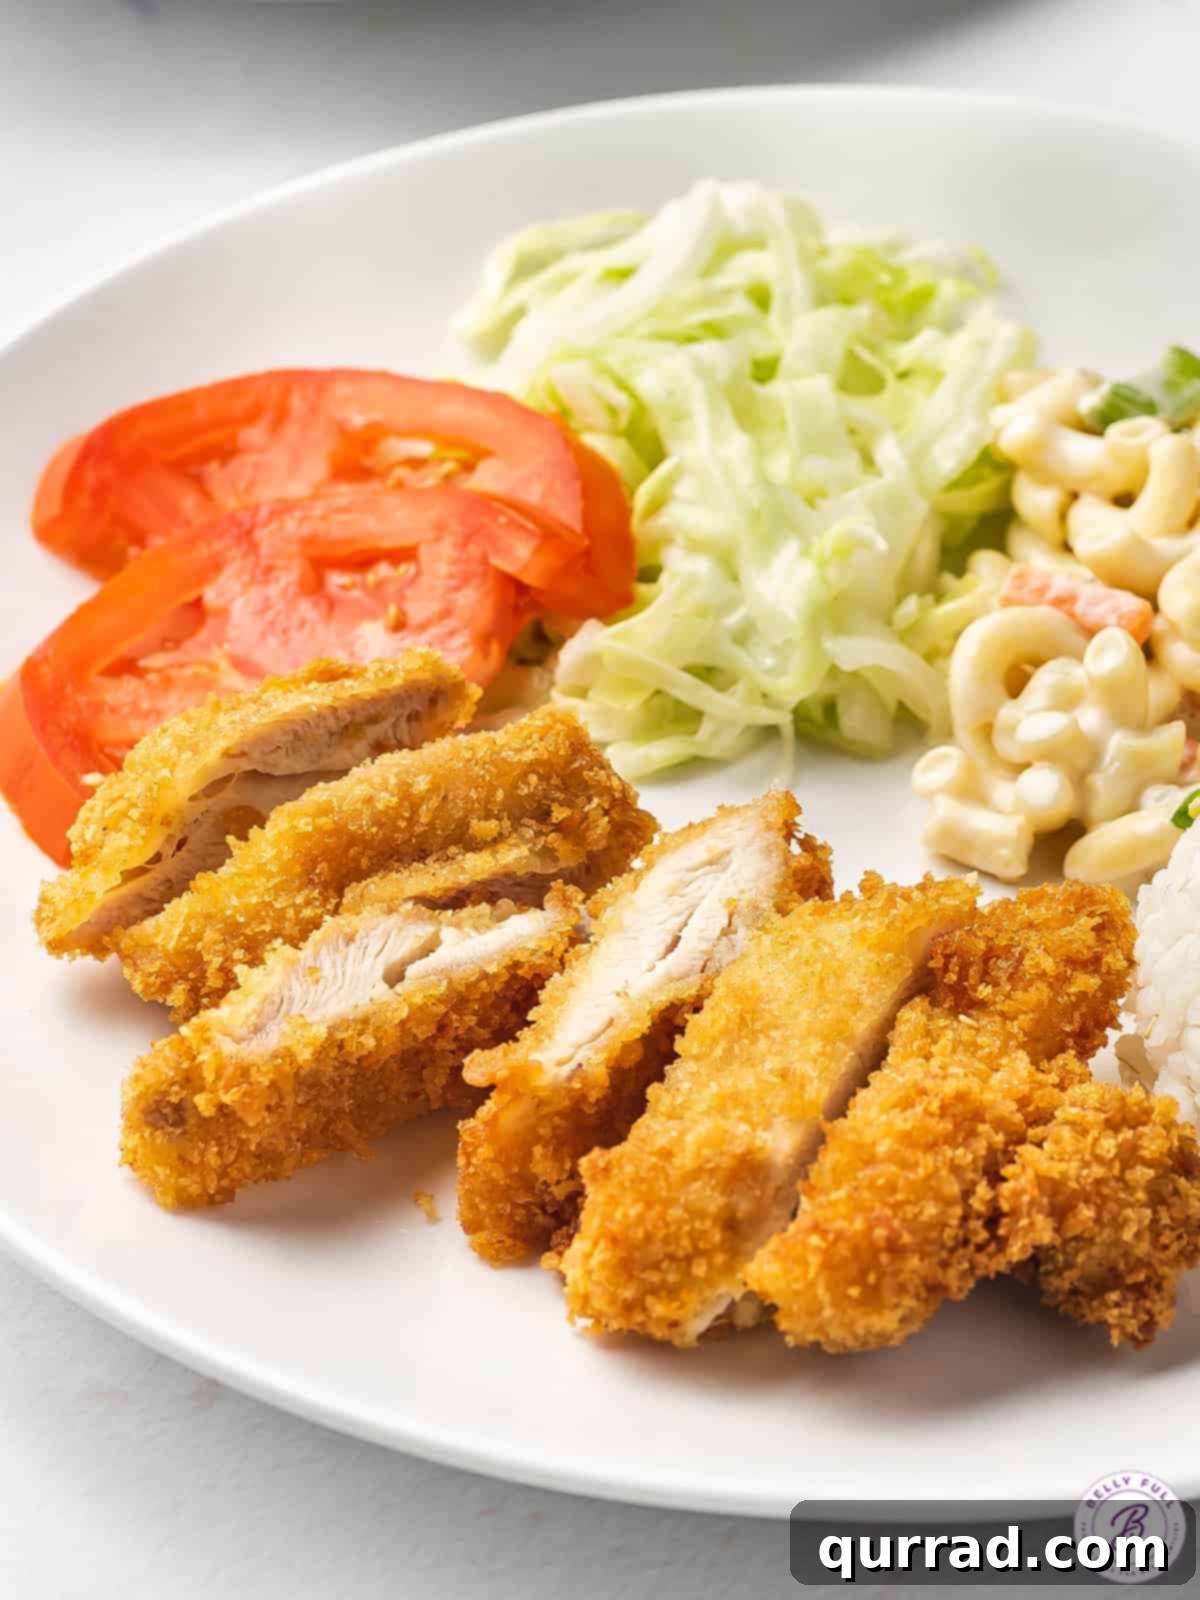
Chicken Katsu, also known as tori katsu or simply panko chicken, is a beloved staple in Japanese cuisine. It’s not just a dish; it’s an experience of contrasting textures and harmonious flavors. Imagine a tender chicken cutlet, pounded to an even thickness, meticulously coated in light and airy panko breadcrumbs, and then fried to a gorgeous golden perfection. The result is an exterior that shatters with every bite, revealing a juicy, flavorful interior.
My personal journey with Chicken Katsu began through my daughter’s friend, whose family owned a Japanese Hawaiian BBQ restaurant. Week after week, she’d bring home leftovers, and I’d find myself devouring every last piece. That distinct crunch, paired with the rich, umami-packed sauce, was simply addictive. It wasn’t long before I decided to bring that culinary joy into my own kitchen, discovering that this seemingly intricate dish is surprisingly easy to master at home.
The Secret Weapon: Homemade Tonkatsu Sauce
While the crispy chicken is undoubtedly the star, the supporting act – Tonkatsu sauce – truly elevates this dish to legendary status. Often referred to as katsu sauce, it’s essentially the Japanese equivalent of barbecue sauce, but with a unique, deeply savory character that hints at a steak sauce’s richness, yet boasts a more pronounced soy sauce umami. This magical elixir is a symphony of sweet, tangy, and savory notes, crafted from a simple blend of ketchup, Worcestershire sauce, mirin, and a few other pantry staples.
The beauty of homemade Tonkatsu sauce lies in its freshness and the ability to customize it to your preference. While it’s the quintessential partner for tori katsu, you’ll soon find yourself wanting to drizzle it over other dishes or even use it as a dipping sauce for various appetizers. Its versatility and depth of flavor are what make this dish truly special and incredibly satisfying.
Why Master Homemade Chicken Katsu?
Beyond the sheer deliciousness, there are several compelling reasons to make Chicken Katsu at home. Firstly, it’s a fantastic way to enjoy restaurant-quality Japanese fare without the price tag. Secondly, despite its gourmet appeal, this entire recipe can be prepared and cooked in under 30 minutes, making it a perfect weeknight meal for busy families. Finally, customizing your katsu and sauce to your exact taste, experimenting with different sides, and enjoying the process of creating something truly satisfying in your own kitchen is incredibly rewarding.
Essential Ingredients for Perfect Chicken Katsu
Creating an authentic and delicious Chicken Katsu starts with selecting the right ingredients. Here’s a closer look at what you’ll need and why each component is important:
For the Tonkatsu Sauce:
- Ketchup: Forms the sweet and tangy base of the sauce.
- Worcestershire Sauce: Adds a complex, savory depth and a touch of tang.
- Low-Sodium Soy Sauce: Introduces the essential umami flavor without making the sauce overly salty.
- Mirin: This sweet Japanese rice wine is crucial for authentic flavor, lending a delicate sweetness and gloss. (Note: If mirin isn’t available, rice wine can be used as a substitute, though you might want to add a pinch more sugar to balance the flavor.)
- Granulated Sugar & Brown Sugar: A combination of sugars to achieve that signature sweet profile.
- Garlic Powder & Ground Ginger: These spices infuse the sauce with aromatic warmth and a subtle kick.
For the Chicken:
- Boneless, Skinless Chicken Thighs: Thighs are preferred for their tenderness and juiciness, which withstand the frying process beautifully. Each piece should be around 5 oz. (Tip: If using chicken breast, slice it horizontally to create two thinner cutlets, then pound them to ¼ to ½-inch thickness to ensure even cooking and tenderness.)
- Coarse Salt & Freshly Ground Black Pepper: Simple seasonings that enhance the chicken’s natural flavor.
- Large Egg: Acts as a binder for the breadcrumbs, ensuring an even coating.
- Vegetable Oil (for egg wash): A small amount mixed with the egg helps create a richer, more adhesive coating.
- All-Purpose Flour: The first layer in the breading process, it helps the egg wash adhere evenly to the chicken.
- Panko Japanese Breadcrumbs: This is non-negotiable for true katsu! Panko is lighter, flakier, and coarser than regular breadcrumbs, resulting in that uniquely airy and crispy crust.
- Vegetable Oil (for deep frying): Choose a neutral oil with a high smoke point for best results.
For Serving:
- Cooked Sticky White Sushi Rice: A classic accompaniment that perfectly balances the rich katsu.
- Shredded Cabbage Salad: Adds a refreshing crunch and lightens the meal.
- Macaroni Salad: A popular Hawaiian BBQ side, offering a creamy contrast.
- Sliced Tomato: Provides a fresh, acidic counterpoint to the fried chicken.
Chicken Katsu Recipe
Cook: 14 mins
Total: 29 mins
Servings: 4 servings
Fried with a light and crispy crust and juicy inside, Chicken Katsu is truly irresistible. A staple at Japanese restaurants, this panko chicken is served with an addictive sweet and tangy tonkatsu sauce.
Ingredients
For the Tonkatsu Sauce
- ¼ cup ketchup
- 1 tbsp Worcestershire sauce
- ½ tbsp low-sodium soy sauce
- ½ tbsp mirin*
- ½ tbsp granulated sugar
- 1 tsp brown sugar
- ¼ tsp garlic powder
- 1/8 tsp ground ginger
For the Chicken
- 4 boneless skinless chicken thighs, 5 oz. each**
- ½ tsp coarse salt
- ¼ tsp freshly ground black pepper
- 1 large egg
- ½ tbsp vegetable oil (for egg wash)
- ¼ cup all-purpose flour
- 1 1/3 cups panko Japanese breadcrumbs
- 3 cups vegetable oil, for deep frying
For Serving
- katsu sauce (prepared above)
- cooked sticky white sushi rice
- shredded cabbage salad
- macaroni salad
- sliced tomato
Instructions
- Prepare the Katsu Sauce: In a small bowl, whisk together the ketchup, Worcestershire sauce, low-sodium soy sauce, mirin, granulated sugar, brown sugar, garlic powder, and ground ginger until well combined. Taste and adjust the sweetness or tanginess to your liking. Set aside.
- Prepare the Chicken: Trim any excess skin, fat, or gristle from each chicken thigh. Place each thigh between two sheets of plastic wrap. Using a meat mallet, gently pound the chicken until it reaches an even ½-inch thickness. This ensures even cooking and tenderness. Season both sides of the flattened chicken pieces evenly with salt and pepper.
- Set Up Breading Station: Prepare three shallow bowls. In the first bowl, add the all-purpose flour. In the second bowl, beat the large egg with the ½ tablespoon of vegetable oil. In the third bowl, place the panko Japanese breadcrumbs.
- Coat the Chicken: Take one piece of chicken and first dredge it thoroughly in the flour, shaking off any excess. Ensure the chicken is thinly but completely coated. Next, dip the floured chicken into the beaten egg mixture, making sure no dry flour spots remain. Let any excess egg drip off. Finally, coat the chicken generously in the panko breadcrumbs, gently pressing the panko into the cutlet to ensure it adheres well and creates a thick, even crust. Repeat with the remaining chicken pieces.
- Heat the Oil: Pour 3 cups of vegetable oil into a medium-sized, heavy-bottomed pot. The oil should be approximately 1½ inches deep. Place the pot over medium heat and begin heating the oil to 340°F (170°C). Use a kitchen thermometer to monitor the temperature accurately.
- Deep-Fry the Chicken: Once the oil reaches 340°F, carefully lower one breaded chicken cutlet into the hot oil. Fry for 3 to 4 minutes on each side, or until the crust is golden brown and crispy, and the chicken is cooked through to an internal temperature of 165°F (74°C). Use tongs to carefully remove the cooked chicken from the oil and transfer it to a plate lined with paper towels to drain excess grease.
- Maintain Oil Temperature: Between each piece of chicken, use a handheld skimmer to remove any stray breadcrumbs from the oil. Allow the oil temperature to return to 340°F (170°C) before adding the next chicken cutlet. This ensures consistent crispiness and prevents the chicken from becoming greasy.
- Rest and Slice: Let the fried chicken rest for 2 minutes before slicing. This allows the juices to redistribute, keeping the chicken moist. Cut the chicken into 1-inch wide strips.
- Serve: Arrange the sliced chicken katsu on plates and generously drizzle with the homemade tonkatsu sauce. Serve immediately with traditional sides such as sticky white sushi rice, shredded cabbage salad, creamy macaroni salad, and fresh sliced tomatoes.
Notes
- *Mirin Substitute: Rice wine can be used in place of mirin, but you may want to add a tiny bit more sugar to achieve a similar sweetness.
- **Chicken Thickness: If one side of your chicken thigh is notably thicker, you can butterfly it by making a shallow horizontal cut towards the center of the thicker part and opening it up like a book. This helps create a more even thickness for pounding. For chicken breast, use 2 pieces (about 10 oz total). Slice each breast horizontally to create thinner cutlets, then pound them to ¼ to ½-inch thickness.
Nutrition
Calories: 327kcal | Carbohydrates: 29g | Protein: 33g | Fat: 8g | Saturated Fat: 2g | Polyunsaturated Fat: 2g | Monounsaturated Fat: 3g | Trans Fat: 0.03g | Cholesterol: 181mg | Sodium: 861mg | Potassium: 501mg | Fiber: 1g | Sugar: 8g | Vitamin A: 183IU | Vitamin C: 1mg | Calcium: 67mg | Iron: 3mg
Nutritional information provided is an estimated automatic calculation and may vary based on specific product brands and any recipe modifications. For precise dietary planning, self-calculation is recommended.
Step-by-Step Visual Guide to Making Chicken Katsu
Sometimes, seeing is believing! Here’s a visual breakdown to guide you through each stage of preparing your perfect Chicken Katsu.
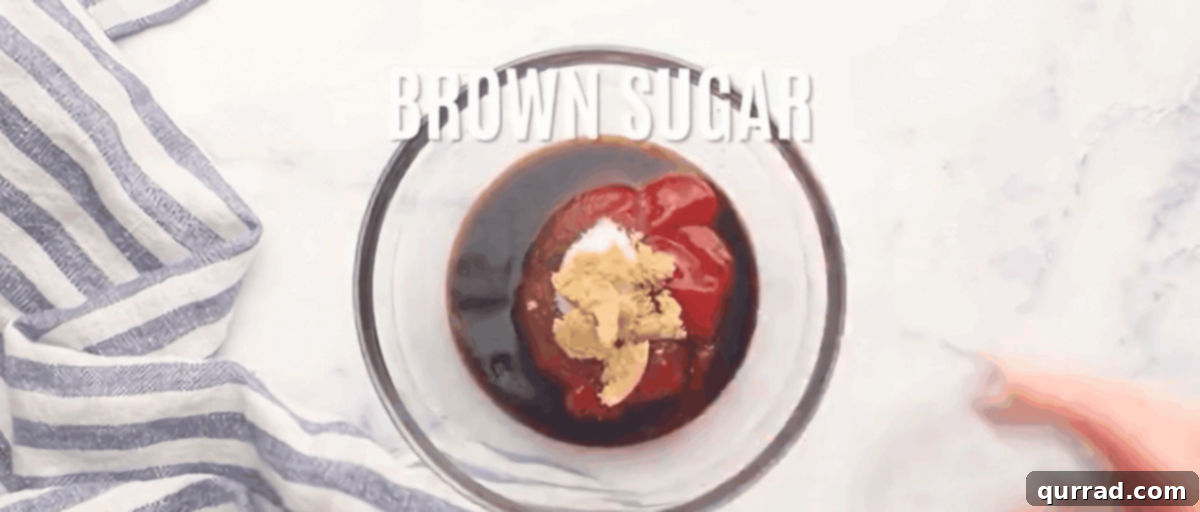
Make the Sauce: Whisk ¼ cup ketchup, 1 tbsp Worcestershire sauce, ½ tbsp low-sodium soy sauce, ½ tbsp mirin, ½ tbsp granulated sugar, 1 tsp brown sugar, ¼ tsp garlic powder, and 1/8 tsp ground ginger together. Taste and adjust to achieve your preferred balance of sweet and tangy.
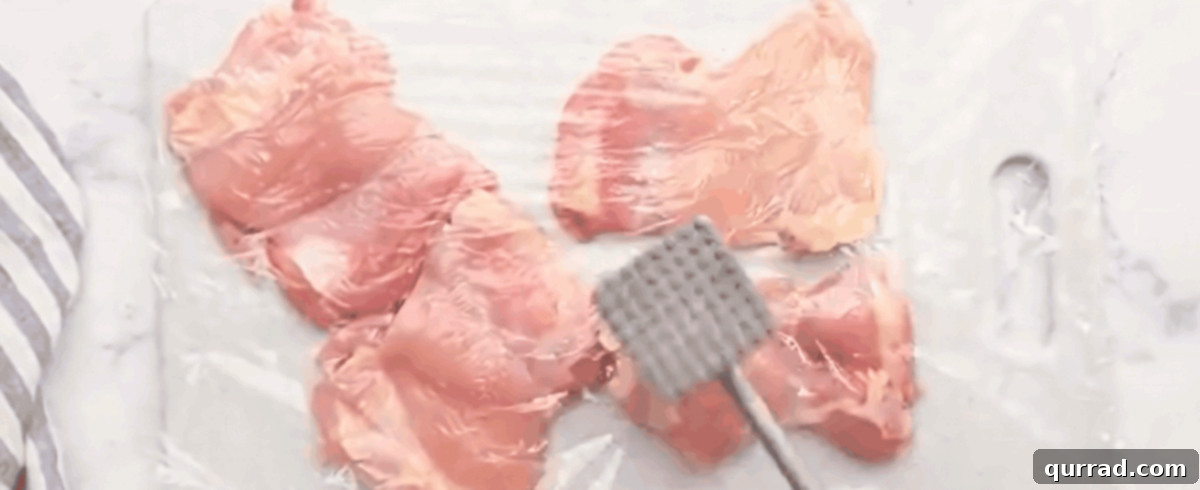
Prepare the Chicken: Trim any excess skin or fat from the chicken thighs. Place each thigh between plastic wrap and gently pound until uniformly about ½-inch thick. This tenderizes the meat and ensures even cooking. Season both sides generously with salt and pepper.
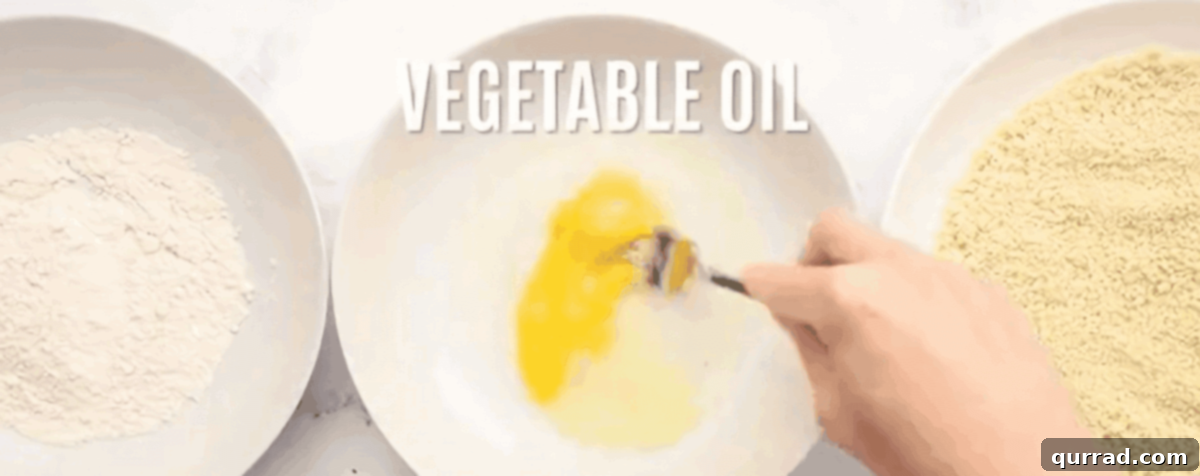
Prepare the Breading Stations: Set up three shallow bowls: one with ¼ cup all-purpose flour, another with 1 large egg whisked with ½ tbsp vegetable oil, and the third with 1 1/3 cups panko Japanese breadcrumbs.
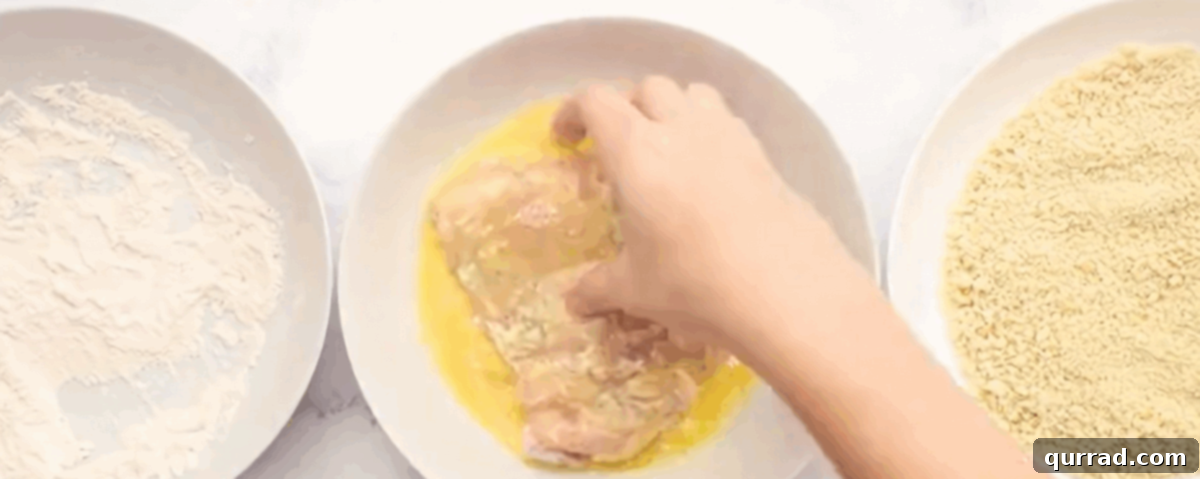
Coat the Chicken: Dredge each chicken piece first in flour, shaking off excess. Then, dip it into the egg wash, ensuring full coverage. Finally, coat it completely in panko, gently pressing the breadcrumbs into the chicken to make them adhere well.
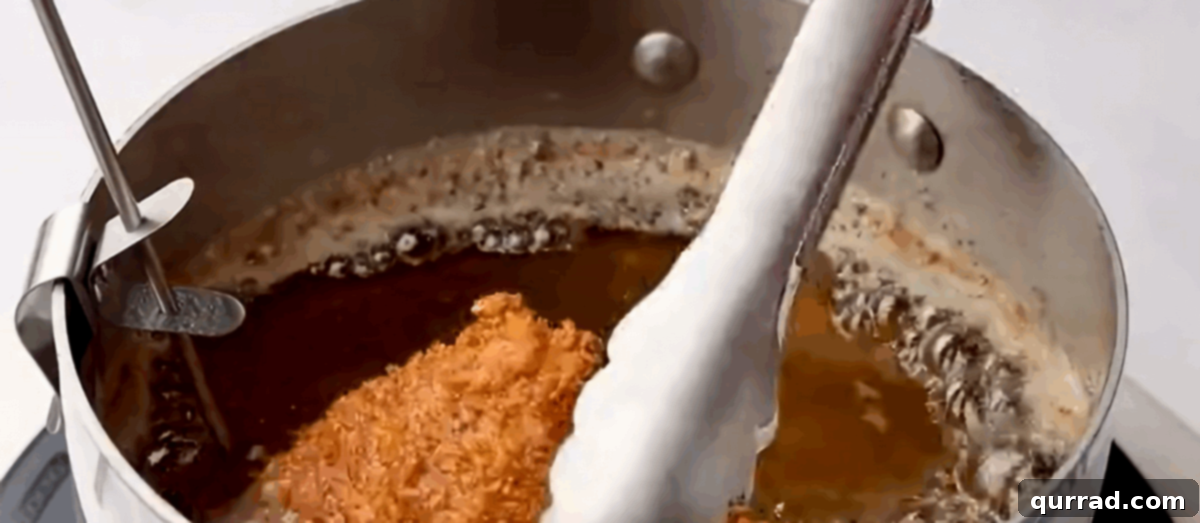
Fry the Chicken: Heat 1½ inches of vegetable oil to 340°F (170°C) in a heavy-bottomed pot. Carefully lower one chicken piece into the hot oil and fry for 3 to 4 minutes per side until it’s crispy, golden brown, and cooked through to 165°F (74°C). Remove and drain on paper towels. Remember to skim crumbs and reheat oil between batches.
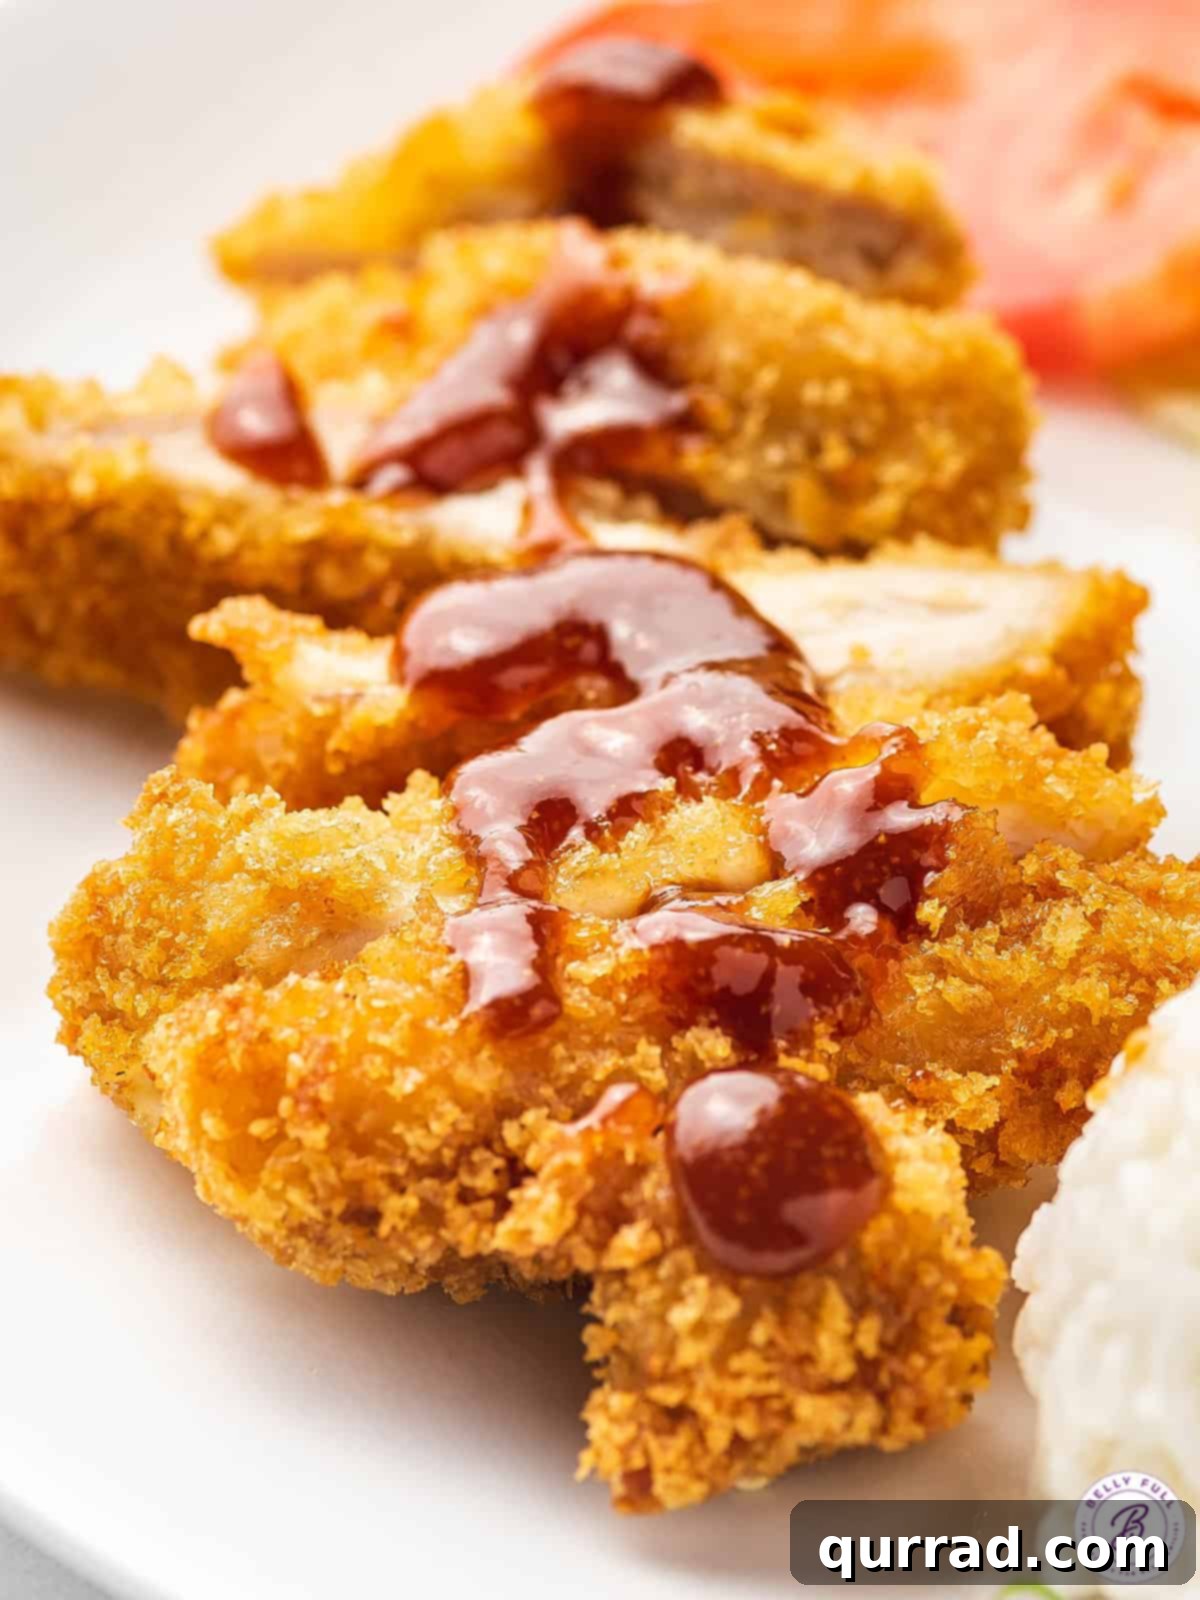
Serve: Let the chicken rest for a couple of minutes, then slice it into 1-inch wide strips. Serve immediately with the prepared katsu sauce, accompanied by sides like macaroni salad, sticky white rice, shredded cabbage, and sliced tomatoes for a complete and satisfying meal.
Alternative Cooking Methods and Variations
While deep frying yields the most authentic crispy katsu, you can achieve delicious results with alternative cooking methods:
- Air Fryer Chicken Katsu: For a lighter option, place breaded chicken pieces in a single layer in your air fryer basket. Lightly spray the tops with oil. Air fry at 350°F (175°C) for 9 minutes, then flip, spray with a little more oil, and air fry for another 9 minutes, or until golden brown and cooked through. Cooking times may vary depending on the size of your chicken and air fryer model; you might need to cook in batches.
- Baked Chicken Katsu: If you prefer to bake, place the breaded panko chicken on a baking sheet. Bake in a preheated oven at 425°F (220°C) for 12 to 15 minutes, or until the chicken reaches an internal temperature of at least 165°F (74°C) and the panko is golden and crisp.
Tips for the Crispiest, Juiciest Chicken Katsu
- Pound Evenly: Don’t skip pounding the chicken! This ensures even cooking and tender results. Uneven thickness can lead to dry spots or undercooked areas.
- Use Good Quality Panko: Panko is key for that signature crunch. Avoid regular breadcrumbs, as they won’t yield the same light, airy texture.
- Proper Breading Technique: Ensure each chicken piece is fully coated in flour, then egg, then panko. The flour helps the egg stick, and the egg helps the panko adhere. Press the panko gently to form a sturdy crust.
- Maintain Oil Temperature: Use a thermometer to keep the frying oil at a consistent 340°F (170°C). If the oil is too cool, the chicken will be greasy; if it’s too hot, the crust will burn before the chicken cooks through.
- Don’t Overcrowd the Pot: Fry one piece of chicken at a time. Overcrowding will drop the oil temperature and lead to soggy, unevenly cooked katsu.
- Skim Crumbs: Regularly remove any loose breadcrumbs from the oil between batches. This prevents them from burning and imparting a bitter taste to subsequent pieces.
- Rest the Chicken: A brief 2-minute rest after frying allows the juices to redistribute, ensuring a tender and moist interior when sliced.
How to Store and Reheat Leftover Chicken Katsu
Chicken Katsu is best enjoyed fresh, but leftovers can be stored and reheated while maintaining much of its deliciousness.
Storage: Store any leftover Chicken Katsu in an airtight container in the refrigerator for up to 2 days. For longer storage, place the cooled katsu in a freezer-safe bag or container and freeze for up to one month. The sauce should be stored separately in an airtight container in the refrigerator for up to 2-3 weeks.
Reheating: To restore its crispiness, avoid the microwave. Preheat your oven to 350°F (180°C). Place thawed chicken katsu on a baking sheet and bake for 15-20 minutes. If reheating directly from frozen, bake for approximately 30 minutes, or until heated through and crispy. Always check that the internal temperature is warm before serving.
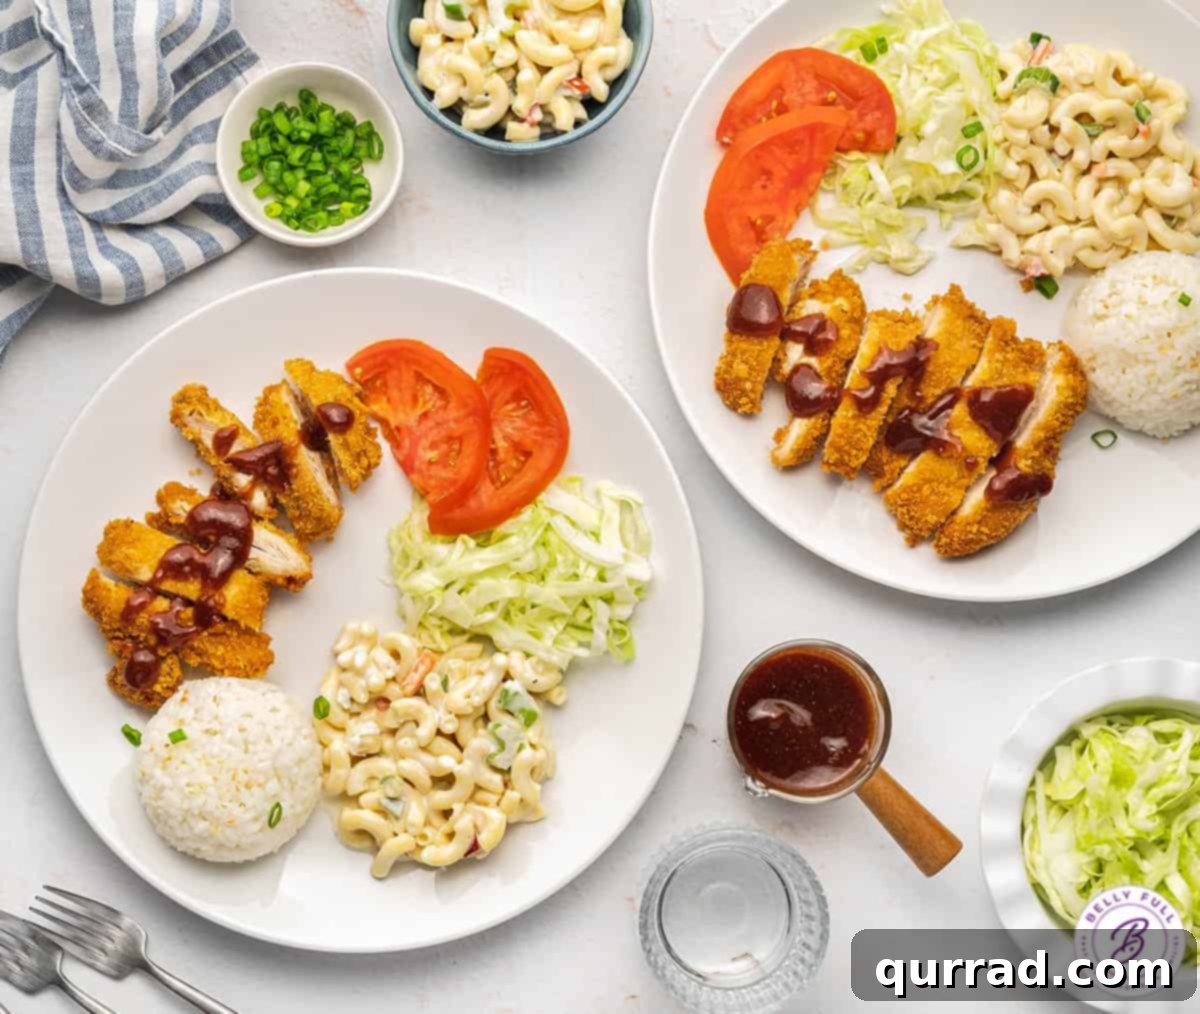
What to Serve with Chicken Katsu
The beauty of Chicken Katsu lies not only in the star dish but also in its complementary sides. I absolutely love serving it the traditional way, with a generous drizzle of homemade tonkatsu sauce and a selection of simple yet satisfying accompaniments. Here are some perfect pairings:
- Steamed White Rice: A must-have! Sticky white sushi rice provides a neutral base that perfectly soaks up the katsu sauce and balances the richness of the fried chicken.
- Shredded Cabbage Salad: A refreshing contrast to the fried chicken. Its crispness and mild flavor cleanse the palate. You can serve it plain or with a light, creamy dressing.
- Macaroni Salad: A creamy, comforting side, often found in Hawaiian BBQ plates. Its rich texture offers a delightful counterpoint to the crispy katsu.
- Sliced Tomatoes: Simple, fresh tomato slices add a touch of acidity and brightness, cutting through the richness of the fried elements.
- Miso Soup: A warm bowl of savory miso soup is a classic Japanese starter that complements any katsu meal.
- Pickled Ginger (Gari): A small side of pickled ginger can offer a pungent, refreshing bite that cleanses the palate between savory bites.
This combination creates a meal that is crispy, satisfying, balanced, and truly hits the spot every time!
Frequently Asked Questions About Chicken Katsu
What is the difference between katsu and tempura?
Both katsu and tempura are Japanese fried dishes, but they use different breading techniques. Katsu uses coarse panko breadcrumbs, resulting in a distinctly crispy, flaky crust. Tempura, on the other hand, uses a light, airy batter made primarily from flour, egg, and ice water, which creates a delicate, almost translucent, crisp coating.
Can I use chicken breast instead of thighs?
Absolutely! While chicken thighs are often preferred for their inherent juiciness, boneless, skinless chicken breasts work wonderfully. The key is to pound them to an even ¼ to ½-inch thickness. You might need to slice a thick chicken breast horizontally first to create two thinner cutlets before pounding.
What if I don’t have mirin?
Mirin is a sweet Japanese rice wine crucial for the authentic flavor of tonkatsu sauce. If you don’t have it, a dry sherry or white wine (like Chardonnay) mixed with a pinch of sugar can be a decent substitute. Rice wine (not rice wine vinegar) with a little extra sugar will also work, though the flavor profile will be slightly different.
How do I know when the chicken is cooked through?
The best way to ensure the chicken is safely cooked and juicy is to use a meat thermometer. Insert it into the thickest part of the chicken, avoiding the bone if present. The internal temperature should reach 165°F (74°C). Visually, the chicken will be golden brown and crispy on the outside.
Can I prepare the chicken ahead of time?
You can prepare the tonkatsu sauce a few days in advance and store it in the refrigerator. You can also pound and season the chicken cutlets, and even complete the breading process, a few hours before frying. If breading ahead, place the breaded chicken on a wire rack over a baking sheet, cover loosely with plastic wrap, and refrigerate. This helps the panko adhere better and reduces sogginess.
How can I ensure my katsu is extra crispy?
Beyond using panko and maintaining consistent oil temperature, ensure the chicken is patted very dry before seasoning and breading. Any moisture will create steam and prevent a truly crispy crust. Also, don’t overcrowd the pot, and always remove any loose crumbs from the oil between batches.
More Asian-Inspired Chicken Recipes to Explore
- Chicken Pad Thai
- Teriyaki Chicken
- Sweet and Sour Chicken
- Chicken Stir Fry