
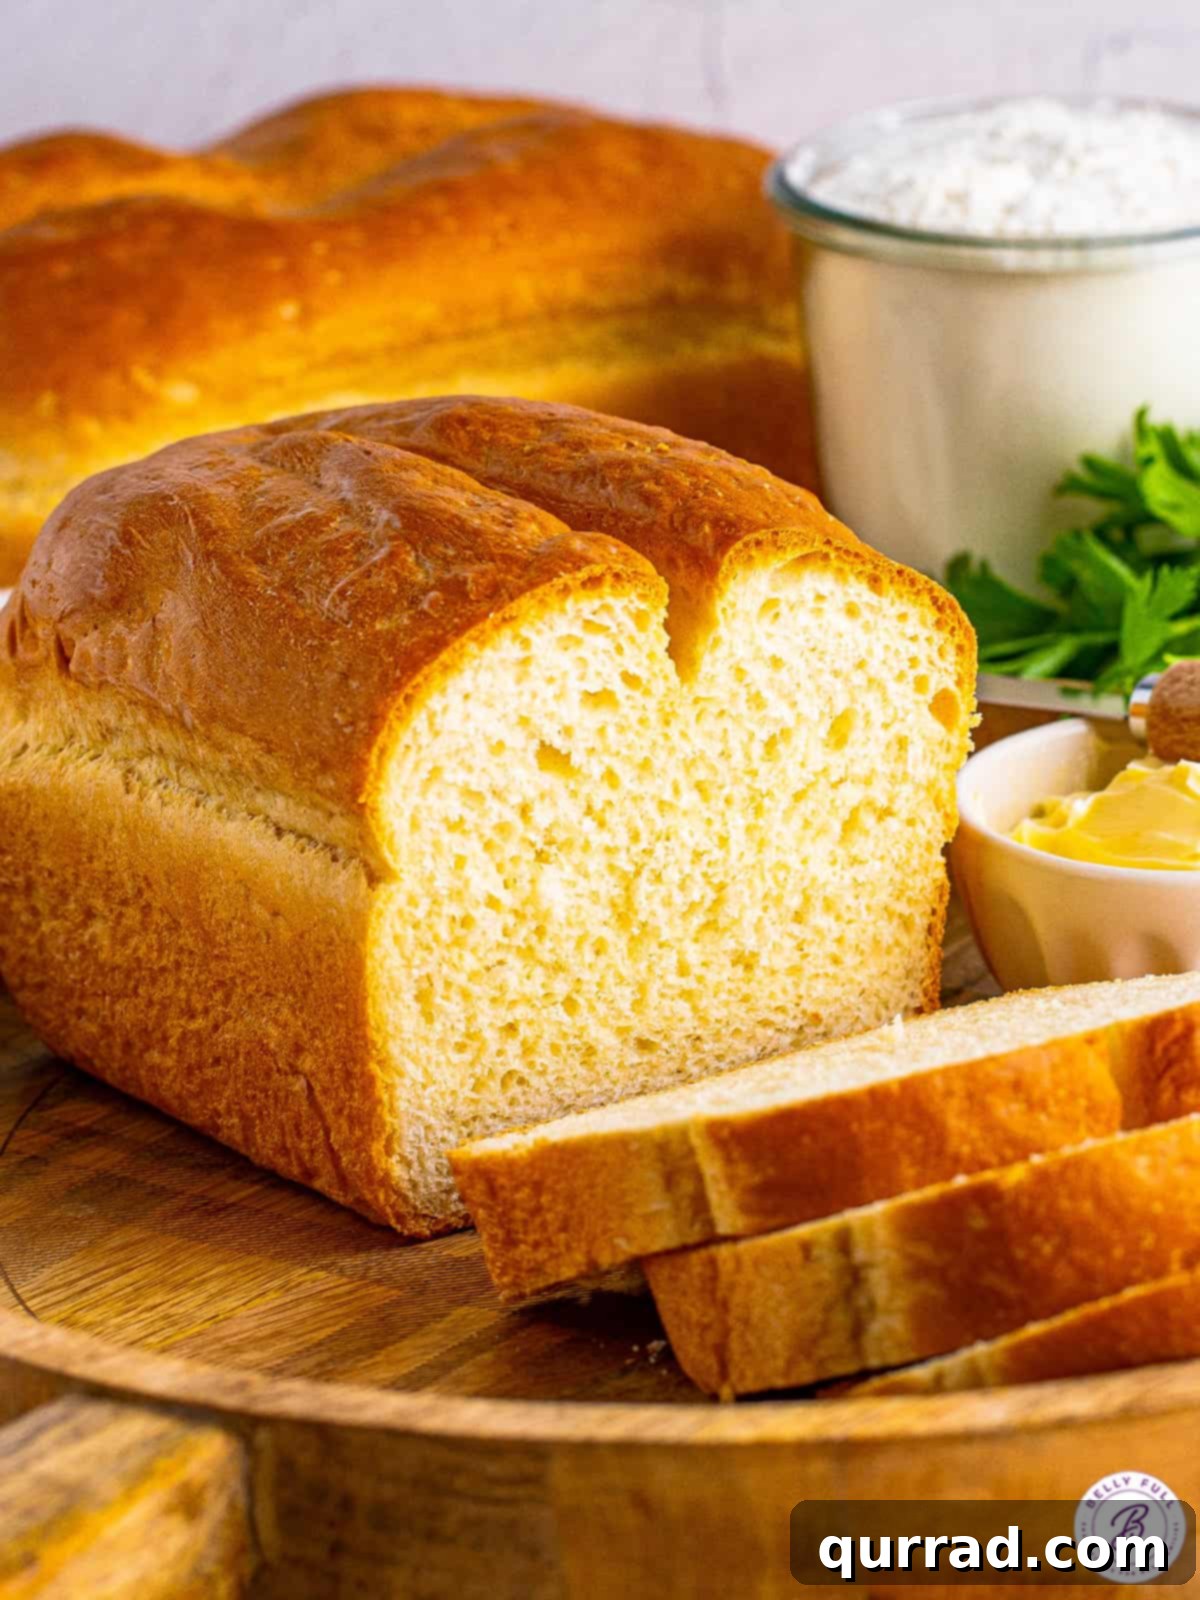
The Ultimate Easy Homemade White Bread Recipe for Beginners
There’s nothing quite like the comforting aroma of freshly baked bread filling your home. This no-fuss **Homemade White Bread** recipe delivers an incredibly light, tender, and truly satisfying loaf that outshines anything store-bought. Perfect for slicing up for hearty sandwiches, toasting golden brown with a generous spread of butter in the mornings, or simply enjoying plain, warm from the oven, this recipe is a true game-changer for any home cook.
Once your loaves have cooled and been sliced, prepare to elevate your mealtime. Imagine crafting the best grilled cheese sandwich you’ve ever tasted, with its gooey melted cheese and crisp, buttery exterior, or assembling a classic, comforting tuna melt that brings pure joy with every bite. The versatility of this homemade white bread makes it an indispensable staple in your kitchen.
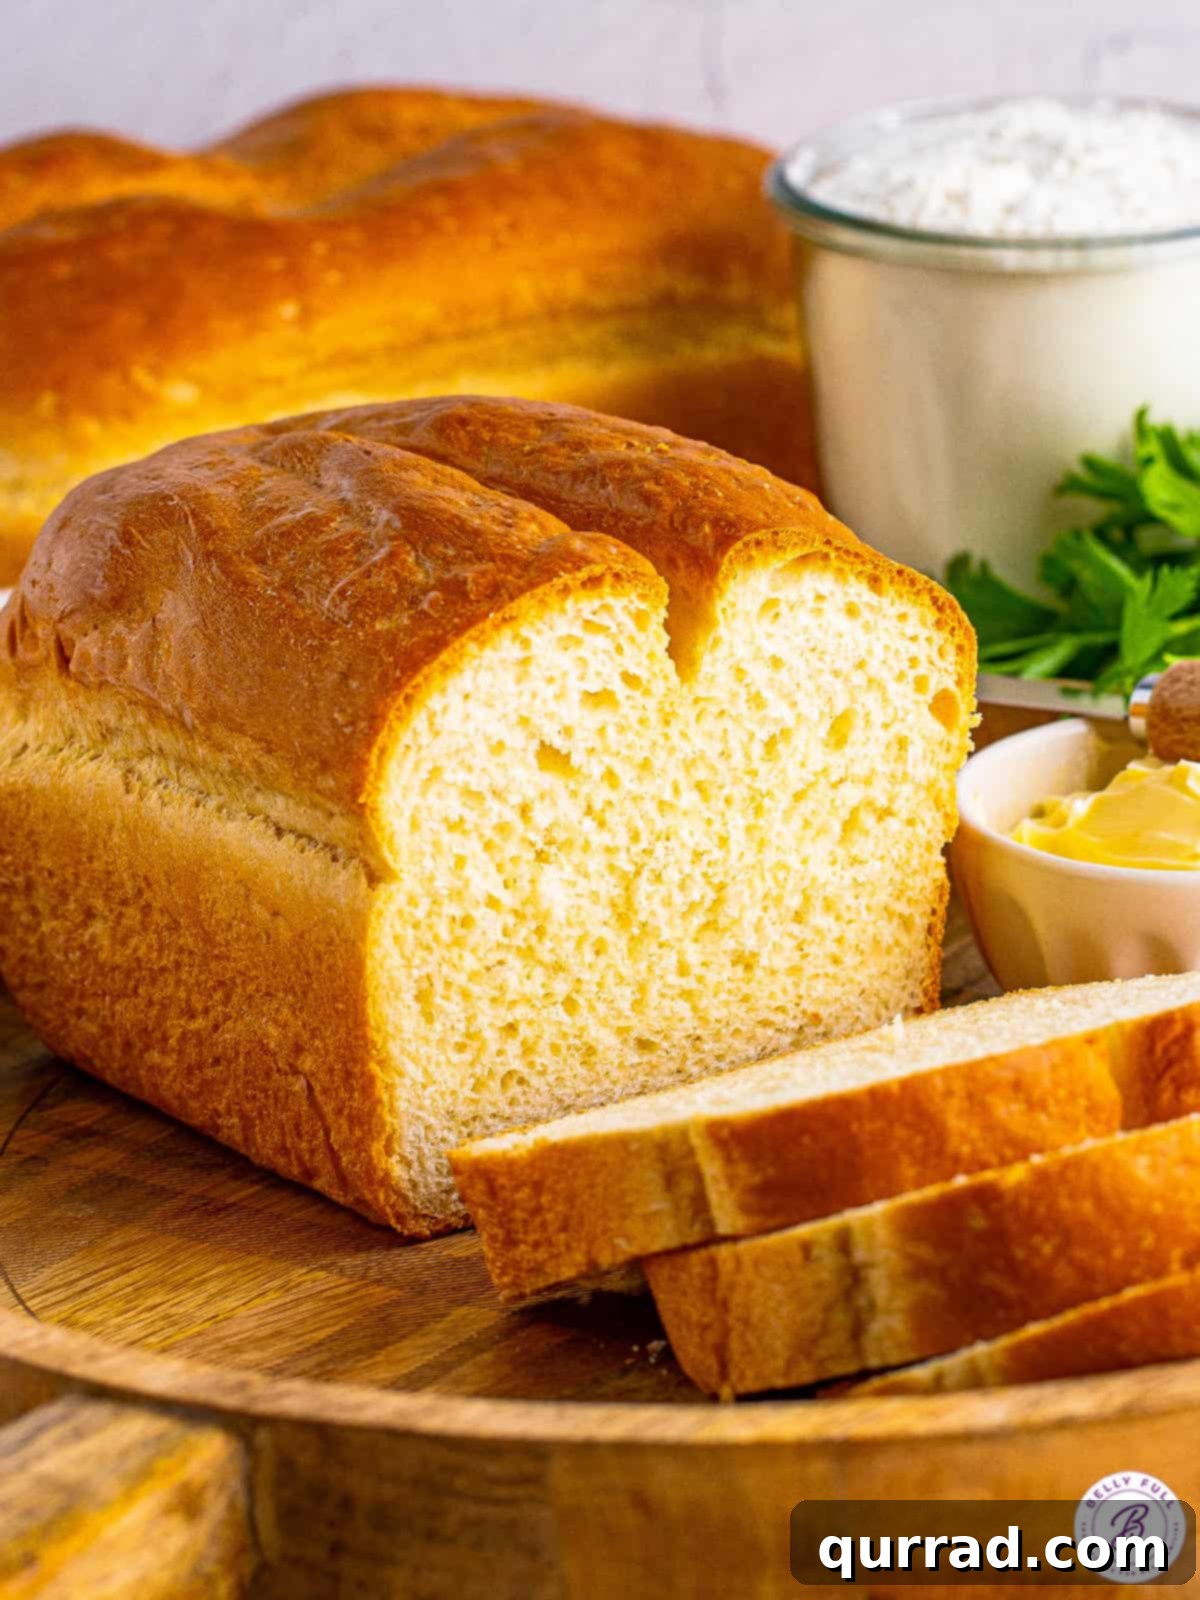
Why Bake Your Own White Bread? The Joys and Benefits
While store-bought bread is convenient, nothing compares to the taste, texture, and sheer satisfaction of baking your own loaf from scratch. This easy homemade white bread recipe isn’t just about creating food; it’s about a rewarding culinary experience that brings a touch of warmth and tradition into your home.
One of the most significant benefits is knowing exactly what goes into your food. This recipe uses simple, wholesome ingredients, free from the preservatives and artificial additives often found in commercially produced bread. You control the quality, ensuring a healthier and more natural product for your family.
Beyond health, the sensory experience is unparalleled. The comforting aroma that fills your kitchen as the bread bakes is simply intoxicating. Then there’s the moment of cutting into a warm, crusty loaf, revealing its soft, airy interior. The taste is inherently superior – fresh, subtly sweet, and wonderfully tender. It’s a taste that will transform your everyday sandwiches and toasts into gourmet delights. Plus, baking bread can be a cost-effective alternative to regularly purchasing artisan loaves, making it a smart choice for your wallet too.
A Timeless, Foolproof White Bread Recipe
This particular white bread recipe is a tried-and-true classic, perfected over three decades in my own kitchen. It consistently produces perfectly light, tender, and utterly delicious bread every single time. It’s truly a foolproof recipe, making it an ideal starting point for anyone looking to venture into the delightful world of bread making.
Its versatility is unmatched. This bread serves as my ultimate go-to for everything from hearty deli sandwiches to simple breakfast toast. Its soft, buttery crumb is also exceptional for soaking up rich sauces, gravies, or the last drops of a comforting soup, adding another layer of flavor and texture to your meals.
Each batch yields two generous loaves, offering great convenience. I often enjoy one fresh and freeze the other, ensuring we always have a supply of wholesome homemade bread readily available for any occasion or craving.
Understanding Your Loaf: Slices and Servings
When you bake homemade bread, the number of slices you get per loaf can vary depending on how thick you prefer to cut them. For this specific recipe, we typically yield about 12 slices per loaf, which is ample enough to prepare 6 delicious sandwiches. Since this white bread recipe produces two loaves, you’ll have enough for a total of 12 sandwiches, making it perfect for meal prep or feeding a family.
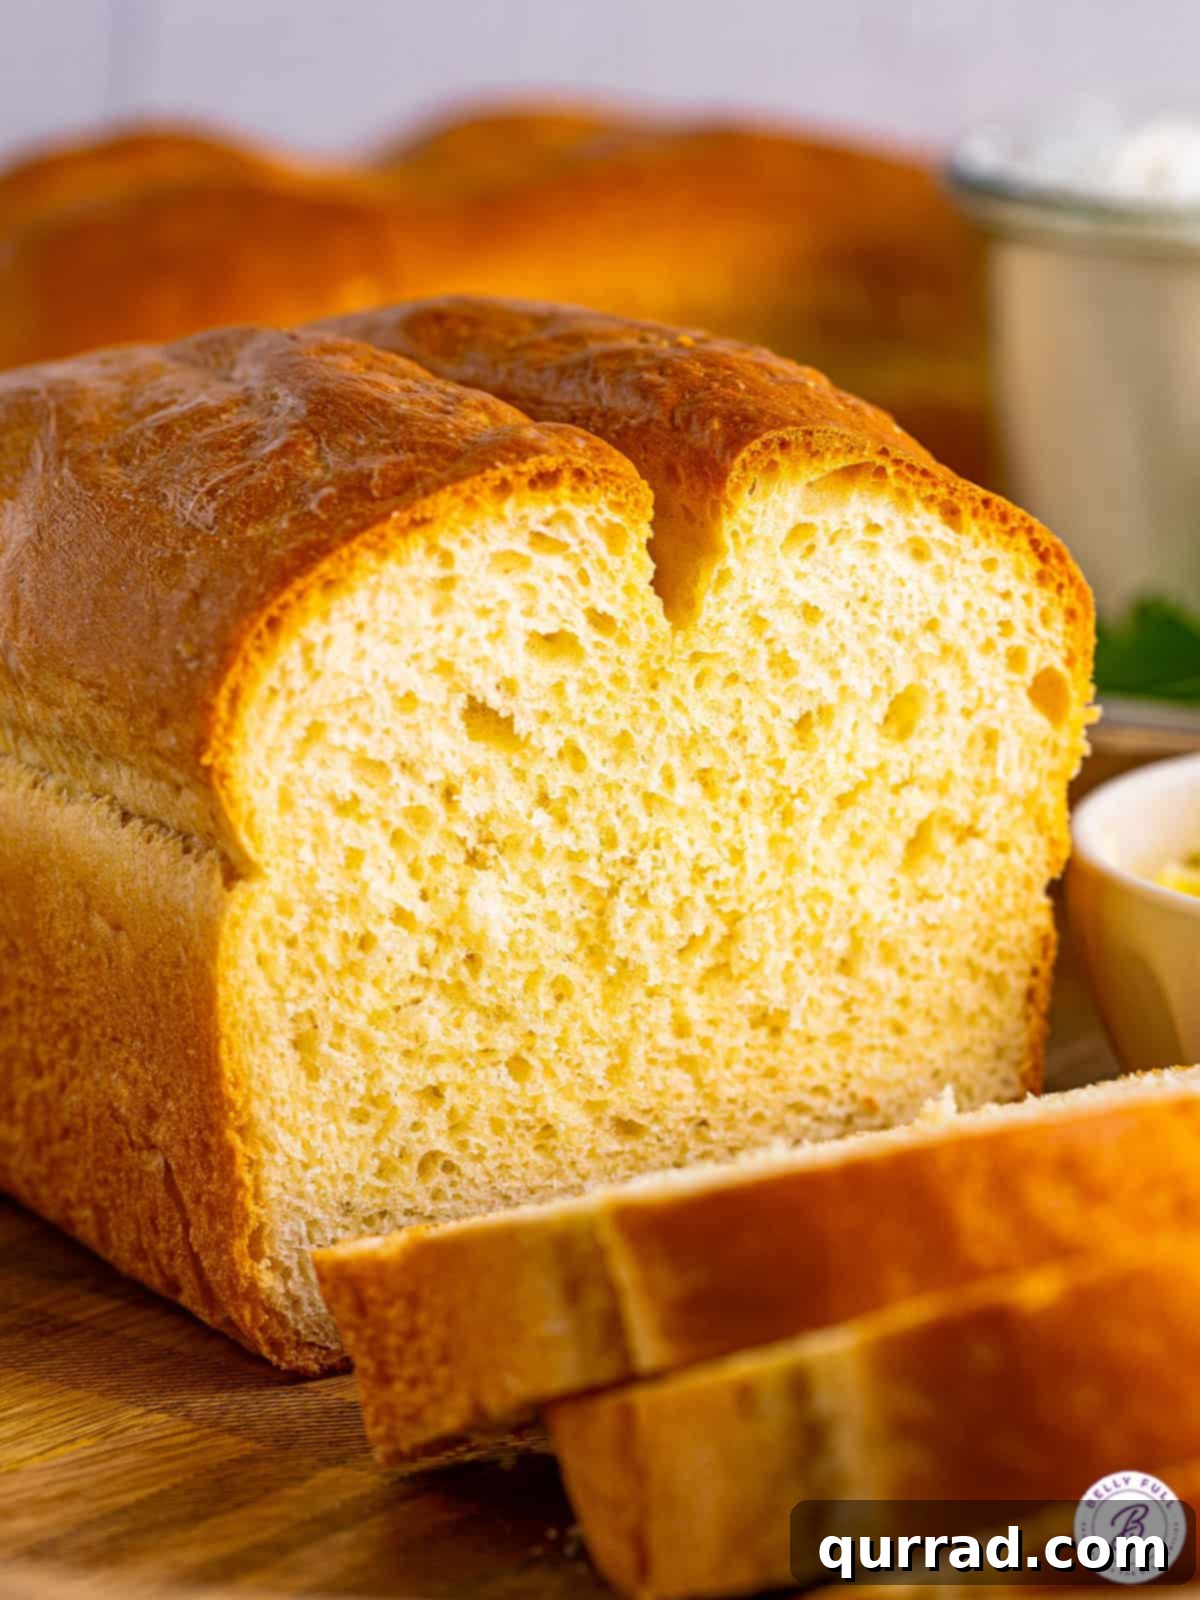
Essential Ingredients for Your Perfect Loaf
Crafting this incredible homemade white bread requires just a handful of staple pantry ingredients, along with salt and water. The beauty lies in the simplicity and the quality of these basic components coming together to create something truly extraordinary. Here’s a closer look at what you’ll need and why each element is crucial:
The Core Ingredients:
- All-purpose flour: This forms the foundational structure of your bread. While you can certainly experiment, standard all-purpose flour works beautifully to create a tender crumb. Ensure it’s spooned and leveled for accurate measurement.
- Nonfat dry milk: Do not be tempted to omit this ingredient! We strongly believe dry milk is the secret to achieving the exceptionally light, fluffy texture and delicate flavor that sets this bread apart. It contributes to a softer crust and better keeping qualities.
- Granulated sugar: A small amount of sugar serves multiple purposes. It provides a touch of sweetness to enhance the overall flavor profile and, crucially, acts as food for the yeast, helping it to activate and multiply effectively.
- Unsalted butter: Softened to room temperature, butter adds richness, flavor, and contributes significantly to the bread’s tender crumb. It also helps achieve that desirable golden-brown crust.
- Active dry yeast: This is the leavening agent that makes your bread rise. Always check the expiration date; old or inactive yeast will prevent your bread from rising properly, leading to a dense loaf. Store it in the refrigerator or freezer to prolong its freshness.
- Kosher salt: Salt is vital for balancing and heightening the flavors of the other ingredients. It also plays a role in regulating yeast activity, preventing the dough from over-proofing too quickly.
- Warm water: The correct water temperature is paramount for activating the yeast. Aim for around 115°F (46°C). Water that is too cool won’t activate the yeast, while water that is too hot will kill it, hindering the rising process. A kitchen thermometer is a valuable tool here.
- Melted butter (for finishing): While optional, brushing your freshly baked loaves with melted butter immediately after removing them from the oven adds an irresistible golden sheen, a hint of extra richness, and a beautifully soft crust. It’s highly recommended for that perfect finishing touch.
All-Purpose Flour vs. Bread Flour: What’s the Difference?
When it comes to flour, you might wonder about the best choice for bread baking. This recipe specifically calls for all-purpose flour because it’s readily available in most kitchens, making the recipe accessible to everyone. All-purpose flour yields a wonderful, tender loaf that is perfect for everyday use.
However, if you happen to have bread flour on hand, you can absolutely use it as a 1:1 substitute for the all-purpose flour. Bread flour has a higher protein content, which contributes to more gluten development. This typically results in a bread with a slightly chewier texture and an even lighter interior. I’ve used both varieties successfully, and while bread flour might offer a marginally lighter texture, the results with all-purpose flour are still consistently amazing and delicious. Don’t feel the need to buy special flour if you already have all-purpose flour in your pantry – this recipe shines with either!
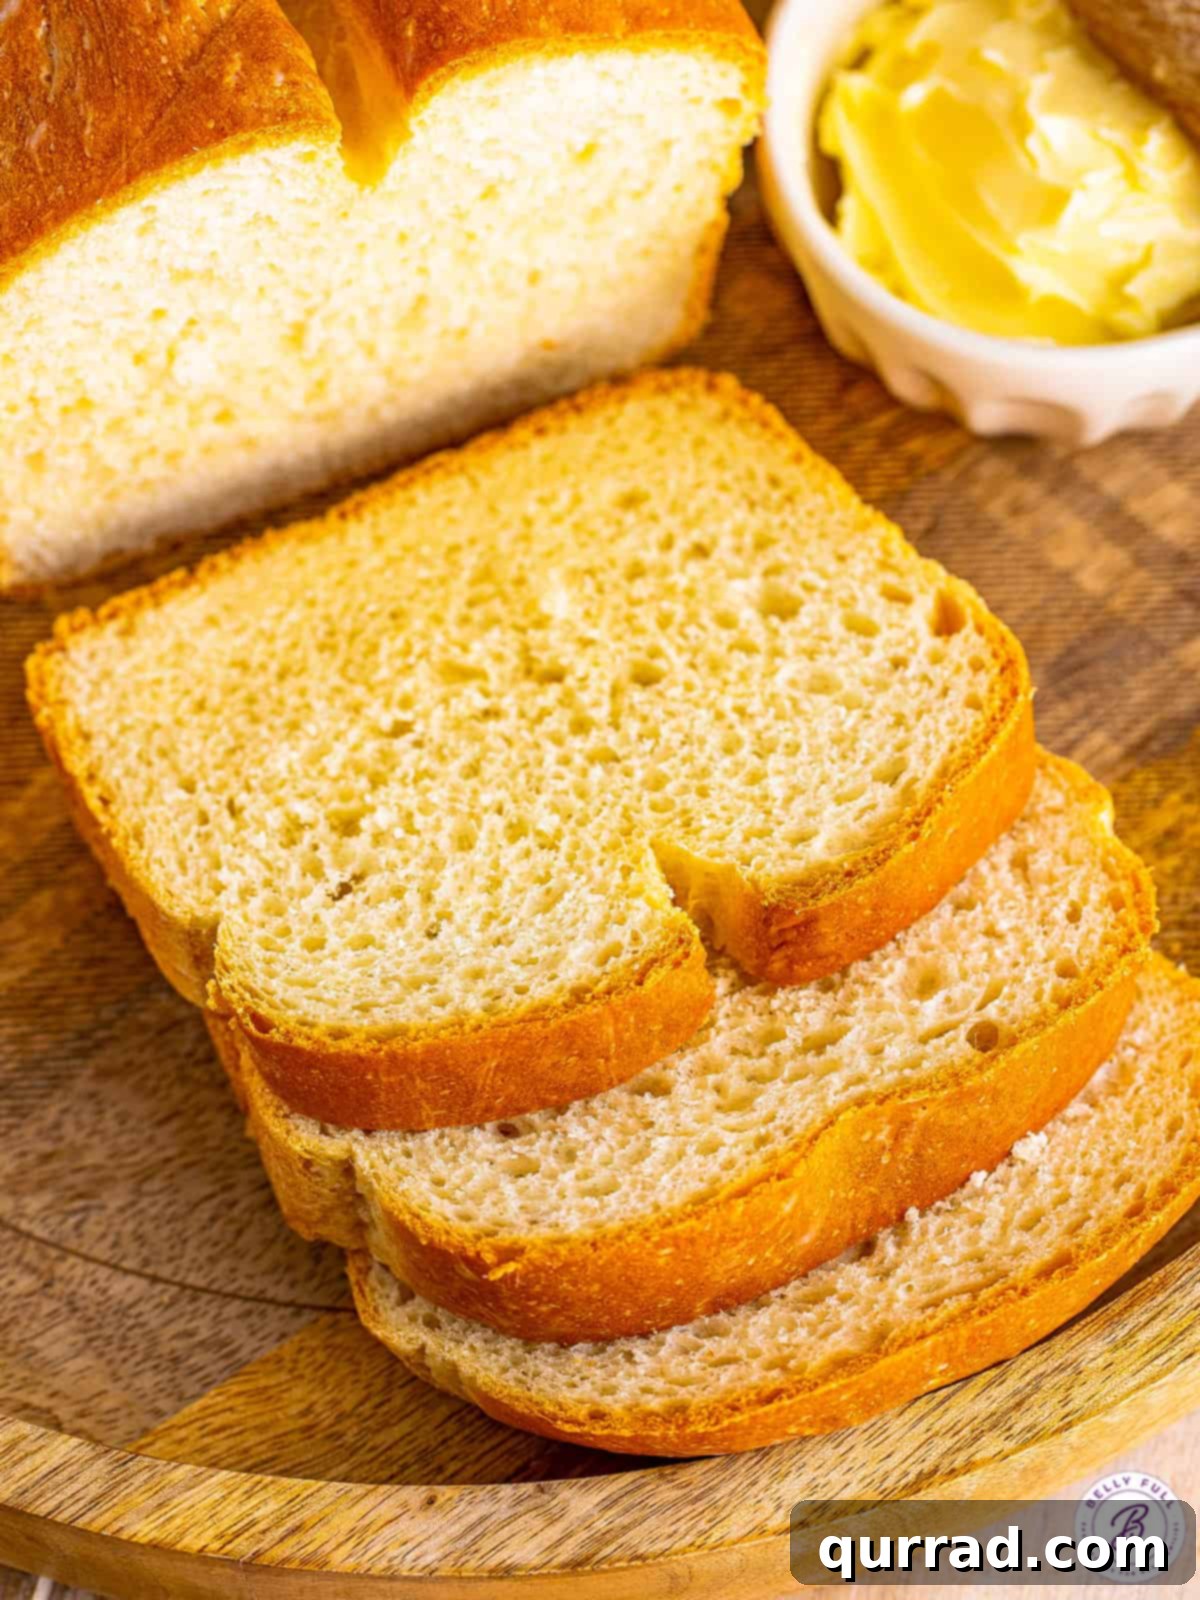
Step-by-Step Guide: Crafting Your Homemade White Bread
Making this sandwich bread from scratch is surprisingly straightforward, even for novice bakers. With a little patience and attention to detail, you’ll be enjoying warm, fragrant loaves in no time. This detailed guide ensures a successful baking journey:
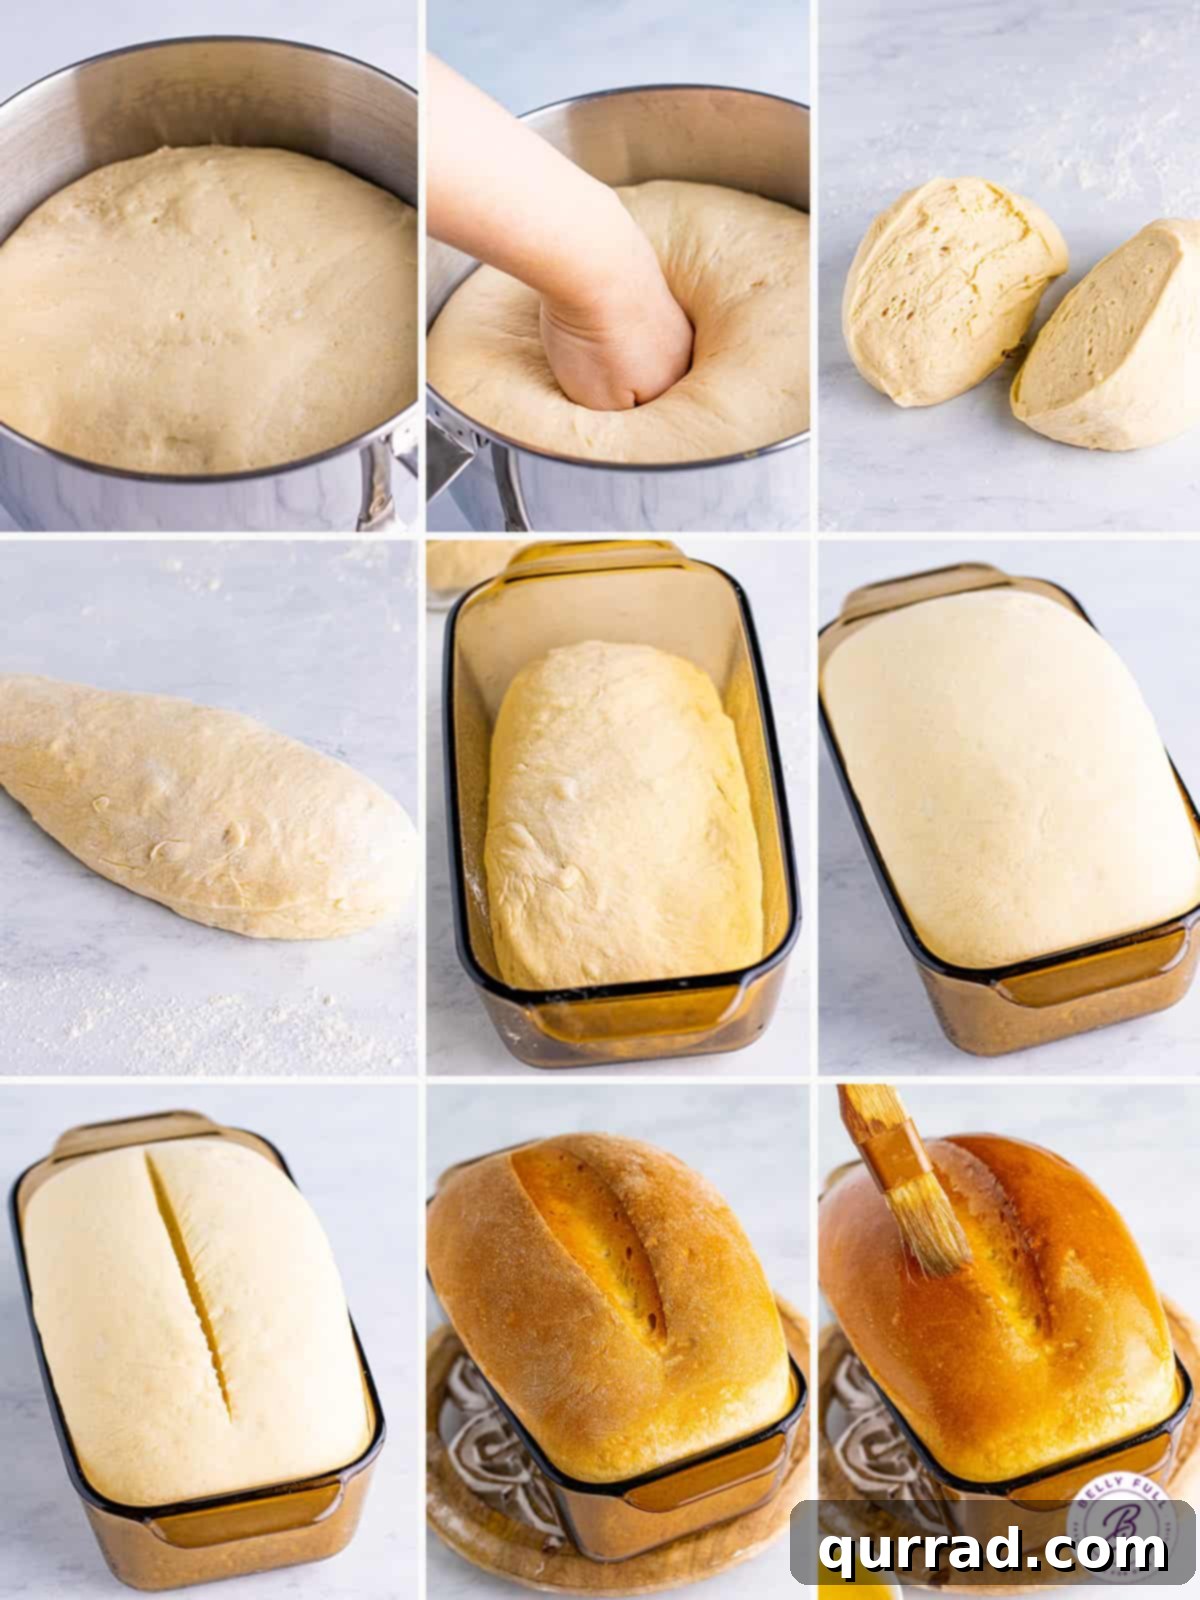
The Journey from Dough to Golden Loaf:
- Prepare the Yeast and Initial Mix: In the bowl of a stand mixer, combine 2 cups of the all-purpose flour, the dry milk, granulated sugar, softened butter, active dry yeast, and kosher salt. Using the dough hook attachment, mix these ingredients on low speed for just a few turns until they are barely combined. Then, add the warm water (approximately 115°F) and continue to mix until a shaggy dough forms.
- Gradually Incorporate Flour and Knead: With the mixer running on slow speed, begin adding the remaining flour, about 1/2 cup at a time, until you’ve incorporated a total of 5 cups. Increase the mixer speed to medium-high. Continue to mix until the dough pulls away cleanly from the sides of the bowl. This is a crucial indicator of proper hydration. If the dough is still sticking excessively after a couple of minutes, add up to an additional 1/2 cup of flour, one tablespoon at a time, until the dough consistently cleans the sides of the bowl.
- Develop the Gluten: Once the dough is cleaning the sides of the bowl, continue to knead it on medium-high speed for a full 10 minutes. This extensive kneading develops the gluten, which is essential for the bread’s structure and elasticity. After 10 minutes, the dough should be smooth, pliable, and elastic, springing back when gently poked.
- First Rise (Bulk Fermentation): Lightly spray the dough with cooking spray and turn it over in the bowl to coat it evenly. Cover the bowl tightly with plastic wrap and place it in a warm, draft-free spot in your kitchen. Allow the dough to rise for approximately 1 hour, or until it has visibly doubled in size. This initial rise builds flavor and aerates the dough.
- Punch Down and Degas: Gently remove the plastic wrap. Using your fist, firmly punch down the risen dough in the bowl to release the accumulated air bubbles. This step redistributes the yeast and evens out the dough’s temperature.
- Final Kneading and Shaping: Turn the dough out onto a lightly floured clean work surface. Knead it by hand for about 1 minute, pressing out any remaining air bubbles. This ensures a consistent, fine crumb in your finished bread. Divide the dough into two equal pieces. Gently shape each piece into a log that will fit comfortably into your greased loaf pans.
- Second Rise (Proofing): Lightly grease two 9×5-inch loaf pans with cooking spray. Place one dough log into each prepared pan. There’s no need to cover them this time. Allow the loaves to rise again in a warm place for 30 to 45 minutes, or until they have doubled in size and look puffy. Towards the end of this rise, preheat your oven to 400°F (200°C).
- Bake to Perfection: Just before placing the loaves in the oven, use a sharp knife or a lame to make a shallow slit (about 1/2 inch deep) down the center of each loaf. This scoring helps the bread expand evenly and creates a beautiful crust. Carefully place the loaf pans into the preheated oven. Immediately reduce the oven temperature to 350°F (175°C). Bake for 30 to 35 minutes, or until the crust is a rich golden brown and the internal temperature reaches 200-210°F (93-99°C).
- Cooling and Finishing: As soon as you remove the golden loaves from the oven, immediately brush the tops generously with melted butter (if using). Let the bread cool in the pans for about 5 minutes. Then, carefully remove them from the pans and transfer them to a wire rack to cool completely. This prevents the bottoms from becoming soggy and ensures an even texture throughout. Resist the urge to slice into them too early, as cooling completely helps set the crumb and makes for easier slicing.
Troubleshooting Common Bread Baking Issues
Even with a foolproof recipe, baking can sometimes present unexpected challenges. Don’t be discouraged if your first few loaves aren’t absolutely perfect! Understanding common issues and how to fix them will make you a more confident baker. Here are some solutions to frequently encountered problems:
My Dough Didn’t Rise!
If your dough doesn’t rise, the most common culprit is inactive yeast. This could be due to:
- **Dead Yeast:** The yeast may be past its expiration date or stored improperly. Always use fresh yeast.
- **Incorrect Water Temperature:** Water that is too hot (above 120°F/49°C) will kill the yeast, while water that is too cold (below 100°F/38°C) won’t activate it properly. Aim for 105-115°F (40-46°C).
- **Lack of Food:** While this recipe includes sugar for the yeast, ensure all ingredients are correctly measured.
- **Drafty Environment:** Yeast thrives in warmth. A cold or drafty spot can significantly slow down or prevent rising. Find a warm spot, like a slightly warmed oven (turned off!), or near a sunny window.
My Bread is Dense and Heavy!
A dense loaf usually indicates an issue with flour quantity or rising time:
- **Too Much Flour:** Over-flouring is a common mistake. It makes the dough stiff and difficult for the yeast to work through. Always measure flour by spooning it into a measuring cup and leveling it off, rather than scooping directly from the bag.
- **Insufficient Kneading:** Proper kneading develops gluten, which creates the airy structure of bread. If the dough isn’t kneaded enough, it won’t be able to trap the gases produced by the yeast, resulting in a dense crumb.
- **Under-Proofing:** If the dough doesn’t rise long enough during either the first or second rise, it won’t develop enough air pockets, leading to a heavy loaf. Ensure the dough doubles in size.
My Crust is Too Hard!
While a good crust is desired, one that’s overly hard can be unpleasant:
- **Over-baking:** Baking the bread for too long or at too high a temperature can lead to a very hard, dry crust. Follow the recommended baking times and temperatures.
- **Lack of Moisture:** Some ovens can be very dry. Brushing the bread with melted butter immediately after it comes out of the oven (as recommended in this recipe) helps soften the crust and adds flavor.
- **Improper Cooling:** Letting the bread cool completely on a wire rack is essential. If it cools in the pan, moisture can get trapped, leading to a soggy bottom, but if exposed to too much dry air without proper buttering, it can also harden excessively.
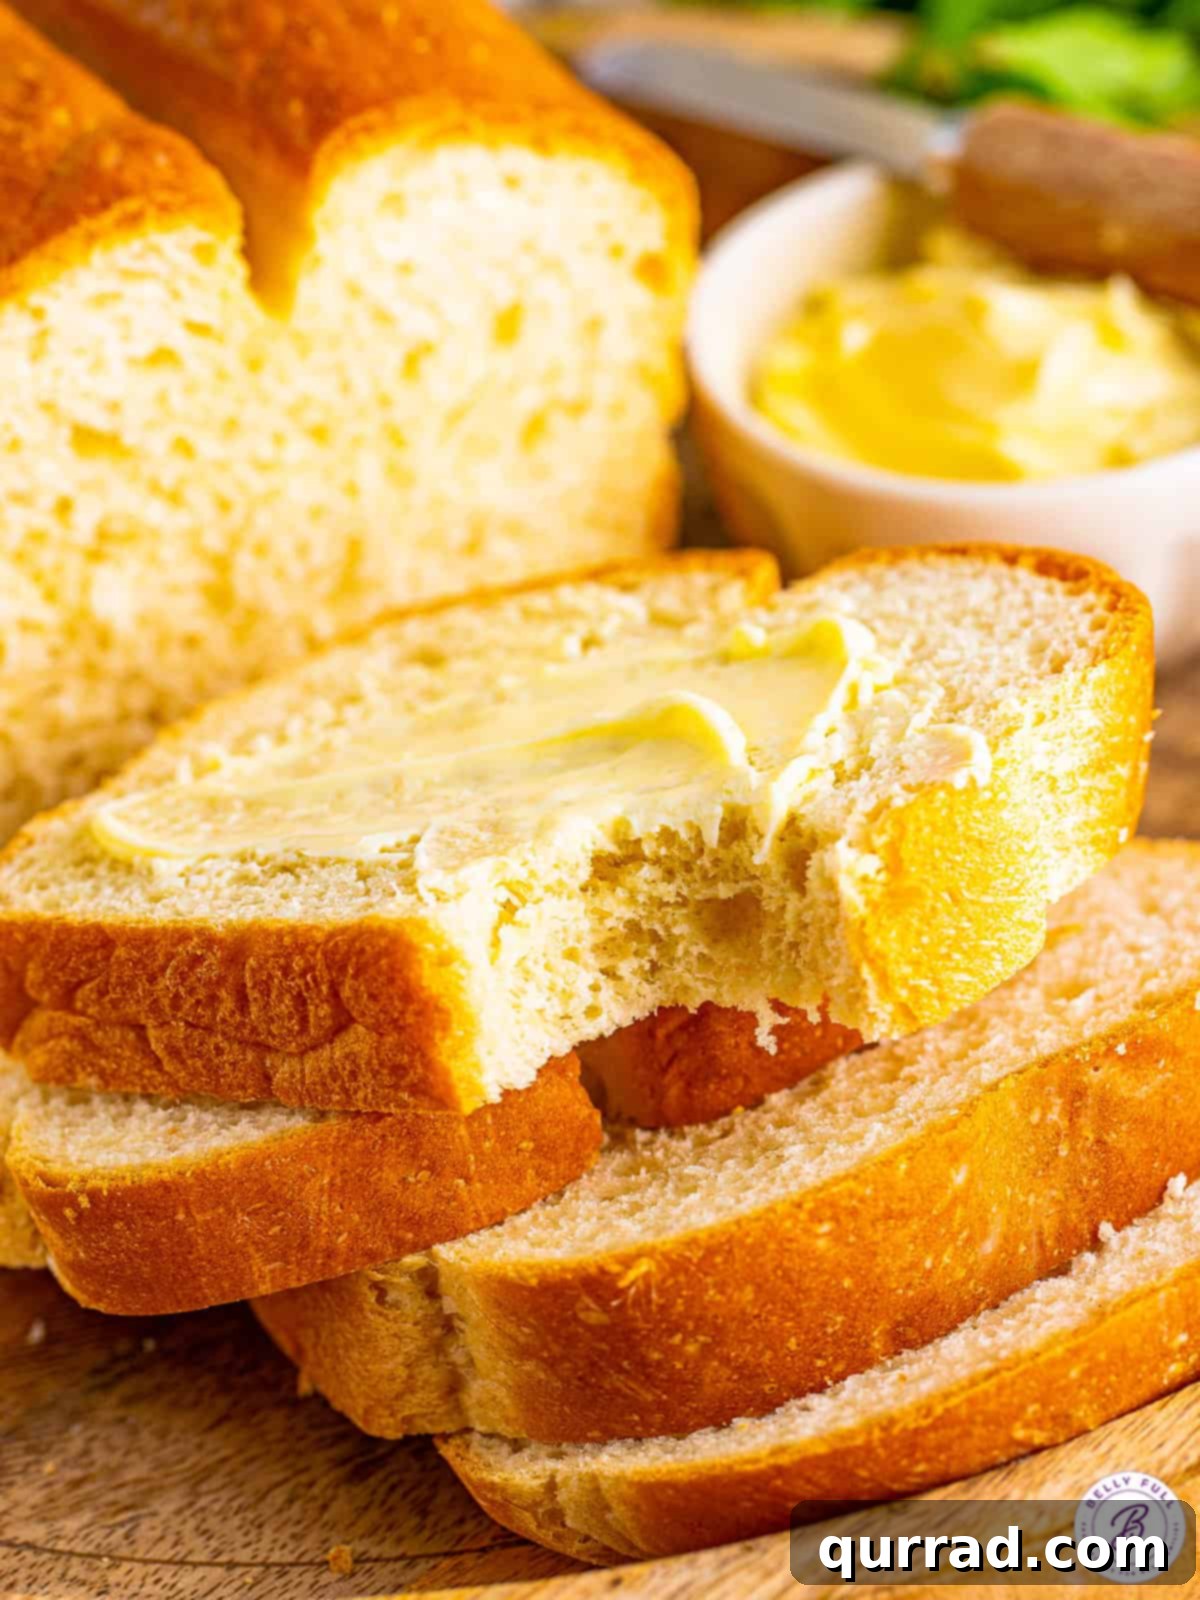
Creative Serving Suggestions for Your Freshly Baked Loaf
Your freshly baked white bread is a versatile canvas for countless delicious meals. Beyond its obvious use in classic sandwiches, here are some inspiring serving ideas to make the most of every tender slice:
- Elevated Sandwiches: While perfect for a simple ham and cheese, take your sandwich game to the next level. Try the famously delicious BEACH Sandwich, a minimalist yet flavorful tomato sandwich with fresh garden tomatoes, or delicate cucumber sandwiches for a light lunch. And, of course, as mentioned, it makes the absolute best grilled cheese sandwich imaginable, with its golden crust and soft interior.
- Decadent Toast: Simple toast for breakfast or a snack can be transformed. Slather it with a creamy cinnamon honey butter for a sweet treat, or enjoy it with rich crockpot apple butter. For a savory twist, a dollop of whipped herb butter turns toast into a sophisticated accompaniment for meals like homemade spaghetti sauce or comforting lasagna rolls.
- Beyond Slices: Don’t limit yourself to slices! Cube stale bread to make incredible homemade croutons for salads or soups. Transform it into a rich and comforting bread pudding for dessert. Or, use it as the base for a savory stuffing that will be the star of any holiday meal.
Storing Your Homemade White Bread for Maximum Freshness
To enjoy your homemade white bread at its best, proper storage is key. Here’s how to keep it fresh, whether for a few days or several months:
Room Temperature Storage:
Freshly baked white bread maintains its quality at room temperature for up to 3 days. To keep it soft and prevent it from drying out, store it in an airtight container, a bread box, or a sealed plastic bag once it has completely cooled. Cutting the bread only as needed can also help preserve its freshness.
Refrigeration:
While refrigeration can extend the shelf life of your bread to about 5 days, it can sometimes cause the bread to stale faster due to a process called “starch retrogradation.” If you prefer to refrigerate, ensure it’s in an airtight bag to minimize moisture loss and protect against odors. For best texture, lightly toast refrigerated slices before eating.
Freezing for Long-Term Enjoyment:
Freezing is an excellent way to preserve your homemade white bread for up to 3 months, ensuring you always have a delicious loaf on hand.
- Freezing a Whole Loaf: If you plan to freeze an entire loaf, wrap it tightly in plastic wrap, ensuring no air pockets remain. Then, place the plastic-wrapped loaf into a large freezer bag, squeezing out as much air as possible before sealing.
- Freezing Sliced Bread: For ultimate convenience, we highly recommend slicing the bread before freezing. This allows you to easily grab just a piece or two as needed, perfect for making individual sandwiches or toast. Simply place the slices in a freezer-safe bag, separating them with parchment paper if desired to prevent sticking, then squeeze out the air and seal.
To thaw frozen bread, simply remove it from the freezer. Slices can be toasted directly from frozen. A whole loaf can be thawed at room temperature, or for a quicker method, wrapped in foil and gently reheated in a low oven (around 300°F/150°C) until warmed through.
Explore More Delicious Bread Recipes:
If you’ve enjoyed the process of baking this easy white bread, there’s a whole world of other fantastic bread recipes waiting for you to discover. Expand your baking repertoire with these delightful options:
- Dutch Oven Bread
- Irish Soda Bread
- Challah Bread
- Focaccia
- Pizza Dough
Homemade White Bread
This no-fuss Homemade White Bread recipe is so light and tender, perfect for sandwiches, simple toast in the mornings slathered with butter, or eating just the way it is!
Prep Time: 20 mins
Cook Time: 35 mins
Rise Time: 1 hr 45 mins
Total Time: 2 hrs 40 mins
Servings: 24 slices (2 loaves)

Ingredients
- 5 & 1/2 cups all-purpose flour, spooned and leveled, divided
- 1/4 cup nonfat dry milk
- 3 tablespoons granulated sugar
- 3 tablespoons unsalted butter, softened to room temp
- 2 & 1/4 teaspoons active dry yeast
- 2 teaspoons kosher salt
- 2 cups warm water (about 115F)
- 2 tablespoons melted butter, for finishing (optional, but recommended)
Instructions
- Add 2 cups of the flour, dry milk, sugar, butter, yeast, and salt to the body of a stand mixer. With the hook attachment, mix it around just to combine for a few turns.
- Add the water and mix to combine.
- On slow speed, begin to add the flour a little at a time until you come to 5 cups of flour. Place the mixer on medium-high speed; the dough should clean the sides of the bowl after a couple of minutes. If it doesn’t, add a little more flour at a time until it does, up to 1/2 cup more.
- Continue to mix/knead the dough on medium-high speed for 10 minutes. The dough will be smooth and elastic.
- Spray the dough with a little cooking spray and roll it around in the bowl, so it is lightly coated. Cover with plastic wrap and let it rise in a warm place in your house for about 1 hour.
- Take off the plastic wrap and punch the dough down in the bowl to release the air bubbles.
- Lightly flour a clean work surface. Knead the dough a few times by hand to get any additional air bubbles out, about 1 minute.
- Spray 2, 9×5 loaf pans with cooking spray.
- Divide the dough into two even pieces. With your hands, form them into a log. Place each log into a prepared baking pan.
- No need to cover the dough again. Let them rise until doubled in size, about 30-45 minutes.
- While they are doing the second rise, preheat the oven to 400°F.
- Once doubled, make a slit down the center of the bread. Place the loaves into the oven and immediately lower the temperature of the oven to 350°F. Bake for 30-35 minutes until golden brown.
- Remove from the oven and immediately brush the bread with the melted butter. Let cool in the pan for 5 minutes.
- Take out of the pans and cool on a wire rack completely before slicing.
Notes
Don’t skip the dry milk: I believe the dry milk is what makes the bread so light and fluffy, so don’t omit it.
Use bread flour instead: If you have bread flour, you can also use it 1:1 for all-purpose flour. I have used both, whatever I have on hand. I think the bread flour version comes out a touch lighter, but either way, still great.
Nutrition
Serving: 1 slice | Calories: 139kcal | Carbohydrates: 25g | Protein: 4g | Fat: 3g | Saturated Fat: 2g | Polyunsaturated Fat: 0.2g | Monounsaturated Fat: 1g | Trans Fat: 0.1g | Cholesterol: 7mg | Sodium: 211mg | Potassium: 66mg | Fiber: 1g | Sugar: 2g | Vitamin A: 102IU | Vitamin C: 0.1mg | Calcium: 23mg | Iron: 1mg
Nutritional information given is an automatic calculation and can vary based on the exact products you use and any changes you make to the recipe. If these numbers are very important to you, I would recommend calculating them yourself.
We hope you love this delicious and easy recipe as much as we do! Your feedback is invaluable, so please consider leaving a review below. For more culinary inspiration and tasty recipes, be sure to follow Belly Full on TikTok, Facebook, Instagram, Pinterest, and YouTube!