

This Cinnamon-Sugar Star Bread is an absolute show-stopper for the holidays, but surprisingly easy to make! Enjoy warm by itself sprinkled with powdered sugar or with a simple cream cheese icing for dunking.
Looking for more festive breads to bake? Our classic popovers and cinnamon swirl bread are also beloved additions to any Christmas celebration.
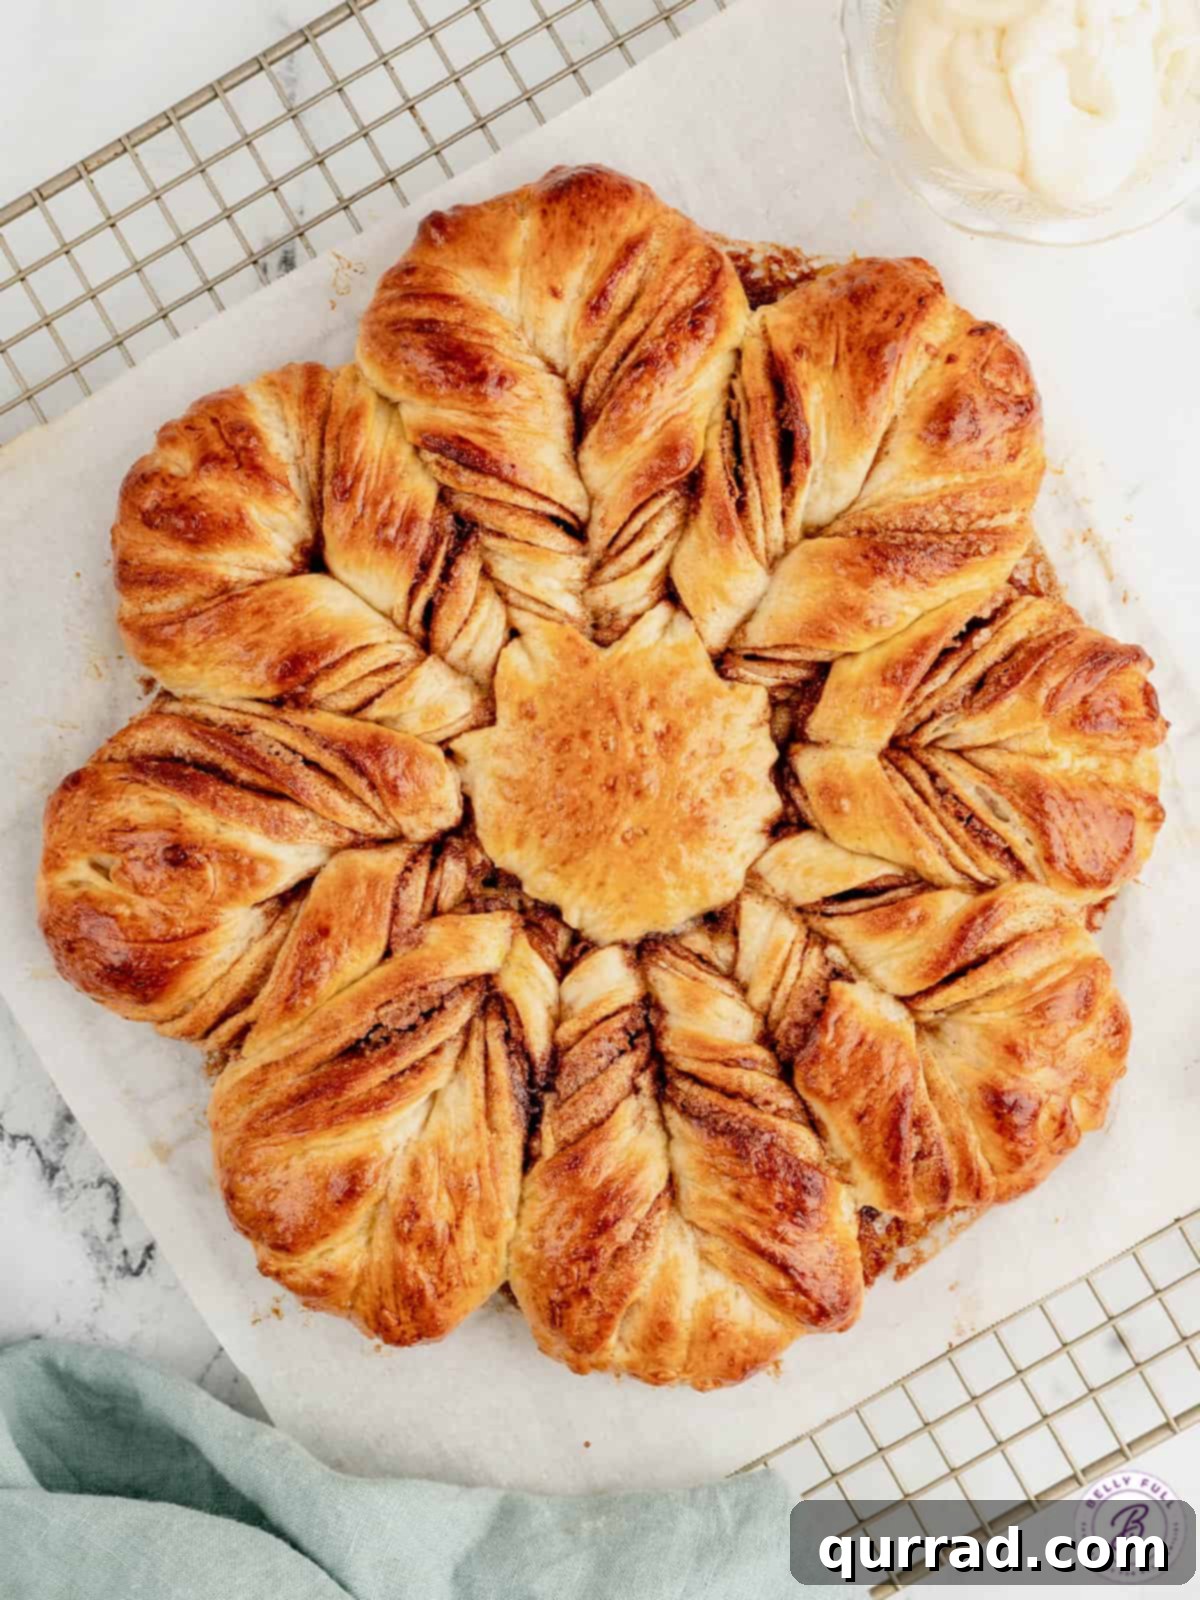
Easy Cinnamon Star Bread Recipe: A Festive Delight for Any Occasion
Imagine a centerpiece that not only looks breathtakingly beautiful but also fills your home with the comforting aroma of cinnamon and warm, freshly baked bread. This Cinnamon Sugar Star Bread is exactly that – a truly spectacular dessert or breakfast pastry that will captivate everyone at your table. While it’s often associated with holiday festivities and referred to as Christmas star bread, its stunning appearance and delicious flavor make it a wonderful addition to any special occasion throughout the year, from cozy family brunches to elegant dinner parties. The irresistible combination of soft, sweet dough and fragrant cinnamon-sugar swirls makes every bite a delightful experience.
What makes this star bread truly exceptional is how effortlessly its intricate design comes together. Despite its elaborate, artisanal look, the shaping process is surprisingly straightforward, requiring no advanced baking skills or specialized tools beyond a good sharp knife or kitchen shears. It’s a project that builds confidence in yeast baking, rewarding you with an impressive result that tastes even better than it looks. You’ll be amazed at the “wow” factor this bread brings, and even more so by how simple it was to create.
Crafting this elegant yeast bread does require patience, primarily for the two crucial rising periods. These allow the dough to develop its signature light, airy texture and rich flavor, ensuring a tender crumb that melts in your mouth. The intricate shaping of the star itself is a meditative, enjoyable process that only takes a few minutes, making the overall baking experience deeply rewarding. So, dedicate a few hours – mostly passive waiting time – and prepare to impress everyone with this homemade masterpiece that truly tastes like a labor of love, without being one.
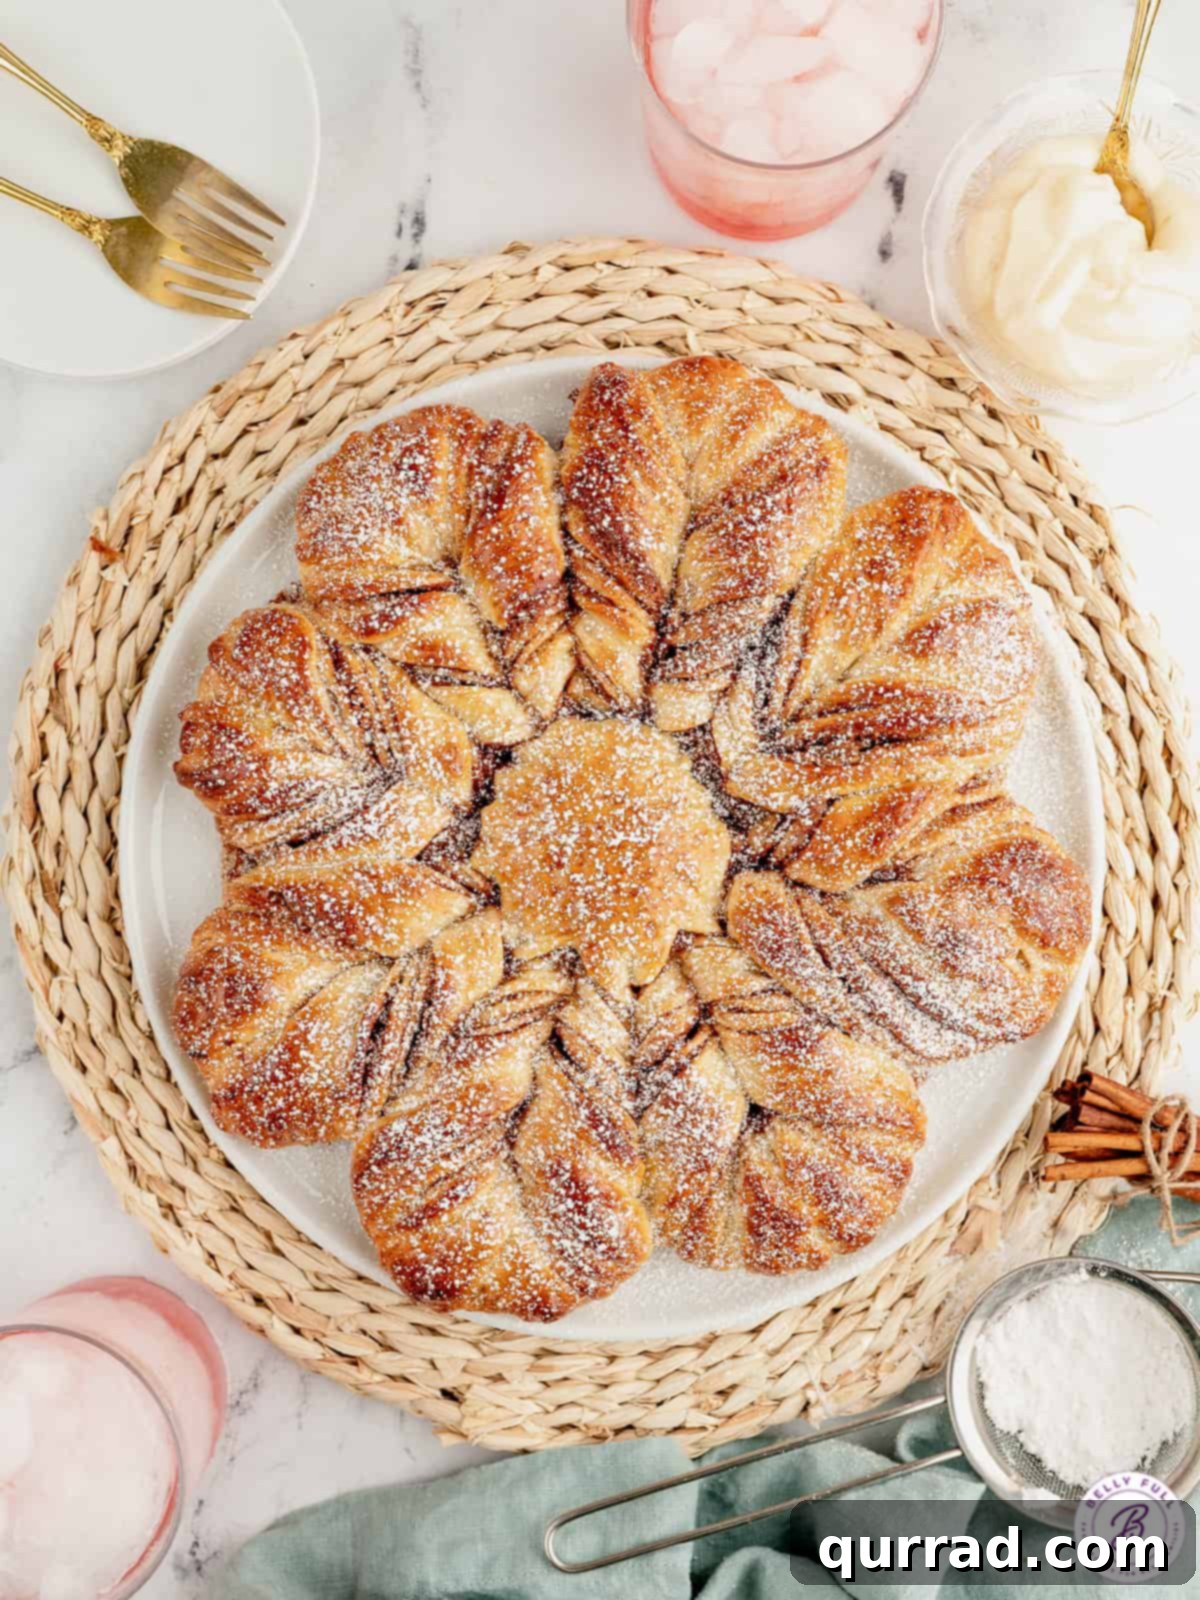
Essential Ingredients for Your Homemade Cinnamon Star Bread
This delightful Christmas star bread recipe relies on a well-balanced combination of common pantry staples, along with a couple of key additions that contribute to its unique texture and rich flavor. Each ingredient plays an important role in creating a dough that’s both pliable for intricate shaping and incredibly tender, moist, and flavorful once baked.
- All-Purpose Flour: This forms the primary structure of our dough. For consistent and successful results, it’s crucial to measure flour accurately. We recommend using the spoon and level technique: spoon the flour into your measuring cup until it overflows, then level it off with a straight edge. Scooping directly from the bag can compact the flour, leading to too much dry ingredient and a dense, tough bread. Properly measured flour ensures a soft, manageable dough that’s easy to work with.
- Plain Instant Mashed Potato Flakes: This might seem like an unusual addition to a sweet bread, but potato flakes are a fantastic secret ingredient for achieving exceptionally soft, moist, and tender yeast breads. They absorb moisture beautifully, creating a silky crumb and significantly extending the bread’s freshness. Make sure to use the plain, unseasoned variety, typically found in a box near other baking mixes or breadcrumbs in your grocery store.
- Instant Yeast: This is the leavening agent that makes our bread rise and become wonderfully light and airy. Instant yeast is incredibly convenient because it can be mixed directly with your dry ingredients without prior activation in liquid. This simplifies the process, making it a true “one-bowl” bread recipe for the initial mixing phase, saving you time and effort.
- Warm Whole Milk: The liquid base for our dough serves a dual purpose: it activates the yeast and enriches the dough with flavor and moisture. The temperature of the milk is critical: it should be comfortably warm to the touch, ideally between 100-110°F (38-43°C). Milk that’s too cold won’t activate the yeast, while milk that’s too hot can kill the delicate yeast cells, preventing your bread from rising. Whole milk provides the richest flavor and most tender crumb, but we discuss alternatives below.
- Unsalted Butter: Cubed and at room temperature, butter is incorporated into the dough to add luxurious flavor, incredible tenderness, and contribute to a beautifully golden, slightly crisp crust. Ensure your butter is softened but not overly soft or melted, as this can adversely affect the dough’s consistency and handling.
- Vanilla Extract: A touch of pure vanilla extract enhances the overall sweetness of the bread and provides a lovely aromatic depth, complementing the warm spices of the cinnamon.
- Granulated Sugar: Essential for sweetness within the dough itself, this sugar also provides vital “food” for the yeast, encouraging it to activate and grow. Additionally, it plays a role in achieving that desirable golden-brown crust. This is, after all, a dessert bread meant to satisfy a sweet craving!
- Salt: A crucial ingredient that often goes underappreciated, salt balances the sweetness, enhances all the other flavors present in the bread, and also helps to control yeast activity, preventing the dough from over-proofing too quickly.
- Egg (for egg wash): A single beaten egg is used to create a glistening, golden-brown finish on your baked pastry. This egg wash not only adds a beautiful sheen but also helps to create a slightly crisp exterior, sealing in moisture and enhancing the bread’s visual appeal.
- Cinnamon: The heart of our delicious filling! Finely ground cinnamon is generously mixed with additional granulated sugar to create the warm, spicy-sweet layers that are beautifully revealed when the star bread is twisted and baked.
- For the Cream Cheese Icing (optional, but highly recommended): A simple yet decadent glaze made from softened cream cheese, powdered sugar (confectioners’ sugar), a splash of milk, and a hint of vanilla. This creamy, tangy-sweet icing is the perfect accompaniment for dunking warm slices of star bread.
Can I Use Active Dry Yeast Instead of Instant Yeast?
Absolutely! If active dry yeast is what you have on hand, you can certainly use it with excellent results. The primary difference is that active dry yeast needs a brief activation period before being added to the rest of your ingredients. To do this, simply warm your milk to the recommended temperature (100-110°F / 38-43°C). In a small measuring cup or bowl, combine the warm milk with the active dry yeast and a generous pinch (about 1/4 teaspoon) of the sugar from the recipe. Stir gently to dissolve, then let it sit undisturbed for about 5-10 minutes. You’ll know the yeast is active and healthy when the mixture becomes visibly foamy and nearly doubles in size. Once activated, add this bubbly mixture to your main mixing bowl with the other wet ingredients as instructed in the recipe.
Important Notes on Warming the Milk for Yeast Activation
The temperature of your milk is a critical factor for successful yeast bread. Getting it just right ensures your yeast thrives and your dough rises beautifully. Too hot, and you risk killing the yeast cells; too cold, and the yeast won’t activate properly, leading to a dough that doesn’t rise effectively. Here’s how to ensure you achieve the perfect temperature every time:
- The Microwave Method for Ease: For a quick and convenient way to warm the milk, pour the required amount into a microwave-safe glass measuring cup. Microwave it in short bursts of 10-15 seconds. After each interval, stir the milk and check its temperature with a kitchen thermometer. Continue until the milk reaches a lukewarm temperature, ideally between 100-110°F (38-43°C). This range is optimal for yeast activation without harming it.
- The Stovetop Method for Control: Alternatively, you can gently warm the milk in a small saucepan over low heat on the stovetop. Stir it frequently to ensure even heating. Be extremely careful not to let the milk simmer, boil, or form a skin, as this indicates it’s becoming too hot for the yeast. Remove it from the heat as soon as it feels comfortably warm to the touch and check with a thermometer.
- Milk Substitutions and Adjustments: While whole milk provides the richest flavor and most tender crumb in this recipe, you can make substitutions if necessary. Using 2% milk is an option, though the resulting bread may be slightly less rich and tender. For an even more indulgent dough, consider using half & half. If you do, simply remove 3 tablespoons of half & half from the total liquid amount and replace them with 3 tablespoons of water. This adjustment helps to maintain the proper liquid-to-fat ratio in the dough, ensuring it behaves correctly during mixing and rising.
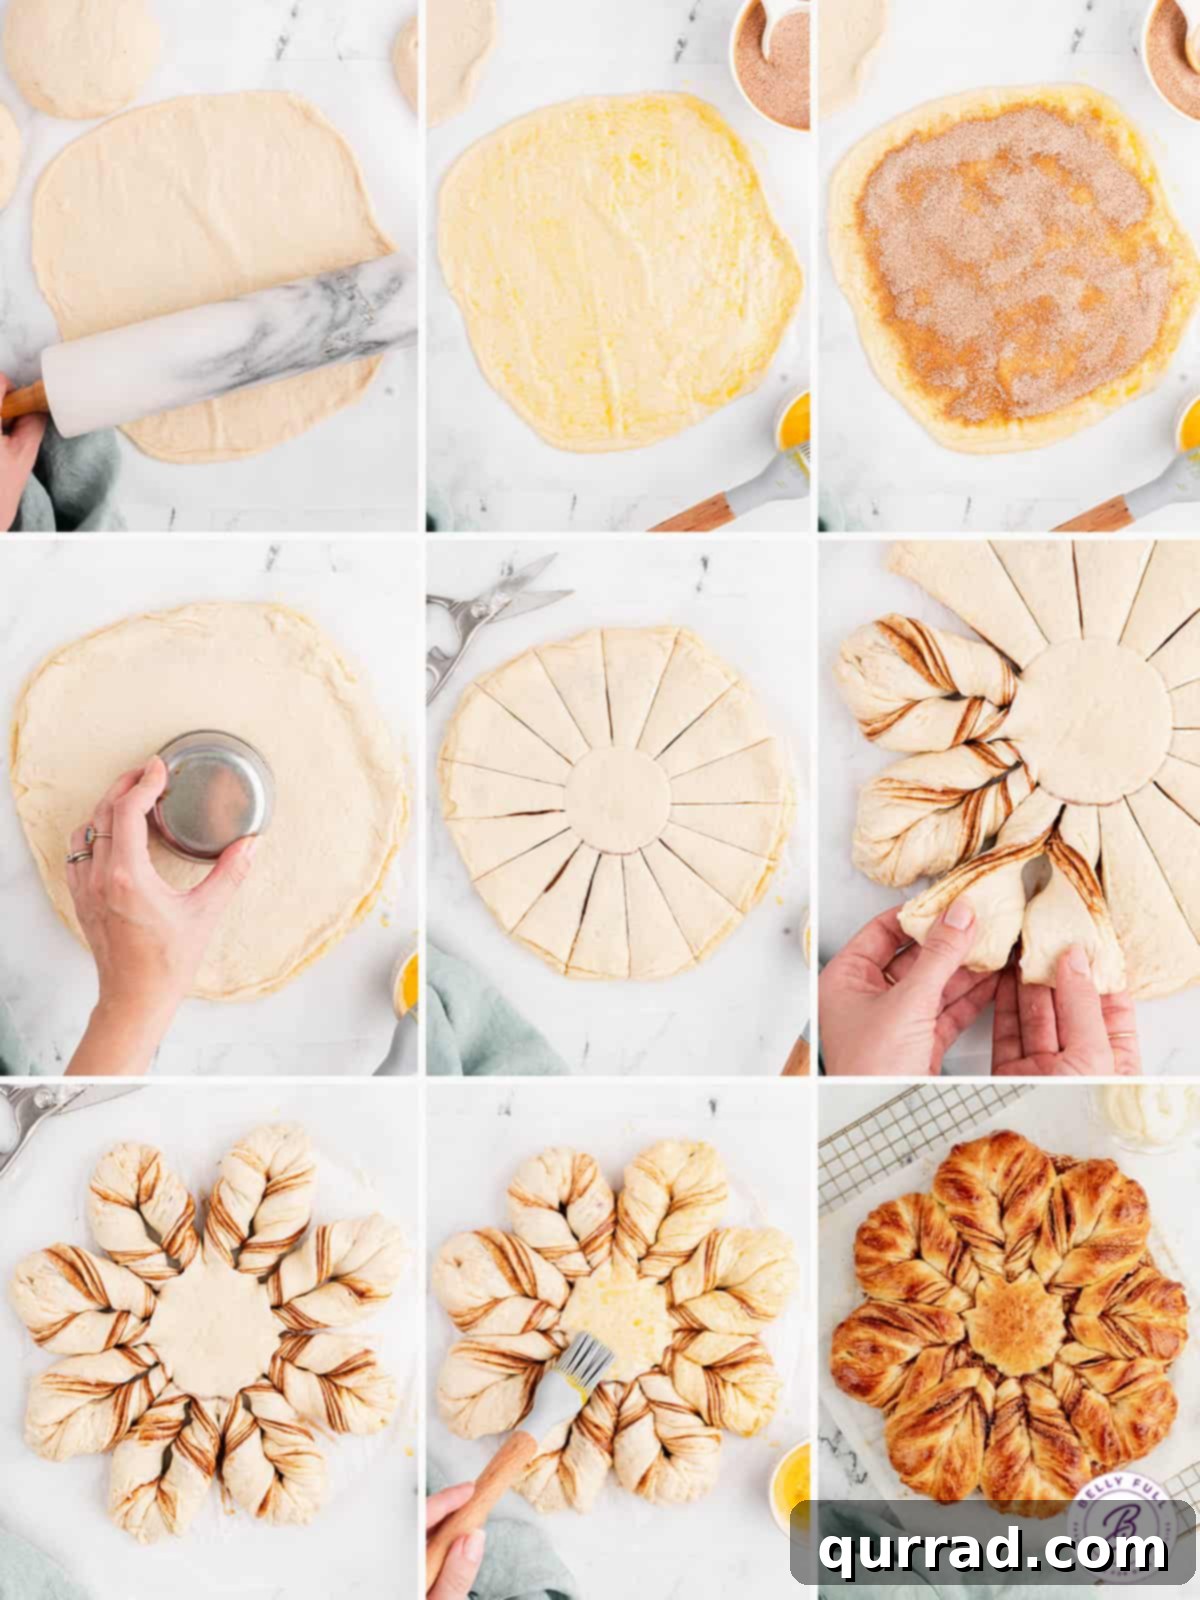
Crafting Your Beautiful Cinnamon Sugar Star Bread: A Step-by-Step Guide
The intricate appearance of star bread might suggest a complicated baking endeavor, but with a bit of patience and careful attention to the steps, you’ll find it’s surprisingly accessible. No fancy gadgets or advanced techniques are needed – just your hands, a mixing bowl, and a good knife or kitchen shears. Let’s break down the process into manageable stages.
Preparing the Enriched Dough
- Begin the Dough: In the bowl of a stand mixer fitted with the paddle attachment (or a large mixing bowl for hand mixing), briefly whisk together the all-purpose flour and potato flakes until they are well combined. This initial whisking helps to aerate the flour and distribute the potato flakes evenly throughout the mixture. Next, add the instant yeast, the precisely warmed whole milk, the cubed unsalted butter, vanilla extract, granulated sugar, and salt. Mix on low speed just until a loose, shaggy dough begins to form. If mixing by hand, use a sturdy wooden spoon.
- Knead to Perfection: If using a stand mixer, switch from the paddle attachment to the dough hook. Increase the speed to medium-low and mix for 2-3 minutes. If kneading by hand, transfer the dough to a lightly floured work surface and knead for 3-5 minutes. The goal is to achieve a dough that is very soft, smooth, elastic, and just slightly tacky to the touch. It should pull away from the sides of the bowl or your hands cleanly. If the dough feels overly sticky, add a tablespoon of flour at a time and continue mixing/kneading until it reaches the desired pliable consistency. Proper kneading is essential for developing the gluten, which gives the bread its structure and elasticity.
- First Rise (Proofing): Lightly grease a large, clean bowl with non-stick cooking spray or a neutral oil like canola oil. Transfer the kneaded dough ball into the greased bowl, then flip it over once to ensure all sides are lightly coated with oil. This prevents the dough from sticking and drying out. Cover the bowl tightly with plastic wrap to create a warm, humid environment, and place it in a warm, draft-free area of your kitchen. Allow the dough to rise until it has nearly doubled in size, which typically takes about 45 minutes to 1 hour, depending on your kitchen’s ambient temperature. When ready, the dough should feel visibly puffy and resilient, and it will have a pleasant, yeasty fragrance.
- Prepare the Cinnamon Sugar Filling: While the dough is undergoing its first rise, combine the granulated sugar and ground cinnamon in a small bowl. Stir them thoroughly with a spoon or fork to ensure the cinnamon is evenly distributed throughout the sugar. Set this aromatic mixture aside, ready for layering.
- Divide and Shape Dough Portions: Once the dough has successfully completed its first rise, gently punch it down to release the accumulated air. Transfer the dough to a lightly floured work surface. Using a kitchen scale for precision, divide the dough into four equal portions. If you don’t have a scale, try to eyeball them as evenly as possible. Roll each portion into a smooth, round ball. These four perfectly formed balls will serve as the foundation for the distinct layers of your beautiful star bread.
Assembling the Signature Star Shape
- Layering the Dough: Lightly spray a 12-inch piece of parchment paper with non-stick cooking spray; this piece of parchment paper will be your dedicated work surface and will also facilitate the easy transfer of the delicate shaped bread to your baking sheet. Take one of the dough balls and, using a rolling pin, roll it out evenly into a perfect 10-inch round circle on the prepared parchment paper.
- Apply Egg Wash and Cinnamon Sugar: Using a pastry brush, lightly and evenly brush the entire surface of the rolled dough circle, ensuring you go from edge to edge, with the beaten egg wash. This serves as an adhesive for the filling and contributes to a beautiful golden crust. Sprinkle approximately one-third of your prepared cinnamon sugar mixture evenly over the entire brushed dough surface, being sure to leave a small 1/4-inch border around the very edge bare.
- Repeat for Layers: Roll out a second dough ball into another precise 10-inch circle. Carefully lift and place this second dough circle directly on top of the first layered dough, gently pressing down to seal the layers together. Repeat the process of brushing with egg wash and sprinkling with cinnamon sugar on this second layer. Do this once more with the third dough ball, stacking it and applying the egg wash and cinnamon sugar. Finally, roll out the fourth and final dough ball and carefully place it on top of the stacked layers, pressing gently to seal all four layers together. Do not apply egg wash or cinnamon sugar to this topmost layer yet.
- Define the Center: To create the central guide for your star, place a 3-inch round biscuit cutter or a drinking glass directly in the exact center of your layered dough circle. Gently press down on it just enough to create a visible impression in the dough without cutting all the way through the layers. This impression will serve as the inner boundary for your star cuts. It can be very helpful to leave the glass or cutter in place as a stable guide while you proceed with making the cuts.
- Creating the Star Points: Now for the artistic and defining step! Using a very sharp large knife or sharp kitchen shears, make 16 evenly spaced cuts from the outer edge of the dough circle, extending inward only up to the impression line you made in the center (do not cut into the central circle). The simplest way to achieve consistently even cuts is to first divide the entire circle in half, then halve those halves to create quarters, and continue halving each section until you have 16 distinct, symmetrical wedges.
- Twist the Strips: This is where the star shape truly emerges. Grasp two adjacent dough strips. Twist each strip away from the other, rotating them two to three times. Be careful not to twist more than three times, as this can cause the delicate dough to tear. Once twisted, firmly pinch the very ends of these two adjacent strips together to form a cohesive point, then gently tuck the pinched end under slightly for a neat finish. Repeat this process methodically around the entire circle until you have 8 beautifully defined star points, creating the iconic star pattern.
- Second Rise: Loosely cover the intricately shaped star bread with plastic wrap and place it back in a warm, draft-free spot for its second and final rise. This crucial stage will take approximately 20-30 minutes. The bread will become noticeably puffy and slightly expand, though it typically won’t double in size as much as the first rise. During this second rise, it’s important to avoid proofing it in a very warm environment like a dedicated proofing box or a low-temperature oven, as excessive heat can cause the sugar filling to melt out prematurely, leading to a sticky mess.
- Bake to Golden Perfection: While the star bread is undergoing its second rise, preheat your oven to 400°F (200°C) with the oven rack positioned in the middle of the oven. Just before baking, gently brush the entire exposed surface of the shaped star bread with the remaining beaten egg wash. This will ensure a beautiful, glossy, golden crust. Carefully transfer the parchment paper with the bread onto a large baking sheet. Bake for 15-20 minutes, or until the bread is beautifully golden brown, and the center is thoroughly cooked through, feeling firm and no longer doughy.
- Cool and Serve: Once baked, remove the star bread from the oven and allow it to cool on the baking sheet for about 10 minutes. This brief cooling period helps the bread set and makes it easier to handle. After 10 minutes, you can transfer it to a wire rack if desired. This Cinnamon-Sugar Star Bread is undeniably at its best when enjoyed warm.
- Prepare the Cream Cheese Icing (if desired): In a medium mixing bowl, combine the softened cream cheese, the tablespoon of milk, and the teaspoon of vanilla extract. Beat these ingredients with a hand mixer on medium-low speed for about 2 minutes. Initially, the mixture may appear lumpy. Gradually add in the powdered sugar, a little at a time, and continue beating on low speed until a smooth, lump-free icing forms. This should take another 2 minutes. If you encounter stubborn lumps, increase the mixer speed to medium to help smooth them out. The icing should have a pourable, drizzly consistency. If it’s too thick, add a tiny splash more milk; if it’s too thin, incorporate a tablespoon of powdered sugar at a time until the desired consistency is achieved.
- Final Touches: For an extra touch of elegance and sweetness, dust the warm star bread lightly with additional powdered sugar before serving. Present the luscious cream cheese icing on the side in a small bowl, making it perfect for individual dipping and customizing each delightful bite!
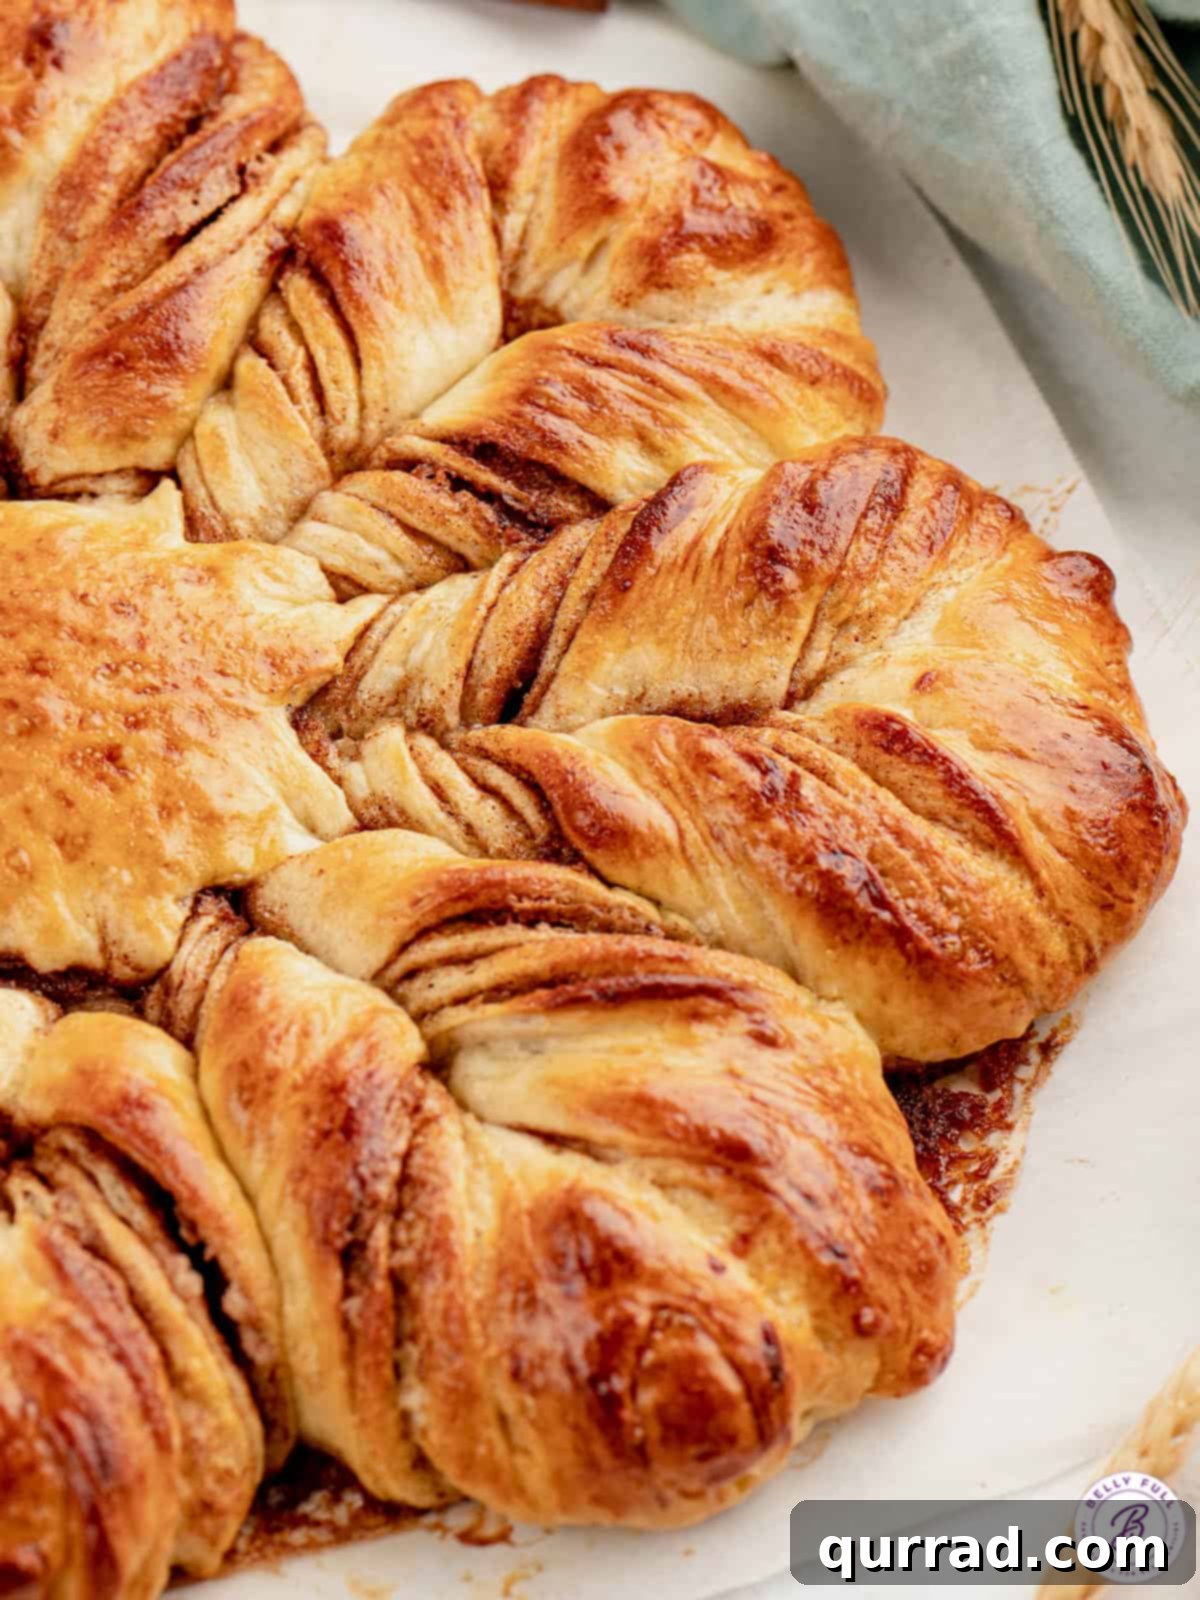
Pro Tips for Perfect Cinnamon Star Bread Every Time
While this recipe is designed to be user-friendly and yields fantastic results, a few extra insider tips can help ensure your star bread turns out beautifully every single time, even for novice bakers. These simple techniques can make a significant difference in both the process and the final outcome of your impressive pastry.
- Accelerate the First Rise: If your kitchen is cool or chilly, you can create a warmer, more conducive environment for your dough to rise. Place the covered bowl of dough on top of a heating pad set to its lowest setting. Alternatively, you can briefly preheat your oven to its lowest temperature (around 150°F / 65°C) for just a minute, then turn it off completely and leave the oven light on. Place your covered dough bowl inside the warm, unheated oven. This gentle warmth helps the yeast become active more quickly, significantly speeding up the first crucial rise.
- Patience is a Virtue for Rising Dough: Don’t despair if your dough isn’t rising exactly as quickly as the recipe states. Yeast activity can vary significantly based on factors like room temperature, humidity levels, and even the age and freshness of your yeast. If your dough appears to be rising slowly, the best approach is simply to give it more time. Even yeast that’s slightly past its prime will eventually rise, it just needs extra patience! When planning to bake any yeast bread, it’s always wise to allot an extra hour or so beyond the estimated time, just in case, though most simple breads will typically take around 3 hours from start to finish.
- Use Parchment Paper for Easy Handling: Preparing and shaping your delicate star bread directly on a sheet of parchment paper is an absolute game-changer. This technique not only provides a naturally non-stick surface for rolling and intricate shaping, but it also makes the crucial step of transferring the delicate, shaped dough to and from the hot baking sheet incredibly easy and mess-free. This prevents any potential sticking, tearing, or deformation of your beautiful star.
- Achieve Perfectly Round Layers: For a flawlessly symmetrical and elegant star bread, uniformity in your dough layers is key. Once you’ve rolled out, stacked, and gently sealed all four dough layers, you can refine their shape. Place a 10-inch round dinner plate or a pre-cut 10-inch circle of parchment paper directly over the stacked dough. Using a very sharp knife, carefully trim away any excess dough around the edges. This simple trick ensures you have a perfectly uniform circular base, which contributes significantly to the final, impressive appearance of your baked star.
- Mastering the Star Points: When forming the star points, the instruction to “pinch the ends tightly together and tuck under a bit” creates neat, rounded, and well-defined points, resulting in a classic star look. However, for a more dramatic, spiky, or “fireworks” effect, you can experiment! Instead of pinching and tucking, you can flatten the ends of each twisted strip slightly and leave them separated, without joining them to the adjacent twist. This allows the ends to flare out, creating a more dynamic, layered appearance. Experiment with both methods to discover your preferred aesthetic!
- Prevent Burning During Baking: Due to the presence of both granulated sugar in the dough and in the generous cinnamon-sugar filling, this bread tends to brown relatively quickly in the oven. It’s crucial to keep a close eye on your star bread as it bakes. If you notice the crust browning too rapidly before the center appears to be cooked through, loosely tent the top of the bread with a piece of aluminum foil. This simple shield will protect the crust from direct heat, allowing the interior to finish baking thoroughly without the exterior becoming overly dark or burnt.
Serving and Storage Suggestions for Your Delicious Star Bread
Ensuring your Cinnamon-Sugar Star Bread is served at its absolute best and stored properly will help you savor every last crumb of this delightful creation, whether it’s enjoyed immediately or saved for later.
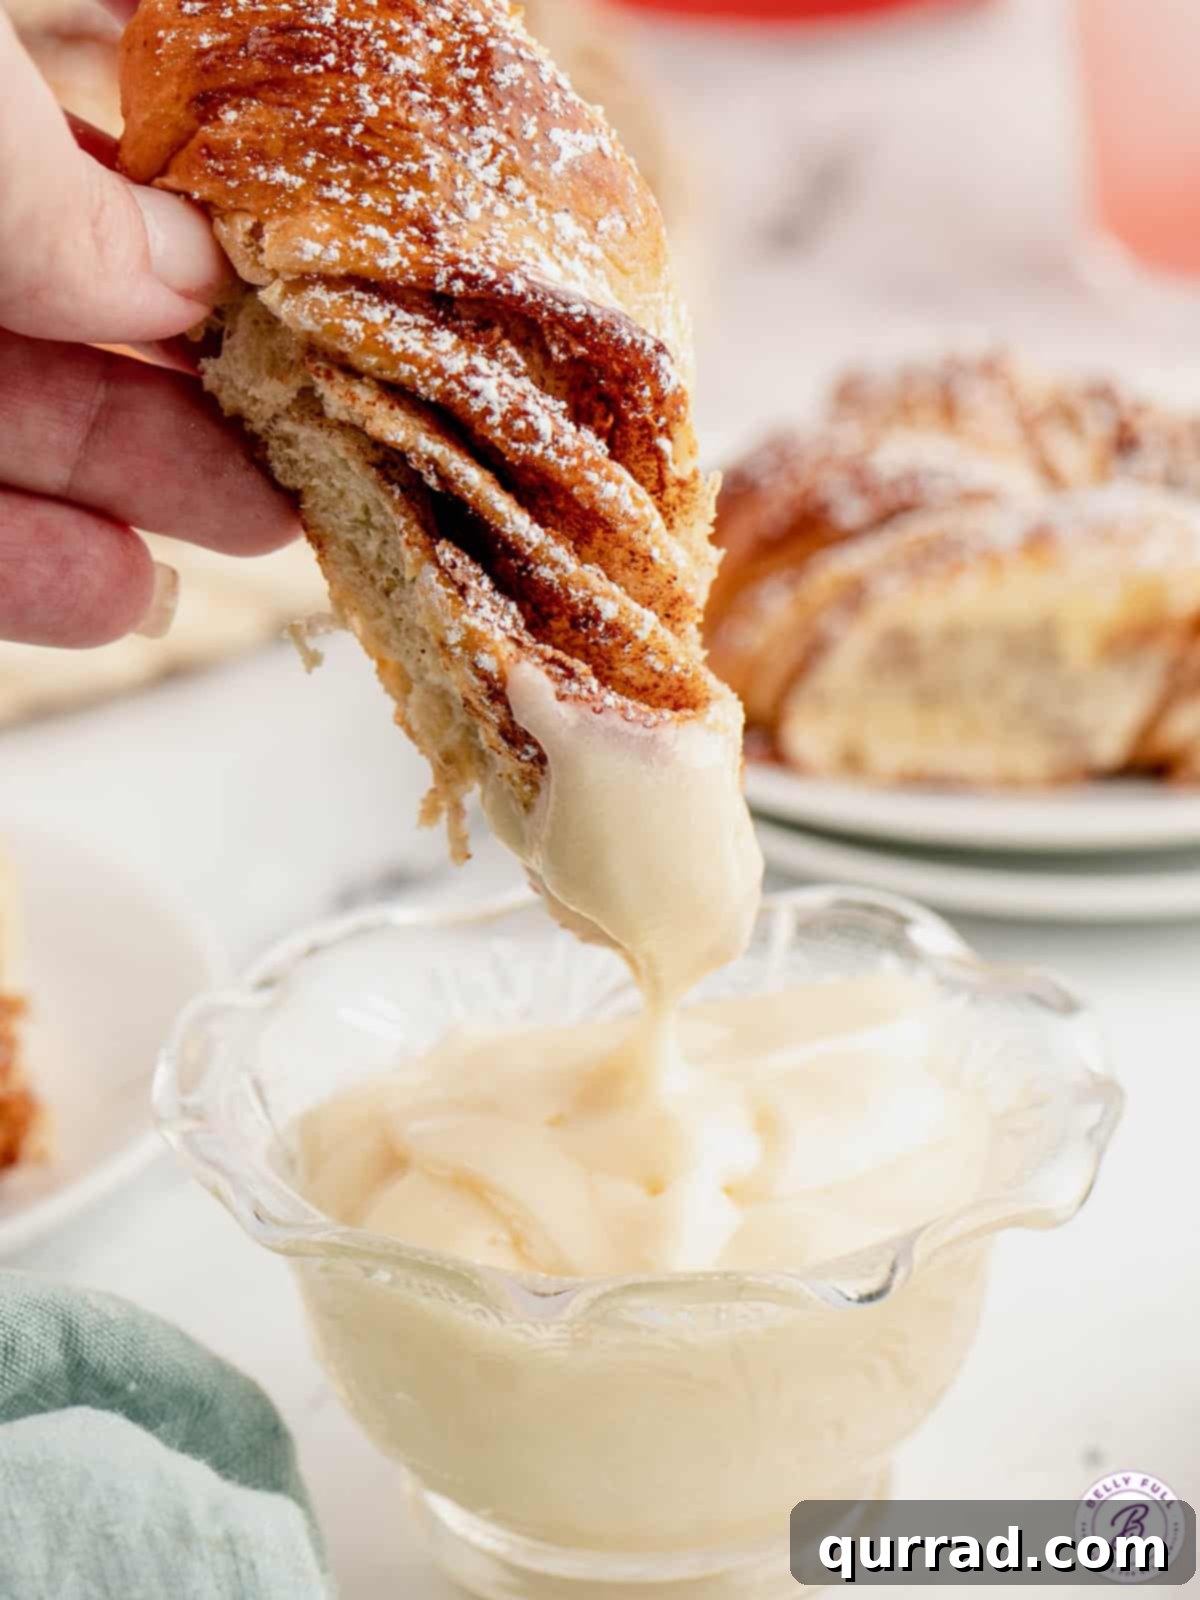
- Optimal Serving Experience: This star bread is undeniably at its peak when served warm, ideally straight from the oven or gently reheated. While incredibly delicious on its own, a light dusting of powdered sugar adds a delicate sweetness and a beautiful, snowy finish that enhances its festive appeal. The optional cream cheese icing is highly recommended for an extra layer of indulgence; instead of spreading it directly onto the bread, serve it on the side in a small bowl for individual dipping. This allows each person to customize their indulgence and enjoy the perfect balance of sweet bread and creamy glaze. It pairs wonderfully with a freshly brewed cup of coffee or tea, making it a perfect addition to a festive brunch spread, a holiday dessert table, or a cozy evening treat.
- Making the Dough in Advance: For ultimate convenience, especially when entertaining, you can prepare the dough for your star bread up to the end of its first rise (corresponding to step 2 in our detailed instructions). After the dough has successfully doubled in size, gently deflate it by poking it lightly with your fingers to release the accumulated gas bubbles. At this point, you have a couple of options: you can wrap the dough loosely in plastic wrap and refrigerate it for up to 48 hours. Alternatively, for longer storage, wrap it tightly first in plastic wrap and then in an additional layer of aluminum foil, and freeze it for up to 1 month. When you’re ready to bake, thaw frozen dough completely in the refrigerator overnight. Then, allow the refrigerated dough to come to room temperature and complete a full, noticeable rise in a warm, draft-free place before proceeding with step 3 of the shaping instructions.
- Storing Leftovers Properly: While freshly baked is always the ideal experience, any leftover Cinnamon-Sugar Star Bread can be stored effectively at room temperature for up to 2 days. It’s crucial to ensure it is tightly covered with plastic wrap or placed in an airtight container to prevent it from drying out and losing its tender texture. For the best flavor and texture when enjoying leftovers, I highly recommend reheating them before serving. Wrap individual slices or the whole bread loosely in aluminum foil and warm it in an oven preheated to 350°F (175°C) for about 10 minutes, or until it is soft, fragrant, and warm throughout. If you’ve made the cream cheese icing, it should always be stored separately in an airtight container in the refrigerator for up to a week.
- Can Star Bread Be Frozen? Yes, this cinnamon sugar star bread freezes exceptionally well, making it a fantastic make-ahead option for busy periods! To freeze, ensure the bread is completely baked and has cooled down entirely to room temperature. Once cool, wrap it tightly in plastic wrap, then add an additional layer of aluminum foil to create a strong barrier against freezer burn. It can be safely frozen for up to 1 month without significant loss of quality. When you’re ready to enjoy it, simply thaw the bread at room temperature, then warm it gently in the oven (following the reheating instructions for leftovers) for that delicious, freshly baked taste and texture.
More Delicious Holiday & Christmas Recipes to Explore:
- Festive Eggnog Muffins with Streusel Topping
- Bright Cranberry Orange Muffins
- Heartwarming Cranberry Cinnamon Coffee Cake
- Sparkling Sugared Cranberries
- Cozy Hot Cocoa Cookies
- Classic Cut-Out Sugar Cookies
We hope you thoroughly enjoy baking and savoring this delightful Cinnamon-Sugar Star Bread. We’d love for you to leave a review below and share your experience!
Cinnamon-Sugar Star Bread Recipe Card
This Cinnamon-Sugar Star Bread is an absolute show-stopper for the holidays, but surprisingly easy to make! Enjoy warm by itself sprinkled with powdered sugar or with a simple cream cheese icing for dunking.
Prep Time: 35 mins | Cook Time: 25 mins | Rise Time: 2 hrs | Total Time: 3 hrs
Servings: 10 servings
Ingredients
For the Dough
- 2 cups all-purpose flour, spooned and leveled
- 1 tablespoon all-purpose flour (for dusting/adjusting)
- 1/4 cup plain instant mashed potato flakes
- 2 & 1/4 teaspoons instant yeast (1 packet)
- 3/4 cup warm whole milk (about 100-110°F)
- 1/4 cup unsalted butter, cubed, room temperature
- 1 teaspoon vanilla extract
- 2 tablespoons sugar
- 1/4 teaspoon salt
- 1 egg, beaten (for egg wash)
Cinnamon-Sugar Filling
- 1/2 cup sugar
- 1 tablespoon cinnamon
Cream Cheese Icing (optional, but recommended)
- 2 ounces cream cheese, softened
- 1 tablespoon milk
- 1 teaspoon vanilla extract
- 1 cup powdered sugar
Instructions
- In the bowl of a stand mixer, or a large mixing bowl, briefly whisk together the flour and potato flakes. Add the instant yeast, warm milk, butter, vanilla, sugar, and salt. Mix on low speed with the paddle attachment just until a loose dough forms (or mix with a wooden spoon by hand if making in a mixing bowl). Switch to the hook attachment and mix on medium-low for 2-3 minutes (or knead on a floured work surface for 3-5 minutes); the dough should be very soft and just slightly tacky. If it’s sticky, add a tablespoon of flour and mix with dough hook until combined.
- Lightly grease a large bowl with non-stick cooking spray or canola oil. Place the dough ball in the bowl, flip over so all sides get oiled. Cover tightly with plastic wrap and place in a warm area of your kitchen to rise until nearly doubled in size, about 45 minutes. The dough will be tender, fragrant, and feel puffy when it’s ready.
- Mix the cinnamon sugar ingredients in a small bowl, set aside. Lightly spray a 12” piece of parchment paper with non-stick spray, set aside.
- On a lightly floured work surface, divide the dough into 4 equal portions; roll each portion into a smooth round ball.
- Roll one dough ball at a time into a 10” round circle. Place it on the greased parchment paper. Brush the entire surface lightly edge to edge with egg wash. Sprinkle 1/3 (about 2 heaping tablespoons) of the cinnamon sugar evenly on the dough, leaving a 1/4-inch edge bare.
- Roll out the next dough ball, place it on top of the first layer and press lightly to seal, and repeat the egg wash, and cinnamon sugar step. Repeat these steps with the third dough ball.
- Roll out the fourth dough ball and place it on top of the others. Place a 3” drinking glass or biscuit cutter in the center of the dough circle, and push lightly to make an impression; this is the center of your star and you will not cut through this. You can also leave the glass in place as a guide while you make the cuts.
- Use a very sharp large knife or sharp kitchen shears to make 16 evenly spaced cuts up to the line of the impression made by the glass. (The easiest way to do this is by dividing the circle in half first, then halve the half circles to create wedges, and halve wedges until you’ve made 16 evenly spaced cuts.)
- Grasp two adjacent strips of dough and twist away from each other two or three times (do not try to twist more than three times). Pinch the ends together tightly and tuck under a bit to create the points of the star. You should have 8 points.
- Cover with plastic wrap and allow to rise in a warm place for about 20-30 minutes. It will be noticeably puffy, but will not grow in size like the first rise. (Do not do the second rise in a proofing box or low-temperature oven, this will cause the sugar to melt out of your bread too much, and it will stick to the parchment paper.)
- Preheat oven with rack positioned in the middle of the oven to 400°F (200°C). Brush dough lightly with egg wash. Transfer parchment paper and dough to a large baking sheet, bake for 15-20 minutes, or until golden brown, and the center is cooked through and no longer doughy. Cool for 10 minutes, serve warm.
- To make the icing: In a medium bowl, beat the cream cheese, milk, and vanilla for about 2 minutes with a hand mixer on medium-low. It will be lumpy. Add in the powdered sugar and beat on low until a smooth icing comes together and no more lumps are present, about 2 minutes. Increase to medium speed if you are having trouble getting the lumps to smooth out. It should be a drizzly consistency. If it’s too thick, add a splash of milk. If it’s too thin, add powdered sugar a tablespoon at a time until the desired consistency is reached.
- Dust the star bread with powdered sugar, if desired, and serve with the cream cheese icing on the side for dunking!
Nutrition Facts (Approximate per Serving)
Calories: 285kcal | Carbohydrates: 48g | Protein: 6g | Fat: 8g | Saturated Fat: 5g | Polyunsaturated Fat: 0.5g | Monounsaturated Fat: 2g | Trans Fat: 0.2g | Cholesterol: 37mg | Sodium: 36mg | Potassium: 120mg | Fiber: 2g | Sugar: 26g | Vitamin A: 276IU | Vitamin C: 1mg | Calcium: 47mg | Iron: 1mg
Nutritional information is an automatic calculation and may vary based on specific product brands and any modifications to the recipe. For precise values, independent calculation is recommended.
Did you bake this delicious star bread? We’d love to hear your thoughts! Leave a rating and review below to share your experience.